In everyday life, a small table fully meets the needs of a family of 3-4 people. This table is successfully used both as a kitchen and as a dining table. The situation changes dramatically when guests arrive. Many people have a desire to make an extendable table with their own hands.
Diagram of a sliding table.
Any table is not a very simple structure, which must withstand significant loads and frequent movements around the apartment. Despite certain difficulties, anyone who is familiar with carpentry can make an extendable table with their own hands. There are many designs of sliding and folding tables. You just need to realistically evaluate which of them you can do yourself.
Step-by-step instructions: design basics
Any table consists of a tabletop, legs and fasteners. Sliding (folding) structures additionally contain removable or movable tabletop inserts and a sliding mechanism. The shape of the tabletops can be round (oval when extended) or square (rectangular).
Scheme of fastening the sliding table guides.
The main requirements for the design are the strength of the tabletop and the reliability of the legs, which should allow it to withstand loads (including shock) and be stable when used while cooking or dining. In addition, the surface should be comfortable and practical.
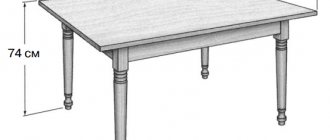
The size of the table is determined mainly by the dimensions of the room and the number of guests who can sit down at the same time. The height of the dining table is usually 73 cm. The dimensions when extended can be calculated based on the condition that the optimal distance for one person at the table is 60-70 cm.
Which countertop shape should you choose?
It is important at the stage of designing the table to decide on the shape of the tabletop that will suit the specific type of room. We will take a closer look at the most common options.
Table 2. Shapes of table tops for an extendable table.
| Shape, illustration | Description |
Square | When assembled, such products can be miniature or large - this will depend on the size of the kitchen and dining room. The extendable table can accommodate 6 to 8 people. The only downside is that due to the presence of all four legs at the end, only one person can be seated, and this is not always convenient. |
Rectangular | A table of this type can be installed in both small and large rooms; it can accommodate up to 12 people. This type of countertop should be chosen by large families or those owners who often invite a large group to visit. |
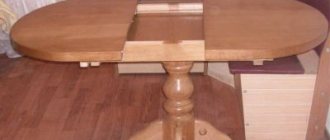
Round | This is a rather unusual shape for an extendable table. This design is also suitable for rooms of various sizes - due to the lack of corners, the table will not take up too much free space, and thanks to this feature it can be moved around the room if necessary. In addition, such a model is ideal for an apartment where small children live, because the risk of injury by hitting a sharp corner is minimized. When assembled, the diameter of such a tabletop is about 90-110 centimeters. When unfolded, the structure becomes oval. |
Octagonal | This is an unusual version of an extendable table top. It is more difficult to make such a design, so it is better for novice craftsmen not to choose it. However, the finished table will be very functional. When assembled, it can accommodate six to eight people; when disassembled, it can accommodate twice as many. This is an excellent option for a large family, in which it is customary to have breakfast at different times, and have dinner all together, at a large table. |
Video – Custom extendable table
Selection of base materials
If you decide to make a table with your own hands, you should decide on the material for the main elements. The aesthetic impression of the table design is mainly provided by the tabletop. In addition, it may be exposed to moisture, fat and other active substances used during cooking; may be affected by increased temperature from hot foods; Significant mechanical loads may be applied. Wooden countertops are quite reliable, environmentally friendly, practical and aesthetically pleasing, but they are also expensive and difficult to manufacture.
The most widely used wood for countertops is pine, oak and walnut. When using wood, it should be thoroughly dried and treated with moisture-proofing compounds. If natural wood is used for the surface, it must be periodically polished and also coated with varnish or wax.
Characteristics of materials for making the table.
A simple, cheap, but fairly reliable tabletop is made from laminated chipboard with a thickness of at least 20 mm. The ends of the plates are rounded and covered with a protective material, for example, silicone or polyvinyl chloride film. Such plates can be additionally coated with plastic. The big disadvantage of this material is swelling when moisture gets into the thickness of the material. In other respects, this material is quite capable of competing with wood.
You can make table legs yourself, or you can purchase ready-made ones. The most common option is wooden block legs. The minimum dimensions of the bar are 40x40 mm. For larger tables, larger timbers should be used. So, for a table with a length (when extended) of about 2 m, a beam with a cross-section of 85x85 mm is recommended. The legs can be square, round or carved depending on the wishes and capabilities of the manufacturer.
In addition to wooden legs, metal legs are also used. For example, you can purchase ready-made metal legs in the form of a pipe with a diameter of 70-90 mm. You can make steel or aluminum legs yourself from pipes and various profiles.
Making furniture yourself: advantages
Not every person can decide to independently manufacture various pieces of furniture, but such actions have several main advantages:
- Saving. This is a good opportunity to save your budget, because you don’t have to pay furniture makers for services.
- The most accurate measurements. You can not only pre-measure the place where the table will be installed, but also adjust some details while working.
- Creation of a unique design. Only on your own can you create an exclusive table that cannot be found on sale.
- Possibility to buy only good quality materials. Furniture shop craftsmen do not always act in good faith, and in order to earn more, they purchase low-quality materials and accessories. That is why it is recommended to do your own purchasing - you won’t fool yourself.
Making furniture with your own hands has a large number of obvious advantages.
Of course, in the absence of any skills in making furniture, making it yourself is a certain risk, because a beginner can simply ruin the materials due to inexperience. But, if you do everything slowly and thoughtfully, then even the first time you can get a very worthy result that you can be proud of.
Extensible table design
One of the simplest designs of an extendable table is based on increasing the size by expanding the surface and laying additional elements. The main tabletop consists of two parts that are not connected to the legs and have the ability to move longitudinally in opposite directions from each other.
Drawing of a kitchen extendable table.
The sliding structure consists of the following main parts: base; main tabletop, consisting of two identical parts; full roll-out guides; additional panels. The base is made in the form of a frame that connects the legs to each other using jumpers (collets), and a top panel that resembles a tabletop in appearance, but is fixed to the legs.
Each part of the main tabletop consists of the surface itself and three sidewalls attached to it. It is recommended to make the drawer mechanism from standard full rollout guides for drawers. It is necessary to purchase two sets of guides with a length of at least 30 cm. Additional elements of the tabletop are made similarly to the main surface and have a length equal to the width of the tabletop, and their width is determined by the length of the extension. The number of elements can be from 1 to 3 at the discretion of the manufacturer.
The operating principle of the design is very simple: both parts of the main tabletop are mixed in guides fixed to the table base until they stop. In this case, the tabletop slides over the surface of the base. In the resulting space between the two parts, additional elements are installed, which, together with the main parts, create the appearance of a continuous tabletop.
Assembly order
You should start assembling parts from the bottom of the table, that is, from the legs. Be sure to make marks at the joints in advance, accurately measuring all distances. Before direct assembly, it is advisable to varnish all parts, so the wood will retain its original appearance longer.
The upper part of the table and mechanisms are fixed to the legs. This results in some outlining of the product, onto which the countertops will ultimately be attached.
Remember that a correctly drawn up diagram will help you assemble the mechanism the first time, as experienced carpenters do.
The tabletops are attached to the construction angles to the finished contour. This should be done using small screws so as not to damage its appearance. Be sure to tighten everything thoroughly. For additional fastening of the fixed parts of the table, use construction adhesive.
Today, many people are trying their hand at carpentry. And this is right, because something created with one’s own hands is much more pleasing than something bought in a store. Moreover, if you are a creative person, then using your imagination, you can easily add bright details to your room.
Making the base
Installation diagram of table cover holders.
The main function of the table base is to securely connect the table legs to each other and provide support for installing the tabletop. Tying the wooden legs into a single frame is done using wooden jumpers - collets. Collets are made of plywood or boards 10-12 cm wide and 18-20 mm thick. The length of the collets is determined by the selected table size when not extended.
To secure the collets, grooves are made in the upper part of the legs on two adjacent sides with a size corresponding to the cross-section of the collet, up to 20 mm deep. The ends of the collets are secured in the grooves. The joint is glued and secured with screws. To strengthen the connection of legs in heavy tables, it is recommended to additionally install wooden gussets at the connection points.
A sheet of plywood 10-12 mm thick is fixed on top of the frame. The size of the sheet is determined by the dimensions of the frame. The sheet is secured with screws. In its final form, the base is a table with a rough top. The top plywood sheet is not a necessary element, since the structure will work without it.
Hidden storage sections
Often the interior space of the table base is used to store dishes or household chemicals. The easiest way to organize storage space is inside a folding “book”. The width of the central segment should be increased by 200–250 mm and several horizontal shelves should be used instead of one vertical crossbar. It is also possible to have a blank lining of the inner box and install doors at the ends of the base.
Due to the complex shape of the legs, the door will be 100 mm wider than the frame on both sides, so it is important to remember one point: the handle on the door is installed on the side where the table leg is located when folded. Accordingly, under different wings, the direction of opening the doors and the location of the legs should be opposite.
In sliding tables, to create a niche, it is enough to line the frame from below with a solid sheet of MDF and add several transverse strips to secure the bottom more firmly. Another option is to use frame strips up to 400 mm wide and fasten the base along the center. Drawers on full extension guides can be installed in the formed niches.
Making the main table top
First, cutting and cutting out two parts of the tabletop of the selected sizes is carried out. If necessary, the surface is covered and the ends are sealed. At the inner end (which coincides with the end of the second part) of each part of the tabletop, two holes are drilled for the dowels of removable elements to fit into them. Hole diameter 8-10 mm.
Diagram of assembly and disassembly of an extendable table.
A U-shaped box is made from the sidewalls, which is a strip of chipboard or a board 100-120 mm wide and 18-20 mm thick. The length of the sides corresponds to the dimensions of the table base, measured along the legs. The corners of the box are reinforced with aluminum corners on the inside.
Narrow (reverse) parts of the guides are fixed on the inside of the side parts of the body so that the box can move at a height of about 2 mm above the plywood sheet of the table base (or the surface of the collets in the absence of a sheet).
A tabletop is installed on top of the box so that the cut of the tabletop coincides with the free ends of the box. Using aluminum corners, the tabletop and the frame are connected to each other.
Features of round shape
For small spaces where a dining table is installed (kitchen, living room or separate dining room), the round design looks practical and attractive . It takes up less space and allows you to comfortably fit around.
Problems begin when a significant number of family members and guests gather around the dinner table. Oversized furniture simply does not fit in a cramped room.
The sliding design eliminates the problem . Its essence is as follows. In its normal state it looks like a small round table for 3-4 people. It is easy to move and install in a new location.
If necessary, the table top is transformed - it moves apart, taking on an oval shape.
Inserts help create a significantly larger surface area. Help : this table can already accommodate 8-10 people.
The simplest system has a tabletop divided in half, the halves of which can move along guide elements in opposite directions.
The gap in the area where the halves diverge is filled with special inserts to preserve the integrity of the tabletop. When assembled, the inserts are located inside and are invisible to others .
Important : the final capacity of the extended table depends on the distance by which the elements can be moved without compromising its stability.
In order for the design in question to work reliably, the following requirements :
- sufficient strength of the tabletop with maximum expansion;
- ensuring the required capacity and ease of use;
- assembly and disassembly without unnecessary effort by one person;
- the possibility of practical use of the entire surface of the extended tabletop;
- mobility;
- ease of making with your own hands;
- low cost;
- external attractiveness.
Manufacturing of additional elements
In the center, an aluminum corner with a vertical side of at least 40 mm is installed on the surface of the plywood base sheet (or the upper end of the collets). The length of the corner is at least 50 cm. The wide (main) parts of the guides are attached to the corner, two on each side. Both parts of the guides (on the tabletop box and on the corner of the base) are joined and snapped into place.
Tabletop cutting diagram.
The parts of the main table top are moved apart as much as possible and the dimensions of the removable additional elements of the table top are specified. Additional elements are cut and sawed, as well as their surface is prepared in the same way as the main tabletop.
Holes are drilled at the inner ends of the removable elements and dowels with a diameter of 8-10 mm are installed. The dowels are secured with glue. Removable elements are installed between the main parts of the tabletop and secured with dowels.
After complete assembly, the operation of all elements is checked. If necessary, painting or additional cladding is carried out.
Finishing
The table should have an attractive appearance, which is ensured by the finishing. First of all, the end is processed . To avoid scratching on a sharp edge, it is recommended to remove a small chamfer.
The end itself is ground to eliminate the risk of splinters. The entire surface of the tabletop is also processed. It should be perfectly flat, horizontal and smooth.
Important : the most common finishing methods are painting and varnishing.
After sanding the surface, the wood can be impregnated with tinting compounds that will create a specific shade and emphasize the wood structure. A layer of varnish will seal the finish. With the help of alkyd paints, you can provide almost any color of furniture for combination with other interior elements .
Another common option is self-adhesive film. It is often used to finish chipboard countertops. With its help, you can imitate various natural materials - wood, natural stone, marble, metal, etc. Inlay or veneering adds special sophistication to the table.
Advice : if the issue of free space is acute for you, also take a closer look at the designs of a folding table, a laptop table, a coffee table and a children's table.
Designer table decoration
The design of the extendable table allows you to use any tabletop shape. The round shape will look very modern. When extended, this table has an oval shape. The entire manufacturing process is similar to the manufacturing of the rectangular version. The only difference is in the cutting of the tabletop.
It is advisable to start cutting by drawing a semicircle of the required size on whatman paper and then transferring the sketch to the manufacturing material.
Removable elements remain rectangular in shape.
The design of an extendable table can be enriched by changing the number of legs. So, for not very large tables, you can provide just one massive leg with a platform or cross at the bottom. You can use two wide side legs.
https://moyagostinaya.ru/www.youtube.com/watch?v=GOw5YdOZjSk
A mandatory element will remain the manufacture of a rectangular table base frame for installing the tabletop.
Rotary, sliding or classic “book”
There are truly many ways to transform a tabletop. The simplest and most familiar of them is used in a cabinet table, which has two lifting tabletops on piano hinges and swivel legs as a support for them. The table is not always comfortable: for those sitting at the central section there is simply nowhere to put their knees, and when unfolding it, it often has to be moved and turned. The aesthetic value of such furniture is almost zero, but the “book” is the most budget option for a table.
Sliding tables have a rigid frame with fixed legs. Only the tabletop undergoes transformation: it is moved to the side to the middle of the frame, while the open part is covered with the second half, which is stored separately. Such tables are good in spacious dining rooms; transformation is carried out in a few simple movements.
By the way, there are several layout options; for example, the edges of the tabletop can be moved with the insertion of a central segment. Or, for example, the tabletop can be folded in half on hidden mortise hinges and fold back onto the open part of the frame after sliding. Do not ignore the rotating structures, in which the tabletop does not move to the side, but turns perpendicularly, after which it is supplemented with a second half.
Other table designs
Folding book tables have a simpler design. For example, you can make a structure that, when assembled, looks like a cabinet. Such a table has a main fixed tabletop 40-50 cm wide. The sidewalls are of the same width, which at the same time serve as the main massive legs. The standard height of the sidewalls is 730 mm. A movable tabletop up to 700 mm long is attached to the fixed tabletop through a hinge. Such tabletops are fixed on both sides. Additional legs are made in the form of frames and are attached to the sidewalls through a hinge. This way, four legs are installed that can be retracted inside. Sliding is carried out in the following order: the moving parts of the tabletop are raised; by turning in the hinge the legs move under them. As a result, the working length will be about 2 m.
Wood or plastic?
The choice of materials for a homemade table is determined by their availability and appearance. Particular attention is paid to the tabletop. It can be made from the following materials:
tree .
The most spectacular, but also expensive, option is solid wood. Such tables have a rich appearance, but the overall design is heavy. A cheaper option is shields assembled from boards. They can be tightly fitted to each other, imitating a monolith, or they can be laid with a gap - a lightweight country table;- wood-shaving and wood-fiber materials . Chipboard, MDF, and plywood are widely used. They are technologically advanced, but have a reduced service life;
- plastic _ Plastic sheets can be selected in different colors. Their advantage is low cost, light weight;
- glass . Glass countertops have become fashionable and are in demand for modern interior styles. The main disadvantage is the complexity of manufacturing.
In addition to the tabletop, the table must stand securely on legs. For their manufacture, wooden beams are most often used.
Tip : you can also use a metal profile for them; in particular, an aluminum flat pipe, corner or U-shaped profile looks modern.
Required Tools
In order to make an extendable table with your own hands, you will need the following tools and equipment:
Tools for making an extendable table.
- drill;
- screwdriver;
- Bulgarian;
- hacksaw;
- screwdriver;
- hammer;
- chisel;
- plane;
- sandpaper;
- file;
- paint brush;
- ruler;
- roulette;
- calipers;
- scissors;
- jigsaw;
- sander
An extendable table is a very convenient and practical piece of furniture. It will help solve some problems associated with lack of space.
https://moyagostinaya.ru/www.youtube.com/watch?v=topIvPRkZuQ
You can make such a table yourself if you apply a little imagination and become familiar with the basic principles of the process.
How to make it yourself
Very often the question arises of how to make an extendable table for everyday use and for a large feast. A sliding model is somewhat more difficult to make than a regular table.
Use professional tools to create a table.
You need certain skills, abilities, necessary materials and tools. Specialized stores offer a large selection of different materials and accessories, and you can assemble the table yourself.
Use quality wood to make the table.
There are a number of advantages to making a model with your own hands:
- you can take into account your preferences, the style of the set and the interior of the room, the number of household members and possible guests;
- the ability to independently select only high quality materials;
- saving money. Assembly and materials will cost less than when ordering from specialists;
- the manufacturing process itself is enjoyable, it is pleasant creative work;
- the product is not only original, but it can turn out even more beautiful and interesting than one made at the factory (made diligently and with soul).
Selecting a product type
The model is selected taking into account the size of the table; the shape and style are important. This takes into account:
- kitchen area, interior;
- material of all kitchen furniture;
- color scheme of the interior of the entire kitchen;
- number of seats at the table;
- its aesthetic significance. Selected tastefully and in accordance with the interior, kitchen tables can perfectly transform any room;
- performance properties, items must be functional, comfortable, with a durable coating, stable and with reliable connection of parts. Important! When choosing a round table, pay attention to its diameter. Excessively large round tabletops are inconvenient. The ideal option is no more than 150 cm. Otherwise, reaching for food at the table will be problematic.
Creating a diagram and drawing
They begin working with a sliding table with their own hands by making a drawing and drawing up an assembly diagram. Before starting work, it is advisable to draw a general outline of the table. Then make a visual drawing of its design to scale.
Create a drawing before making the table.
You will need to indicate all the exact dimensions of the two tabletop blanks, inserts and legs. Also indicate the location of the insert and the overall dimensions of the table.
Equipment, materials and tools
How to make a round extendable table from wood with your own hands.
High-quality fittings are the key to long-term use of the table.
What you will need for manufacturing is mainly:
- block board for ease of work;
- two semicircles and an insert for the tabletop, with dimensions according to the drawing;
- beam for legs - 4 pcs. or a beautiful single wooden leg;
- plywood ring - the connecting link between the table top and the support;
- plywood reinforcement strips for stability;
- 4 aluminum corners with a length of at least 50 centimeters;
- a pair of telescopic guides of at least 50 cm (coincident in length with the corners).
There should be no unevenness on the surface of the wood.
When choosing a material you should consider:
- Wood is the most beautiful, strong, durable, and moisture resistant. No special care required. However, the tabletop is quite heavy and the material is expensive;
- Chipboard is the lightest and cheapest material, but short-lived. Its optimal and durable coating is laminate. It tolerates dampness and temperature changes well;
- MDF is a safer material (there are no formaldehydes in the composition), but it does not tolerate contact with water;
- Tempered glass is used in kitchens with a modern style and a small space. It does not require constant care;
- The tabletop looks original when combined with wood, MDF, and chipboard. It is durable, but quite heavy.
Note! A round wooden table will always look smaller and lighter if it has a thin tabletop and graceful legs.
A drill will help you in making a table.
The most necessary tool:
- electric or hand saw;
- electric drill;
- screwdriver (screwdriver);
- bolts, nuts, self-tapping screws;
- tape measure, ruler;
- glue;
- materials for finishing the edges of the tabletop.
Preparing the Basic Elements
All elements must have the dimensions indicated in the drawing. When assembling the table, you must strictly follow the assembly sequence.
Consider all the features of the material from which you will make the table.
Build process
The transformer must be assembled in the following sequence:
- cut out parts according to a drawing prepared in advance;
- drill holes in the corners;
- lay parts of the guides to the corners, mark holes and drill;
- screw the movable side to one part of the tabletop, the fixed side to the other;
- attach a lock to each side of the table with self-tapping screws;
- install the legs using self-tapping screws.
Final stage
When making a countertop from chipboard, it is usually covered with laminate. Then, after special treatment, you can paint it. After installation, the ugly end of the tabletop is sealed with edge tape. The wooden surface can be sanded and painted.
You can decorate the folding table according to your taste.
You can add images of flowers or other designs to the black background of the table. A folding table can be turned into a work of art.
Handmade folding structure
The country model is always universal, due to the fact that it can decorate the kitchen, be moved to the garden, or can be placed in the room.
To make a wooden table you will need:
- A pair of chipboard sheets, the dimensions of which should be approximately thirty by sixty-five centimeters. The thickness should be at least two centimeters;
- Boards - fifteen pieces - 550 by 50 by 20 millimeters;
- Self-tapping elements forty-five millimeters in length;
- Bolts with washer and nut. Ten pieces is enough.
If the assembly is carried out using photographs, then everything is visible on them, and in this case a drawing is not required. This is a pretty convenient way.
Step-by-step execution technology:
- First, the boards must be cut to size;
- Then thorough sanding is carried out;
- The parts are bolted together according to the markings according to the diagram;
- The table is assembled from prepared structural parts.
What materials are they made from?
A folding table for a small kitchen can be:
- Wooden. Such furniture is made from solid wood or furniture panels. The most expensive models are made from solid wood; those glued together from planks are average in price. But wooden folding kitchen tables require special attention: they are afraid of prolonged contact with liquids and react to high humidity. In general, wood is beautiful and prestigious, but troublesome.
- Made from laminated chipboard or MDF, these are some of the most affordable models. The most inexpensive ones are made from laminated chipboard; you will have to pay a little more for laminated MDF. But the peculiarity is that with active use the film wears out or begins to peel off.
Wooden or veneered and you can’t tell right away - Made from chipboard or MDF covered with veneer. These models are average in price (veneered MDF is more expensive), but it is difficult to distinguish them from natural wood in appearance. The downside is that hot glue can melt, which will lead to the veneer peeling off.
- Glass. Glass tables are durable, elegant, stylish and beautiful. Their main advantage is that they do not “load” space, which is very important for small kitchens. But they “ring” when you place dishes on them and feel “cold,” which is unpleasant in winter. Another minus is that constant care is required, as fingerprints and dust are visible. But you can put cold, hot, pour water...
As you can see, there is no ideal. Everywhere there are pros and cons. All you have to do is choose which ones attract you more or which ones will “fit” better into your interior.
We select, install and repair table fittings ourselves
There is not a single modern home in the world that does not have a table: square or round, with or without a transformation mechanism, glass, plastic or wood - it always occupies a central place in every home. Regardless of the model and shape of the product, table fittings are used in each of them. During assembly, folding, sliding, retractable, tensioning and support mechanisms can be used. It is the quality of the fittings that determines the service life of the table, its functionality and ergonomics. Furniture fittings for low quality tables often break and require repair. In some cases, broken parts can be repaired with your own hands, while in others you cannot do without replacement. Selecting high-quality fittings is not difficult if you know what to look for.
Wooden frame - legendary reliability
The tsarga is the frame to which the table top is attached. In 90% of domestic kitchens you will find a kitchen table on exactly this basis.
Over the past decades, a lot has changed in drawer models - new fittings have appeared, new mechanisms for increasing the area have appeared. One thing has remained unchanged and unites them - the drawer - a massive base for the tabletop.
What is the secret of such popularity?
Reliability. The drawstring design has been tested by time - it is the most durable.
Sustainability. Both folded and unfolded, the drawer tables are able to withstand the weight of a whole roasted pig and the fun of revelry guests.
Durability. The fittings are made mainly of metal, so after decades you can easily arrange even the drawer table that your grandmother received as part of her dowry.
Naturally, there are also disadvantages :
Inconvenient. In most of these tables, you will be resting against the drawer if you want to cross your legs over your legs.
Massively. Tsar tables look heavier and not as elegant. They will look out of place in a light, “floating” interior. But perhaps you just need a solid dining table - then the drawer will be just right.
Modern models of sliding tables made of glass will look good in technological interiors. Take a look at the photos of high-tech kitchens to form your own opinion about what interiors imbued with the spirit of high technology look like.
Restoration process
Restoring a kitchen table yourself is not an easy process, but if you follow all the rules and do not deviate from the instructions, you will succeed. Try restoring a veneered table with defects on the table top.
It is necessary to prepare a grinding machine, enamel paint of the desired color, wood primer, and a special wax paste.
- It is necessary to inspect the table, identify defects, and tighten the bolts if necessary.
- Using a sanding machine, we remove the old coating, using two types of sandpaper - coarse and fine
- Then the table must be thoroughly cleaned so that no dust or dirt remains.
- Chips, cracks and irregularities are covered with wood putty
- After this, the table is covered with primer and sanded again.
- The finished table can be stained or painted; it’s better not to skimp on paint
- After the paint has completely dried, a protective layer of varnish is applied on top; you can also use wax
If you don't know how to update an old kitchen table, then this guide will help you with this fun activity. A table painted through openwork tulle looks very beautiful; this is an easy way to make the table unique and elegant.
