Repair
0
10 101
Share
Is your kitchen set worn out and out of shape, but you don’t have the money to buy a new one? Don’t despair, it’s better to try to repair the furniture yourself. Before you begin the process, carefully inspect the furniture for breakages and damage. Think about whether there is any point in restoration, because if the set is made of low-quality material, it will be too expensive to update the furniture yourself. In some cases, its cost is equal to the price of a new set. Wooden furniture is repaired several times. And if the restoration goes wrong, don’t despair, it’s quite possible that you’ll end up with a completely new-looking kitchen. Technologies and ideas for remodeling furniture with your own hands will help you correctly carry out independent restoration work and at the same time show your imagination. In this article you will learn how to update old kitchen furniture with your own hands.
Renovated kitchen, but looks like new
- Decorative ways to update an old set
- DIY furniture reconstruction methods
- We are restoring a kitchen made of chipboard
- Self-adhesive film for finishing kitchen furniture
- We paint kitchen facades correctly
- Varnishing of kitchen facades and countertops
- Features of self-repair of basic kitchen elements
Decoration with rattan inserts
The principle is the same as with ceramic tiles. Rattan inserts will look appropriate with ethno- and eco-style. Rattan copes well with moisture, which is why it is well suited for the kitchen. It can be used to replace glass inserts along with large-scale restoration of facades. Rattan inserts can be glued on top of blind cabinets. The variety of weaves and the presence of several shades will allow you to choose the appropriate insert option.
Working with rattan is easy:
- a fragment of the desired shape and size is cut out; you can use pruning shears or metal scissors;
- the segment can be attached to the facade with a stapler;
- Wooden planks pre-treated with an antiseptic are installed around the perimeter of the insert. You can use glue;
- The main thing with rattan is not to overdo it - small inserts on the largest cabinets will be enough to add the necessary notes to the interior.
Facades
Restoration may be required not only due to breakdowns or other defects of the furniture, but due to its “moral” obsolescence. Having seen a design he likes, the owner may want to change the appearance of the facades. In this case, repairing a kitchen set involves updating its front panels.
Pasting with polyvinyl chloride film
PVC film is a popular material for redesigning kitchen furniture. It is easy to use, durable and does not fade. There are several types of film:
- smooth;
- with a textured surface imitating various natural materials;
- with embossing.
Imitations of wood and natural stone are the most impressive, not only in appearance, but also to the touch. The average film thickness is 0.2-0.55 mm.
It is advisable to paste kitchen facades and cabinets with a more durable and inexpensive material. It lays down easier and does not bubble during the sticking process. Since it is not easy to cover an old kitchen, it is better to follow the technique of gluing PVC film:
- Use a tape measure to measure the size of the façade. Leave 20 mm on each side for bending.
- On the back side of the film there is paper lined into squares measuring 10x10 mm. The obtained dimensions of the facade are marked on it. After which the fragment must be carefully cut out with a stationery knife or scissors.
- The fittings are removed from the kitchen facade: handles, hinges and locks are unscrewed. Working with PVC film requires an absolutely even base. Therefore, dirt and crumbs are carefully removed. The surface of the door is degreased using White Spirit or another solvent.
- Apply the film to the facade, not forgetting about the fold allowance. Gluing is carried out in the direction from top to bottom. Carefully peel off the paper base. Glue the film to the facade, ironing it with a dry cloth or sponge. Make sure that no air bubbles form. Gradually remove the paper, sliding it down. The greatest difficulty will be in processing the corners. To paste over an old kitchen, use a hairdryer. When heated, a slight heat-shrinking effect is obtained. In this case, the film is firmly attached to the base.
- The final stage of work is the installation of previously removed fittings.
Coloring
When thinking about how to make a new kitchen set from an old one, they remember the simplest and most affordable method: painting the facades. This method requires careful surface preparation.
- The doors are removed from their hinges and the fittings are unscrewed.
- Swollen or otherwise deformed ends are cleaned with sandpaper or an abrasive stone. Fine dust remaining after the process is carefully removed using a rag or vacuum cleaner.
- The facades are washed and degreased.
It is important to know: before painting, protect the workplace from splashes and drops by covering the surfaces with paper or cloth.
To transform facades, it is recommended to use spray enamels. The paint is applied holding the can at a distance of 15-20 cm. The door is installed vertically. You can also use the double coloring method using stencils. After the facades have dried, fittings are installed on them.
Rattan update
Rattan fabric is a beautiful material with a woven structure that has an easy-to-clean surface. When soaked in cool water for 15-20 minutes, it becomes soft and slightly increases in size. After drying, it becomes strong and elastic again. This property of rattan is used when redesigning furniture.
There are 2 options for updating facades. Using any of them, you can replace the glass of a cabinet and replace it with a dense, beautiful material with a textured surface.
- Making a frame from slats and attaching rattan to it with staples using a construction stapler. Work is performed with softened material. After drying, it will stretch and gain strength. The slatted frame is attached to the facade with small nails without heads or fixed with Moment glue.
- Glue dry rattan to the facade using water-based glue. A good choice is Moment Montage. A frame of slats is secured on top of the canvas with nails.
The slats are pre-polished and varnished. The most impressive are carved planks or those with a pattern burned into them. Instead of wooden ones, you can use metal or plastic slats.
Use of chintz
Fabric decor is rarely used, so this is your chance to make your kitchen unique. You will need a piece of fabric with a suitable pattern, and then everything is simple:
- the beginning, as always, is to dismantle the facades and fittings;
- cabinets are measured, fabric is cut out and glued to pre-washed and degreased facades;
- facades are covered with colorless varnish in 5-7 layers, it will protect the fabric from moisture, grease and odors;
- All that remains is to return the fittings to their place, and you can purchase new, more suitable handles;
- An interesting effect can be achieved if you make a lampshade for a lamp from the same fabric, or sew covers for chairs.
How to cover a kitchen unit with self-adhesive film
The update method is suitable for laminate furniture. Careful preparation of surfaces will ensure a tight fit of the film.
There is no need to start gluing right away; it is necessary to carry out the following preparatory work in the exact sequence:
Calculating the area of the purchased film according to the area of the surfaces to be pasted is not suitable. You need to decide on a sample, based on its width, draw on paper each detail to be restored, on a scale of 1: 10. The cuts and overlays will be immediately visible and will not last long. We start from complete cuts and put up with the inevitable remainder.
Subtleties of the matter
Restoration of kitchen facades from MDF
Small chips and scratches are repaired with a furniture wax pencil. It is applied to the damaged area, and after hardening, the restored surface is sanded with fine sandpaper. The pencil is selected to match the color of the facade.
Decorative stickers will update the look of the headset and hide minor defects. Before gluing them, the surface is cleaned and degreased.
Price for renovation of kitchen facades
| Type of work | Qty, size | Price, rub |
| Sanding old paint | 1 m2 | 320 |
| Applying stain | 1 m2 | 1250 |
| Eco veneer | 1 m2 | 3850 |
| Apply varnish | 1 m2 | 2500 |
| Padding | 1 m2 | 1600 |
| Cover with enamel | 1 m2 | 2800 |
| laminated chipboard egger | 1 m2 | 2100 |
| Solid veneer | 1 m2 | 8600 |
A master will tell you the exact cost of repairing kitchen facades after assessing the scope of work on site.
The price depends on a number of factors:
- technologies;
- volume of work;
- type of damage on the kitchen facade;
- the need to replace accessories, and so on.
By contacting us, you can count on low prices and high quality of order execution.
Decoupage of kitchen facades
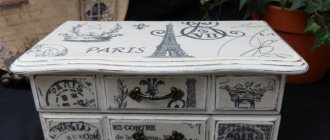
Decoupage is a great way to update your kitchen set and give it a touch of Provence style. After the transformation, the facades will look as if talented artists painted them for you, but you will know that you made all this beauty with your own hands. You can put absolutely any design on cabinets and shelves, but usually they choose something related to plant and kitchen themes: images of fruits and vegetables, coffee, jars of spices and cereals, flowers, etc. Decoupage will help decorate facades with ornaments in the style of Gzhel or Petrikov painting. The main thing is to find a suitable drawing - no one limits your imagination.
Everyone can cope with the restoration of facades on their own:
- remove all doors, remove fittings;
- If the surface of the headset is perfectly flat and smooth, then you only need to wash it well to get rid of stains of grease and dirt. If there are defects, it is better to sand the surface. First use fine-grained sandpaper, and then coarse-grained sandpaper. If you have a sanding machine at your disposal, it will greatly simplify the process. If there are cracks, depressions, or pits, it is better to fill them with putty. When it dries, the treated areas are sanded again. After this, the facades can be primed, but many skip this stage;
- The decoupage technique is suitable not only for wood, chipboard and MDF - it can also be used to decorate plastic and glass facades. Preparing them for decoration is very simple - just get rid of all the dirt and grease;
- The easiest way is to use three-layer napkins for decoupage. Think in advance about which part of the façade the drawing will be located. Don't use images that are too small. Different cabinets can be decorated with pictures in the same style. The image can be glued to regular PVA glue;
- Now all that remains is to open the facade with acrylic varnish, it is better to use 3-4 layers, each applied after the previous one has completely dried. The easiest way to work is with a narrow brush with long bristles;
- All that remains is to return the fittings and install the facades.
If this is not your first work using the decoupage technique, then you can use not only special napkins. Experienced craftsmen know that fragments of wallpaper with a suitable pattern, and even maple for a kitchen table, will do, not to mention that the image you like can be printed on a printer.
Decorative ways to update an old set
If there is no significant damage to the furniture, and only scratches or stains appear in some places, put off repairing the kitchen set yourself until better times. Here you can get by with decor. For these purposes, vinyl stickers or decoupage are used.
Vinyl stickers will help hide a crack in your furniture in a few minutes and at the same time give it a new look. They are inexpensive, come in a wide range, are easy to clean and can withstand temperature changes. If you want such stickers to last for a long time, purchase only certified products.
Decoupage furniture is an equally popular option. Select the image you will transfer. Use the top layer of napkins with a pattern. Degrease the surface, then apply decoupage glue in the required place and press the image onto it. Once the glue has dried, apply acrylic varnish.
Step-by-step algorithm for painting or varnishing
- Dismantle the facades, remove fittings and glass inserts. Cover those elements that should not be exposed to paint with masking tape.
- Before painting the kitchen unit, you need to clean the surface. Treat it with a solvent, remove the film, if any, using a technical hair dryer, sand it with fine-grained sandpaper.
- Cover the facades with 1–2 layers of primer. If you work with wood, choose special primers designed for this material.
- Start applying paint or varnish. You will need at least 2-3 layers. Before applying a new layer, be sure to wait until the previous one has dried (check the time specified in the instructions). To make your work easier, you can use a spray gun. With this device, you can apply paint or varnish faster and more evenly. Another way to achieve better results is with aerosols, but this has its drawbacks. Firstly, it is not environmentally friendly, and secondly, you will have to be content with a limited color palette.
- Wait until completely dry. This usually takes at least 2 hours for paint and at least a day for varnish. There is no need to additionally coat acrylic paint or enamel with varnish.
Application of film and plastic
A fairly simple method of restoration is the use of self-adhesive film. Before gluing it, it is necessary to treat the surface with a solvent to remove dirt and grease. There should be no obvious dents or bumps on the surface: all such defects will appear through the film. Smoothing is done using a rubber squeegee or spatula. If air bubbles appear, they should be carefully pierced with a needle or cut with a razor and smoothed out.
Renewing the facade using sheet plastic does not require sealing surface defects, since they are covered with a sheet of sufficient thickness. The plastic is cut to size and glued using special glue. The edges of the sheet are carefully processed with a file to form a small chamfer.
Nowadays, most furniture, such as cabinets, bedside tables, kitchens, and so on, are made of chipboard. The material is good, quite flexible (there is one for every taste and color). However, it has a big disadvantage. Over time, especially if this is a frequently used door, the hinges can be pulled out by the roots (probably many have experienced this), and the hinge dangles... the sash sags, or even comes off altogether. In general, how can I fix this whole thing? Detailed instructions + video version...
The essence of the problem is that it will not be possible to screw the “screws” back into these torn fasteners. They simply won’t stay there. We need to fix it some other way. For me personally there are only three. I’ll tell you about each one separately.
Decorative inserts
Flat plastic inserts, composite marquetry, carved three-dimensional ones, embossed metal - a desirable decor if a certain style is observed. But you can set a unique new style. Decoupage became widespread and became a total women's hobby. It is famous for its environmentally friendly technologies. Overhead rondos, ovals, boutonnieres, corners and appliqués are created, and sometimes the entire set is modified beyond recognition. The stylistic possibilities of the decoupage technique are wide: from archaic to ultra-modern techno.
Tabletop restoration
If there are chips, scratches and other damage on the countertop, then restoration of this part cannot be avoided. The methods and options for carrying out manipulations directly depend on what material it is made of.
The question of how to update a kitchen countertop is one that comes up most often, since the surface is systematically subject to mechanical damage and quickly becomes unusable.
Old stains on artificial stone countertops can be removed with special chemical mixtures; they are sold at any household chemical store. Small scratches are sanded using a special sandpaper, after which the surface should be polished and it will look like new.
Polishing a tabletop is an important stage in its restoration.
Materials such as chipboard and MDF are low in cost and are often susceptible to the influence of external factors, but repair work on them is much easier to carry out. Chipping of small areas is restored by gluing the part using a special glue. If the chipped part cannot be restored, then you can make a special mixture, apply it and wait until it dries completely.
The final touch is sanding the coating.
Natural wood can also be restored quite easily; scratches and chips can be sanded, and chipped areas can be glued on.
Restoration of kitchen facades made of natural wood
Solid wood furniture looks great, but requires compliance with several operating conditions:
- The surfaces of wooden furniture should be cleaned with soft cloths soaked in a soapy solution. Do not use solvents or abrasive cleaners.
- Do not place hot dishes on the countertop.
- The humidity in the room should not rise above 70%.
- Minor damage and scratches must be repaired as soon as possible.
Scratches and cracks on the facades of solid wood furniture are repaired with melted wax. Chips are smoothed out with wood putty. After leveling the surface, the restored area is covered with a layer of furniture varnish.
If you need not just minor repairs, but a complete update of the appearance of the facade, replace the entire varnish coating. This is done this way:
- We dismantle the facades and remove the fittings.
- The surface is carefully treated with fine sandpaper. It is necessary to completely remove the old varnish coating. This is not always easy, especially if there are raised patterns or indentations.
- We remove varnish shavings and sawdust with a damp sponge or napkin.
- After drying, prime the surface twice, allowing each layer to dry before applying the next.
- Apply varnish with a brush or roller. We form the protective film in several layers, with each subsequent layer being thinner than the previous one. The varnish dries for at least a day in a well-ventilated area.
A different shade of wooden furniture will be given by stain or varnish with pigments.
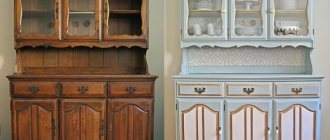
You can change the set beyond recognition and give it a more modern look, as in the photo, by painting it.
The nuances of working with natural wood
Furniture made from real solid wood is a classic option that does not lose its attractiveness and practicality over the years. Wood is a very durable, environmentally resistant, environmentally friendly material that has a presentable appearance and a long service life.
When renovating kitchens made of natural wood, you must adhere to a few simple but effective rules:
- Having discovered scratches or small cracks on the wood, we immediately restore the surface using furniture wax. Otherwise, there is a risk that the tree will begin to dry out in the damaged area;
- if you need to eliminate a chip, wood putty will help. Apply it layer by layer until the surface is level. After complete drying, sand the defect area and coat with varnish;
- restoration of a damaged varnish layer - this often happens in places where the wood has been subjected to severe mechanical damage. Simply fill the deformed area with a layer of clear varnish and let dry.
Natural wood is an expensive material, working with which requires special knowledge and skills. In order to be sure of the correct approach to repairs, it is better to turn to professionals.
The main condition for extending the life of wood furniture and maintaining its visual appeal is proper care of the products:
- Do not use abrasives or solvents. To clean the surface, use only soft cloths soaked in a mild soap solution;
- Do not allow hot steam or moisture to accumulate in the kitchen. The optimal humidity percentage for natural wood is no higher than 70 percent;
- do not place hot dishes on the surface of solid wood furniture;
- regularly carry out minor repairs to furniture - rub out scratches, coat the wood with mastic, check fastening joints.
By restoring kitchen furniture with your own hands, you will not only save your family budget, but will also be able to realize your artistic ideas and ambitions. Original decor, choice of colors, and your own design will turn the work not into a banal furniture repair, but into a real creative process.
Replacement of old furniture facades
We unscrew the old facades, remove them, and take measurements of the cabinet or hanging cabinet. We check the corners with a square. We eliminate existing distortions by installing corner clamps. Only from the newly restored corners can the exact size of the new facades be determined. For two door cabinets and cabinets, subtract 3 mm from the width - for the convergence point in the middle.
Cutting new laminate flooring with a hacksaw is a bad practice. Only a fine-toothed circular saw at high speed can avoid chipping. If the home craftsman undertakes to do everything himself, the recommendation is this: you need to remove the plastic under the metal ruler with an awl and go deep down to the chipboard itself. The plastic is cut along two lines with an indentation equal to the width of the cutting tool (usually 2 mm).
When it is not possible to cut chipboard without chips, they use a 3D edge rather than a strip one. It needs to be filed on a chair, giving a length allowance of 3 mm (an edge of this type hides the corners of the shield). The same allowance - 3 mm - must be taken into account during cutting.
How to update old kitchen furniture with your own hands: painting, moldings
Those who decide to change their facades should pay attention to an excellent material - moisture-resistant plywood. It is light, durable even with through cuts, which is important for frame and openwork facades. In addition, two layers of 8 mm can be added to a thickness of 16 mm and not change the established dimensions of the old chipboard set.
The required thickness can also be achieved using moldings. Semi-cylindrical, molded, flat, classical ancient Greek mutulas - all these configurations, superimposed on a spectacular background, will introduce clear lines and expressive style. Moldings create the effect of milled Victorian style furniture. The weakest point of plywood - the edge - is protected with wood, for example, birch rulers.
Plywood sheets only need a primer before painting. Previously painted chipboard facades without damage do not need to be primed. It is impossible to re-stain stained stained wood. But you can paint it with high-quality acrylic or pentaphthalic paint, tinting it yourself or using a centrifuge at a tinting center.
Painting Tips
Glass replacement
As a rule, it is enough to simply wash glass inserts in facades well to return them to their original ideal appearance. But what if you want something new? You can replace the existing transparent glasses with frosted or colored ones, then the kitchen will noticeably change. True, the glass will have to be made to order, and not everyone can handle the replacement itself.
A more budget-friendly option is to buy self-adhesive film. With its help, you can give the glass the desired shade without depriving them of transparency. It will help create a matte effect or imitate a real stained glass window. Anyone who knows how to use a tape measure or measuring tape, scissors and is able to carefully apply the film can definitely cope with gluing the film.
There is also an old, ancient method that involves applying a mixture of chalk powder and silicate glue to the glass. This material is applied to the glass in two layers, after which they become matte.
Renewal by varnishing
The stronger the smell of varnish, the more resistant it is to mechanical stress. Alas, a durable varnish without a pungent odor has not yet been created.
The best varnishes are at the beginning of the list:
There are a lot of “combi” varnishes with partial addition of certain substances: shellac, resin, drying oil, acrylic suspension. The wide variety is associated both with the purpose of improving the compositions and with different purposes. It is often necessary to re-varnish surfaces containing lecithin (converted fats). Nitro varnish will no longer stick to this. In any case, varnishing is the most reliable way to protect solid wood and paint on furniture. If you don’t like shiny shine, choose a matte composition. You can add particles for sparkle, tint to taste (tinting reduces transparency). By selecting the composition and mode of the nozzle of the spraying device, the varnish creates the effect of raindrops, bubble skin, silk, and mica plates.
Some varnishing tips:
Very important! Spraying any paints, even acrylics, is extremely harmful to the respiratory system. You need to work with a respirator.
Source
How to update kitchen furniture
When updating a kitchen set, you need to focus attention not only on the cabinets and their facades, since other items also become unusable from long-term use - handles become loose, the coating peels off, the lining is worn out. But, if necessary, restoration of this furniture can be carried out by analogy with facade surfaces. You can repair and update the appearance with your own hands for the following units:
- chairs;
- countertops;
- kitchen tables.
If you approach this issue correctly, the restoration procedure does not cause any particular difficulties, and the final result will be no worse than design developments. Ideas for modifying and decorating pieces of furniture can also be gleaned from designer master classes or using your own imagination and attention to detail.
Tabletop
The countertop in the kitchen, as the main work surface, is constantly exposed to negative influences during the cooking process. Such factors lead to destruction of the surface and the appearance of scratches, stains, holes and other types of damage. To update the kitchen countertop, replace the surface with a new one, for example, made of artificial marble or porcelain stoneware. If you are restoring a work surface with your own hands, then you often take into consideration the option of ceramic tiles:
- The surface must be leveled with a sharp tool, for example a knife, cutting off all swollen or deformed areas.
- A metal profile of small height is fixed along the perimeter of the plane as a side for placing tiles.
- The glue is applied directly to the degreased surface of the table, this will enhance adhesion and fix the new coating more firmly.
- The tiles or fragments are laid tightly so as not to leave gaps, leveling the surface.
- When the tile surface has already been assembled, you need to fill the seams with epoxy and level the resulting coating.
Attention!
After hardening, epoxy resin acquires a dense structure, this will preserve the condition of the surface for a long period. This composition, after removal, does not pose any health hazard, so it is used as a coating in the manufacture of bar counters or tables in cafeterias.
Chairs
Chairs, like stools, are among the most common units of kitchen furniture, especially when the kitchen is combined with a dining room. The seats that are most susceptible to wear and tear require replacement of the filling and upholstery. Of course, scuffs or tears can be hidden under specially sewn covers, but this approach will not correct the deformation of the filler. Repairing a chair involves the following algorithm:
- Removing the old trim - usually on the reverse side there are simple fastenings of the seat to the frame and clips holding the material.
- If the filler is completely unsuitable, you should simply throw it away after disassembling the seat.
- The base must be cleaned of any remnants of old filler and, if necessary, leveled (wetting with water and pressing with a weight until completely dry).
- It is recommended to clean the frame from the old coating by sanding, and then cover it with varnish or paint.
- New material is cut out using a template from the old one. After placing fresh filler, it is fixed to the base with a construction stapler.
The fabric for seat upholstery must be durable and non-marking. Depending on the intended style, they buy material of a neutral tone and sew ordinary covers. It is worth abandoning options with leatherette, since this type of covering is short-lived and, with minor damage, will quickly spread into long tears, which is why you will need to perform the entire updating procedure again.
Cabinets
Of the kitchen furniture, cabinets suffer the least during use, since the use of these parts of the kitchen furniture is not widespread. But, cabinets sometimes also require restoration. The weak points of this kitchen unit are the legs, doors, and shelves. Often the entire body becomes loose. To restore a cabinet in the kitchen with your own hands, perform the following types of repairs:
- Replacing legs. New support parts can be purchased at a hardware or furniture store. To replace a piece of furniture, turn it over, remove the old legs and screw in new ones. If the previous fastening points are very loose, it is recommended to fill the holes and screw the screws into new places.
- If the housing becomes loose, you need to check the condition of the fasteners. When the bolts or screws are loose, just tighten them, then everything will be fine. If the attachment points are damaged, buy corners of the appropriate size, and then fix them in new places to strengthen the body.
- Drawer guides and bottoms suffer. These elements must be completely replaced with new ones - the fittings are purchased at a hardware store and fixed in new points. You can try to level the bottom, but usually this method does not allow you to completely restore it - it’s easier to cut it out or order a new one.
- Shelf fastenings that have come loose and are lost are replaced with new fittings. If the previous places are broken, you need to fill the chips and fix the fittings on the entire part of the wall. Shelves are also replaced when broken - they can be cut out yourself or ordered from a furniture workshop.
Attention!
The doors act as the front part of the kitchen - such parts of the kitchen unit are restored in the general manner - sanding, painting, drawing and replacing fittings. The front panels of the bedside tables can also be completely replaced with others.
Kitchen table
A table located in the kitchen also requires restoration after prolonged use - its legs may become loose and the surface of the tabletop may be damaged. In the case of the legs, they need to be tightened more tightly, which requires a screwdriver, wrench, hexagon or pliers, depending on the structure of the fastener. To restore the countertop, you can lay ceramic tiles or paint with acrylic. For stencil painting you need:
- paint of the required colors;
- brushes with long bristles;
- stencil with the intended pattern;
- foam sponge.
The main tone is applied to a cleaned, sanded surface in 2-3 layers to obtain an even tone. After the initial table covering has completely hardened, you should apply the stencil in the right places and apply a different color with a sponge, ensuring that the edges are blurred. When the design has dried, you can coat the surface with a polyurethane-based varnish, which will ensure the durability of the design, as well as the smoothness of the table.
DIY furniture reconstruction methods
Kitchen sets, like any other furniture, can be cosmetically tidied up by using self-adhesive film, painting, or varnishing with clear or tinted varnish. Considering that the furniture in the kitchen is used intensively, and the climate in the catering unit is aggressive, the materials used must be resistant to temperature changes, high humidity, exposure to chemicals (varnishes, paints, films), and also environmentally friendly, since most surfaces are kitchen comes into contact with food. Let's consider these methods in more detail.
The film is cheap, but very practical in everything
We are restoring a kitchen made of chipboard
The two previous methods are used for minor damage; in other cases, serious action cannot be avoided.
It is worthwhile to dwell on the repair of chipboard furniture with your own hands. After all, kitchen sets made from this material are popular due to their affordability. Let's look at common damage and how to fix it:
- Chips. Using a chisel, the edges of the chips are leveled and filled with molten wax. Unnecessary wax is cut off, giving the required angle to the surface. Next, using a special felt-tip pen, the texture is restored and opened with varnish;
- Scratches can be removed by applying furniture wax to them. As in the previous paragraph, the texture is leveled and fixed with varnish;
- Scuffs are eliminated with a piece of microfiber cloth, which is moistened with a tint marker color identical to the surface. Spoil the damage lengthwise, then apply varnish;
- Cracks. Fill the crack with PVA glue. It is more convenient to do this with a syringe and needle. Place a clamp on the side of the crack and pull it off. Wipe off excess glue with a cloth and leave to dry for a day;
- It is better to replace the torn edge. To do this, a new laminating edge is placed on the end and smoothed on top with an iron.
Self-adhesive film for finishing kitchen furniture
The stores have a very large selection of films; there are no problems finding them.
To repair kitchen furniture with your own hands, self-adhesive furniture film is often used. Basically, it is used to paste over the facade of furniture. Before gluing the film, prepare the surfaces. For convenience, remove the facades and fittings. Wipe the surface thoroughly with sandpaper, degrease and, if possible, prime. Take the necessary measurements from the facade.
To apply self-adhesive film without bubbles, follow the instructions:
- Cut the film according to the dimensions obtained. This is easy to do thanks to the centimeter scale on the back. Don't forget about 2 cm wide allowances;
- Peel off 5-10 cm of the protective film and slowly press the decorative layer to the facade, smooth it with your hand or a special scraper from the middle to the edge;
- Continue unwinding the film onto the furniture and gluing it in small sections;
- If it turns out uneven, tear it off and re-glue it.
It’s not always possible to do everything correctly, even if you follow the instructions. If the furniture film does not lie tightly, bubbles appear despite all your efforts, try smoothing them towards the edge, piercing them or cutting them in the center. After this, release the air.
When repairing kitchen furniture, mirror self-adhesive film is also used. It has high moisture resistance, tolerates temperature changes well, is easy to care for, and is scratch-resistant.
We paint kitchen facades correctly
The painting method is used not only when restoring furniture, but also when changing the style of the kitchen.
The advantage of painted facades is that by changing the design you can easily repaint them in the desired color
Painting old furniture with your own hands is easy:
- Remove the facades, then unfasten the fittings and decorative elements from them. If there are glass inserts, remove them or cover them with film;
- Clean all elements intended for painting thoroughly from dust and dirt, then degrease;
- If there are deep damages on the surface, putty them;
- Apply a primer suitable for the façade twice;
- Before using spray paint, protect all surfaces that may come into contact with it. Pick up the can and shake for half a minute. Apply the paint slowly, keeping a distance of 20-30 cm. After the first layer has dried, apply one or two more. You can use a roller or brush for painting. And even better, both. For hard-to-reach places, a brush is suitable; in other cases, a roller is suitable. Don't add too much paint, otherwise it will run;
- When the facade is completely dry, coat it with varnish. Depending on what you want the surface to look like, choose a glossy or matte varnish. It will highlight the color and protect the surface after painting;
- Let the varnish layer dry. Attach the fittings to the facade and install it in place.
Varnishing of kitchen facades and countertops
You can restore old furniture with your own hands using the varnishing method. First, we will look at the main stages that make up this process, and later we will focus on the repair of specific kitchen furniture.
The glitter polish looks great
You can update old wooden furniture using varnish like this:
- Unfasten the kitchen facades and countertops, free them from fittings. If there are glass inserts, seal them with tape.
- Completely remove the old varnish layer using sandpaper. Shake off the dust or remove with a vacuum cleaner, then wipe the surface with a damp cloth and wait until it dries completely.
- Spread the primer evenly and let it dry.
- Apply a thin layer of varnish. If you are going to refresh your furniture, take a clear varnish, and to change its color, purchase a colored one. After drying, apply several more layers. Mahogany furniture can be finished with stain instead of varnish.
Advice! The glue is quite toxic, so restoration of furniture using it should be carried out outside an enclosed space.
Finishing work
Remodeling a kitchen with your own hands is a simple and even fun process, especially if all family members are involved in the work. It is better to entrust the replacement of electrical wiring, global redevelopment and transfer of communications to professionals, and you can refresh the interior yourself by decorating the walls. To do this, you need to remove the old coating, putty, level the walls and cover with new paint.
If you cannot make the surface perfectly smooth, ordinary wallpaper will help hide minor defects. It is recommended to cover a free bare wall with photo wallpaper with a 3D effect. Thanks to a drawing with a perspective, any room will only increase in volume. It is noteworthy that painting along with leveling costs about 3,000 rubles, so this remodeling option is very economical. Are your old tiles chipped or cracked? There is no point in removing all the old coating when it is enough to replace only the area that has failed.
Before painting the walls and ceiling, do not forget to protect the furniture from accidental drops and drips.
Painting walls with two different colors is a powerful design tool that allows you to create unique effects.
Kitchen door repair
The most common is cabinet door repair, which is caused by defects such as misalignment of the doors, changes in the geometry of the doors, spontaneous opening, difficulty closing, and loss of stability. The main reasons leading to such phenomena are deformation of the cabinet body, loss of vertical installation, mechanical damage, delamination or swelling of the material, failure of hinges or magnetic latch.
The most common reason is a broken hinge, which requires replacement. Typically, kitchen furniture contains standard disc-type hinges with two adjusting screws. First of all, if you have a problem with the door, you should try to adjust its position by turning these screws. If damage to the mechanism is noticeable, it is necessary to replace the hinge with a new one. This operation is carried out in the following order:
- The old loop is removed.
- One of the plates of the new hinge is tightly installed in the round socket of the door (diameter - 35 mm) so that the hinge mechanism is strictly perpendicular to the side cut of the door. The plate is secured with two screws screwed through the holes in the ears.
- The second hinge plate is installed in a similar slot in the side of the cabinet and secured with two screws through the holes in the bosses.
- Screw two screws into the corresponding holes. With their help, the position of the door relative to the cabinet body and the second leaf (if provided) is adjusted.
A common cause of the door opening spontaneously is damage to the magnetic latch. The fact of damage is determined visually, and if it is detected, a new magnet should be installed. At the same time, we should not forget about the presence of a return element, a metal plate on the sash, which must exactly coincide with the magnets.
The cause of door skew may be loss of vertical position of the cabinet. Cabinets are characterized by sagging legs under the influence of their own weight. In this case, you should place a strong support under the leg and adjust the installation of the cabinet. Wall cabinets are characterized by loose hinges. To eliminate the defect, the cabinet will have to be removed from the wall and the hinge strengthened, for which more powerful screws are screwed in.
