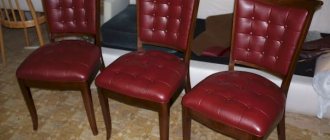
Over time, interior items become unusable: both inexpensive furniture and exclusive furniture or those that were inherited from you are not immune from this. Modern chair restoration technologies make it possible to eliminate signs of wear, repair broken parts, and restore or improve the design of furniture.
Restoring chairs allows not only to eliminate all structural defects and replace worn parts, but also to completely change their appearance. Why throw away your favorite old furniture if you can give it a second life? The specialists of our studio will undertake the restoration of any models and return them to their former beauty.
Advantages of do-it-yourself restoration
By restoring old chairs with your own hands, you can make completely new versions of the products, real works of art. In addition, it will cost much less than purchasing a new product. To update a wooden chair with a back, you don’t need a lot of materials, tools, or time.
Advantages of restoration:
- It is possible to completely restore chairs from the last century that do not harmonize with the design of the house today. The use of new materials will help adapt them to a modern interior.
- The ability to change the design and design using colored or transparent inserts, carved or forged elements.
- Even an inexperienced craftsman without special knowledge and skills can update old chairs.
- Saving. Professional restoration of antique furniture is expensive, so if you wish, you can do this work yourself at home at minimal cost.
Most often, products made from valuable wood species are subject to renewal. In rare old chairs, the carved legs and backs are restored, the upholstery fabric is changed, and the frame is also strengthened. The main thing is not to damage the coating when disassembling antique furniture, as this will significantly reduce its value.
Restoring a kitchen stool includes changing the seat upholstery, painting the legs or sewing fabric covers. Furniture can be updated in two ways:
- If the surface of the stool is not damaged, without visible defects, then it will be enough to remove the old upholstery, polish it, varnish the wood, and decorate the seat.
- If there are cracks or small chips on the surface, they are repaired using wood putty or glue. In case of major damage, furniture elements require complete replacement.
Restoring a child's high chair uses the same technology as for an adult. Only in this case should you pay special attention to the condition of the additional elements. For the safety of the child, they need to be strengthened.
You can also repair bar stools yourself. Wooden, metal products, as well as rattan models are subject to restoration.
It is possible to completely restore chairs from the last century
Possibility to change the design and design
The work can be completed without special knowledge and skills
Saving
To make wooden chairs look more interesting after repair, they can be decorated using various techniques:
- Artistic painting - colored patterns are applied to the refurbished chair using a brush.
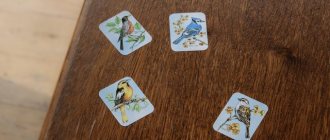
- Decoupage - gluing cut-out pictures from paper napkins and applying glue and varnish to them.
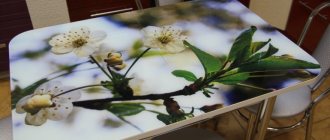
- Self-adhesive film - can be used either colored or imitating natural wood.
- Craquelure is a technology for creating aged material. The work will require special plaster, varnish or paint.
- Regular painting.
An old, dry chair will have a fresh and updated look if you glue veneer to the surface and cover it with varnish.
Artistic painting
Decoupage
Craquelure
Painting
Adhesive tape
How much does it cost to restore a wooden chair?
Depending on the damage, prices for chair restoration are divided into three categories.
Minor repairs to a chair – strengthening the frame if it is slightly loose. Re-gluing the chair, replacing the fabric, partially restoring the varnish. 3-5 thousand rubles.
Complete restoration of a chair - Disassembly, cleaning of the chair from dirt, darkened varnish, damaged glue, restoration of threads, parts connecting parts, extension of legs. Replacing the filling, upholstering with fabric or leather, decorating with carnations or braid. 10 – 15 thousand
Restoration of antique chairs. They are more expensive not because they are antique, but because they have more damage and the technology is more complex. Most often, antique chairs from the 19th century, stored for a long time in unfavorable conditions. In the country house, attic, disassembled on the mezzanine. The carving has been partially lost, the gilding has been worn off, and the varnish has worn down to the wood.
The table shows the optimal prices for the repair and restoration of chairs with the most common types of damage.
| Chair | Minor repairs | Complete restoration with re-gluing and varnish replacement | Restoration from a ruined state |
| Hard wooden chair | 3-5 t.r. | 10-15t.r. | from 15 t.r. |
| Soft chair or floor chair | 5-7 t.r. | 10-17t.r. | from 20 t.r. |
| Antique spring chair with sea grass and horsehair | 10-15 t.r. | 20-25t.r. | Dog. |
| Empire style, classicism, shellac polished | 30-35 t.r. |
Necessary tools and consumables
To repair wooden chairs, you need to first prepare tools and materials. The list depends on what exactly the master plans to do. To completely restore an old chair, you will need:
- Acetone, alcohol, remover, degreaser - to remove old varnish.
- Furniture foam rubber. The classic reupholstery of chairs or stools involves the use of a thick variety 5-10 cm wide and a thin one 2-3 cm wide.
- Construction stapler. Strong staples will secure the upholstery fabric to the furniture frame.
- Stain, primer, varnish. Liquid formulations will give the product a certain color.
- Paint brushes. They can be with synthetic and natural bristles.
- Plywood sheet. If the restoration of a chair requires replacing the seat, use 4-layer material.
- Wood glue "Moment". This is a quick-drying material that perfectly holds elements together and does not delay the repair process.
- Clamping devices - clamps. They free both hands and fix the repaired elements in a certain position.
- Upholstery material is necessary at the final stage of restoration. The size depends on the dimensions of the chair itself.
- Hammer, mallet, electric drill, electric jigsaw, screwdriver.
- Fastening elements: screws, corners.
As for sandpaper, it is chosen depending on the stage of work. For the initial processing of a wooden chair, material with a grain size of P40-P60 is used, and to prepare the product for painting and decorating, you will need sandpaper marked P150-P180 or less. For interlayer cleaning of varnish or paint surfaces, use a variety of sandpaper P220-P360.
Prices for reupholstering chairs
| Name of service | price, rub. |
| Chair reupholstery (seat) | from 500 |
| Chair reupholstery (seat + back) | from 850 |
| Gluing chair elements | 350 |
Material prices
| Name | Unit change | price, rub. |
| Spunbond | linear m. | from 100 |
| Sintepon 1 l.m. (width 150 cm) | linear m. | from 150 |
| Furniture foam rubber (width 200 cm) | linear m. | from 600 |
| Leather substitute (width 140 cm) | linear m. | from 800 |
| Upholstery fabric (width 140 cm) | linear m. | from 1200 |
| A natural skin | m2 | from 2800 |
Repair and design of the frame
The work of updating old chairs and decorating them requires a careful and careful approach. If the product is durable and has not dried out anywhere, then it is not at all necessary to disassemble it into elements. It will be enough to replace the soft upholstery and paint the parts. But, as a rule, there is always some damage on old frames. These may be scratches, chips, indentations from impacts and other damage.
A small master class on restoring chairs for those who do not know how to eliminate these shortcomings:
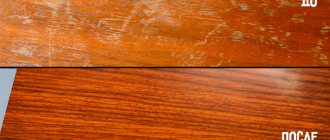
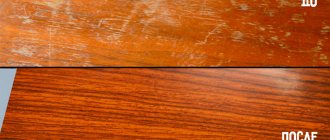
- To remove minor scratches, sandpaper and construction mastic are used. After sanding minor damage, putty is applied. After 1.5-2 hours of drying of the paste, the surface is re-sanded with sandpaper and covered with varnish or paint.
- To fill a large nick, you will need putty, which should be applied to the nick with a spatula and allowed to dry. Then rub it with fine sandpaper and apply paint.
Use sandpaper to remove small scratches
After sanding, putty is applied
After the paste has dried, the surface is cleaned and covered with varnish or paint.
You can also restore a chair using a patch. For this you will need:
- small wooden patch;
- clamp;
- ruler, pencil;
- PVA glue;
- enamel.
Before starting work, you need to prepare a wooden block of the required size. The fibers in it should be located in the same direction as in the damaged area. Then apply glue to the base of the piece, close the notch, and secure with a clamp. After the composition has dried, rub the wooden block with sandpaper. At the next stage, you can paint over the old chairs with enamel or varnish.
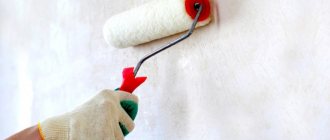
The varnish is applied exclusively to a smooth surface. If there are cracks, they are sealed with a special putty. For work, use regular paint brushes, special rollers or sprayers.
If you plan to decorate chairs using the decoupage technique, you also need to remove the old coating from them. To do this, sanding is used. But to speed up the process, it is better to choose a liquid remover for varnish or paint. 10-15 minutes after application, the chemical is removed with a spatula, the surface is sanded and polished. After receiving a smooth product, you can begin decoupage. If the surface of the furniture is in good condition, then you need to remove the top layer only in the place where you plan to apply the images.
To remove epoxy adhesive from the frame, you can use a jet of steam instead of water. If there is no special device, a regular kettle can come to the rescue. A hose with a tip is attached to its spout and the wood is cleaned of glue.
Apply glue to the base of the block, close the notch, and secure with a clamp
Sand the wooden block and paint it
Master class on chair decoupage
How to restore old chairs using the far from new direction of decoupage - it’s worth learning about this even before starting work. You will need special paper napkins, pieces of fabric, leather appliqués and other decor. To secure the elements, you can use PVA glue and varnish. You can decorate in this way not only the back and seat of the chair, but also the legs.
Step-by-step technology for performing the technique:
- Sand the surface of the chair with sandpaper. Use putty to repair cracks. Prime the surface of the product and, if desired, coat it with water-based paint.
- Cut out your favorite motifs from napkins. Place them on the surface and cover with PVA glue. After drying, varnish the chair.
- Place pieces of fabric or leather on the surface of the chair greased with glue. Cover the top again with glue and then varnish.
To prevent the glued elements from peeling off from the surface, you need to apply several layers of varnish.
Treat the surface of the chair
Prime the surface of the product
Cover with paint
Cut out your favorite motifs from napkins
Place on the surface and cover with PVA glue
After drying, varnish the chair
Features of restoration of metal chairs
Unlike wood, metal chairs are more durable. If they break, they are more difficult to repair, and during restoration the product needs to be protected from only one “enemy” - corrosion. For metal, they buy a special primer and paint that have an anti-corrosion effect. Enamels are applied in several layers, and colorless compounds are coated in three to four layers. It is not recommended to use chairs and stools with a metal frame in kitchens and bathrooms, where the humidity level systematically increases. To remove the old layer of paint or varnish, the chemical treatment method is ideal for metal, since the material is not afraid of aggressive agents.
Working with the seat
Before repairing a chair, you must check the condition of its main part. If there is a need to replace the seat base, it is worth considering that the thickness of the plywood must be at least 18 mm. In this case, the chair will support the weight of an adult up to 120 kg.
Sequence of making a plywood base:
- prepare a drawing on graph paper, attach it to cardboard and cut out the template;
- attach it to the plywood, trace along the contour with a pencil;
- use a jigsaw to cut out the part and sand the edges with sandpaper;
- Drill holes on the base for fastening bolts;
- Insert the seat into the frame and secure it with bolts.
Attach the chair frame to the plywood, trace along the outline with a pencil
Using a jigsaw, cut out the part and sand the edges with sandpaper.
Insert the seat into the frame and attach with bolts
If you need to replace only the soft part of the seat, you should decide on the upholstery material. Firstly, it is desirable that it have increased wear resistance. Secondly, it must fit into the interior of the house.
If a complete replacement of the filler is required, the thickness of the foam rubber should be 40-60 mm.
Step-by-step instructions on how to make a soft seat if it was not originally provided:
- Draw a template for the filling and upholstery.
- Place it on the foam rubber and cut it with an increase of 7-8 cm to fit the edges of the base.
- Place the upholstery template on the fabric. Cut the material with an allowance of 8-10 cm for the hem.
- Attach the cut out parts to the base using a stapler and staples.
In order for the lower part of the seat to have an aesthetic appearance, you need to attach a lining. She will hide all the errors in repairing a chair with her own hands.
Attach a chair and trace with a pencil
Cut part
Cut the base material with allowances
Attach the cut parts to the base
Ready soft seat
If you need to cut the upholstery according to old patterns, you must first carefully remove it. To do this, remove the staples from the seat and separate the filling along with the upholstery. Before cutting, it is advisable to wash the material in order to find out the percentage of its shrinkage and not make mistakes in the calculations. If you don’t have an old pattern, you need to take horizontal and vertical measurements of the seat. On upholstery fabric, it is advisable to add 8-10 cm on each edge. To make it more convenient to fix the foam rubber, it needs to be glued to the base with PVA glue.
Proper execution of cladding:
- Lay the material face down on a flat surface.
- Place the base with the foam facing down on top.
- Fold the material and nail it with staples or nails. The distance between the fasteners is 15-20 mm.
The upholstery of the backrest in a chair occurs in a similar way, but with some nuances. Hard foam rubber is not placed on the structure; soft foam is used for it, which is cut along the contour and does not bend around the edges. The fabric on the back can be secured with staples.
Restoring chairs with your own hands is not as difficult as it might seem at first glance. On top of that, it is also economical. It is enough to select the appropriate materials, use your imagination, and after a few hours of work you will get an amazing result that exceeds all expectations.
Remove the staples and separate the filling along with the upholstery
Glue the foam to the base
Bend the material and nail it with staples
Secure the seat
Reviews
“
Konstantin Ts.
Saved your wallet from unnecessary waste. Our sofa was in more or less normal condition, but its upholstery was already tormented by stains and stain removers; our son was small and he took care of everything. My wife has already found a new sofa to buy, but of course it’s not cheap... At work they recommended meb-obivka, I ordered a free measurer-designer from them, with samples of materials for upholstery. And it worked! My wife liked the idea! In 2 weeks, our sofa was restored beyond recognition - like new now! You can also think about the second boy.
“
Maria
I remember when I was a child, my father changed the fabric on the chairs and sofa a couple of times himself. Therefore, when our sofa became frayed after 7 years, I started looking to see if anyone could reupholster it for money. And I found the workshop meb-obivka.ru. Already on the phone I liked how they work and what they offer. They repair the furniture in-house, we delivered the sofa ourselves and then picked it up 2 weeks later. I had my own fabric, but they also offered different options. The reupholstery was done well, without gaps, the seams are even and barely noticeable.
“
Nadya Maslova
We wanted to change the upholstery on a U-shaped sofa. I contacted the manufacturer and they said the price was the same as for a new sofa.. and then they found the meb-obivka workshop and they offer it at half the price for sure. A designer-measurer arrives with a bunch of samples - choose what you want. We didn’t want to transport the sofa; it’s a chore to pull it out of the Khrushchev building back and forth. and the guys from the company said that they could do the reupholstery at our home. Everything was done quickly - in a few days. The work was completed flawlessly.
