Like any other electrical equipment, a kitchen hood requires connection to an electrical outlet.
If there is already an outlet in a suitable place, the question disappears. If it doesn’t exist, and you need to do it, then you need to know certain installation rules. Below we will figure out where it can be installed.
Let’s make a reservation right away: ideally, you need to solve the issue of creating a power point when the place for the stove and hood has already been precisely determined, kitchen furniture has been selected (and ideally purchased and installed), and the exact model of the hood has been selected.
Installation height of inclined hood above the stove
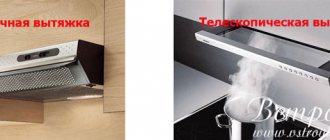
Recently, inclined hoods have become widespread. They are the most aesthetically pleasing and fit better into modern interior styles. For them, the installation height is slightly less:
- for gas stoves - 55-65 cm,
- for electric and induction cookers - 35-45 cm.
Why is it important to adhere to installation heights?
It is extremely important to install the hood at the height recommended by the manufacturer - only in this case will it work for a long time and perfectly clean the air from smoke and drops of fat formed during cooking.
Installation at the lowest height can lead to a fire, interfere with cooking and is not aesthetically pleasing.
A very large height will not allow you to capture all the contaminants entering the air, and the efficiency of the hood will decrease.
Installing a socket for a hood
The placement of the socket where it will be connected depends on the installation height of the hood above the stove. Traditionally, the socket is mounted directly above the hood. A good option is to fix the rosette approximately 10-30 cm above the strip of hanging slate. At the same time, do not forget to move the hole for the rosette 20 cm away from the axis of symmetry of the hood, since the exhaust duct runs through the center.
Connecting an electrical outlet
The socket is connected after all preliminary work has been completed:
- cable installed;
- the location where to install has been determined;
- installation of sub-socket boxes (mounting installation boxes);
- devices with the required level of IP protection were purchased.
Once all these steps have been completed, you can proceed with the actual installation.
The connection looks like this step by step.
- Turn off the circuit breaker (circuit breaker) in the panel. Despite the fact that this work is not difficult, one should not ignore such an aspect as safety.
- Check that there is no voltage. Before removing the front panel and touching the stripped wires and contacts with your hands, you must make sure that there is no voltage. This can be done with a simple electrical voltage indicator, multimeter or tester.
- Strip the wire. Before connecting, you need to prepare the wire peeking out of the glass. If the installed electrical cable or wire has double insulation, then 15-20 centimeters of outer insulation are removed from it. After which it will become more pliable for connection. If paired wiring with single insulation is carried out, then it is necessary to separate the cores by 5-10 centimeters.
- Connect a new outlet. First you need to connect the lead wire to the contacts. To do this, approximately 5-10 millimeters of insulation is removed from the current-carrying cable cores. The exposed part of the cable is inserted into the terminal and firmly fixed with a screw. When tightening the screw, do not use incredible force, otherwise the cable may be pinched. If grounded outlets are connected, the grounding conductor is connected to the proper terminal (grounding terminal). This contact is connected to the grounding “whiskers”. Before connecting the grounding conductor of the cable, you must make sure that this conductor is the “ground”.
- Place the socket in the installation box. After connecting all the supply wires, you should place the working part (conductive elements) of the socket in the installation box. It must be mounted evenly, without distortion, flush with the wall. The supply wires are carefully hidden in the installation box. After placing the socket in the required position, it must be securely fixed. For this purpose, it is equipped with specialized clamping “feet” (or fastening antennae) with screws. When screwing in the screws, the fastening antennae diverge, thereby securing the socket. New generation electrical sockets do not have fastening lugs. They are secured with screws located in the installation box.
- Screw on the front panel. After installing the conductive elements, you can screw on the front panel.
To learn how to properly connect a hood in the kitchen, watch the following video.
Which cable to choose for the kitchen
Next, you need to calculate the cross-section of the common supply wire of the electrical panel and the outgoing wiring to each pantograph.
Here, follow the rules: for device loads up to 3.5 kW - copper cable VVGng-Ls 3 * 2.5 mm2
for device loads up to 5.5 kW - copper cable VVGng-Ls 3*4mm2
with a total load of all devices up to 10 kW - copper cable VVGng-Ls 3*6mm2
with a total load of all devices up to 15 kW - copper cable VVGng-Ls 3*10mm2
Why there should be a brand VVGnG-Ls is discussed in detail in the article below:
Even if you have a house with an old grounding system (without a third protective conductor), still do the wiring with a 3-core cable. This will save you in the future from additional costs for reconstruction and replacement of wires.
As a last resort, the third wire will be a backup for zero or phase, in case of a possible break or other damage.
Installation methods
Socket for pendant hood
There are several options for installing an outlet under a kitchen hood. They are distinguished according to the following criteria:
- for built-in modifications of exhaust devices;
- for samples of suspended hoods;
- if possible, install the socket in a protective casing.
In the first case, the socket for the built-in hood is most conveniently located inside the wall cabinet itself. For hanging models, the area above the top panel, located near the air duct, is optimal. In this case, the power cord is securely hidden behind the structure and does not spoil the overall appearance of the kitchen. The last of the proposed options is good in itself, since the outlet is securely hidden, its location does not violate any of the requirements of current standards.
General requirements
A kitchen hood is a low-power appliance (up to 500 W), so there are no special requirements for its connection. Most models plug into a regular grounded electrical outlet. If a dedicated connection point is not provided, then connect to the nearest available one.
It is somewhat more difficult to connect a hood for which the manufacturer has not provided an electrical cord. In this case, you will have to connect to the network directly with an electrical wire.
Choose the installation height and location based on your convenience.
Mount the connection point in an inconspicuous place, but so that it has good access.
Selecting an electrical outlet and cable
It is worth paying close attention to the outlet itself:
- The manufacturing material must be resistant to high temperatures. The best solution would be to take an expensive device made of heat-resistant plastic that can withstand accidental heating. Cheap ones will quickly turn yellow and darken;
- there should be no play in all connections;
- the holes for the plug must be protected by sliding curtains;
- The last thing you should think about is how the outlet will fit into the design. But you shouldn’t forget about it!
The cable also needs to be chosen carefully. You need to find out what the power of the kitchen hood is, and then select the appropriate cable for it.
It is quite possible that in the future not only the hood will be connected to this point, so it is important to take this into account. Modern devices have a power from 100 to 400 watts, and the current does not exceed 2 amperes
If you take a cable with a cross-section of one and a half squares, then it will be enough not only for the hood, but also for another electrical appliance, but not very powerful
Modern devices have a power from 100 to 400 watts, and the current does not exceed 2 amperes. If you take a cable with a cross-section of one and a half squares, then it will be enough not only for the hood, but also for another electrical appliance, but not very powerful.
How to install (fix) a flat kitchen hood?
A flat, or as it is also called, a suspended hood usually does not have an air duct, but is equipped with a filter for air purification.
By the way, any model of hood can be started in recirculation mode (air purification with a built-in filter) or in air exhaust mode, depending on your desire and capabilities.
It should be remembered that filters need to be changed at least twice a year.
The installation of the hanging hood itself is very simple. The exhaust device has a special mount; you just need to transfer marks to the wall, the distances between which will correspond to the holes on the mount.
All that remains is to drill the wall, hammer in the dowels and attach the awnings with a screwdriver or screwdriver. We attach the exhaust device to them and connect it to the network.
Choosing a place for an outlet for a hood: rules and standards
When the outlet has already been selected and purchased, you need to choose where to place it.
The main rules for choosing a place for sockets for the hood:
- You need to decide exactly where and at what height the hood will hang (probably the most important rule). This is necessary so that when choosing a place for an outlet, you can comply with other rules and restrictions (distances to pieces of furniture).
- The minimum distance from the power supply point to the kitchen furniture (countertops, cabinets, shelves) is 5 cm.
- The minimum distance from the power supply point to the ventilation shaft opening is 20 cm.
- It is recommended to make the socket not close to the hood body, but to move away from it about 30 cm to the side. In this case, the heat will not reach the power point, and possible drops of water and fat from the stove will not reach.
- There must be grounding, current strength - from 15A.
- The total power of kitchen appliances should not exceed 4 kW. If the sum of the power of the kitchen equipment is already or exceeds 4 kW, a separate line must be installed for the hood to avoid overloading the electrical network when all devices are operating simultaneously.
- Access to the outlet should not be blocked by furniture or appliances, at least massive and heavy ones (placement inside a closet is allowed). Firstly, you need to see what condition the power point is in. Secondly, in case of problems with it or with the wiring, you will have to move furniture and appliances (and in the kitchen it is often impossible to move a separate piece of furniture).
It is also recommended to find out exactly what the cord length is for the selected model (if you have already chosen it). Usually it is about 80 cm (not a generally accepted option, but the most common).
The height of the outlet for the hood: which one should I use?
The recommended installation height is 180-200 centimeters from the floor, or 100-110 centimeters above the table (slab).
The optimal height from the stove (countertop) can be calculated using the following formula:
H ch + H b + 5
, Where:
- HVP: height from the hood to the stove;
- Hv: the height of the hood itself (body);
- 5 - half the height of the socket.
Where to make a socket for a “regular” hood (not built-in)?
Another important point: it is initially recommended to decide on the model (or at least the type of hood), and only then select where it will be connected to electricity.
The reason is that different types of devices have their own connection characteristics:
- Built-in (built-in). It is installed in a cabinet, and the socket is usually located there.
- Hanging (installation is carried out under the kitchen cabinet, or without it). If you install a hanging hood under a cabinet, then the power supply point can be made inside it.
- Island (ceiling). The most difficult option in terms of installation: attached to the ceiling, away from the wall. Electrical power in this case can be provided by direct connection to the wiring (more on this below). Or, as an option, the power supply point is placed under the ceiling.
- Corner, inclined, fireplace, T-shaped. Such devices are connected in the same way, into an outlet near the installation site.
Where and how to make a socket for a built-in hood?
It was already mentioned above that for a hood built into a cabinet, you need to install the socket there (in the cabinet). Therefore, initially you need to have at least a design for future furniture, and only then choose a place for an outlet.
You need to start working after the furniture has been installed. In this case, there are a couple of important rules of the PUE that must be followed:
- The socket must be installed on a fireproof base.
- “Hidden” wiring that will run inside the kitchen furniture must be laid in a corrugated steel casing for protection.
Do all hoods have a plug?
Most models are sold with a plug. However, some devices are sold without it - just a cord with wires at the ends. They are rarely on sale, but they are still found, so just in case, when purchasing, it is worth checking whether the model has a fork.
How to connect it in this case? The options are:
- Attach the plug to the wires and connect to the outlet in the usual way.
- Connect via Wago terminal blocks.
- Connect via terminal block.
Connecting a hood without an outlet to electricity (directly): is it worth doing this?
Do I need an outlet to connect the hood? Necessary, but not mandatory: if necessary, the device can be connected directly to the wiring, without a plug and socket - using terminal blocks.
This scheme is considered unsafe and is not recommended. In addition, this is also inconvenient: if you need to remove the hood, then disconnecting such a connection will be more difficult and longer.
What will be included separately
When all the devices necessary in the kitchen have been identified (which will be constantly connected to the network), then you need to imagine what other devices will be used in it.
First of all, you will need to connect equipment such as a blender, mixer, coffee grinder, meat grinder, food processor and the like. Just for such devices, you need to think about which side of them to install the socket and where to place it - near the table or above the tabletop. If you have a habit of reading while eating or just need to have your phone at hand, then sooner or later you will need to charge it. The same goes for a laptop or tablet.
You also need to remember that the kitchen is a place where people clean often - it doesn’t hurt to think about where to place the sockets so that the power cord of the vacuum cleaner doesn’t throw everything off the table or countertop. As an option, you can make a double outlet for the refrigerator and, if necessary, connect a vacuum cleaner to it.
If we talk simply from the position of common sense, it is necessary to install sockets directly on the kitchen apron and always near the dining table. Connecting too powerful devices is not expected here, so you can install sockets in blocks - from two to four double ones in each of these places.
In general, there is a simple rule that allows you to calculate how many sockets you need in the kitchen - you need to calculate how many appliances will be used in any case and add 25% to this number in reserve.
Optimal place
As mentioned above, there are several options for installing an outlet for a kitchen hood:
- for built-in modifications, the ideal location would be the inner box of the wall cabinet, into which the hood is built;
- for hanging-type models - above the top panel, near the air duct, then the power cord will be located out of sight;
- in the air duct casing.
An extremely important characteristic is the installation height of the socket under the hood. Professionals advise installation at a distance of 190 centimeters from the floor or 110 centimeters from the countertop. Such a decision is completely understandable. The ideal installation height for the hood is 65 centimeters above electric stoves or hobs and 75 centimeters above gas stoves or hobs. The approximate height of the devices themselves is 20-30 centimeters. We add up the maximum dimensions and get 105 centimeters. For comfortable installation of the socket, leave 5 centimeters. As a result, its optimal location will be 110 centimeters from the top of the tabletop.
Despite the fact that a distance to the outlet of the exhaust system of 190 centimeters from the floor or 110 centimeters from the countertop is suitable for the majority of modern hoods and in kitchens of almost any architectural design, it is nevertheless necessary to understand that this is just a universal height, it is not always may be the most suitable for your particular case. As a result, even at the electrical installation stage it is necessary to have a clear plan of your kitchen with the selected electrical equipment
Then you will have the opportunity to very accurately calculate the ideal place for the socket, while taking into account that, as a rule, the length of the power cord for a kitchen hood is no more than 80 cm in length
The method of placing the socket inside the furniture makes it possible to hide the electrical wiring, which corresponds to today's method of arranging electrical points. The close proximity of electrical wiring and wood threatens to create fire hazards.
Kinds
Choosing a hood for the kitchen should begin with determining the installation area for such equipment. If the set with a hob is placed against the wall, a fireplace-type hood will suit you. It has a flat back side, so it does not cause any difficulties during installation.
Tip: if desired, this type of hood can be hidden in a wall cabinet
In this case, it is important to take into account the ratio of the parameters of the equipment and the furniture: it is better to fit kitchen hoods for kitchens 60 cm and above into the shelf in such a way as to leave a small distance between all the walls
If a corner of your kitchen is reserved for the cooking area, opt for corner hoods: thanks to their special shape, it is much easier to integrate them into the space between two adjacent walls.
For an island kitchen, wall-mounted hoods are suitable, which are attached not to the wall, but to the ceiling. Another name for this model is a kitchen umbrella hood.
Dome hoods may also differ in the nature of the material used in the design. The most common are metal hoods. For example, steel structures, especially those coated with protective enamel or special paint, inspire confidence.
Materials must withstand both periodic cleaning and sudden temperature changes. Among the colored models of exhaust hoods, it is better to give preference to hoods painted using the powder method: such a surface, compared to enamel, is more wear-resistant.
Attention! Unusual shapes and designs are typical for hoods made of plastic, wood and glass, but such designs do not always have a long service life. If you want to purchase a hood with a non-standard design, choose models that combine several materials at once
For ease of use, manufacturers are gradually moving away from standard push-button models of hoods: they are more difficult to clean, and over time, the buttons wear out and lose their appearance. Therefore, you can purchase hoods with touch controls and a liquid crystal display, as well as models that can be turned on and off remotely.
The sizes of dome hoods can also vary. It is better not to choose a model with minimal parameters, since ideally such a design should correspond to the dimensions of the hob. Kitchen dome hoods with a width of 60 cm are considered the best option, but models with a width of 90 cm or more are available for sale.
Advice: do not assume that large hoods are better at cleaning the air. Operational efficiency will depend not on volume, but on power, so small models can be installed even in a spacious kitchen.
When purchasing a dome hood, consult the details of its installation. As a rule, the technical documentation displays the optimal height for placing the exhaust device above the hob.
To properly secure and connect the hood, you do not need any special skills, so let's look at the main stages of such work.
The correct location of the outlet for the hood in the kitchen
Installing a power source next to a suspended hood is the most common method of supplying electricity. It is convenient to make such a connection at the design stage of constructing kitchen walls. The structural condition of the walls makes it possible to install the electrical wire using a hidden method. With this arrangement, a hidden type electrical appliance is chosen.
It is recommended to place the power source at a height of 20–40 cm from the working plane of the hood on the left or right side of the air duct. When choosing a side, ease of access to the electrical appliance is taken into account. Some craftsmen try to hide it behind the air duct so that the connection is not visible. But turning the hood on or off from the network with such an installation will be extremely inconvenient. Aesthetic perception fades into the background, especially in case of urgent need to switch off.
You can soften the visual perception of a power source located on the side of the hood
To do this, you need to pay due attention to its color and design when purchasing. This connection will be correct and safe
In the case when you have to deal with installing a socket on already finished walls, external laying of the electrical wire and the use of a surface-mounted electrical device are applicable. Hidden installation is more correct, but if we are talking about a tiled wall, then there are no other options.
When laid open, in accordance with safety requirements, the electrical wire is mounted in a special plastic corrugated braid. This will prevent accidental damage to the electrical cable.
It is possible to install using a combined method, i.e. hidden wiring and surface-mounted sockets or vice versa. Such a performance will not be pleasing to the eye, but will only be able to fulfill its intended purpose.
It is important to use an electrical wire with a cross-section of 2.5 sq. mm and a socket rated for 16 A. This will preserve the consumer connection network in case of overload or improper use
Most household hoods have an operating current of up to 10 A. But during voltage surges, the design of the electrical part must have a safety margin.
Installing a hood inside the top row of kitchen furniture will greatly simplify the method of connecting to the electrical network
With this design of ventilation equipment for the kitchen, it is important to supply voltage to the top row using a hidden or open method. To do this, they often use a pencil case located close to the top row of shelves.
Installation of electrical wiring inside the furniture will have to be done in a metal corrugation or a special fireproof plastic braid. The current source is installed in close proximity to the hood on the back or side wall of the cabinet.
In accordance with safety requirements, the surface-mounted socket must be installed on a fireproof base. As the latter, a dielectric plate is used that is larger in area than the base of the electrical appliance by 10–15 mm on each side.
Such a connection will be the best from an aesthetic point of view. The technical features of using such installation are less positive. Electrical wiring installed inside furniture made of wood or chipboard has a risk of fire. Strict adherence to the rules and regulations for laying household electrical networks will minimize this risk.
There are different methods for connecting ventilation equipment in domestic premises: with twists, through an automatic device or through a terminal block. Correct and safe in all respects is to connect the hood in the kitchen using a socket. Other methods have greater risks and less reliability.
Peculiarities
Nowadays, consumers can choose from a variety of cleaning systems, fans or hoods. They differ in appearance, equipment, installation and connection techniques. Hanging, wall-mounted, similar in appearance to a vertical umbrella and others - each hood requires a fail-safe power supply system. The location of the outlet is determined in accordance with the location of the main structure of the cleaning system.
Most modern exhaust systems are mounted in a wall cabinet above the hob (stove) or installed autonomously (without auxiliary elements). When installed in a cabinet, the socket is installed inside its body, so the electrical connector is accessible for use and there is no need for additional design. In autonomous systems, it is customary to place electrical cables and electrical sockets behind the exhaust system casing.
Choosing a place for an outlet for a hood: rules and standards
When the outlet has already been selected and purchased, you need to choose where to place it.
The main rules for choosing a place for sockets for the hood:
- You need to decide exactly where and at what height the hood will hang (probably the most important rule). This is necessary so that when choosing a place for an outlet, you can comply with other rules and restrictions (distances to pieces of furniture).
- The minimum distance from the power supply point to the kitchen furniture (countertops, cabinets, shelves) is 5 cm.
- The minimum distance from the power supply point to the ventilation shaft opening is 20 cm.
- It is recommended to make the socket not close to the hood body, but to move away from it about 30 cm to the side. In this case, the heat will not reach the power point, and possible drops of water and fat from the stove will not reach.
- There must be grounding, current strength - from 15A.
- The total power of kitchen appliances should not exceed 4 kW. If the sum of the power of the kitchen equipment is already or exceeds 4 kW, a separate line must be installed for the hood to avoid overloading the electrical network when all devices are operating simultaneously.
- Access to the outlet should not be blocked by furniture or appliances, at least massive and heavy ones (placement inside a closet is allowed). Firstly, you need to see what condition the power point is in. Secondly, in case of problems with it or with the wiring, you will have to move furniture and appliances (and in the kitchen it is often impossible to move a separate piece of furniture).
The height of the outlet for the hood: which one should I use?
The optimal height from the stove (countertop) can be calculated using the following formula:
H vp
+ H v + 5
, where:
- Nvp: ;
- Hv: the height of the hood itself (body);
- 5 - half the height of the socket.
Where to make a socket for a “regular” hood (not built-in)?
The reason is that different types of devices have their own connection characteristics:
- Built-in (built-in). It is installed in a cabinet, and the socket is usually located there.
- Hanging (installation is carried out under the kitchen cabinet, or without it). If you install a hanging hood under a cabinet, then the power supply point can be made inside it.
- (ceiling). The most difficult option in terms of installation: attached to the ceiling, away from the wall. Electrical power in this case can be provided by direct connection to the wiring (more on this below). Or, as an option, the power supply point is placed under the ceiling.
- Corner, inclined, fireplace, T-shaped. Such devices are connected in the same way, into an outlet near the installation site.
Where and how to make a socket for a built-in hood?
It was already mentioned above that for a hood built into a cabinet, you need to install the socket there (in the cabinet). Therefore, initially you need to have at least a design for future furniture, and only then choose a place for an outlet.
You need to start working after the furniture has been installed. In this case, there are a couple of important rules of the PUE that must be followed:
- The socket must be installed on a fireproof base.
- “Hidden” wiring that will run inside the kitchen furniture must be laid in a corrugated steel casing for protection.
Do all hoods have a plug?
Most models are sold with a plug. However, some devices are sold without it - just a cord with wires at the ends. They are rarely on sale, but they are still found, so just in case, when purchasing, it is worth checking whether the model has a fork.
How to connect it in this case? The options are:
- Attach the plug to the wires and connect to the outlet in the usual way.
- Connect via Wago terminal blocks.
- Connect via terminal block.
Connecting a hood without an outlet to electricity (directly): is it worth doing this?
Do I need an outlet to connect the hood? Necessary, but not mandatory: if necessary, the device can be connected directly to the wiring, without a plug and socket - using terminal blocks.
This scheme is considered unsafe and is not recommended. In addition, this is also inconvenient: if you need to remove the hood, then disconnecting such a connection will be more difficult and longer.
By yourself or by a designer!
A large number of household appliances used in the kitchen require an increase in the number of electrical outlets. With the ideal location of kitchen outlets, for each household appliance used, you need to plan its own separate outlet. If this is not possible, then you can determine the required number of kitchen outlets based on the following rules.
Air ducts
So, the kitchen hood is connected using special air ducts, which can have a rectangular or circular cross-section. However, today they are made of metal or plastic. It must be admitted that plastic is gradually replacing metal from the market only because of its cheapness. In all other respects, these are dimensions, shape, and so on, they are the same, because the basis for choosing an air duct is its cross-section, which affects the air suction performance.
There is another type of air ducts. It is made in the form of corrugation and is made of aluminum alloy. It should be noted that the corrugated air duct is very convenient during installation. There is no need to use additional fittings for it, because it bends perfectly. Therefore, corrugation is most often used in places where there is little space for laying a ventilation duct. True, the appearance of this type of air duct is not the most presentable, so they try to put it in a decorative box or under a finished ceiling (suspended or suspended).
Plastic air ducts for ventilation
But plastic air ducts look quite presentable. In addition, you can choose from this category a type that would be less noticeable at the top. For example, a rectangular air duct with a height of elements no more than 10 cm. It can be laid directly on the kitchen unit closer to the wall, and it will not be visible from below. That is, today manufacturers are solving many problems related to the design of premises. And in this regard, plastic air ducts are no exception.
Read also: Types of kitchen air purifiers
By the way, they are connected to each other with special fittings, which are included in the delivery set. These are double-sided couplings for connecting rectangular sections and bends for connecting outlet sections. The connection is made using the socket connection method, this is when the cross-section of the fittings is slightly larger than the cross-section of the air ducts. That is, the second ones are inserted into the first ones, and at the same time, complete tightness of the joint is guaranteed.
It should be noted that all hoods have a standard outlet for contaminated air. It has a round cross-section. So, there are no problems with connecting rectangular air ducts to the hood. For this purpose, special adapters are used, one end of which is round, the other rectangular. Exactly the same devices can be used to connect air ducts of smaller diameter to the hood.
Kitchen hood diagram
A little about the types of hoods
Modern hoods work in two ways:
- the air flow in them constantly circulates through filters (grease and carbon) and returns back to the kitchen - circulation hoods;
- the air above the stove is sucked into the air duct and discharged into the ventilation duct of the house - exhaust ventilation;
- New generation hoods combine both the first and second methods of air purification.
Connecting hoods of the second and third types is more labor-intensive, because installation of an air duct will be required.
Even more varieties of hoods can be distinguished by considering the method of their installation. In total there are about five of them, but from the point of view of connecting to the electrical network, fundamental differences arise between built-in and island (ceiling) hoods. The first ones are adjacent to the kitchen wall, or built into hanging cabinets, the second ones are attached to the ceiling above the hob, which is located in the center of the room.
Drawing a new line
This method is the most acceptable and safe. It is very popular when connecting a suspended (island) hood. The disadvantage of this method lies in the need to lay an electrical cable from the nearest junction box during renovations in the kitchen, because... work is coming on gating and plastering a section of the wall and ceiling. The new electrical wire for a suspended hood can be hidden behind a suspended ceiling. Undoubtedly, a socket on the ceiling looks unaesthetic, so a connection option via a terminal block or separate terminal blocks is suitable here. Make sure the cables are connected correctly: phase to phase, zero to zero and ground to ground.
Basic mistakes in the placement of sockets
The importance of the correct location and connection of kitchen outlets cannot be overestimated. Any kitchen, even the most original one, must first of all be safe.
It is not uncommon for owners to underestimate this requirement. This happens mainly due to inexperience, because they do not complete a full renovation of the premises every month.
Among the mistakes made when placing kitchen sockets, there are both frankly gross and insignificant. If minor defects only bring inconvenience and some discomfort during operation, then serious flaws can cause a lot of trouble.
Incorrectly installed wiring can cause a severe fire due to a short circuit
The worst thing is neglect of safety rules
This is when the wiring is laid incorrectly, the material of the walls and the required insulation option in a particular case are not taken into account. Such negligence is fraught with disastrous consequences - in the event of a short circuit, the entire house will be left in a matter of ashes in a matter of minutes
The second serious violation is when all electrical installations are powered from one power cable. This arrangement of sockets in the kitchen does not stand up to criticism, because the line simply will not be able to withstand the voltage.
The result is a completely non-functional room. You should always make sure that only one powerful or 2-3 low-power devices are turned on. This is unacceptable for the kitchen.
The third mistake is if a separate line was not allocated for the electric stove, coming from the panel. This powerful consumer of electrical current will work efficiently only if it is connected correctly.
Fourthly, all sockets hidden under the sink must have an appropriate degree of protection against moisture - at least IP44. Groups of electrical points located in the free access area of children must be equipped with protective curtains.
It is advisable to immediately move incorrectly located sockets to places more suitable for them (+)
Fifthly, for all appliances that work with water, for example, a dishwasher or washing machine, it is important to make a separate supply line. It must be equipped with a residual current device, and it is advisable to install sockets with grounding
In the event of a short circuit, these measures will help protect your home from harm by disconnecting the line.
Minor errors in the placement of kitchen outlets include the inconvenient location of some of their groups. It’s also bad when you forgot to provide a couple of spare points, for example, for a phone or laptop charger.
Sockets that are harmoniously matched to the overall style of the room will not irritate the owner
Another unpleasant drawback is when the color and shape of the body of the installed sockets stands out from the overall design of the room. This usually happens if the owners change the overall concept of the kitchen many times. Having purchased the necessary materials, they suddenly decide to change the color scheme or order other furniture, forgetting about the already installed sockets.
Where to begin
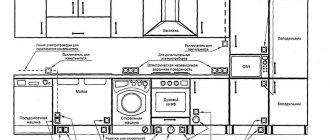
To decide how to properly arrange sockets in the kitchen, first of all, a floor plan is drawn up, which will show the location of the furniture and all electrical appliances. Here it would be useful to consult with the person who will be in charge of all this management. There are quite a few little things in this matter, for example, it is desirable that the layout of sockets in the kitchen take into account whether he is left-handed or right-handed, so as not to subsequently get confused in the wires from the mixer or blender.
layout of sockets for electrical appliances (click to enlarge)
When the plan for arranging furniture and appliances is ready, you can now begin placing sockets in the kitchen, given that on most devices the connection wire is rarely longer than one meter. If the total power of two devices does not exceed 3.5 kW, then you should think about how to install a double socket. It is also suitable for permanently installed devices that do not turn on at the same time, but it is better to make calculations with a margin. If now it is difficult to imagine how a dishwasher and oven can be turned on together, then it is unknown what habits will appear later.
Conclusion
Of all the proposed options, each has its own advantages and disadvantages. You can choose for yourself which option is right for you. But based on experience, the outlet for the hood is the optimal ratio of price and convenience. Well, if you are so confused by its appearance under the ceiling, then by correctly placing the outlet you can almost always visually hide it.
Buying a kitchen hood is an excellent gift not only for any housewife, but also for everyone at home. The statistical majority of families eat in the kitchen every day. Often it is a favorite corner of households and staying guests, a place of intimate conversations and culinary feats. The kitchen room, due to its purpose, needs reliable ventilation. Connecting an exhaust hood in the kitchen perfectly solves the problem of cleaning the air from odors and fumes, but it should be remembered that the exhaust unit is, first of all, an electrical appliance that requires proper connection and maintenance.
Summarize
Any kitchen space, if, of course, it is used for its intended purpose, needs the installation of a hood. This is the only way to ensure constant and timely air purification and thereby protect kitchen surfaces from grease and soot.
But, like other electrical appliances, the hood needs power, and the easiest way would be to install a separate point for this purpose. To avoid problems during installation, you need to determine in advance the location of the socket for the hood in the kitchen.
And to do this, you will have to take into account many factors, ranging from the type of hood being installed to ease of use and compliance with the interior. Also, do not forget about safety rules.
Only after careful planning of the work and installation of furniture can you begin to install the outlet itself.
