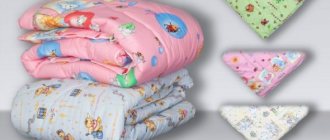
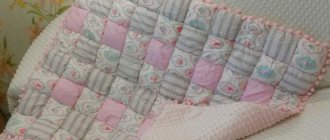
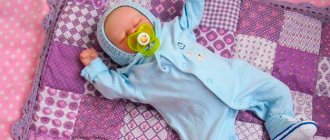
A handmade patchwork quilt will be an excellent decoration for a child's room or an original gift
. Nowadays, there are a huge number of techniques for needlework. Recently, the patchwork technique has been increasingly used. Products made using the patchwork method look very unusual, but at the same time elegant. A patchwork blanket is perfect for decorating a boy's or girl's nursery. You can make such a product yourself. All you need is a specific fabric pattern and a little patience.
Making a baby patchwork blanket with your own hands
Before starting work, you must decide on the choice of fabric. The choice of material will depend on the style of the room. It is desirable that the color of the pattern and furniture be the same.
Experts advise giving preference to cotton. This material does not shrink after washing and retains its color for a long time.
To make your own quilt, you will need a ruler, scissors, a sewing machine and a cutter. It is worth noting that you need to take fabrics of different colors. White and yellow materials go well together.
When making a baby patchwork blanket, follow the following algorithm:
- First, cut the white and yellow fabric into squares. The side of the workpiece should be 20-25 cm. Do not forget to trim the edges of the fabric and ensure the symmetry of the parts.
- After this, take a square of white and yellow fabric and place them right side together. Pin the workpiece together.
- Sew the resulting product using a sewing machine. If you still decide to give preference to cotton, use thick needles.
- Then take the workpiece and cut it diagonally.
- As a result, you should have 4 triangles. Iron each piece with an iron. This will help avoid shrinkage in the future.
- Next, you need to loosen the seam and press down the colored side of the seam allowance. Cut off the “ears” that appear using scissors.
- Fold 4 squares and sew them. It is very important to monitor the position of the corners. They need to be perfectly even.
- Once you have made one quilt block, make the rest in the same way.
- Sew all the blocks using a sewing machine.
- Sew insulation with padding made of padding polyester to the wrong side of the blanket. This can be done using a sewing machine or by hand.
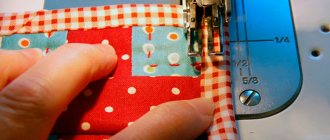
- Sew the edges of the resulting blanket. This can be done using a sewing machine. If you don't have one, do it manually.
We sew a hut block - a well using the patchwork technique
Patchwork using the well technique is considered one of the simplest. Its basis is a square, which is covered with strips of fabric. In the classic version, if the central square is red, then the block is called a “hut”, if it is blue, then the block is called a “well”.
Choose the colors of fabrics for stripes to your liking. All the strips with which you will cover the square are the same width. The length of the strips must be measured each time before sewing the parts together.
The following describes in detail the patchwork technique for beginners step by step, following which you will sew a finished block:
Cut out a template 6×6 cm from cardboard. Using it, cut out a square from fabric, leaving seam allowances of 0.5–0.6 cm (which corresponds to the width from the needle to the edge of the foot when sewing).
Using the template, cut out a rectangle, but from beige fabric, and stitch it to the left to the red square. Align the edges if necessary and measure the long side of the resulting rectangle.
Cut a 10 x 6 cm rectangle from the fabric of the following color and sew it on as shown in the photo. Press all seams carefully.
If you follow the patchwork technique, you will get a rectangle 10 x 12 cm.
- Along the right edge of the block, attach a strip 6 cm wide and equal to the right side of the resulting fragment (10 cm), made of fabric of the fourth color. Pin it perpendicular to the seam and stitch. Then carefully press the seam.
- Take the next strip of fabric of a different color, also 6 cm wide (5th color in our block), attach it to the bottom edge, cut it, pin it.
- Stitch, remove the pins and press the seam to one side. Smooth out all edges with a rotary cutter or scissors.
- Proceed to the second round. Attach a strip of beige fabric 6 cm wide to the left side of the square, pin it, stitch and iron it. This is the 6th color in our block.
- Similarly, sew a 6 cm wide strip of a different shade of beige to the top of the block.
You can stop at this option, or you can continue sewing strips clockwise until you are satisfied with the size of the block. For example, if you want to sew a pillow 40 x 40 cm, then you need to continue sewing strips to the desired size.
Please note that on the right side of the block I have pink fabrics, and on the left - beige. You can make a block in different ways, for example, place dark stripes of different colors on the right, and light stripes on the left (about the same as shown in the photo)
Finish the block with a red stripe 6 cm wide. In total, you get 3 circles of stripes that do not touch each other anywhere in the pattern.
DIY patchwork quilt for a newborn: step-by-step instructions
You can sew a patchwork quilt for a newborn at home. To sew in a patchwork style, you will need thread No. 45, a square template made of cardboard or plastic, pins, needles, chalk, measuring tape, scissors.
Pay special attention to the choice of fabric. If you are sewing a blanket for newborn babies, use cotton materials. Chintz, linen or calico will do.
In addition, before you start sewing, decide on the material for the insulation. Experts recommend giving preference to batting or padding polyester. These materials cannot harm the health of the child.
A blanket for children should be sewn in the following order:
- First, cut the fabric into individual pieces using a template. It is advisable to number all pieces of fabric.
- Sew all the square pieces into strips and then connect them together. Iron the flaps before sewing them together.
- Pin two pieces of fabric together and stitch them together.
- Place the lining face down on the surface. The dimensions of this blank should be at least 5 cm larger than the shreds.
- Place a layer of batting or padding polyester on the lining. Place the facing material (shreds) on top.
- Pin the blanket together.
- Stitch the blanket using a special darning foot.
- The final stage of making a blanket for children is edging. To carry out this operation you will need 4 strips. The length and width of the strips should be a couple of centimeters larger than the dimensions of the blanket.
- Sew the strips to the edges of the blanket.
- Finally, hand stitch using strong threads.
Blankets and bedspreads using the patchwork technique add coziness to the home. Read more about patchwork and its advantages in the material:
Materials
The cover of the blanket can be anything as long as it does not affect the skin and looks good. Covers for blankets for newborns, as well as for camping blankets, country blankets for hammocks, etc., used outdoors, are best made from raincoat fabrics. The cover of a thick winter blanket is made from thin furniture upholstery. For the durability of the blanket it is very important that the cover is stronger than the lining; In addition, this solution will allow you to fit the blanket into the bedroom interior. But with the lining and liner the matter is a little more complicated.
Lining
Cotton, satin or twill are most often used for the lining of the bowl; in expensive models there is silk. Cotton textiles are good for everyone, except that they get dirty easily, get sweaty and wear out pretty quickly. Therefore, cotton lining is used in blankets for children and babies born in the warm season; For the lining of a blanket for a winter-born, it is better to take calico or baize. In the era of diapers, the problem of moisture resistance from the inside, thank God, is not relevant.
Satin, twill and silk are light, durable, absolutely vapor permeable, and do not accumulate dirt. But they are slippery. Some people like it when the blanket caresses their body, while others, on the contrary, toss and turn in their pajamas underneath, still trying to fall asleep. In addition, blankets with slippery linings are not recommended for sleepyheads: they slip and become confused.
In this case, the best choice would be bamboo fabric: cotton or viscose with the addition of the finest bamboo fibers. What they write about its supposedly miraculous health and unique thermal properties is an utter lie. What can you do, marketers are, to put it mildly, peculiar people. If their boss strictly forbids them from embellishing under the threat of lifelong excommunication from corporate events and bonuses, their breath will simply stop and will not open again. However, bamboo canvas has many real advantages even without forced pushing:
- Hypoallergenic, antistatic.
- To the touch - like cotton.
- Wear resistance is an order of magnitude higher than that of cotton and almost the same as that of silk.
- High vapor permeability and very low porosity for solid particles; simply, it allows sweat to evaporate freely without accumulating dirt.
- High mechanical strength.
- It stretches weaker than even silk: if you make a lining from bamboo fabric in a blanket with a removable liner and an armhole with a pocket in the legs, the inside will not come out. In any case, a frill 5 cm wide is enough to ensure that the underside of the blanket never shows.
Liner
Blankets are most often insulated with synthetic fibrous materials: synthetic padding polyester (base is silicone, item 1 in the figure) or holofiber (base is propylene, item 2). The pads of modular blankets (see below) are conveniently stuffed with synthetic down, pos. 3. This is the same padding polyester, only not in sheets, but in the form of shaggy granules. To insulate blankets, sheet synthetic winterizer and holofiber are taken with a density of 150-200 and a thickness of 5-8 mm.
Insulation for blankets
A blanket with padding polyester insulation is lighter and cheaper than one made from holofiber, but the padding polyester cakes faster when washed. Both of these materials are warm, unusually light, harmless, incl. for small children, but their own moisture capacity is small, i.e. they sweat and become damp easily. Because The materials are non-woven, blankets with inserts made from them must be quilted, otherwise the insulation will quickly bunch up. But stitching a blanket on synthetic padding requires special techniques, because... It’s a bit thick and crawls between the lining and the tire, but at the same time it readily clings to the needle and thread.
The blanket liner is made of fleece, the same one from which jackets and warm underwear are made (item 4), is somewhat heavier and more expensive, but in return it has a lot of advantages. Fleece is a fabric, so to speak, for outdoor use, durable, warm and resistant. Its vapor and moisture permeability is heterogeneous: from the fluffy side to the dense side it is good, but on the contrary it is low, i.e. it will absorb sweat and release it, and it will be difficult for coffee spilled on the blanket to seep into the body.
Fleece does not crawl and has almost no stretch. The insert in the blanket can be made replaceable and you won’t have to worry about quilting, or you can quilt a blanket with a non-replaceable insert using a simplified, much less labor-intensive scheme, see below. In the latter case, the blanket can be washed without anything: fleece, like a woven material, is completely washable.
Last fall, the author of this publication took and replaced a jacquard camel blanket with a fleece liner (it’s cheaper than a jacket); I just needed to sew the cuts lengthwise and make an overlock. And what? The blanket became lighter, but it was no worse warm in winter. And in the off-season, when the heating was already turned off, it was too early to turn on the air conditioning and the temperature in the apartment jumped from below the sanitary standard to +27, it was equally comfortable under a blanket with a fleece liner. And for your information: a jacquard blanket made of natural six Khakassian camels measuring 210x250 at current prices will cost about 3,000 euros. Although demolition, of course, is not and is not expected in any conceivable and inconceivable operating conditions.
Patchwork
A patchwork quilt has long been sewn as a dowry for girls of marriageable age, and not at all out of poverty, but as evidence of their perseverance, hard work, skill and artistic taste; Hawthorns and princesses also sewed blankets from scraps. In the West, the latter, already in marriage, often also wove tapestries, with which the wife of William the Conqueror entered history: her creation depicts the history of the conquest of England by the Normans.
With the beginning of Soviet power, war was declared on quilts as mercilessly as on churches. At the suggestion of the well-known comrade. Inessa Armand and Alexandra Kollontai. The reason for such intolerance can be understood if we recall the latter’s “glass of water theory” and the well-known slogan that followed from it in the 20s of the last century: “The Komsomol should not refuse a Komsomol member!” In what - vol. Kollontai and Armand were sanctimoniously silent, but the ugly Komsomol orgies date back to those times.
By the way, the comrades, convinced party members, did not miss their goal. At any party meeting, activists with serious faces, but with burning impatience in their souls, awaited the “sixth question.” It was customary to consider 5 issues “on paper” at one pars meeting, and the “sixth issue” was a drunken bacchanalia afterwards.
“Promising” Komsomol activists were often involved in “considering the sixth question” if they were available. Of the current openly Nazi figures, one can find at least 10 of varying degrees of fame, during which they labored in this incarnation and firmly believed in a great bright future. His own, for sure, and only based on his natural abilities, without any outstanding abilities, great works and achievements. And then suddenly you are faced with perestroika, revelations, a turning point and a complete failure of your career. Well, how can you not go completely berserk? However, let’s put an end to what sometimes happens under the blanket and return to blankets as such.
Baby Quilts: Sewing Techniques
The most common patterns for sewing patchwork quilts are “Honeycomb”, “Arable”, “American Square” and “Checker”. Typically, a baby blanket is sewn using the Honeycomb technique. A product made using this technology looks very attractive and fits harmoniously into the interior of a children's room. This technique involves making one decorative element from 7 hexagons, which have different colors.
The “Arable land” technique is the simplest and is perfect for beginners. To make a blanket using this technique, you will need pieces of fabric that will be cut into separate strips.
The sewing pattern for the “Arable land” type is as follows:
- The blanket area is divided into 3 identical sections, the boundaries of each should be located at right angles to each other.
- Then each section is divided into parallel strips.
- All stripes are numbered.
- Stripes with the same number must be the same color.
The American Square pattern uses a sewing technique in which all the colored stripes are sewn in a spiral around a small square. Typically, this technology is used in the manufacture of contrasting products. “Chess” is also a common technique. It involves sewing strips of fabric from squares of different colors.
Variety of styles
Chaotic patchwork also has its own directions. Not all of them are ideal for creating blankets using this technique. Styles are:
- classical. The most suitable for sewing a blanket, as it easily fits into the selected dimensions and monotonous decor of the room. This style includes patches of equal size, often in two color schemes, which are placed in clear symmetry or in a checkerboard pattern;
- Oriental. More suitable for decorative small blanket. The style is maintained in the use of flaps of different shapes and sizes, adding to them a variety of embroidery with threads, beads, beads, as well as zippers, buttons, chains and any other type of decorative design. However, unlike the next type, the eastern one adheres to a certain system and symmetry in stitching the flaps;
- crazy patchwork is a “crazy” patchwork technique. The style, which is not limited in the shapes and placement of flaps, combines the chaotic clumsiness of the placement of parts and a mixture of color schemes. More suitable for blankets and bedspreads of outdoor garden decor.
Related article: Do-it-yourself good mood organizer for your beloved man
Quilt patches come in many forms:
- squares - simple stitching of square flaps of the same size;
- stripes - flaps of stripes can be sewn either alternating or in a circle, into a spiral, decreasing their length as you work, using a template in the form of a lined square;
- triangles - in order to achieve a smooth square canvas at the end, such flaps are cut in the form of isosceles triangles;
- honeycombs - symmetrical hexagons, which are combined with triangular flaps along the edge;
- lapachikha is a type of patchwork made from patches of different shapes, assembled into a specific pattern according to a pre-prepared template.
Caring for a Quilt
In order to maintain the good appearance of a patchwork product, you need to follow some rules. First of all, a patchwork blanket needs to be washed properly. Experts do not recommend washing too often. It is recommended to wash such items by hand in soapy water.
To avoid damage to the fabric, it is important to iron the blanket correctly. If you used padding polyester as a filler, ironing is prohibited. Otherwise, the blanket will lose its texture.
You should also adhere to the following recommendations:
- If you need to hide the blanket for a while, do not fold it. It is better to roll the product.
- If you decide to machine wash your blanket, use the most gentle setting. The optimal water temperature for washing a quilt is 35-40 degrees. Spin must be turned off.
- Using bleach to wash a quilt is strictly prohibited.
How to become an owner?
You can buy a handmade patchwork quilt, or you can make it yourself. Many stores for needlewomen have ready-made patchwork kits containing templates and other necessary things.
Making a blanket doesn't take long. First you need to draw a sketch of the product. It will be in the form of a diagram. Then, based on the diagram, you need to cut out parts of one shape or another from the selected material. After this, the pieces of fabric need to be sewn together, thereby collecting the front part of the blanket. If you plan to sew a double-sided blanket, you will need twice as many scraps.
When the top and bottom of the blanket are ready, you need to trim their edges and then sew them together, adding filling. You should not leave raw edges - such a product will look sloppy. When joining the edges of the top and bottom of a quilt, it is common to use binding as a border.
Patchwork blanket for babies (video)
Making a quilt for a child is quite simple. To do this, you do not need to go to any master class. Just stick to the basic rules of patchwork. It is very important to maintain the symmetry of the squares when working. Otherwise, the blanket will turn out ugly, and the baby is unlikely to like it. When choosing fabrics, pay attention to the fabric. Give preference to natural cotton fabrics, because they are non-toxic and not harmful to the child’s health.
Read more about patchwork techniques in the article:
