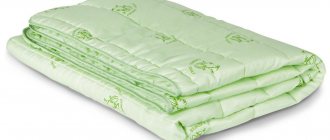
Quilt: pattern and calculation of materials
As an example, we will give a calculation for a children's quilt measuring 110*140. In order to sew such a blanket, you will need:
- A piece of fabric;
- Bias binding;
- Sintepon or other filling for a blanket;
- Threads.
So, for a blanket measuring 110*140 we will need two cuts measuring 114*144 cm. The calculation is very simple, the length of the blanket + 2 cm per edge on each side. You will also need synthetic padding fabric in the size of 110*140 cm; if it is a ball filler, then for a size of 110*140 cm you usually need 400-500 g.
Calculation of bias tape - blanket perimeter: (110+140)*2 = 500 cm = 5 m + 5-10 cm for allowances.
Baby quilt pattern
Material cutting
The main lining fabric and synthetic padding layer are cut to the same dimensions. Making some details more or less is labor-intensive and unnecessary work.
Note! The main fabric is cut strictly along the thread. The required size is measured along the edge of the fabric, an incision is made, and then the thread must be carefully pulled out. The canvas is cut strictly according to the resulting puff.
You might be interested in this All about satin jacquard, fabric for bed linen
Cut the fabric thread by thread
If the upper part of the blanket is sewn from several parts, then all its parts are cut out, assembled into a single whole according to the pattern, and then the lining and interlayer are cut strictly according to the dimensions of the front side. The synthetic padding filler, consisting of two strips, is swept away manually with thread before cutting.
Quilted blanket: how to sew?
A quilted blanket is most often made from cotton fabrics, which usually “shrink” after washing and ironing. Therefore, the fabric must first be ironed with steam (carry out a WTO) so that it gives natural shrinkage, and only after that cutting should be done.
WTO of fabric before cutting
- Lay the fabric on a flat surface so that no folds form, and measure 114 cm on one side and 144 cm on the other, draw a contour with chalk and cut the fabric into the necessary parts.
- After this, mark the stitch on the front side with a washable felt-tip pen or basting. We will talk about stitching options in the next section.
- The next step is to fold the edge along the top and bottom of the cover on all sides (the same 2 cm) and iron it so that the raw sides look inward towards the wrong side. After this, you can “layer” the blanket.
- The first and bottom layer is cotton fabric with the wrong side up, the next layer is padding polyester or any other filler, the next layer is cotton fabric with the wrong side down and the marked stitching up. Sweep the blanket around the perimeter so that the padding polyester is evenly distributed over the blanket area, and you can proceed to sewing.
A quilting foot is the best assistant for quickly quilting blankets and bedspreads.
For convenience, place the sewing machine on an unfolded table, so that a large area remains on the left and the blanket slides freely without impeding movement. If possible, purchase a quilting foot and install it on the machine. Start stitching the blanket from one of the edges, and continue stitching until all the marked lines have been sewn.
Check that everything is done and secure the bias tape around the perimeter. The corners can be made either beveled oval or left at 90 degree angles. Sew around the perimeter, carefully secure the thread and wash the quilt. The product is ready!
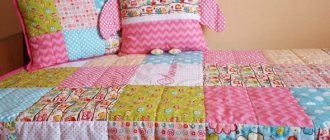
Patchwork quilts are sewn using the same pattern, where the scraps are sewn one to one until they come out into a large canvas. The size can be changed depending on your wishes.
What you need
To hand quilt a blanket, you first need to select a shape. For novice craftsmen, it is better to opt for rectangular options, but if you already have sewing skills, then you can choose an interesting quilted model that complements the bedroom interior. The next step is choosing the material.
The most suitable material for sewing a quilt with your own hands is cotton. And for the cover they take the following canvases:
- satin;
- percale;
- teak;
- batiste.
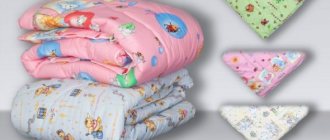
If the quilt is intended for newborns, then flannel, flannel or calico will do. The filler is padding polyester, the thickness of which can be chosen at your discretion. The thinner the padding polyester, the easier it will be to quilt it. Teak with a dense texture is taken when natural down is chosen as a filler.
For beginning craftsmen, it is better to opt for rectangular options, but if you already have sewing skills, then you can choose an interesting quilted model.
Tips for choosing fabric:
- for a quilt, it must have properties such as wear resistance and density;
- the color of the material is selected based on your taste or the color scheme of the room;
- if you have to quilt by hand or if a beginner will do the work, then you should not buy jacquard, velor, linen or velvet, they are difficult to work with;
- It is better to sew the bottom part of your blanket from rough fabric to avoid slipping during use.
To manually quilt a blanket with your own hands, you should arm yourself with the following tools:
- needles;
- fabric color threads;
- edging tape;
- scissors;
- centimeter or ruler;
- sewing machine for quilting.
Video: How to quilt a patchwork quilt? Secrets
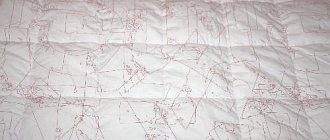
- Now let's move on to the methods of stitching blankets. Square stitch for blankets, when the lines intersect at an angle of 90 degrees.
Square stitch blankets
- Diamond stitch for blankets, when the stitches create elongated diamonds. This is the classic and most common way to stitch blankets.
Diamond quilt stitch
- Also interesting and unfairly forgotten recently is the “wave” stitch method.
Wave quilt stitch
- And numerous methods of fancy stitching, the beauty of which directly depends on the experience of the craftswomen.
All kinds of stitches for children's and adult blankets
All types of stitches are performed according to the same pattern:
- Marking with chalk, washable felt-tip pen or pencil;
- Note;
- Stitching with dense stitching.
And finally, we attach a video of machine stitching a blanket.
Types of DIY blankets
Blanket with cover
There are several common types of bedding that you can create yourself:
- the most practical ones are quilts. The frequent curly stitching catches and fixes the filler, preventing it from bunching up.
- In addition to them, there are products sewn like old feather beds. The filling is punched into the bag cover and a duvet cover is put on top. Sewing a padding polyester blanket with your own hands using this principle is simple and quick. The only drawback is that the liner inside it often gets knocked down; you have to remove the cover from the duvet cover and straighten the filling;
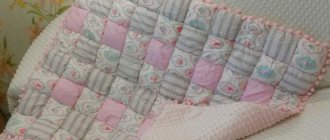
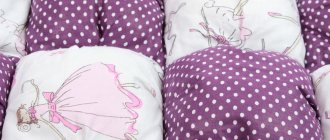
- A separate group includes blankets sewn from scraps of fabric and padding polyester into separate small pillows, which are then connected to each other.
Finishing the edges of the blanket
Cotton wool is applied in even layers to the lining laid out on the table. Then the finished top is placed on cotton wool and the edges are sewn together.
Sweep the product through all layers. It is better to do this with a long needle and cotton threads No. 40 and No. 50. The stitch length is 3-5 cm. Start basting in the center and work towards the edges of the blanket. Finish basting at the corners. Then possible irregularities and flaws will not accumulate in one place, but will evenly appear on the edges of the product, where they will be leveled (cut off) or covered with edging.
The parts of the blanket must be connected on a flat, hard surface. Depending on the size of the finished product, this can be a cutting table, a special podium, or simply a cleanly washed floor.
rods, which can be connected to each other directly or with the help of additional parts - narrow or wide strips. The stripes form a so-called dividing frame, which simultaneously separates and unites the individual blocks. It is better to cut out the strips for the dividing frame after assembling the individual blocks. This will allow you to more accurately select the size and color of the frame.
The more significant the importance of bedding becomes. We will explain why it is so important to be able to create a bonbon blanket with your own hands step by step. Many parents opt for well-known brands, and this decision is understandable. But no less correct is the method we suggest - sew your own bombon blanket! We will help you by providing a suitable master class.
The same pattern is used to sew other strips to the base. As a result, we get a blanket.
Pillows on the sofa, baby blanket
If you have finally finished quilting the bedspread, the shapes of the patterns and long lines are perfectly even, there are no sags at the joints and the dimensions of the bedspread are almost the same as they were at the beginning, then consider yourself a pro and sewing a frill along the edges of the bedspread is no longer a problem for you.
However, this is not the most difficult thing. The most difficult part to mark is the stitch on the right side of the fabric. You can’t mark with chalk or a pencil either, there is only one way left - manually using contrasting threads to stitch the lines along which the stitching will be done on a machine.
More homemade products: How to make a truck out of cardboard with your own hands - photos and tips
It is better to first perform such a calculation on a sheet of paper in a reduced form, for example, on an unfolded piece of paper from a notebook in a box, and then make a life-size model of a rhombus or square and check how it will lay out on the back side of the fabric, having previously outlined the dimensions of the future bedspread with chalk .
The most “advanced” way of applying markings to a bedspread is to buy special paper that sticks to the fabric and, when wet, can be easily removed without leaving any traces of glue. You can use various types of washable markers, but sweeping is still much “cleaner” and more reliable. Moreover, with the help of a basting you will prevent the top fabric of the bedspread from shrinking as much as possible, and at the same time fix the padding polyester and lining with the top.
So, how to sew a potholder quickly and easily? Let's first sew this traditional mitten with edging and a loop.
Knitting potholders is another way to create practical kitchen accessories. Even the simplest pattern will help create a beautiful product. However, do not forget that too voluminous diagrams are not suitable for tacks - they will be inconvenient to use.
Required Tools
Sewing a blanket begins with measuring the bed. The product should completely cover its entire area and hang slightly on three sides. To sew a blanket you will need:
- roulette;
- centimeter;
- awl;
- pins;
- spool of thread with needle for basting;
- chalk or a sharpened piece of dry soap;
- sewing machine.
Sewing tools
Stitch patterns: simple and complex
In sewing, a stitch refers to a quilting stitch that joins several layers of fabric together. The use of this technique has 2 goals: giving the product a beautiful appearance and insulation. Stitch patterns can be divided into simple and complex types. The first ones do not require much experience and can be done even by novice craftswomen. This group includes loops and waves.
Carrying out complex patterns requires certain skills and accuracy. This category includes various ornaments, intricate designs and all kinds of geometric shapes (see photo).
