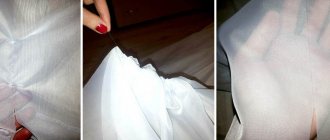
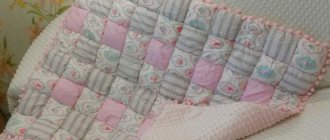
Finishing the edges of the quilt
Today we will teach you how to edge a blanket with your own hands. In our article you will clearly see how to do this easily and correctly. In the example, we will be edging a quilt using patchwork. In fact, you can finish the edges of any blanket this way. Very often, the edges of a blanket become frayed during use; they can also be refreshed. And your favorite blanket will still serve you.
We really hope that this master class will be useful to you. To get started, you need to trim the edges of the new blanket and align its corners. If it is an old blanket, trim off the frayed edges and straighten them.
How to edge a blanket
From the fabric you have chosen for the edging, cut strips 10 cm wide. The length of the sewn strips should be equal to the length of the perimeter of the blanket.
Fold the ribbon in half (wrong side inside) and iron.
It will be convenient for you if you wrap the tape on a piece of cardboard.
Never start work from a corner. Leave a small “tail” of their tape at the beginning of work.
Using sewing pins, pin the ribbon to the front of the quilt. Step back about 1 cm from the edge. Sew until you reach the corner.
When you reach the corner, stop sewing 0.5 cm from the corner. The needle must be in the fabric. Raise the presser foot and turn the work 45 degrees. See photo.
We sew to the edge.
Next, wrap the tape at an angle. Be sure to follow the sequence shown in the photo.
We bend the edging so that a 90 degree angle is formed.
The excess fabric forms a 45 degree angle.
Align the sides of the edging with the edges of the blanket
Sew the tape to the next corner.
The angle should look like this.
We continue to sew. When you have sewn all the corners and matched the joint, the ends of the tape need to be tucked inside. If the tape is too long, the ends must be cut off.
Sew the ribbon to the end.
Unscrew the sewn ribbon.
The angle should look like this.
We wrap the ribbon and sew it with a blind seam by hand.
Processing the corner from the inside out.
That's all the wisdom!
We hope you find this quilting tutorial helpful. Author Sandi wishes you inspiration!
loskutbox.ru
Materials, tools
To sew a blanket from scraps, cotton and linen fabrics are most often used. They are pleasant to the touch, durable, and wash well. The only thing is that washing at high temperatures shrinks the fibers, the fabric itself wrinkles, is difficult to iron and can fade. Contrasting shades are used to add accents and a mosaic effect to the finished quilt. Pastel colors for bedding elements are more appropriate.
It is important to carefully select wool threads for knitting or finished fabric, examining them for strength and dye content. Remember that fibers that are too bright can stain other items and lose their color after the first wash.
Viscose and synthetics are very fragile, “loose” fabrics for patchwork techniques. They wrinkle and take a long time to iron, but retain their original softness and color for a long time. It is better to use variegated material.
Frequently used prints:
- floral pattern;
- geometry (stripe, checkered pattern, circles, etc.): it is important to pay attention to symmetry when using patches;
- thematic drawing: for example, a children’s room - bears, boats, cartoon characters, etc.;
- abstraction – used for panels and exquisite products. With the help of individual parts, a landscape and a thematic image are created.
What tools are needed to sew a blanket with your own hands:
- Sewing machine or good needles and threads for hand sewing.
- Iron, preferably with a steam function.
- Ruler, centimeter or tape measure, rectangle, compass, triangle and other measuring instruments.
- Special paper for patterns or graph paper.
- Sharp scissors. Professional craftsmen use disc cutters.
- Steamer, pins.
- Decoration elements: beads, embroidery, fringe, braid, etc.
- Textile.
Quilt Ether 52. How to make a quilt border?
In Quilt Live 52 you will learn how to sew a border onto a baby quilt. To this end, we: choose the right edging color. In this broadcast it is dark pink, sometimes burgundy, the color of the main theme of the blanket. The most suitable colors: red, burgundy, brown. The width of the trim is 3.5 cm. The length of the trim = measurement + 25 cm. We sew the trim pieces on the bias, watch the video. We begin to sew the binding to the front side of the blanket. We bend the edge of the binding from which we begin to sew with an allowance of 6 mm on the bias, watch the 7th minute of the video. At the 8th minute, see the tactics of passing a right angle. We finish sewing the binding. The overlap is 2-3 cm, see 11-35 minutes of the video. We bend the binding to the wrong side and wrap it twice. From the wrong side we sew it manually with a hidden seam. Hooray! The edging is ready!
A complete course on sewing a DLO, a children's quilt, here: https://quiltlada.getcourse.ru/blanket
⇨Training site https://quiltlada.getcourse.ru/cite_map⇨Instagram https://www.instagram.com/quiltlada_handmade/⇨I am on VKontakte https://vk.com/quiltlada1⇨Masters Fair: https://www. livemaster.ru/quiltlada⇨Facebook https://www.facebook.com/quiltlada⇨Website https://quiltlada.com/
★My projects★Patchwork clutch in 2 hours https://quiltlada.getcourse.ru/clatch Children's blanket https://quiltlada.getcourse.ru/blanket Author's patchwork skirt https://quiltlada.getcourse.ru/ubka Vest with patchwork set https://quiltlada.getcourse.ru/vest_start Landscape pillow https://quiltlada.getcourse.ru/crimea_poppies
A little about me: Patchwork master, teacher. Born in Tomsk, I have been living in Moscow since 2002. She graduated from 3 financial universities and until 2014 worked as a top manager in international companies. She deliberately got into patchwork, and in 4 years she created 296 large patchwork projects. Participant, teacher and speaker at Russian and international exhibitions. Married, two adult children. I am writing a book about creativity and patchwork.
videoclubs.ru
Features of the patchwork technique
The patchwork technique requires attentiveness, accuracy, perseverance and inspiration, which will help turn all creative ideas into reality. The investment of time and effort pays off in excellent results and saved money.
Sandwich Quilt
A classic technique used to sew a quilt from scraps. A characteristic feature is the layout of all prepared layers, forming a kind of sandwich. In some cases, coupons are prepared from all materials and placed on top of each other. For a quick option, blocks of fabric parts are formed, then sandwiched with padding polyester and inner fabric.
All parts are sewn on a sewing machine or manually stitched through.
Patchwork is beautiful and easy: finishing the edge of a blanket
This master class is perfect for those new to quilting. This is a really great way to edge a quilt.
Quilting is beautiful and easy: How to finish the edges of a quilt
1. Sweep away your blanket
Usually the batting is cut immediately to the size of the blanket, but not this time. Take my word for it, using this method is very, very simple.
2.Sew the scraps together as usual, with one small exception - make sure none of your stitches go through the batting. Make all small turning stitches along the edge of your flaps.
3. Carefully cut off the excess batting. This is not as easy as it seems, the batting is falling apart, draw a cutting line before the “operation”.
4. Trim the lining fabric, leaving a couple of inches around on all sides of your quilt.
5. Start basting anywhere you like, folding the fabric allowance in half.
... And then fold it in half again, and secure it, for example, with a pin. Afterwards you can iron these edges - it won’t be too difficult. Bend all the edges in this way.
6. When you reach the corner, fold the corner like this:
... And then the next corner as shown in the photo:
... And fold it in half again to make a nice corner. Secure it.
This procedure may take a little time and a couple of attempts, but you will definitely succeed. Continue until you have folded all the corners.
7. Sew straight along the inside edge.
Once you've reached the corner, simply lift your presser foot, turn the piece 90 degrees and continue sewing the same way! As easy as pie.
Now there are several reasons NOT to use this method.
1. It is quite difficult to fold the edges evenly and beautifully for a large blanket. Use this method only for small patchwork projects.2. You need to consider how your outer fabric and lining will look.
Author MK Allison
loskutbox.ru
Mastering the high-speed method
Master class on high-speed sewing. For patchwork style bedspreads, quickly prepared coupons are used. Preparation instructions:
- Cut 2 identical strips from the prepared materials.
- Sew them right sides together.
- The third stripe is equal to the width of the previous segment. Sew right sides on both sides.
- Cut the resulting structure into isosceles triangles.
- Turn from the wrong side to the front. Iron seams if desired.
In this case, it is better to use natural fabric, such as chintz, for the inner linen.
We sew a patchwork quilt. Place the canvas on a flat surface with the wrong side up, with padding polyester on top of it. Place the finished coupons on the padding polyester, stitch each side and along the perimeter of the entire product. Cut the edging line according to the shape and decorate the edges of the blanket.
Edging patchwork panels and blankets
The neatness of a patchwork product will first of all be given by a beautifully selected and high-quality sewn edge - a border. The border is an important element of the patchwork technique, and the overall impression of the entire work often depends on its appearance and quality of execution. An artistically selected border will highlight the successful color scheme and highlight the patchwork pattern on the product. If you are creating a wall panel, then already at the initial stage of the sketch you should imagine what kind of border - “frame” for your work - you will make. A beautiful border can enhance the impression of the work, while a tasteless border or one that doesn’t match the style and color can completely ruin it.
The border can be overlapping, with corner squares and with beveled corners.
Useful tips
- So that the bordered product does not warp or bulge, after the border is sewn onto it, all measurements of the future border are made not along the edges of the patchwork product, but through its middle. This is done because due to the large number of seams and stitches, the product may change dimensions (skew).
- The hem should always be cut along the longitudinal or transverse thread so that it does not stretch out in the future.
- If there is not enough length of fabric for the border, then it is added. In this case, the border is sewn only at an angle of 45 degrees. This will make the seam less noticeable.
- You can sew a border from several strips of fabric of different sizes. It is desirable that the stripes taper towards the center, which gives the effect of “collecting” the composition.
- You can make an asymmetrical border, for example, different colors (on different sides) and different widths.
- You can insert sewn-in strips, squares, triangles, letters and other shapes into the main border strip. But if you choose a patterned border, then it should not interfere with the main product.
Since the border is a kind of logical continuation of the work, you can use some pieces from the main fabric in it. But this must be done very carefully so as not to overdo it: after all, the main function of the border is to limit and collect the frame for the product.
Thin items can be edged with a strip of fabric. The strip is cut along the lobar and sewn along the edge of the product, seam to seam - front to front. 45 degree angles are sutured on the arms.
The border may be an extension of the lining folded over the patchwork top. To do this, the lining is cut wider than the top. For thin and multi-layered items, there are different ways to sew on the lining as a border.
Trimming lining of a three-layer blanket
The layers are initially cut out as follows: the padding (batting, interlining) is 1 cm larger than the patchwork top on each side, and the lining is 3 cm larger.
Processing corners with an “envelope”
The quilted blanket is stitched around the entire perimeter, retreating 6 mm from the edge. Then the edges of the padding are trimmed by 5 mm, and the lining fabric by 2.5 cm, counting from the cut of the padding.
The corners are treated with an “envelope”. Mark an angle on the lining and cut it off at a distance of 1 cm from the padding (at the seam). This 1 cm is folded over the patchwork top, and the cut of the lining is also folded 1 cm and pinned so that it coincides with the edge of the stuffing.
Finally, the lining is folded over the patchwork top so that the fold overlaps the machine stitching, and sewn by hand, preferably to the stitches. The resulting corner is also sewn with a hidden seam.
Lining edging for thin items
In this case, the lining must be cut wider than the product by the width of the border plus a seam allowance. For example, if the border of the finished product is 2 cm, then to make it you will need 4 cm of fabric and 5 mm for an allowance on each side.
On the lining, mark the sewing line for the border, then fold any of the corners in half with the right side inward and iron the fold. The fold corner is folded over itself, bent at the point of intersection with the border sewing line, the corner is ironed, turned back, stitched along the fold line and cut off. The seam is smoothed on both sides and excess fabric is trimmed.
The remaining corners of the lining are prepared in the same way, then it is turned right side out. The patchwork top is inserted into the resulting “frame”, the edges of the border are turned up by 5 mm, basted and stitched.
www.hnh.ru
Results of the work performed: is there anything to be proud of?
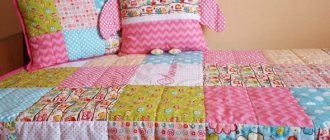
If all the recommendations outlined today are implemented, then there will definitely be something to be proud of. The resulting blanket will not only be warm, but also beautiful. Well, with the right choice of filler, it will also become light. Here are examples of how this work should end.
PHOTO: YouTube.com Only one straight seam is visible on both sides of the edge
PHOTO: YouTube.com The patchwork quilt even looks warm, airy and light
patchwork quilt, edged with bias tape
For visual learners, we have prepared a video.
For those who like to understand diagrams, photographs and drawings, below the video is a description and a step-by-step photo master class. Before proceeding with further work, you need to measure the blanket in length and width, align the sections of the blanket, while cutting off excess padding polyester and lining.
The best way to finish a quilt is to edge the edge of the quilt with bias tape.
Bias binding is an even strip of fabric of a given width, cut at an angle of 45 degrees to the grain of the fabric. The length of the strip is equal to the perimeter of the blanket. The width depends on the edging method. To achieve the required length, parts of the binding are stitched together with a seam 0.7 cm wide. The seams are also placed at an angle of 45 degrees relative to the strip itself.
For our blanket you will need a binding 10 cm wide and a length equal to the perimeter of the blanket. After stitching the parts, the binding should be ironed in half along its entire length.
Sewing the binding: Apply the binding, ironed in two folds, to the front side of the blanket, aligning the cuts of the binding with the cuts of the blanket. You should not start stitching the binding from the corner.
Break the stitching before reaching the corner of the blanket by the width of the seam.
Turn the blanket 90 degrees, remove the working surface of the blanket from under the foot and bend the trim upward (in a horizontal plane) forming a 90-degree angle with the blanket, as shown in the picture.
Aligning the fold of the binding with the cut corner of the blanket, return it down (in a horizontal plane), thus forming a fold of binding in the corner of the blanket.
Lay a through stitch, starting from the very edge of the top, with a seam width of 10-12mm, aligning the edges of the binding with the edges of the blanket. Sew to the next corner, etc.
After stitching the binding, straighten the corners and, aligning the width of the binding on the front side, bend it around the cut of the seam allowance.
Baste the binding using straight or oblique running stitches.
In this case, the corners should be straight, and the diagonal fold should be located in the middle of the corner both from the front and from the back of the product.
All that remains is to sew along the seam of the sewing tape to secure it in this position with a machine stitch.
Beautiful finishing stitches are obtained using monofilament.
If it is not possible to make an even seam, then it is better to hem the binding manually - with hidden stitches using cotton threads in the color of the fabric.
The marking should be removed.
Our blanket is ready!
And we have already given it away.
Friends!
Our master class is aimed at those who are sewing a blanket for the first time!
— Were our master classes on sewing a patchwork quilt useful?
— What questions or confusion arose during the work?
babairisha.ru
DIY bedspread in patchwork style
What you need to prepare for sewing a bedspread with your own hands:
- Working material, padding polyester and inner fabric.
- Tools.
- Sewing machine, pins, thread, scissors.
Distribute the prepared coupons into specific blocks, following the sketch or diagram. When stitching, each section should be in the shape of a square or rectangle. Sew each group into a single fabric. The outer side should be larger around the perimeter of the inner insulation and fabric layer.
Then quilt the resulting fabric with padding polyester, stitching each row. Roll the product and sew on the inner fabric.
We sew a children's patchwork quilt for beginners. Part 4. Edging and finishing the blanket
In the previous parts (part 1, part 2, part 3) we connected the backing, insulation and patchwork top and quilted the blanket on a machine.
Now all that remains is to give the blanket a finished look and close the cut. To do this, we will prepare the edging and sew it on.
The color of the edging can be any - to match the blanket or the back, contrasting with it or any other. As you see fit for the blanket. I will make a piping from the leftover fabric from the reverse side. I think the orange color would complement the front of the quilt and would also be good on the back. You can buy fabric for the edging after the entire blanket is sewn: sometimes it is difficult to decide on the color until it is ready.
We will need:
- Fabric for edging (how to calculate, fabric later in the topic).
- Scissors or cutter.
- Cutting mat.
- Threads match the piping.
First you need to calculate the perimeter of the blanket. To do this, we measure it and add up the lengths of all its sides.
My blanket has two sides of 110 cm and two sides of 132 cm.
110+110+132+132 = 484 cm perimeter.
The edge should be 20 centimeters longer than the perimeter. I like to leave more and will do the calculation for 520 cm of edge.
I still have fabric from the wrong side with a width of 135 cm, therefore we divide 520:135 = rounding, four whole stripes. The piping will be 7 cm wide, folded 3.5 cm. 4 stripes * 7 cm = 28 cm of fabric 135 cm wide.
If you make a edging from fabric 110 cm wide:
520:110 = 5 whole stripes. 5 stripes * 7 cm = 35 cm of fabric with a width of 110 cm for piping. Take a couple of cm more, if the store cuts it unevenly, this happens. In this way, you can calculate the amount of fabric for the edging based on any of its widths.
If you want to make a wider edging, calculate the number of stripes and multiply by the desired width.
We cut strips of fabric with a cutter or scissors. Four stripes 7 cm wide.
These strips need to be connected into a single tape. To avoid excess thickness of the fabric, we connect at an angle of 45 *.
Fold the ribbons right sides together at a 90* angle. For clarity, I drew a seam line; you can also draw lines for yourself with a pencil or chalk and sew along them.
We sew on a machine. Both threads in the machine should match the piping.
Cut off the excess.
Using a steam iron, smooth out the entire edge.
Now fold the edging with the right side out and smooth it along the entire length.
The result is a long strip of fabric folded in half, 3.5 cm wide. This is our finished edging.
Now we apply it to the wrong side of the blanket with the edge towards the edge of the blanket, the fold towards the center of the blanket. Important: do not start sewing the piping from the corner, it is better from the middle.
There is an option to sew the piping first to the front side using a machine, and then manually to the back, but I prefer to sew both sides using a machine for durability and reliability.
If it is more convenient for you, pin the edging with pins. You can apply it as you sew. But be sure to leave at least 10 cm of the tail unsewn at first.
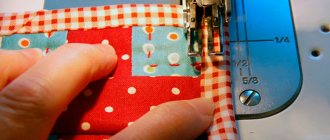
Sew on by machine. Choose the position of the needle and the distance from the edge so that the stitching necessarily covers the zigzag edge of the blanket. Agree, it won’t be very beautiful if a stitching zigzag sticks out from under your stitching.
Not reaching about 6 mm from the corner, we stop and move the line at an angle of 45*.
We put the blanket on the table and make a corner. To do this, bend the edge upward to form a 45* corner.
Now we bend the edging down, the fold of the edging should be flush with the edge of the blanket. If necessary, secure with a pin.
Having stepped back about 6 mm from the edge, we continue to sew the edging to the next corner.
We sew the edging along the entire perimeter in this way and stop about 15-20 cm short of the beginning. We make a tack.
Our task is to combine the edging beautifully into a single piece. We fold the edging and mark with something inside the edging the place where it should meet. Pencil, soap, fabric marker - whatever.
You can directly draw lines inside and sew along them. We fasten the straightened edging with pins and sew it on a typewriter.
Cut off the excess.
Fold it in half lengthwise again and machine sew this piece. The edging is sewn on the wrong side.
Now turn the blanket over with the right side up and, going around the edge, pin the piping to the front side to the piping sewing line (covering it slightly). You can start from a corner.
Sew on by machine. You can also use decorative stitches. It’s more elegant and sometimes even easier to sew on the piping. To lay a beautiful, even stitch along the edge requires some experience and skill; decorative stitches do not require such precision.
Having reached the corner, either fasten the stitching and fold the corners on the table, or you can fold them directly on the machine and sew without interrupting the stitching. As you prefer.
For this colorful blanket, I chose a zigzag stitch. It seems to me that she decorates the blanket. If you are making a blanket for adults or some other classic option, you should rather choose a straight stitch.
After sewing on the edging, the blanket can safely be considered complete!
Almost any not very large baby blanket can be folded into an envelope for discharge. Whether it is square or rectangular does not really matter - the nurses in the maternity hospital will roll up a beautiful little bag from any blanket. All you have to do is buy 4-5 meters of satin ribbon of any suitable color at any sewing store.
Such a blanket will warm the baby not only with warmth, but also with your love and care.
Don't be afraid to try new things, believe in yourself and do everything with love and pleasure! Good luck!
You can read the previous parts of the master class here:
We sew a children's patchwork quilt for beginners. Part 1: Creating a block
We sew a children's patchwork quilt for beginners. Part 2. Assembling the patchwork top
We sew a children's patchwork quilt for beginners. Part 3. Assembling the blanket
Source: livemaster.ru
tehnologi.su
Product sizes
First of all, you need to be guided by the size of the sleeping place, the parameters of the future owner of the blanket and his activity during sleep.
For a single bed, the length of the product is usually 180 cm, and the width is up to 130 cm. For a one and a half length, about 200 cm is taken, the width is from 140 to 180 cm, this should be based on preferences. Double beds require heavier blankets; their length can be more than 200 cm and their width up to 4 m.
Product diagram
Beginners usually use simple patterns consisting of identical squares. With enough experience, creators like to choose more complex designs. But you must always take into account the size and number of patches, their arrangement and colors.
In traditional patterns, plain patches without a pattern are rarely used; you can combine a single-color fabric with a patterned material. There are no specific rules for repeating patches, but the pattern must be carefully thought out.
