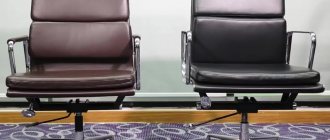
Good day to all! Many of you have at least one office desk at home on wheels, with a lifting mechanism and other things. That’s why today we’ll talk about repairing a computer chair.
Despite the seemingly complex device, in practice you can deal with malfunctions with your own hands. Yes, you will have to buy some spare parts, spend time and effort.
Those who do not want to do this themselves can seek help from a master who works at home or accepts problematic chairs in a workshop. Addresses and contacts are not difficult to find in Moscow and any other city, such as Minsk, Kaluga, Kharkov, St. Petersburg, Kyiv, etc.
But I still suggest trying to cope with the chair at home. In fact, there is nothing complicated here. You don't need any special tools or extensive experience. You just need to know the device and understand where everything is.
DIY office chair repair: instructions with video
A modern office chair is a functional and comfortable piece of furniture, equipped with a rather complex mechanism that sooner or later fails. In such a situation, there are three options for the development of events: purchase a new one, take it to a specialized workshop, or repair the office chair yourself.
As practice has shown, it is quite possible to carry out such work on your own. The only thing that is required from the master is strict adherence to the sequence of actions and implementation of the instructions that will be given in this publication.
Types of office chairs
Today, there are three types of chairs on the office furniture market:
- For a manager This piece of furniture usually has maximum capabilities: a five-beam steel cross; synchronization mechanism (a device that forces the seat and backrest to repeat the movements of the owner); mechanisms for adjusting backrest resistance, seat depth, negative tilt, etc.
- For staff, furniture of this type has more modest characteristics and functionality. Most varieties are lightweight (ensuring high mobility) and are equipped with mechanisms for adjusting seat height, armrests, and back angle.
- For visitors, Office chairs of this modification are simply beautiful, stable and comfortable furniture, devoid of any functionality. Often they do not even have a rotation mechanism and are produced on four legs, instead of one supporting leg with a cross on wheels.
Design features
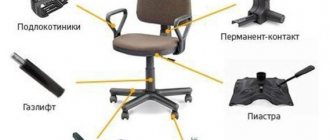
Despite the variability of designs and functional content, almost all chairs consist of one set of elements:
- Five-beam cross (base). This part is made of metal or plastic. The first option is better quality and more expensive
- Rollers. Just like the crosspiece, the wheels can be made of metal or plastic. However, the mount and internal hinge of any roller are metal
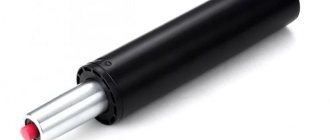
- Pneumatic cartridge (gas lift). The part serves as the leg of the chair and is responsible for its “elasticity”
- The swing mechanism contributes to the axial deflection of the chair and its fixation in one position. On expensive models, a mechanism with an offset axis is installed, ensuring the smoothest swing possible.
- Piastra. This element is a metal platform with a lever. Serves to change the height of the seat relative to the cross
- Permanent contact is an element that connects the backrest to the seat and is responsible for changes in its position
Most office chair models have armrests. In cheap models, these elements are made of plastic; in more expensive ones - made of anodized or stainless steel.
Piastra
A piastra is a part that is responsible for height regulation. If your chair has become shaky and creaky, then this is a breakdown of the piastres. What could have happened?
- The mounting screws may have become loose. Twist them. If that doesn’t help, unscrew it completely, apply glue (PVA or Moment will do) to the thread and screw it in. Allow the glue to set before you sit back on the chair.
- The insert seam between the plate and the bushing that fits onto the gas lift has burst. You can solder the seam. It is important to remove the gas lift first.
Types of office chairs
For the manager, for the staff and for visitors.
The executive chair is fully equipped with: a five-beam steel crosspiece, a synchromesh mechanism, mechanisms for adjusting the backrest resistance and seat depth, etc.
The chair for employees is not as equipped and functional. As a rule, such models are lightweight, which ensures high mobility. It is also equipped with a device for adjusting the seat height and backrest angle.
An office chair for visitors, simple, comfortable, beautiful, but lacking functionality. As a rule, they do not have a rotation mechanism.
What parameters are adjustable?
To adjust an office chair, you need to change or adjust its parameters:
- The highest point of the seat should barely reach knee level in a standing position or be slightly lower. It is also adjustable in relation to the level of the tabletop. When a person is sitting and his hands are on the table, his elbows should be bent at an angle of 90 degrees.
- Backrest tilt. It is necessary to fix it at such an angle as to maintain the most comfortable position for the back of the person sitting. The chair should not rest against the spine, or, conversely, lean far back.
- Rocking mechanism. This parameter is adjusted to the person’s weight. The larger it is, the more rigid the swing must be to avoid falling.
- The height and angle of the armrests should be at such a level that the elbows of the person sitting in a bent position barely touch their surface. Otherwise, excessive pressure will be applied to the fingers and supporting parts of the hands.
To determine the correct body position in an office chair, you need to follow three simple rules. Firstly, it is recommended to place the center of the computer monitor directly at eye level: in order to read the necessary information from the screen, there should be no need to move your neck. Secondly, you need to feel good support for the curve of your lower back. Thirdly, the distance from the back of the shin to the front edge of the seat should be no more than 5 cm. To check this, just clench your fist and see how freely it passes between them. If the fist squeezes through with difficulty or does not fit at all, then the backrest needs to be moved forward. If the distance between the shins and the edge of the chair is too large, then it is moved back.
The seat height should reach knee level in a standing position.
The tilt of the back should maintain a comfortable back position
Adjustable to seat weight
The height of the armrests fixes the position of the hands at table level
Correct adjustment of an office chair
Assembly instructions
In order for the computer chair to serve for a long time without any breakdowns or extraneous squeaks, during the installation process you need to carry out all manipulations step by step, as prescribed in the assembly instructions. To independently perform all the work, a minimum set of tools and basic skills in handling them are sufficient.
Installing rollers into slots
The most convenient way to start assembling an office chair is by installing the wheel casters. It’s easy to place them in the slots of the cross:
- For convenience, it is better to place the star-shaped part on a horizontal surface, for example, on a table or floor, with the holes facing up.
- Then insert the roller rods into the sockets and press on each wheel until a characteristic click occurs - in this case, locking occurs. If you don't have enough hand strength, you can use a rubber hammer - this tool will make the task easier.
- When the fastening of all the roller supports is completed, all that remains is to place the cross on the floor, and then press on it with the whole body, which will help check the reliability of the wheels. This completes the assembly of the support part.
Turning the cross over
Insert the rollers into the slots
We check for strength
Seat preparation
The next step is to install the adjustment device on the seat. The piastra is attached to the bottom side, and the mechanism itself is attached to the back. They are bolted to the seat using a hex key. Fasteners should be tightened securely, taking into account long-term use of this furniture.
In order for the self-assembly of an office chair to be successful, before starting work you should check the completeness of the fasteners. All bolts should be equipped with flat washers and lock washers to prevent premature loosening.
When installing armrests, it is important to determine the correct location (left, right), otherwise you can confuse the elements during installation. Having attached the armrests to the seats, they are fixed - each with three bolts
The backrest is screwed on with a large adjusting screw.
There are models of computer chairs in which the armrests are mounted using brackets on the metal body of the seat
The backrest is screwed on with a large adjusting screw. There are models of computer chairs in which the armrests are mounted using brackets on the metal body of the seat.
Assembling the base
Installing the piastra
We fix the base
Tighten the bolts with a hexagon
Installing a gas lift into a crosspiece
Before installing the lifting mechanism, it is necessary to remove the protective caps from its ends - otherwise they will interfere with the normal operation of the shock absorber. After this, the lower part of the gas lift will need to be aligned with the hole located in the center of the cross. As a result, the base with the rollers will stand on the floor, and the working mechanism will be in a vertical position.
The telescopic plastic casing is designed for insurance; it protects the seated person from falling in the event of a lift failure. In addition, this element performs a decorative function, masking the shock absorber in a ready-made computer chair. Its body consists of several parts, which are more convenient to assemble by stringing directly onto the gas lift from above. When the supporting base is ready for attaching the seat, you can proceed to the final stage.
Removing the protective caps
We insert the gas lift into the cross
Installing the lifting mechanism
Putting on the cover
Connecting chair parts
You should be extremely careful when securing the assembled seat to the supporting base - brute force can damage the gas lift and completely disable it. The assembler's main task is to gently install this element onto the lifting mechanism. The procedure does not require special training or special knowledge:
The shock absorber rod must be carefully fitted with a piastra, rigidly fixed under the seat. Next, press on it with force, or even better, sit down. At this moment, reliable adhesion of the parts will occur. It is not recommended to assemble the product by any other methods.
It is not recommended to assemble the product by any other means.
After all the steps described above, the computer chair will be ready for use; all that remains is to check the quality of the work performed
It is not recommended to assemble the product by any other means. After all the steps described above, the computer chair will be ready for use; all that remains is to check the quality of the work performed.
Place the seat on the shock absorber
Press to secure
Checking the build quality
Cross
Breakage of this part of the chair almost always occurs due to careless use. The crosspiece is destroyed if the user suddenly sank into the seat and “fell” into it. Of course, everything also depends on the material. Steel crosspieces are much stronger than plastic ones, but they can also malfunction.
Almost any breakdown of this element cannot be repaired and requires replacement.
- Carefully remove the crosspiece. Use tools for this and do not act harshly, as you may damage the gas lift.
- Remove the wheels.
- In the center of the cross there is a ring with recesses that secures the plastic casing. Using a screwdriver, pry up the ring and slide the edge of the casing. Take it off.
- Remove the plugs.
- Replace and reassemble.
If only one beam is broken, the entire five-arm should still be replaced. Since in this case the remaining rays take on the entire load and can also quickly break. It is recommended to replace the broken plastic cross with a stronger metal one, if possible.
Computer chair repair: tips and instructions
A computer chair is an essential attribute of a modern person’s workplace, without which it is difficult to imagine a study or office.
Office chairs are designed to be lightweight, maneuverable and comfortable for long periods of work in the office or at home.
The comfort of a computer chair is expressed in its ergonomic and functional form, it is suitable for people of any build, height or weight. All this is possible thanks to the unique ability to adjust the height or level of backrest tilt to the needs of a specific user, for which the gas lift built into the design of each chair is responsible.
The main signs of a gas lift malfunction
However, this same part is also a vulnerable point, the breakdown of which renders the entire functionality of the seat unusable.
Office chairs are comfortable and functional furniture, but sometimes they require repairs
Computer chair repair at home
Computer chair parts that may need to be replaced or repaired
Office chair design diagram
If you are faced with a malfunction of your computer chair, you need to find out which part requires repair. One of the most common causes of failure is the gas lift, as the part that is most susceptible to wear.
Do-it-yourself repairs will not restore the full functionality of an office chair
There are two ways to fix a broken gas lift
The first option is to replace the faulty part with a new one, no matter what, from a whole chair or purchased in a store
A chair gas lift or lifting mechanism is designed to adjust the height of an office chair
This method can be considered expensive, since it will require purchasing an entire gas lift. To make the replacement, you will need the following set of tools:
- carpenter's hammer;
- pliers;
- bolt with a diameter of at least 10 mm;
- screwdriver or screwdriver;
- technical lubricant.
Set of repair tools
To replace the legs of a computer chair, you must follow the step-by-step instructions:
- We remove the wheels and dismantle the seat back, for which we turn the chair over and unscrew the necessary screws from the bottom of the chair. This is necessary for subsequent ease of dismantling; you also need to remove the armrests, if any. Use a Phillips screwdriver to unscrew the 4 bolts. Remove the seat from the chair mechanism. Disconnected chair mechanism.
- Without turning it over, we remove the seat itself, for which we unscrew the four fastening screws and move away the protective cover of the legs. We knock the gas lift out of the mechanism, for which we use a bolt and a hammer; if the swing mechanism does not separate, you can add technical lubricant. We proceed to dismantling the gas lift
- We do the same with the crosspiece, but here you may need pliers, since the bolt may not be enough. Tap the edges firmly, and be careful not to touch the gas chamber in the center, as damage to it could be life-threatening. Keep in mind that over time, the fastening may become compacted and come out poorly; in this case, use technical lubricant at the connection point.
- The hardest part is over, all that remains is to put the chair back together. We carry out all the steps in the reverse order: screw the seat back to the swing mechanism, do not forget to check the compliance of the front side of both parts. Assemble the crosspiece, putting the wheels in place, and insert the new gas lift with the bottom side into the corresponding hole. New gas lift to replace the broken one. Assembling the crosspiece in place
- Put on the protective cover and install the seat on top (don't forget to remove the protective cap), now you can sit on the chair and check the functionality of the new gas lift and the lever that presses its button. The assembled chair after repair
Gas lift malfunction
The most common cause of office chair failure is damage to the lifting mechanism.
If the lift mechanism in the chair needs repair, but all other parts are in order, do not rush to throw it away. Fix it! You can replace the gas lift yourself. Unfortunately, even without breakdowns, this part will wear out sooner or later.
The process of replacing this mechanism can be called two-part:
- Dismantling the lifting mechanism. Measurements for purchasing or ordering a new part.
- Installation of a new part. Assembly.
That's all. This will take about 45 minutes, excluding the time needed to find the part.
You will need an assistant and some tools:
- gripping pliers (needle-nose pliers);
- pipe wrench;
- Phillips screwdriver;
- hammer (it is optimal if you use a wooden or rubber one).
- turn the chair upside down and place it on the table;
- remove the mechanism from the seat using a screwdriver;
- The gas lift can be removed by applying several medium-force blows with a hammer. You need to hit from the side of the cross (five-pointed), but so as not to damage it. For this it will be more convenient to use two hammers. Place one hammer on the gas lift, and strike with the second from above;
- install a new lifting mechanism;
- assemble the chair;
- adjust the chair lowering lever.
Features of do-it-yourself banners
Anyone who decides to remake an old chair into a more modern one is completely free to choose materials and the style of the future design. Before starting work, you should decide in which room the product will be placed and who will use it. For the nursery, “cheerful” colors are selected, but non-staining, natural fabrics. The kitchen uses materials that do not absorb liquids and odors.
It is important that the updated item fits optimally into the existing interior. Depending on the design of the upholstered furniture and the accuracy of the craftsman, its repair will take from a couple of hours to several days
Tools
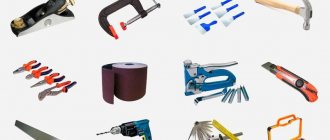
Do-it-yourself restoration of armchairs is impossible without a certain set of tools, usually available in the arsenal of every home craftsman. You will definitely need:
- hammer;
- screwdrivers with flat and Phillips tips;
- tailor's scissors;
- adjustable wrench;
- pliers;
- metal and hair brushes;
- furniture or construction stapler with staples at least 10 mm high;
- screwdriver;
- clamps;
- tape measure or tailor's centimeter - measuring tape 150 cm long;
- sandpaper, grit from P40 to P120.
In addition to tools, restoring an old chair will require a suitable covering fabric. Additionally, depending on the condition of the wooden frame and old springs or cushions, materials may be needed to restore or replace them:
- foam rubber in slabs or sheets;
- batting;
- wood glue;
- furniture varnish;
- paint, primer;
- self-tapping screws
Instead of carpenter's or wood glue, you can use thick PVA for paper and cardboard.
How to repair it yourself?
Chairs today have different designs, on which the algorithm for repair work depends. If this is an ordinary wooden product, then repairing it is quite simple. It is necessary to identify the problem, which is often poor-quality fasteners or a violation of the structure of the material. This can be corrected by replacing the wooden element (backrest elements, frame base, etc.) with a new one or simply tightening the bolt.
More difficult to repair are shell chairs, which often have fabric outer upholstery. To get to the breakdown, you first need to dismantle the fabric. The process of repairing such chairs is much more complicated, so it is not always possible at home.
Office chairs are mechanisms that consist of several parts. There are many reasons why this design loses its characteristics:
Rollers falling out. Often this can only be corrected by replacing the crosspiece or these moving elements
It is important to first check the cause of the breakdown (broken hole, missing retaining ring on the roller, etc.)
Gas lift malfunction. There are also several reasons for this, including improper fastening of the piastrum or malfunction of the control lever mechanism
Therefore, you should check these attributes first.
Breakage of the cross. The functionality of this element can only be restored by replacing it with a new one.
The back does not spring. The main cause of this problem is the violation of the integrity of the metal parts inside. Sometimes the spring mechanism also fails. Operation can only be restored by replacing parts with new ones.
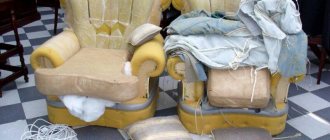
Upholstered furniture used daily quickly wears out and loses its attractiveness. It is not necessary to purchase a new chair right away: when the frame is in good condition, you can replace the upholstery yourself and give the product a “second life.”
- Screws are removed with screwdrivers;
- Use wrenches to loosen bolted connections;
- Nippers and staples are removed with wire cutters and pliers;
- The new casing is secured with a stapler;
- used if the fabric covering has a complex shape;
- In most cases, the flaps are held together with a needle and thread.
New fabric is selected according to density and quality; tapestry, jacquard or velor are suitable.
- Sintepon;
- Foam rubber;
- Batting;
- Coir;
- Horsehair.
The advantage of do-it-yourself restoration is the ability to choose the most convenient structure for the updated chair.
- Burlap and foam rubber are cut to size for the seat;
- The padding polyester is cut 50–100 mm larger on each side;
- The first layer is burlap, the second is foam rubber;
- Due to its large size, the third layer of synthetic padding covers the “pie”;
- The edges of the top material are hemmed to the frame;
- The pillow in the middle is additionally fixed with threads in 4-5 places.
The chair can be upholstered with any material, depending on the client’s taste preferences, interior design or financial capabilities. This can be leather, its substitute or another textile analogue.
Common breakdowns
As noted above, an office chair is a rather complex device and any of its structural elements can fail.
Damage to the cross
The problem with this element may be destruction at the junction of the beams. The material from which the cross is made is important here.
As a rule, the base is a hollow structure into which a polypropylene pipe of suitable size and cross-section can be inserted. It, in turn, must be rigidly fixed to the base and the damaged beam.
Plastic parts cannot be spliced using glue or a soldering iron due to the large loads on the paws. There is no point in restoring the integrity of this element. The best option would be to completely replace the damaged structure with a glass-filled polyamide base.
In order to dismantle the crosspiece of an office chair, you need:
- Remove the rollers . As a rule, they do not have a rigid fixation and are quite simply removed from the mounting sockets. To illustrate the process, it is recommended to watch the video:
Note! In case of critical damage or destruction, it is impossible to knock the gas elevator out of the base. In this case, you should remove the working cylinder with the seal and bearing from the “glass”.
The process technology and dismantling device are shown in the video:
Destruction of the swing mechanism
If the chair does not hold the “horizon”, then the problem is most likely in the destruction of the swing mechanism.
Fastening to the seat is done with four screws using a shaped screwdriver. The element is dismantled as follows:
- The bolts that secure the rocking mechanism from the seat are unscrewed
- The gas lift is knocked out of the device mount.
This element is made of metal.
You can independently solve the problem of a collapsed device by completely replacing it (recommended) or using a welding machine.
It should be noted that most chairs originating from the Middle Kingdom are not suitable for domestic spare parts. This concerns, first of all, the swing mechanisms (size discrepancy).
- Chinese mechanisms: 200 x 200 mm.
- Domestic: 200 x 150 mm.
In order not to re-drill holes when replacing an element, we suggest using adapter plates. How it looks assembled can be seen in the figure below.
Air chuck failure
The pneumatic cartridge of the chair is a two-chamber structure filled with air. When you press the adjustment lever, the valve stops the flow of air between the chambers.
If, when pressing on the valve, the gas lift rod does not extend, it means that the integrity of the piston, seal, etc. is compromised.
It is important to know! The gas lift cannot be disassembled . If damaged, a complete replacement of the element is required
The dismantling process is described above. To clarify the process, watch the video about replacing the gas cartridge on office chairs:
A fairly common cause of gas lift failure is the bending of the adjustment lever, which does not allow pressing on the cartridge valve. In this case, the repair can be easily carried out independently: you need to bend the lever to its original state.
Tips for use
An office chair, especially a refurbished one, is a rather fragile and vulnerable structure. During operation, it is recommended to strictly adhere to the instructions. If you ignore existing rules, the shelf life of the product will be significantly reduced. To ensure that your office furniture lasts a long time, you need to keep the following points in mind:
- It is not recommended to use chairs in rooms with high air humidity.
- If furniture is brought into an office or apartment from the cold, you cannot immediately begin assembly, because fragile plastic parts are very sensitive to temperature changes. It is better to start installation at least a day later.
- Do not put pressure on the bolts during assembly, otherwise the nut may fall under the upholstery and you will have to dismantle the seat in search of a fastener.
- Do not exceed the permissible load on the rollers and crosspiece.
Two people cannot sit on the chair, otherwise the base of the product may break. For heavy-weight employees, it is recommended to choose chairs with a metal cross: it is stronger and more reliable than plastic ones. It is strictly forbidden to fall onto the seat.
You should be aware of the fragility of the armrests. Under no circumstances should you sit on them. Experts recommend tightening all fastening bolts once a quarter so that they do not become loose over time. You should not use the seat to transport heavy objects, as this will quickly deteriorate the upholstery and damage the mechanisms. You cannot carry a chair on the floor if it is covered with tiles: when the rollers get into the joints between its fragments, this leads to rapid wear.
The fabric of computer chairs is quite vulnerable to external influences. The seat and backrest should be vacuumed weekly to prevent dust from accumulating on them. In case of stubborn stains, you can use only the products recommended in the operating instructions. It is strictly forbidden to use traditional methods.
In order for the chair to serve for a long time and not break, it is necessary to strictly adhere to the operating requirements. If the warranty on a piece of furniture has already expired, you can carry out simple repair work yourself. The success of the repair depends on the complexity of the breakdown, as well as on the quality of the spare parts chosen to fix the problem.
Operating rules
Gas elevator
We are talking about a pneumatic chuck here. Essentially, this is a structure consisting of two chambers that are filled with air or gas. When the user presses the position adjustment lever, the valve closes the air flow between these chambers.
When the valve does not operate when pressed, there are problems with the piston, seal and other components.
Never attempt to disassemble a gas lift. This is a non-separable device, which in case of malfunctions must be completely replaced.
How to re-string: step-by-step guide
One of the ways to restore an old leather chair is to reupholster it. This process is quite lengthy and labor-intensive. First of all, new fabric is purchased. Upholstery can be done with leather or other popular materials. Some experts also recommend purchasing substances for padding (foam rubber, batting). To simplify the reupholstering operation, you also need to have a stapler, nails, hammer, etc.
The algorithm for solving this problem can be described in several successive steps:
The first stage involves removing the fabric from the bottom of the chair. In simple models, this part is fixed only from the bottom
But there are complex models, so it is important to initially free this part and then proceed with other operations
After this, the fabric is completely removed from the surface of the structure.
It is important to do this sequentially to avoid any damage to the elements. Please note that each element of the chair is covered with one piece of fabric. Therefore, it must be released sequentially, layer by layer. You should not tear these elements, since they will then need to be used as blanks for cutting
Therefore, it must be released sequentially, layer by layer. You should not tear these elements, since they will then need to be used as blanks for cutting.
The next step is to dismantle the old foam upholstery. To remove it, you should carefully unbend it and remove all the metal brackets with which it was secured. Also try not to tear the material, which will later be used as blanks when replacing foam rubber.
Cut out the material. This operation involves the formation of new upholstery elements. To do this, use old pieces of fabric that were attached to the armrests, backrest and seat. The size of the new elements should be slightly larger than the old ones. This is due to the fact that it is not always possible to predict how accurately the fabric will fit. Therefore, it is better to take it with a reserve.
This step involves fixing the foam. Previously prepared pieces are sequentially placed on a specific part of the chair. If the foam protrudes in certain places, then it should be cut off. This way the appearance of each element is formed. Then a padding polyester is placed on top of the foam rubber. After this, both substances are fixed on the frame using a stapler
It is important to attach them so that they follow the contours of individual parts of the structure
The process is completed by attaching the fabric. This operation is very similar to the previous one
But it is important to place the pieces correctly on the surface. Before fixing, carefully align the fabric and stretch it
Initially, the middle part of the workpiece is nailed with staples. This is necessary in order to avoid distortions. Then each of the corners is sequentially stretched and secured using a stapler.
Cross
Metal crosspieces break extremely rarely. But the plastic ones are deformed with enviable regularity. Destruction mainly occurs at the junction of the beams of the cross.
Some advise taking the damaged element, filling the hollow cross structure with some material such as a polypropylene pipe, and then using glue or a soldering iron to assemble everything. But the load will be too high, and such a connection is unlikely to last long.
The most correct solution would be to replace the computer chair element. To do this you need:
- Remove the rollers. Most often, they can be easily removed from their seats. If rigid fixation is used there, unscrew the fasteners and remove them;
- Remove the piastra. Fixation is carried out here on a cone. To disconnect the element from the gas lift, you need to gently but forcefully tap with a hammer at the connection point. If it doesn’t work well, use a lubricant like WD40;
- Remove the retaining clip. It is installed in the upward recess of the gas lift;
- Knock out the gas elevator itself. It is removed by knocking it out. It’s just extremely important not to hit the cylinder itself, which is filled with gas. This is dangerous to your health and life.
Then buy a new crosspiece and assemble the entire assembly in reverse order.
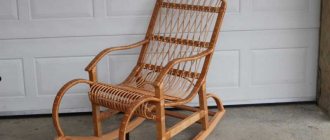
How to repair a wicker chair?
To reconstruct wicker chairs you will need:
- scissors (or pliers);
- chisel;
- a set of skins with different grain sizes;
- construction knife;
- glue;
- in some cases - varnish.
The first step is to carefully inspect the furniture. Only after identifying the entire list of breakdowns can you begin to work. Missing rods will have to be replaced. The same is done with broken weaves. The selection of a replacement rod is carried out carefully, taking into account the sizes of the remaining parts; of course, only the same type of wood is used. Cracked rods are repaired using a large amount of linseed oil.
After absorption, soak again. Putty will help deal with the largest cracks.
Chair back restoration
We will separately consider repairing the backrest if it was broken for any reason. After completely dismantling the upholstery, you need to determine the cause of the breakdown. These could be loose fastening bolts that need to be tightened.
- If there is a crack in the frame, you can try to find a similar part and replace the broken one. Or carve a new one out of wood yourself.
- If the cause of the breakdown is a loose tie strap, you need to tighten it. To do this, remove one of the edges of the tape and stretch it evenly, after which we fasten it with staples.
- If the tapes have lost their previous properties, they must be replaced with new ones. The remaining excess is cut off with scissors so as not to spoil the appearance after reupholstering. You will get a beautiful chair without extra costs.
Why do wheels sometimes break?
There can be several reasons why wheels break:
- Pollution.
- Dust and dirt that clog moving parts will shorten component life.
- Heavy load by weight.
- Uneven floor surface.
- The seat pin is worn.
- Manufacturing defects.
Or it may turn out that the parties have simply exhausted their resource, physically consumed. Of course, buying new furniture because of such a problem is at least unreasonable. It is important to know how to remove wheels from an office chair. Then the problem will be solved quite quickly.
Benefits of self-updating
Repairing furniture yourself is actually not as difficult as it seems. If you have sufficient skills, and they will be acquired, accumulated and improved with each step, even a beginner in this matter can update a chair at home. According to experts, the main thing here is to act carefully and not deviate from the plan - in this case, the end result will impress the household. In addition, reupholstering furniture yourself has an undeniable advantage - it will cost much less than turning to professionals or buying a new product. And if you show a little imagination and creativity and think in advance about how to update an old chair with your own hands, changing the design that has lost its trendiness or improving the shape, you can turn it into a completely new element of furniture.
Work order
Before you begin restoring a chair with your own hands, you need to carefully inspect it in order to know in advance what actions need to be performed and in what order. During the inspection, it is necessary to evaluate the condition of the upholstery, the wooden structure that serves as the frame, as well as the lifting mechanisms, if the chair is folding and the seat is equipped with them. The upholstery is usually replaced with new ones, and loose wooden parts are strengthened with glue. And it happens that the mechanisms are worn out and the chair cushion does not rise; what to do about this problem will depend on the specific situation. Worn metal parts are unlikely to be repaired, and replacing mechanisms with new ones can be unreasonably expensive. Alternatively, you can abandon them altogether and, sacrificing functionality, fix the pillow motionless. If you determine the scope of work in advance and carefully consider how to repair the chair, you can end up with truly comfortable upholstered furniture.
Disassembly and preparation
Any disassembly of chairs and upholstered furniture should begin with dismantling the upholstery. All actions must be performed extremely carefully, trying not to damage the integrity of the fabric.
It is very convenient to use elements of the antique covering as patterns for future patterns of new covering, which will save a lot of time and labor when repairing a chair with your own hands.
If the restored model is equipped with armrests and decorative parts, they are also dismantled. But in some cases, you will first need to remove the seat and back cushions, if they are provided for in the design.
The base may need to be repaired. Often, metal springs, which were standardly installed inside in Soviet furniture, are unsuitable for further use, having broken completely or sagged over time and lost their former elasticity and rigidity. In this case, the wooden frame can be covered with jute tape. Step by step everything looks like this:
- first, the product is stretched in one direction, for example, from left to right, and then in another, perpendicular - from bottom to top;
- tapes of opposite directions need to be intertwined with each other, and their ends secured to the frame with a stapler.
As a result, instead of a cushion from old spring mechanisms, you will get a durable fabric base for the new seat.
When inspecting a wooden frame, you need to pay attention to the strength of the parts and their connections to each other. Some units may need to be disassembled to re-glue the joints. If you are restoring a chair with wooden arms and legs, you will need to decide whether the finish needs to be changed.
Disassembling the chair
Wrapping with jute ribbon
Design update
Quite serious repairs will be required if the frame is loose or, even worse, some elements have burst lengthwise - this happens due to long-term storage of furniture in unheated rooms, where temperature and humidity values change several times a year. Having disassembled the components, you need to inspect the parts to assess the possibility of their further use. Typically, connections between wooden structural elements are made tightly tongue-and-groove. If the chair has been unstuck for a long time, the surfaces could wear out when rocking. In this case, the gaps between the parts have increased, and the connections in the assembly have become more mobile than during the original assembly. Simple gluing in this case will give a short-term result - soon the structure will become loose again, so you will need to get rid of the gaps by inserting wooden planks of the appropriate sizes.
All parts of the units, including new inserts, must be thoroughly coated with glue during assembly.
Broken frame elements must be glued together. If the part has split lengthwise into two parts, this is not difficult to do - you need to clean the surfaces from dust and, after spreading it with glue, compress it tightly while the latter dries or polymerizes. To ensure high pressure, you can use clamps or wrapping with a rubber band. If the burst element does not come apart, the glue can be pressed into the crack using a medical syringe with a thick needle, after opening the crack with a flat screwdriver.
If a long part breaks across, the adhesive joint at the fracture site will be weak. In this case, you can try to repair it using two overhead strips of suitable length, glued lengthwise. If this is impossible to do due to the design of the chair, you will have to replace the broken element. In most cases, the frame parts are straight slats and bars - it will not be difficult to plan them yourself.
Glue the broken elements together
Increase joint surfaces to restore structural integrity
Soft part update
The seat cushion and backrest are usually covered in the same material. When choosing it, the interior features of the room in which the furniture will be located are taken into account. For a living room or hallway, the seat and back are usually restored with artificial or natural leather or jacquard - such upholstery will give the chair an expressive appearance. For rooms where there is an increased risk of contamination, flock is more often used.
Before the reupholstery itself, you will need to perform a number of preparatory steps. If the old springs on the seat were not removed, it will be enough to replace the soft lining under the covering material; batting folded in several layers is quite suitable. It should not be laid directly on the spring block; first you need to make a gasket from a durable material, for example, burlap.
If the springs are replaced with a jute strip, as described above, it is also necessary to cover this “weaving” with canvas or burlap, and cut a piece of foam rubber on top to the size of the pillow. If the thickness of the sheets is insufficient, it is worth making the liner multilayer. The foam rubber is covered with sheets of batting and secured to the frame using a furniture stapler.
To find out the amount of material needed to restore the chair, the patterns (old covering) are laid out as compactly as possible, but not closer than 3-5 cm from each other.
When using foam inserts, the volume of the seat may increase, and more material will be required for the upholstery - in this case, when laying out the patterns, you also need to take into account the amount of allowance.
To make patterns for upholstery parts, a piece of new material must be laid out exactly on a flat surface, with all the patterns placed on top of it. Next, all future details are outlined with chalk and then cut out. It is recommended to overcast the edges with a sewing machine to prevent them from unraveling.
You need to pull the material onto the pillows carefully, avoiding the formation of folds. To do this, first it is “baited” in the corners of the frame with a stapler. If the pillow is round, you can mentally draw two lines through the center, imagine the intersection point and secure the fabric at it. Next, between the fixed points, the edges of the upholstery are fixed with a slight tension. If necessary, you can remove the staples with which the material was originally “baited” using pliers. And then, tightening the fabric, fasten it again.
The material on the underside of the seat and the back of the backrest is hemmed with thread or tacked with furniture nails with decorative heads. You can secure the fabric with a stapler and cover the staples with textile decorative tape.
Cut the seat and back from foam rubber
Cut corners
Sew new filler to the old layer of foam rubber
Upholster the seat with new material
Secure the upholstery using a staple gun
Updating wooden elements
It happens that do-it-yourself restoration of a chair is not limited to replacing the upholstery and pillow filling. Furniture often includes antique carved armrests, back frames, ornate legs - you can preserve and emphasize all this beauty by updating the appearance of the elements:
- First you need to remove the old paintwork from all wooden surfaces. If the parts are flat, this can be done by using a grinding machine (belt or vibrating). If they are of complex shape, and even with threads, you will have to clean off the coating manually using fine sandpaper. Alternatively, you can use special compositions for removing paint and varnish coatings.
- Having gotten rid of the old layer, you need to inspect the surfaces for chips and cracks, and if necessary, putty them with a special compound or rub them with a mixture of wood glue and fine sawdust obtained during grinding.
- After puttingtying the chair, another sanding will be needed.
- You can decorate wooden furniture elements with various paints, after priming the surface with special compounds and sanding it with fine (P100-P120) sandpaper.
- Paint and varnish coatings are applied in several layers. Their quantity, as well as the drying time, are usually recommended by the manufacturer.
A beautiful wood finish is obtained by using at least 3 layers of furniture varnish. There is no need to prime the surface before applying it. After the first layer has dried, the surface is sanded.
To preserve the natural texture and color of wood, you can not cover wooden products with paints and varnishes, but use stains.
Sand parts, remove varnish
Cover with stain and wait for it to dry completely
Treat with furniture varnish
Connect all the parts
Assembly of the structure
When the restoration of the chair is completed, the furniture is assembled in the reverse order of its disassembly. Cushions and armrests are installed on the frame and secured using the method used before dismantling. It is better to replace old screws, if fastening was carried out with their help, with new ones. Lastly, decorative elements are installed.
An old chair, repaired with your own hands in accordance with the instructions given above, will certainly become a decoration in the house and a source of pride for the owner.
Restored chair
Why do you need a reupholstery?
Over the years, any piece of furniture in your interior becomes outdated, becomes unusable, the drapery wears out, becomes stained, and wears out. Over time, outdated furniture becomes uncomfortable to use; among other things, it no longer fits into the interior and even distorts the overall picture of the room. This means that the time has come to either replace and dispose of old furniture, or try to restore and reupholster it.
Restoring furniture yourself has its advantages.
Reupholstery is possible when the chair is still:
- Durable;
- Reliable;
- Has a strong base.
Upholstery will give a second life to an outdated chair, returning and even improving its former appearance. The updated chair will be able to serve for several more years as a reliable and tested piece of furniture.
