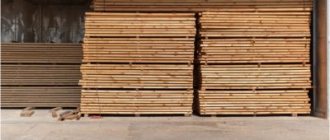
Regardless of the quality of wood processing, over time its surface may become rough, which will make the finishing process more difficult. The master faces quite a big problem when sanding such boards. And the varnish soon after application cracks and begins to crumble.
Wood roughness most often occurs due to improper drying. Such defects are a consequence of uneven drying of the layers. The fact is that the upper layers, when dry, become smaller in volume than the inner ones. And surface deformation occurs.
It should be remembered that in winter the moisture content of wood is minimal, while in spring it reaches its maximum. Therefore, try to prepare the boards at the optimal time so that the wood contains as little juice as possible. This way, you can minimize the possibility of the boards becoming warped and cracked. The number of cracks and their depth directly depends on the strength of wood drying. Soft wood dries out the least.
Each tree has its own degree of shrinkage. Depending on this, tree species can be divided into three groups: low-drying, moderately drying and highly drying species. The first are poplar, willow, cedar, spruce, and pine. The second group consists of aspen, linden, oak, elm, and ash. And the third includes apple tree, birch, maple and larch. This must be kept in mind when choosing wood. After all, the degree of shrinkage is one of the most important factors for successful construction.
The purpose of wooden blanks dictates the condition of their drying and what permissible moisture content will remain in the material:
- From 18 to 22% - the tree can be transported in warm weather to fairly remote places. Applicable in the normal construction of houses, the manufacture of containers, etc.;
- From 2 to 15% – a subtype of woodworking humidity, at which boards are used as decking material, for cladding and for flooring;
- From 8 to 15% – carpentry moisture, solid or glued wood products: window frames, door panels, stairs or interior elements;
- From 2 to 8% is furniture humidity, which gives wood the most optimal characteristics during processing.
Many people dry boards at home, completely forgetting about the properties of wood. From the article you will learn what needs to be done so that the boards can maintain their smooth surface and not cause you any inconvenience during their subsequent processing, and you will receive answers to frequently asked questions.
Drying oak: problems and solutions
Oak lumber is difficult to dry: oak is susceptible to “drying out” and the formation of external and internal cracks. In particular, enormous difficulties arise when drying freshly sawn oak lumber with a moisture content above 25%. If in this case, in the initial drying phase, the temperature is higher than +55°C, a crisis of wood capillaries occurs and the formation of wide internal cracks.
You can, but you don't need to
This paragraph is taken from a 30-year-old annotation for a conventional dryer and will remain valid until the time when oak grows on Earth.
The worldview of professional dryers is the following: it is generally possible to dry oak from a freshly sawn state, but it is better not to do this. Only thin, up to 30 mm, materials with a humidity of 40% or lower can be dried completely harmlessly for wood.
Modern drying installations, regardless of the operating principle, are controlled by programmable devices (controllers) designed to maintain a certain dependence of the atmospheric climate in the chamber on the humidity of the material being dried. The climate in a conventional drying chamber is determined either by the temperature and drying gradient, or by the temperatures of the “dry” and “wet” thermometers, depending on the design of the dryer control system. There are no differences in the operation of such systems, because the drying programs used are similar or very similar, and the only difference is in terminology.
Drying program
The drying program is usually divided into several phases, of which only two are actually drying phases. In the first phase, drying occurs from the initial humidity to a humidity of 26 - 30% at a relatively low temperature and drying gradient. In this case, the temperature and gradient throughout the entire phase usually remain constant. In the 2nd phase - from a humidity of 26 - 30% to the final one - drying occurs at elevated temperatures and drying gradients and is usually accompanied by an increase in the gradient towards the end of drying. In some cases, an increase in the drying gradient is also accompanied by an increase in temperature.
In the case of oak, there are a number of “pitfalls”: a large variation in the moisture content of freshly sawn material within the boundaries of even one board leads to a dependence of the drying result on the location of the humidity sensors, according to which the drying is controlled. The dryer controller, using the average readings of the humidity sensors, can switch the drying mode from the first stage at the moment when the entire batch of wood acquires a moisture content of 26 - 28%. In this case, there is a very high possibility of cracking of part of the material whose moisture content exceeds the indicated value.
To eliminate this phenomenon, when the oak moisture content reaches 26 - 28%, an intermediate conditioning should be created, which consists of manually setting the drying gradient to 1.2 - 1.5, maintaining the material under these conditions for a certain time (10 - 24 hours), and only later switch the mode to the second stage of drying.
Drying at the 2nd stage usually does not cause problems and can be forced completely without danger. The temperature in the first drying phase is set within the range from +45° to +55°C, and the drying gradient is from 2.2 to 2.6 (the lowest values correspond to thick lumber, the highest values correspond to narrow lumber). In the 2nd phase, the temperature rises to +55°. +65°C, and the gradient is from 2.2 to 3.
Most manufacturers of vacuum chambers do not recommend or prohibit drying oak at a humidity above 30%. So, for example, in the instructions for operating the press-vacuum drying chamber of the WDE office, an exception is made only for thin, up to 30 mm, materials, with an initial humidity limit of 40%.
From theory to practice
Using tips for conventional dryers, we have selected drying modes that allow you to dry freshly sawn oak to the required final moisture content without any defects. The drying modes, in other words, the pressure in the chamber and the temperature of the heating plates, were set so that the drying gradients in phases corresponded to the drying gradients recommended for use in conventional chambers. The superheated steam pressure was 130 mBar so that the temperature of the wood in the first phase did not exceed +54°C, and the temperature of the plates was maintained at +55°C. After 10 hours of intermediate conditioning at a pressure of 150 mBar and the same temperature, the transition to the second stage of drying is carried out with a temperature rise to +70°C.
How to dry wood cuts?
Step 2 – collection and delivery of logs
On an industrial scale, powerful trucks and other loading equipment are used to transport saw cuts. But if there are not so many logs, you can do without special equipment, using only a trailer and a winch with a cable. In fact, with this technique, the log is rolled into a trailer, and then secured with wedges and tie-down straps.
Step 3 – creating slabs
First the log needs to be cut. Without extra industrial capacity, it is quite possible to turn even very large trunks into planks. This requires chainsaw-based sawmills. The sawmill removes several boards from a log in two ways:
- Radial is a cut in the direction transverse to the annual layers of wood. The result is a very durable slab that practically does not dry out. We resort to such end cuts when we make, for example, small coffee tables.
- Tangential - a cut with a cutting plane passing tangent to the core of the trunk. The result is a slab with an exquisite pattern, which, however, can become deformed over time due to drying out. These are the kind of blanks we use for our branded tables made from solid sawn wood.
Step 4 – drying the wood
This is the final stage for creating a slab, but not the last for making a wooden table. Drying saw cuts must be approached with extreme care, since violations of technology lead to damage to the material. Drying the wood helps prevent further cracking.
If there are a lot of workpieces, it is more convenient to dry the material in the fresh air. The boards are stacked so that there is always space between them for moisture to evaporate through air masses. Atmospheric drying allows for a natural drying process, so the wood will not warp. Drying takes a long time - a medium-sized slab can last for several years. The final moisture content of the cut after this stage is 10-12%. It’s also not a good idea to overdry the workpiece, so the process is controlled by an electronic moisture meter. Its sensors are placed across the wood grain and away from the edges of the board. Sometimes our workshop may require additional thermal drying of slabs. It uses Western technologies and uses water steam. Thermal drying is needed for blanks for those products that will often experience temperature changes and humidity surges. Such structures, for example, include furniture for saunas. As a result of this procedure, the moisture content of the saw cuts is only 5%.
Step 5 – storage of saw cuts
So, the solid slabs are ready. But they cannot be processed right away - the workpiece needs to rest within the walls of our workshop for a couple of weeks so that the moisture balance is equalized and fixed. We choose the place for storing wood very carefully: good ventilation, optimal ratio of ultraviolet radiation and shade, absence of dampness.
We store the slabs in a special room where we organize the necessary microclimate. In this case, the wood is laid in a special way: the boards lie in stacks, but are separated by special spacers - stickers. This ensures a flow of fresh air to each cut.
Step 6 – slab selection and preparation
When the cuts are ready, we are waiting for only one thing - your orders. When a new client comes to us with a request to create furniture, the WoodMood manager shows different options for slabs. The future owner of the dining table-river selects the most attractive, in his opinion, samples from the storage room. In parallel, our technologist is developing a technical map. It contains all the product dimensions and properties, which will serve as instructions for craftsmen at the production stage. Then the required cuts are sent to the molding shop: they are roughly ground and calibrated to the required dimensions.
Step 7 – decorative filling
The prepared cuts are sent to the next WoodMood workshop. Our craftsmen fix them in formwork on a special table and fill the space between them with a special composition. Before the process, the surfaces are thoroughly cleaned of dust and dirt. The pouring itself is done carefully and in several layers so that the polymer coating is dense, uniform and smooth, without bubbles or holes. When the polymer solution hardens, it eventually forms a decorative part of the tabletop - a colored river. A table made of wood and resin is an excellent and colorful combination, which has acquired the name river table and is so loved by our customers. But it takes from one and a half to two weeks for the liquid to harden. All this time, the workpiece also remains in sterile protection so that no debris gets into the polymer layer.
Step 8 – final processing
The final stage of creating an exclusive table is the longest. The tabletop is first roughly ground on an ShLPS machine, and then proceeds to fine-grained sanding by hand. After this, the wood is impregnated several times with oil - colorless or tinting. This coating not only complements the appearance of the table, but also protects it from the harmful effects of the environment. Thanks to such protection, you can keep the table even in the kitchen. In addition, impregnation improves the pattern of annual rings, giving it clarity and brightness.
Step 9 - production of the underframe
When the tabletop is ready, it’s time to think about what it will be supported on. Making the base is identical to the production process described earlier. Our craftsmen in the workshop make the bases from a metal pipe, then polish it and send it for painting. The underframe is primed and acquires the shade desired by the client.
Step 10 – assembly and packaging
In order for the table to acquire its final shine and gloss, when the tabletop and base are already fastened to each other, we polish the furniture by hand. A special polishing machine and a couple of polishes are used. A snapshot of the completed table is then sent to the client. At this time, we pack the structure to protect it during transportation. The table is awaiting delivery to the customer in a special room in our workshop: the humidity there is 45-60%, and the temperature is strictly +18-25 degrees.
Now you know in detail how we create designer wooden furniture for you. Safe and environmentally friendly, it is truly original and will delight you in any interior. Oh yes, there is also step 11, but we just completed it - we told you about our production.
Rules and tips
Drying chambers and a vacuum method are used to dry oak in large industries. At home, these methods are unattainable because special equipment is required, which is expensive. Another effective method is under the influence of electric current, but in Russia it is actually not used due to the high price.
Before drying the material, it is recommended to understand the following rules:
- The oak wood simply dries out. This means that when the humidity drops below 7%, the product will begin to burst, both inside and outside.
- The longest time will be needed to dry the freshest wood with a humidity of 25%.
- If you start drying immediately by raising the temperature above 50 degrees, the internal capillaries of the wood will begin to collapse and the inside of the product will become covered with cracks. This will not affect the appearance, but fragility increases by 75%.
- High-quality drying is carried out only by maintaining uniform temperature and humidity.
Recommendations for drying wood
If lumber is dried naturally, the duration of this process should be taken into account. The tree must be protected not only from precipitation, but also from direct sunlight.
When wood is dried indoors, good ventilation (no drafts) must be ensured. Drying should not be done near powerful heating appliances. Avoid contact of boards with metal. This causes the wood to darken.
Source: brusder.ru
Several available wood preparation methods
For home processing, the following methods are used:
- Dry the oak tree prematurely. The required tree is marked in advance on the plot and in the spring the bark is removed from it, straight from the roots to a height of 20–30 cm. The juices will not be able to reach the crown in a suitable volume and the oak dries out. In the autumn it is cut down and cut into timber.
- Natural drying. Oak wood of natural moisture content is purchased. The material is laid out under cover on the site, so that the wood is blown from all sides. The material is laid on chocks in layers. The distance from the ground to the bottom row is at least 300 mm. Drying time is 3–6 months, depending on the atmospheric climate and humidity.
- Drying small items indoors. The oak product is wrapped in newspaper in 5–8 layers and covered with PVC film on top. Holes are made in the film for ventilation. The product is placed on the windowsill above the battery. Once an hour the package is turned over. The process takes 2–3 days. This is the most affordable method to dry a wood product at home.
It is difficult to dry large oak timber at home. The most affordable option is outdoors. But wood is hygroscopic and simply absorbs water from the air. In other words, if drying is carried out during the rainy season, then the process becomes worthless. The most common option is to harvest wood from the winter forest. In winter, at temperatures below -20, oak wood acquires moisture equivalent to chamber drying. Therefore, products from winter forest do not require additional preparation.
How can you dry boards quickly?
There are also times when you need to quickly dry the boards. Is there such a way? Yes, sure. Wrap the board in 5-15 layers of paper, one layer of cellophane and make holes in the latter.
After this, place the board on a warm radiator. A window sill is perfect for an apartment. Considering that the paper absorbs all the moisture, change it several times during the day. And turn the board over. With a thickness of 3 cm, 4 days will be enough for drying.
The main disadvantage of this method is that the board warps. But you can easily fix the situation with a plane.
Production methods
When preparing wood in production, chamber drying is used. The oak is placed in a special sealed convection chamber. Under the influence of high temperatures and ventilation, excess moisture evaporates evenly and the wood dries out. The process is carried out in three steps:
- Heating of wood.
- Drying.
- The oak cools and acquires the desired humidity.
The camera is constantly monitored, because if the process is disrupted or a mistake is made, the product begins to twist or crack. The chamber drying process lasts from 1 to 3 weeks. But almost all manufacturers reduce the process and the wood does not dry out completely.
The vacuum drying method is carried out in special chambers, where, under the influence of atmospheric pressure and high temperatures, low moisture content of lumber is achieved. The vacuum method is used in industries for preserving wood, because in the chambers the product is additionally treated with antiseptics. The compositions fall deep into the wood under the action of vacuum. This increases shelf life and improves the properties of products during transportation. The vacuum method is difficult to reproduce at home, because special equipment is needed.
Chamber drying, due to its inherent complexity, gradually fades into the background. The newest method is replacing it - infrared preparation. Infrared treatment allows you to reduce drying time and save electricity. At the same time, the effect on oak wood is uniform and soft, and does not destroy the product from the inside and outside. The action of infrared heat makes it possible to obtain any percentage of humidity.
How to dry wood in the microwave
The “Kulibins” of our country invent various methods of drying wood, which can be done independently and at home. We have already talked about drying wood by boiling it in salt. Now let's talk about drying wood in the microwave. It is clear that this method is suitable for drying small-sized wood (perfect for drying suvel and burl, including)
Drying wood in the microwave, at a minimum, solves three problems at once:
- Quick drying with “luring” moisture from the middle of the bar
- Drying at home
- Budget drying
Microwave
Unfortunately, microwave manufacturers did not look that far and did not write operating instructions on how and in what mode to dry this or that type of wood. And there is no “wood drying mode” button on any microwave.
Therefore, there is only amateur information obtained experimentally by masters of experiments. We will tell you general recommendations on drying technology. In general, finding the optimal method for drying wood in a microwave can only be achieved through trial and error.
Drying wood
An important point in drying wood is the need to remove moisture not only from the surface, but also from the center of the block. Natural drying takes considerable time, and the evaporation of moisture begins from the surface, and further drying occurs when the product is ready. This often leads to various types of product deformations.
Know-how - preparation with infrared light
Infrared batteries can be used at home and in factories. The process requires cassette molds, which are placed inside a special frame of iron stacks. The size of the battery depends on the number of cassettes, so for home use 2–3 pieces are enough. The amount of material being processed at once does not matter; the main thing is to position it correctly and direct the light. Treatment up to 6–12% is carried out within 6–7 days. To obtain 20–25% humidity, 2–3 days are enough.
After infrared action, oak lumber has the following properties:
- Has a specified humidity.
- The fibers do not deform, therefore there is no internal stress or microcracks.
- On the outside, the oak remains natural (the color and shape do not change), as with atmospheric drying.
The humidity is checked during infrared action with a hand-held moisture meter. As soon as the characteristics meet the assigned tasks, the dryer turns off. Immediately after the process, the dried lumber can be used in work. The process is shown in more detail in the video:
Because oak is capricious and does not react well to temperature changes, the rational drying methods are natural or infrared. They are suitable for home use and do not require any special preparation. In large industries, chamber drying or vacuum preservation is used. Which significantly reduces time and extends shelf life.
What is the fundamental difference between steam dryers?
The steam drying unit is suitable for processing wood of various species with different moisture content. The principle of operation of the chamber is simple: steam is heated to a temperature of over 120 degrees Celsius and circulates due to the operation of powerful fans. The steam passes through the lumber stack and “pulls” the water out.
In front-loading units, the output is chamber-dried oak boards with a moisture content of 8-10% (room-dry wood). This is the optimal level of moisture content for materials to be glued (for example, oak for stairs).
Despite the fact that steam drying chambers operating in a soft mode require more time to process materials than installations with contact heating, they have an undeniable advantage. Thanks to the constant exposure to steam and gentle temperature, the wood does not crack due to internal stress, but dries evenly, gradually acquiring the desired level of humidity. This drying method reduces the percentage of defects to an absolute minimum and makes it possible to obtain oak for baths, interior decoration, the construction of stairs and other structures.
Oak drying
When choosing to build a house, parts of furniture or individual structures made of oak, you should be aware that poor drying can lead to a change in the characteristics of the finished product for the worse. Due to the excessive water content and uneven drying of the lumber along its length, it begins to deform.
And this becomes a significant problem when carrying out any type of construction. Therefore, it is very important to organize high-quality drying of wood before putting it into use.
General drying rules
The wood species may simply be overdried (the degree of humidity drops below 7%, with violations of the technology and drying time). A similar condition has a special term, “dryness”. It is fraught with cracking of the material, not only from the outside, but also from the inside.
Requirements for wood used for insulation (and not only) of a house
Here are the requirements for wood: good quality. This means: you need lumber with a small number of knots, without falling knots, without rot, smooth, dried. But where can I get one?
It’s unlikely that you’ll be able (or want) to look through every single piece of wood in a stack at a timber trading base in search of the perfect ones. Especially if you need not 1, 2, 5... pieces, but five or six cubic meters. Therefore, most likely, having looked around the burning rows of stacks, you will simply point at one of them, deciding for some reason that the boards in it are more or less normal. Like, load me with this.
You can, of course, buy wood that has been dried in a factory, impregnated with fire retardants and other protective compounds, smooth, planed, and calibrated. True, it will cost at least 2.5 times more. Can everyone afford it, and are there such factories everywhere?
In fact, you can do everything yourself and get a satisfactory (or satisfying?) result. This method of drying lumber was not invented by me, but I read it once on some forum or website, applied it and was very pleased. And I recommend it to you.
The only drawback of this method of drying boards is that it is somewhat labor intensive, but the result is worth it.
Features of drying oak: how to properly process wood
Oak is a very popular material that is used extensively:
- Construction site.
- Finishing works.
- Making furniture.
- Making art objects and souvenirs.
Naturally, not only freshly cut and sawn wood is used, but processed and perfectly dried material. This is an indispensable condition to avoid further cracking, changing the shape and size of the product. Oak, which is used in construction or furniture making, must have certain physical and mechanical properties.
Therefore, when sawing is completed, the question arises: “ How to properly dry oak .” We will give the answer to this in this article.
Order a call from the website: kak-sushit.ru
| Good to know |
| Questions and answers |
Question: How to avoid defects when drying lumber? Reasons for its occurrence Answer: There are four main reasons for marriage: 1. Drying too quickly.2. Drying too slow.3. Improper stacking.4. Operational errors. These reasons lead to the following types of marriage: .
LLC “DAKT.RU”
, Moscow
Phones: 8 +7 8
Address: 127576, Moscow st. Novgorodskaya, building 1 room G 235
Source: www.kak-sushit.ru
Individual characteristics of the oak tree species: what should be obtained as a result of drying
Oak lumber is quite capricious; it is difficult to dry naturally. It is not enough to simply throw a stack under a canopy or in the open sun to get the desired result after a certain time.
Before drying oak boards , you need to understand the individual characteristics of the material:
- The oak tree species is susceptible to drying. This means that when the water level drops below a critical level, internal and external cracks can be created.
- The most difficult thing to dry is freshly sawn oak, whose humidity exceeds 25%.
- Temperatures above 55 degrees are not allowed during the initial drying steps. This leads to the collapse of wood capillaries, in other words to the appearance of multiple internal cracks.
- It is not recommended to send freshly sawn material with a humidity above 40% for drying.
- Proper drying of oak requires maintaining a certain level of temperature and humidity.
The specifics of drying oak wood are such that in order to obtain high-quality material without flaws with a certain percentage of moisture, you need to draw up a preparatory plan for this procedure and use special means. There are several tasks for drying oak:
- Shrinkage with warning of linear dimensions configuration. Here the humidity is reduced to 30%.
- Drying to transport humidity of 20-22%.
- Full volume drying for specific applications. The humidity level should be 6-12%.
Oak drying methods: chamber and tubeless methods
From all of the above, it is clear that obtaining a tree species from freshly cut oak that meets all the necessary characteristics is a labor-intensive and time-consuming process.
There are many methods to reduce the moisture content of boards, logs and beams, but all of them can be divided into two huge groups:
- Tubeless (atmospheric) drying.
- Chamber drying.
Atmospheric drying is the most easily accessible and natural method of reducing humidity levels. The technique has been used in sawmills and wood processing industries for centuries. It is believed that naturally dried wood is of higher quality and can be used for decades without changing its initial properties. But the method has one significant drawback - it takes a long time.
Because modern life is very busy, buyers are interested in purchasing material very quickly. Logging companies, in turn, prefer to sell timber in the shortest possible time. Therefore, in the 19th-20th centuries, a huge number of techniques using electronic energy were invented. Chamber drying is done in convective chambers; the condensation method and vacuum drying are also used.
All work is carried out in industrial conditions, usually divided into the following stages:
- Warm up
- Specifically drying.
- Cooling, obtaining a given humidity threshold.
Chamber drying is identical to repeatedly accelerated atmospheric drying; the desired result is achieved many times faster. But the drawback is the complexity of the procedure. It is necessary to introduce expensive equipment, most often this can only be done in industrial settings.
Fortunately, infrared dryers have appeared not so long ago, which make it possible to reduce the time of atmospheric drying and obtain the desired result in a time comparable to chamber processing. With all this, all the individual characteristics of drying oak wood ; the material does not experience brutal action that destroys the structure. At the end of the process, the humidity reaches the desired level.
Purchasing “extra” grade wood from the manufacturer
In our company you can buy chamber-dried oak for construction and finishing work. Since we are manufacturers of lumber and independently carry out all types of work, from harvesting plots to drying and storing wood, you can count on affordable prices and a sufficient number of goods in stock. You can purchase goods in wholesale and retail quantities; for more details, please contact us in a convenient way.
Copyright © 2022 Techimport M LLC
Techimport M LLC
140005, Moscow region, Lyubertsy, st. Kirova, 20a
Source: www.tehimport-m.ru
Infrared drying of oak: advantages of the modern method
Proper drying of oak has now become possible even at home. Infrared dryers, manufactured under the FlexiHIT brand, have a cassette form factor, are simply placed inside stacks, and can also be used for drying small pieces of material. In this case, the size of the tree species does not matter; it is enough to use the right number of dryers and place them correctly. The result is achieved in 3-7 days.
The characteristics of infrared-dried oak correspond to the properties of atmospheric-dried wood:
- The material has a specified moisture content.
- The fibers do not warp, cracks and stressed areas do not appear.
- The appearance corresponds to the appearance of naturally dried oak.
It's catchy that you take advantage of IR (that is, thermal, infrared, based on infrared radiation)
Anyone can use dryers; you don’t need any special abilities to get the results. The equipment operates from an ordinary electronic network, and at the same time consumes absolutely little. To dry 1 cubic meter of wood, no more than 200-400 kW is required.
To check the humidity, it is enough to use a moisture meter; when the desired value is reached, the infrared dryers turn off. Oak can be used immediately for its intended purpose.
The oak wood species is quite capricious when dried, in order to get the best result in the shortest possible time, it is better to prefer tubeless drying in combination with IR (that is, thermal, infrared, based on infrared radiation)
dryers.
