A bedside table is an important piece of furniture for any apartment. Nightstands are needed in the hallway, near the bed or in the bathroom. In any apartment or house there are a thousand little things that just beg to be hidden in the nightstand.
You can make it yourself or remake the old one, breathing a second life into it and refreshing it, this always has a great effect on our eyes, showing updates and a small rearrangement in the room, especially in spring, during the time of change and development.
Photos of DIY cabinets on the Internet cannot help but inspire.
Brief overview of the article
What are nightstands used for?
Nightstands have a number of functions in any apartment:
- shoe cabinet in the hallway;
- bedside table;
- a bedside table in the laundry room or bathroom for storing household chemicals;
- a nightstand in the kitchen, which is also an additional table for storing small items and serving dinners.
Bedside table
It is easy to store books that are in the process of reading right now in the nightstand. You can put a glass of water and your phone on the nightstand. Hide your favorite hand cream or eye drops. There are a lot of important little things when you wake up or go to bed, and they all need to be stored somewhere.
A bedside table is quite difficult to ignore and get by without it in everyday life, so it is a real indispensable assistant for any housewife. You can buy a bedside table or make it yourself.
Decoration
Ideas for decorating this piece of furniture are numerous. To do this, it is allowed to use various finishing materials, but the most popular methods are:
- the use of various self-adhesive films;
- wallpapering, which can be paper, non-woven or vinyl;
- painting with different types of paints, and this method is considered optimal for structures made of natural wood;
- gluing various rhinestones or other decorative elements that act as furniture decoration;
- covering with different types of fabric or leather, and it can be natural or artificial.
Before using any type of finishing material, it is necessary to use degreasing compounds, and it is also recommended to treat the product with antiseptics. Photos of the finished results are located below, and each residential property owner independently decides which decoration method is best for the cabinet. This takes into account the style in which the bedroom is designed.
Thus, the process of creating a bedside table is considered simple, so each person can independently carry out this procedure. The result will be furniture that has a beautiful appearance, as well as being highly reliable and resistant to various factors.
History of the bedside table
They say that the first bedside tables appeared in the eighteenth century. Their place of origin is France. The first copies had the most understandable function - they hid a chamber pot.
Other historical sources claim that the first bedside tables appeared in Italy, and only then migrated to France and gained enormous popularity and became known throughout the world.
The French participle for a piece of furniture can also be read in the name. Tumba in Russian echoes its French counterparts, meaning column or stall.
Nightstand design
In today's world, there may be a million design options, but only a few design variations.
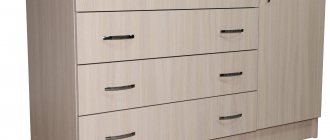
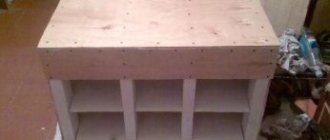
An ordinary bedside table with two or three shelves, often retractable.
Note!
- Do-it-yourself wardrobe: a review of ways and methods on how to build a stylish and original wardrobe (video and 145 photos)
Do-it-yourself furniture restoration - removing chips and scratches, restoring surfaces. Instructions with photos and video tips
DIY ottoman: how to make it at home. The best ideas, master classes. Photo + video review of beautiful ottomans
Hanging shelf or shelf with a drawer. Most often it comes in one stylistic solution with the bed and headboard. Often in such interior solutions, phone chargers and spotlights are built into the bedside tables or next to them.
A big plus for such variations is the effect of floating in the air, this allows you to create additional lightness in the space, especially if they are not large.
One of the noticeable disadvantages is that it cannot be painlessly dismantled; traces of the fastening will remain, so with this decision it should be understood that the choice of design is stationary in nature and requires complex actions for updating.
Of what?
So, having decided to assemble the cabinet on your own, it is worth understanding its manufacturing materials. The following are best suited for these purposes:
Tree.
It is distinguished by its naturalness, safety, beautiful texture, pleasant and unobtrusive aroma of fresh wood. When choosing a type of wood, you should take into account its appearance, technical characteristics and your financial capabilities .The most expensive are oak, beech and black walnut. Furniture made from this wood is considered elite. It has an exclusive appearance and durability.
But when working with oak, you may encounter difficulties. Since it is difficult to process at home.
Beginning craftsmen should pay attention to birch or pine. These lumber have low cost, attractive appearance and are easy to process. People also like to work with ash, larch and linden.
- Boards.
When choosing them, pay attention to the presence of defects: the bluish tint of the boards indicates their poor quality, the presence of holes also indicates that the wood has been damaged by pests. It is also worth choosing boards without cracks, knots and other obvious defects. As for the type of wood, oak lumber is considered the most expensive due to its aesthetics and strength. Elite lumber also includes boards made of ash, walnut and beech. If you want to make a budget version of the cabinet, you can choose coniferous boards. They are resistant to negative factors. Their peculiarity is that the needles are not attacked by pests, they emit a pleasant aroma and are easy to process.
Cardboard. Such furniture is at the peak of its popularity due to its low cost and exclusivity .
Despite the fragility of the consumable material, cardboard furniture is durable and reliable. The only thing is that cardboard does not tolerate high humidity. Therefore, it is not recommended to make cabinets for the bathroom or kitchen from it.- Plywood. When making furniture from plywood, a material with a thickness of at least 8 mm is selected .
Plywood is distinguished by: naturalness, environmental friendliness, flexibility in work, durability, resistance to mechanical loads and other negative factors. If necessary, plywood can be decorated with veneer or self-adhesive film. Also, a plywood cabinet can be stained and covered with paints and varnishes. This material copes well with high moisture. Therefore, it can be used to make furniture for the bathroom, dining room and kitchen.
Tip : the choice of material is a matter of taste. The bedside table can be assembled from any available materials.
Drawing question
We make a drawing. Taking inspiration from selections on renovation websites and beautiful pictures on the Internet, we determine the style of the future bedside table and its design features. Select the required number of shelves. We understand whether closed shelves are needed or open ones will suffice.
Tip: practical housewives will always opt for cabinets with locking doors. This is a good way to avoid visual noise in the apartment and hide all the necessary and important miscellaneous things behind the door.
Note!
- How to make a backlit mirror with your own hands: necessary materials, tools. Tips for choosing lamps and LED strips
- A simple and beautiful DIY bathroom shelf made of MDF, glass, plasterboard: straight and corner options. Photo instructions, tips, video master class
How to make a computer desk with your own hands from wood or chipboard. Photo/video master class + description of models
In such an interior it is easier to clean, there is less dust and more rest for the eyes, which are not distracted by the abundance of various types of household noise.
Assembly steps
After the initial inspection for defects, as well as equipping the workplace with light and tools, you must:
- mentally draw up an action plan guided by the principle “from big to small”;
- we start with the formation of the main body - the frame of the entire structure;
- Next you need to assemble the boxes;
- the next stage will be marking the installation of retractable mechanisms for drawers;
- after which you will need to correctly position all the fasteners;
- now - fronts for drawers and installation of handles;
- The final stage will be the top of the chest of drawers.
Assembling the chest of drawers
Pay attention to how placement on the floor is provided. Sometimes wheels can be used, which must be secured with separate screws
In other cases, legs are installed, or the chest of drawers stands on solid base strips.
Inspect the details of the chest of drawers.
It is with this element that the process should begin in order to immediately give the mechanism stability.
Assembling the chest of drawers
In order for the case to be strong and reliable, it is necessary to fix all the walls with tightening screws. The back of the chest of drawers is usually turned towards the wall of the room, and therefore is often made of thin materials; nails will be enough to fasten it.
First, assemble the chest of drawers.
If your specific design includes cross bars, they should also be installed at this stage. To ensure a flat surface and maximum compliance of the sides with each other, it is recommended to check the installation result with a level.
Before assembling the chest of drawers, it is advisable to read the instructions.
Assembling drawers
The correct assembly of the chest of drawers is determined by both the accuracy of the measurements and the accuracy of the installation of the entire structure. For greater convenience, you should immediately divide all the components into separate piles so as not to get confused.
Assembling the chest of drawers will not take much time.
First, we take short self-tapping screws (25-35mm) and connect the body with them. Then use slightly longer screws (40-50mm) to attach the bottom. It is advisable to complete the installation of the boxes by fastening the facades using self-tapping screws.
Standard assembly of a chest of drawers is a fairly simple matter.
But it is better to carry out this procedure after installing the roller guides along which the box will move. This way you will protect yourself from inaccuracies and errors.
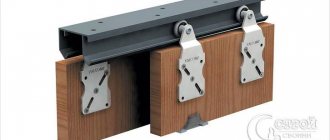
Installation of guides
The key to quiet and smooth movement of all elements of the chest of drawers is the correct installation of the guide elements (ball or roller). Accurate measurements using a tape measure are necessary so that the drawers can be pulled out without touching anything or creating additional noise.
Secure drawers carefully.
Initially, you need to attach the runners to the inside of the chest of drawers, then the guides to the outside of the drawers. For successful fixation, you will need short-length self-tapping screws (no more than 30mm).
If you have drawers, the first thing you need to do is screw the guides to the inner surface of the chest of drawers (cabinet).
If the work done was successful and all the drawers are positioned correctly, all that remains is to attach the fronts and handles to them. You can use nails, screws, or even strong double-sided tape.
Assembling the bedside table and choosing fittings
Please note that detailed instructions on how to make a cabinet may differ depending on your initial preferences. The diagrams and drawings for making the cabinet will depend on this.
Treatment
In order to be able to use old boxes as cabinets, it is necessary to improve the damaged wood of each product.
Use a flexible sanding block to create a smooth, even surface on each side.
Then, after rubbing, the surface should be cleaned of excess sawdust and dust. Only after this, cover the wood with stain if you further plan to use varnish as decoration. Or cover it with a special paint base for long-term storage of wood.
Then you can paint it the desired color.
Which material to choose?
Traditionally, most bedside tables are made from wood and other wood-containing materials. So what can you make a cabinet out of with your own hands?
Top popular materials include:
- Furniture panels;
- MDF;
- laminated chipboard;
- Plywood (less often).
More environmentally friendly and safer are MDF panels and, of course, natural wood, which is quite rare in typical apartments.
A little about design
So, you need to choose a cabinet that is not only suitable in design and convenient to use, but also one that fits seamlessly into the bedroom design and looks in its place. This aspect is one of the important ones both when choosing a product in a store and when creating it with your own hands.
Plywood correspondence stand
Simple, uncomplicated bedside tables, made of wood or a material that imitates it, can suit almost any interior, especially classic ones. In general, these are the types of cabinets that are most often used, but they are matched to the color of the rest of the furniture in the bedroom. If you make a cabinet from solid wood, then the bed under it should be made from the same material.
But even the simplest cabinet can be decorated very beautifully using various paint materials and techniques, including the technique of aging furniture. But here again, it is important to make the bedside table so that it fits into the interior and is in harmony with the rest of the furniture. For rooms in oriental or eco-style, rattan bedside tables are suitable. They will look natural and simple, but at the same time they will fit perfectly into such styles.
Hanging cabinet
But in a high-tech style or similar, you can even install a metal or glass cabinet. Here it is important to make the product modern and somewhat simple, without pretentiousness or excessive decoration.
On a note! For a novice craftsman, it is recommended to choose the simplest version of the cabinet. You should not mess with carved and intricate designs if you have never done something similar with your own hands before.
Unusual bedside tables that will decorate the interior
Unusual ideas
Simple bedside tables may be too simple and banal a solution for extravagant and stylish individuals. There are a million DIY bedside table ideas!
Therefore, here is a selection of ideas for non-standard variations:
- An old suitcase – a restored suitcase with attached legs – is a stylish retro idea. You can hide things inside, and put your essentials on top and set an alarm clock.
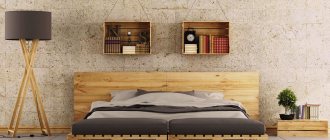
- Fruit boxes are a light loft story that is easy to transform, and you don’t mind saying goodbye to it in a couple of years.
- Cutting down a tree;
- Small former stepladder.
Folding desk
Making a carpentry workbench with your own hands
If there is absolutely not enough space in the children's room, a folding wall-mounted table will be the ideal solution.
The folding wall-mounted table has three positions - when closed, it is a slate board where you can draw with chalk; when open, it is either a drawing table or a writing wall-mounted desk.
This design is a large rectangle 86 x 61 cm, which rotates on a 28 mm dowel rod, attached along one edge to a rod in a frame that is attached to the wall. A wooden side pin secures the table in the closed position. The legs fold on piano hinges and the outer leg is a large rectangle underneath the table. Two other rectangles on the sides allow you to remove the legs. Special recesses in the frame allow you to install the tabletop in different positions. For the table surface here, MDO plywood (a type of plywood for external use) was used. MDO provides a flat surface on both the table and chalkboard surface. The table is supported in two positions by two folding legs. There are four holes made in the lower part into which pegs are inserted to block the legs. There is also a magnetic latch that holds the legs when the table is closed. There is also a book stand that can be used when the folding table is lowered. Holes are drilled into the top edge of the panel to form the front of the pencil rack. At the edge of the frame there is a bracket for attaching a table clamp lamp.
Photo source: www.instructables.com/id/Wall-Desk/
Tools
When starting the journey of creating a piece of furniture, it is worth checking that you have the following tools at home:
- Jigsaw;
- Sanding machine or sandpaper of different densities;
- Tassels;
- Varnishes and paint of desired colors;
- Screwdriver;
- Drill;
- Accessories.
How to make a cabinet with your own hands? Get inspired and start creating!
Finishing
The easiest way to finish is to cover a finished and sanded bedside table with adhesive film, color matched to the overall interior design, preferably coated with acrylic-based varnish.
Under varnish, even when exposed to direct sunlight, the appearance will last for about ten years.
Next, we will consider the types and designs of cabinets.
