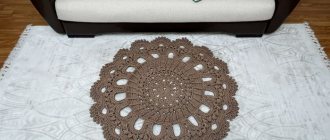
Embroidery using carpet technique has its own characteristics, since it is not at all similar to other types of embroidery. The finished products are distinguished by their softness and similarity to a real carpet. Used to create pillows, blankets, paintings, bedspreads, toys. Today we will look at carpet needle embroidery and describe the methods and technology for creating the work.
Features of carpet embroidery
In needlework, embroidery is done on a mesh base (stramin) . The process itself involves attaching short threads or creating thread loops .
In the first case, a special hook is used, with which a piece of thread is pulled through and secured to the front side. As a result, the pattern is not smooth, but fleecy , as is the case on a traditional carpet.
When embroidering with loops , a special needle is used to form them. The work will require more diligence, because the first time you don’t always get perfect loops.
This kind of needlework is simple and every needlewoman can master it in a minimum amount of time. Despite its ease, this technique is a painstaking task that requires constant attention.
Needles
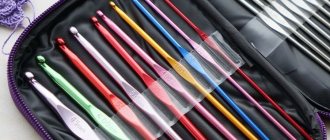
Hooks
Master class video
Before you start creating original paintings accompanied by complex patterns, it is recommended to get your hands on embroidering simple patterns.
Experienced craftsmen pay attention to the fact that even by embroidering simple geometric shapes and abstract patterns, they manage to obtain an original product, using which they can decorate the interior of their home space.
Carpet embroidery is an excellent opportunity to perfectly organize your free time and get a unique decorative product. If you wish, you can download a training video, watching which you will be able to study the secrets of the craft in more detail and visualize the technique of making stitches.
By watching videos of master classes, novice embroiderers are inspired, charged with creative positivity, and get to work with special zeal.
Types of carpet equipment
There are two carpet embroidery techniques. They have their own characteristics and allow you to get work that is completely different in appearance.
- Nodular or tugging . The work is done not with a needle, but with a crochet hook. For this you need to use a special tool, and not the usual knitting tool. Create a carpet from the edges to the center, separately tying each piece of thread to the base. This process is not difficult, but due to its labor intensity it takes a lot of time.
- Looped . Another name is non-woven or printed tapestry. The work is carried out with a special needle for carpet equipment. It will not be possible to replace it with another tool. The entire process is carried out on the wrong side of the work. If high density is required, the loops are made as close to each other as possible. Using this technique, you can perform work with full coverage of the fabric and partial, when only the contours of the image or some of its elements are made voluminous. To create a printed tapestry, not a mesh, but a dense fabric is used as a base.
Nodular (pulling)
Looped
Embroidery kits are produced for both techniques. You can also find patterns for carpet-style needlework. In this case, all materials will need to be purchased separately.
Which carpet technique do you like best?
LoopedKnot
Hook for carpet weaving
Hook with movable lock. It has a special shape that simplifies the process of tying a knot from a thread.
The carpet embroidery technique came to us from the East, where this decorative and applied skill was mastered even before our era. Today, many needlewomen have mastered it at home and embroider stunningly beautiful rugs, panels, sofa cushions, and also decorate bags, accessories and household items.
Tools and materials
To create a craft you need to have a special tool. The main ones are a hook for one technique and a needle for another.
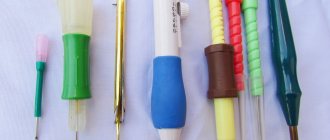
- Punching needle . This special tool allows you to make loops on fabric. Outwardly, it resembles a significantly enlarged syringe needle. Its tip is also cut at an angle; inside it is hollow, since a thread is pulled through it. The front side of the tool is considered to be the one on which there is a beveled cut, and the back side is the one on which the needle is completely straight. Just starting to master non-woven tapestry, you should choose an automatic tool. It will allow you to get perfectly even loops, since the length of the thread is adjusted in advance, so you won’t have to monitor it during the embroidery process. The device is usually equipped with several replaceable needles so that the needlewoman can use yarn of different thicknesses. While working, the needle should be held with the side or front side facing the embroidery. It does not matter in which direction the work will be carried out; the craftswoman can do it in the way that is most convenient for her.
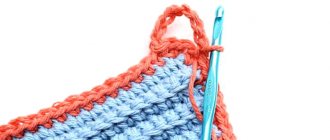
- Hook . It has a special bend that allows it to be easily passed through the base mesh; as well as a latch that prevents the picked up thread from slipping out. Kits usually include a hook; if it is not, you will need to purchase the tool at a craft store.
With the loop technique, you also need to have a frame or hoop to work. Without this, you won’t be able to tighten the base sufficiently, and you won’t be able to make the loops evenly and beautifully. It is optimal if the devices are the size of the entire picture . This allows you to avoid creasing the threads in the finished areas and ensures maximum attractiveness and neatness of the finished item in the future.
Threads
To create products using carpet technology, you need to use special threads that have sufficient thickness .
With the knot method, the choice is made in favor of acrylic or wool yarn. Thin threads will not look good in such work. They will not allow you to create a fluffy surface; they will droop downwards, making the appearance of the thing unattractive.
Yarn is also used for the loop technique , but it can be thinner. In this case, in addition to acrylic and wool threads, cotton and less often viscose threads are used.
Woolen
Acrylic
Cotton
Editorial Voice
Matryona
Fan of embroidery and sewing
Ask a Question
Regardless of the technique, the yarn should be even . Boucled threads or those with any decorations (sequins or beads) are not suitable. The exception is thread with lurex. It does not disturb its smooth structure and gives the finished product a special attractive shine, enhancing its decorative qualities.
The basis
For crochet embroidery, only a special mesh is used, which is called stramin . When working with a needle, take a thick cloth. Preference should be given to natural fabrics - cotton and linen. They have sufficient strength and hold the thread tightly. The loops will not slip out of them, so you don’t have to worry about the safety of the item. The needle passes through them easily, which is important with a dense pattern, when the fabric can withstand a lot of punctures.
Work process
This type of needlework, like carpet embroidery, is very suitable for beginners, because you can master it in a short time. Initially, you need to choose a drawing for work. You can draw the diagram yourself or choose a picture you like. It is important that there are no small parts on it, because they complicate the work process and are difficult to see on the finished product.
Draw a design on the wrong side of the fabric with a pencil, keeping in mind that the front side will have a mirror image.
Place the fabric in the hoop and stretch it well so that there is no sagging. It is advisable to choose a hoop size such that the entire picture fits.
Thread the thread of the desired color into the needle. When working, the fabric breaks through, the work is held with the wrong side up. You need to hold the needle strictly perpendicular to the surface, inserting the tool until it stops. The length of the pile is adjusted by a limiter on the handle and depends on the wishes of the master.
In carpet embroidery with a needle (information for beginners), it does not matter which side the work starts from. Insert the thread into the needle, leaving an end of at least 3 cm. It is important that first the outline of the selected fragment is made, which is best done in a contrasting color (black), and then the space inside is filled with the main color. You can make stitches along the contour, filling the fragment from the periphery to the center, or go through straight rows. The choice depends on the performer.
Then, with a gentle upward movement, the carpet embroidery needle is pulled out and rearranged 2-3 mm from the original puncture. You don't need to raise it too high, otherwise the loops will unravel or be uneven. Before you start, you need to practice on a small area of fabric. The front row rarely looks perfect, but that's no reason to panic. The result will be visible when a fragment of the drawing is completed.
Periodically you need to turn the work over to the front side for control. The finished loops are bent in the direction opposite to the needle so that they do not intertwine, which will make the work sloppy.
To change the colors of the yarn, just cut the thread of the used color, leaving a small tail, thread a new color into the needle and continue working.
The process is fun and quite fast, the video demonstrates this.
How to embroider - step by step instructions
Crochet embroidery
Crochet embroidery sequence:
- A piece of thread is folded in half .
- Pulling the folded thread with a hook through 1 thread of the mesh (the tool passes from one hole to the next one).
- Threading the ends of the thread through a loop that is pulled through the warp. This knot must be tightened very tightly so that the thread does not slip out.
- Filling the area of the entire pattern in a similar way.
- Trimming . To make the front side even, the finished embroidery is cut with sharp scissors so that all the threads are the same height.
Editorial Voice
Matryona
Fan of embroidery and sewing
Ask a Question
With the knot method, to simplify the work on the grid, you can use a marker or pencil to highlight areas of the same color so as not to constantly check the diagram.
Punch needle embroidery
The loop technique, after transferring the pattern onto the fabric, is performed in the following order:
- Threading a needle.
- Punching fabric . The needle is inserted strictly vertically. If it is tilted, the loops will get tangled and the item will be damaged. Sudden movements and great efforts should not be made when piercing. Gently press on the tool until its end completely comes out on the other side of the base.
- Subsequent loops . They are placed at a distance of 1 mm from existing ones, moving in rows. Sometimes after 7-10 loops have been made, the thread begins to tug and tighten them. In this case, it must be cut and embroidery continued with a new thread, separated from the existing loops.
To understand whether you like the carpet embroidery technique or not, you can try it on a simple job. It’s easy to find diagrams of various levels of complexity, but it’s even easier to purchase a ready-made set that contains everything you need.
End of work
In carpet needle embroidery, it is important for beginning craftsmen to finish the work correctly so that the product retains its shape for a long time.
Remove the finished embroidery from the hoop. Carefully inspect the front side. If some loops turn out to be longer than the neighboring ones, you can carefully tuck them in with tweezers, picking them up from the reverse side. If the loops turn out to be shorter than others, then using a needle or hook you can slightly pull them up.
From the wrong side, trim off the excess threads, leaving 2 cm tails, which need to be secured by passing them under adjacent stitches.
Coat the wrong side of the work with PVA glue diluted in a 1:1 ratio. This should be done with a soft brush and so that the glue does not get on the front side. This technique will secure the yarn and prevent the loops from unraveling. If you do not dilute the glue, then after drying the work will be hard, and when bent the product will crunch.
Cover the work coated with glue with film and leave overnight. Then remove the cellophane, lay the product on a flat surface and leave until completely dry. This smoothes the surface well.
Iron the embroidery from the wrong side and glue it with non-woven fabric. You can go over the adhesive solution again. After such manipulations during operation of the product, nothing is scary anymore. All threads are securely fixed.
All that remains is to hem the lining, if it is a rug, if it is a pillowcase - the second wall, if it is a picture - insert it into the frame.
