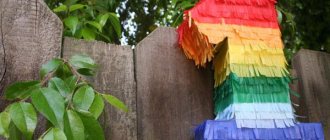
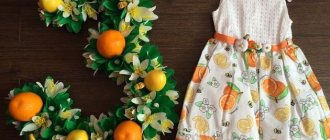
Thanks to bright and unusual accessories, a child's birthday or photo shoot turns into a real celebration. One of the popular decoration options is voluminous numbers and letters made from napkins, which are used not only as decoration, but also for entertaining children.
Surprise your guests and personalize your holiday decor!
We create from paper
Perhaps the easiest way to create from paper, and besides, it is the most popular material for such crafts. You can buy colored paper or cardboard right away, or if you want an unusual design, you can buy white. It’s better to color a ready-made figure, but if you’re not sure what you can do, you can do this before cutting it out.
On the back side of the sheet, draw the outline of the future number with a simple pencil, then repeat the outline again, but at a distance of 2-5 cm from the first one. Take a second sheet of paper and draw exactly the same thing on it. Cut both sheets along the outer contour. Make perpendicular cuts to the full depth of the second contour around the perimeter, but not too often.
Next, we bend the resulting parts so that the first contour is the fold line. And with tape (paper or double-sided so that the glue lays well on top) we secure them together on the inside to form a continuous line. From the outside it should look as if there are no cuts at all. We do the same with the second sheet.
Next, coat one convex line on the outside with glue and insert it inside another sheet. We tightly apply the glued strip seam to seam so that it turns out evenly. Now we leave it to dry and our paper figure is ready.
Once the craft is dry, you can decorate it with glitter, stickers and artificial flowers.
Numbers from napkins
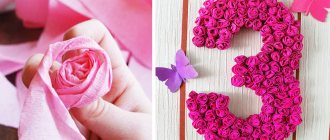
To create a three-dimensional number from napkins, you need to make small flowers out of them, which you will then use to cover the future frame of the number. How to create artificial flowers from napkins and fabric is described below.
You need to cut out the frame of the number from cardboard and fasten its parts with tape; here you can cut out all the parts separately, unlike the method of creating numbers from paper entirely, since the frame will not be visible, it must be closed. After making the frame, it needs to be completely covered with flowers using PVA glue or double-sided tape.
You can also use a foam base for these purposes; in this case, the flowers at the base will need to be wrapped with wire so that the other end is stuck into the foam, or the wire can be used instead of the core.
Types of frame
First of all, you should make a frame onto which the paper elements will be attached in the future. It is advisable to choose thick cardboard that will not tear or deform during the decorating process. There are several options for the basis for numbers and letters from napkins. They can be voluminous, flat or frameless.
One of the simple and uncomplicated ways to decorate your home is the holiday trend of recent years - numbers made from napkins.
Flat figure
Flat figures look less impressive compared to voluminous ones. However, their production will require less time and effort. To create such a frame with your own hands, you will need to follow the recommendations.
This decorative element has gained popularity; it is used as a prop at children's photo shoots and at various holidays.
- If the size of the figure does not exceed an A4 sheet, you can find a suitable diagram on the Internet and print it.
- To create large figures, you need to draw a diagram on whatman paper by hand or print it in parts.
- Cut out all components.
- If there are several parts, connect them end to end with tape.
- Then the resulting diagram must be attached to the prepared cardboard and carefully traced around the outline.
- After this, you need to cut out a figure from cardboard.
- If you plan to make several numbers from napkins with your own hands, you will need to repeat the entire process in the same way.
The most important date on which holiday numbers are usually made, of course, is the birthday, especially of children.
Volumetric
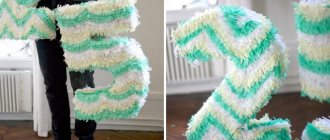
Volumetric letters and numbers made from napkins look brighter and more impressive. They will take a little longer to create. Following the step-by-step instructions presented above, the first part is made. After this, you need to perform a few more steps.
Such numbers are used on New Year’s Day, February 23 and March 8, on wedding anniversaries and organizational anniversaries, and at various thematic events.
- Print and cut out a similar pattern that will serve as the back of the frame.
- The next step involves cutting out the tape. It will serve as the end part of a volumetric figure. Its width is equal to the width of the future digit.
- For numbers that have a closed internal space (0, 4, 6, 8, 9), it is necessary to cut out additional side parts.
- Elements with rounded edges (2, 3, 5, 6, 8, 9, 0) should be done very carefully. Making straight edges (1, 4, 7) is not difficult.
- Upon completion of the preparatory process, all components should be secured with tape. The front and back are placed on the sides, the side tape is in the middle.
You can save a lot by making these crafts yourself.
Important information! If the cardboard is wide enough, it is recommended to cut one long side strip. Making folds at the corners is easier and faster than cutting out each element separately.
You can simplify the process by using foam rubber or polystyrene foam. To do this, you will need to prepare a stencil, trace it on the base material and cut it out using a stationery knife.
Looking at such masterpieces made from napkins, it seems that only an experienced craftsman can create this.
Below is the sequence of actions using the example of a volumetric unit for celebrating 1 year:
- Prepare a suitable hard cardboard box.
- Using a stencil, draw a diagram with the following dimensions: width 35 cm, height 70 cm, depth 12 cm. Dimensions may be different, depending on the desired volume of the figure.
- Use a knife to cut out two main parts and secure them with tape. A painter is best.
- Cover the cavities formed on the sides with tape made of cardboard of a lower density.
- After this, the blank for the number 1 for a year from napkins must be covered with white paper so that the material used does not show through on the finished product.
- The final stage is decorating the finished product. It involves attaching all the flowers prepared from napkins to the frame.
In fact, with due diligence, even a beginner can cope with such numbers.
Frameless figures
Some decorative elements do not require the manufacture of a rigid frame. These include figures made using the quilling technique and textile crafts with soft filling that creates volume. To make them, you will need to prepare a model on which the jewelry parts will be attached in the future.
Don’t think that numbers made from scrap materials will look ugly.
Felt numbers
The technology for creating numbers from felt is somewhat similar. The first step is to cut out the shape itself. And the easiest way would be to simply sew two parts and stuff them with padding polyester.
In addition, you can use a stapler to attach pieces of felt to cardboard and repeat the first method. In this case, the cardboard will become a frame for the soft fabric.
Numbers for a girl's birthday
If it's a girl's birthday:
- A flower number for a girl can be made original with the help of additional details (bows, crown).
- The baby will be delighted with the figures decorated with small soft toys. The themed holiday decoration looks interesting: a number, a cake and accessories decorated with characters from the birthday girl’s favorite cartoon.
How to create flowers for a volumetric composition
First you need to make the flowers themselves. To do this, you can use any materials you like: fabric, paper, napkins. From these materials we cut out petals of different sizes. And gradually, from the smallest children, we begin to fasten them together; this can be done with glue or thread. We make a core from beads and wire.
There is another way to make flowers. You need to cut out squares of the same size and stack them, then fasten the middle with a stapler. Future petals need to be given a rounded shape and the petals raised upward; for this, sometimes it is necessary to fasten them with a thread just above the fastening with a stapler.
This method is probably simpler, the flowers turn out a little less elegant and lose a little of their individuality, but this way you will create the required quantity to decorate the number much faster and with less effort.
Types of paper napkins and materials for production
Paper napkins are divided into the following types:
- white;
- plain colored;
- white or colored with ornaments;
- single-layer;
- two-layer;
- three-layer;
- with perforation;
- hygienic;
- cosmetic;
- canteens;
- serving.
Paper napkins are made from cellulose.
To make flowers from paper napkins you will need the following materials and tools:
- paper napkins;
- threads or paper tapes;
- needle;
- threads;
- scissors;
- pencil without edges;
- stapler or glue;
- thick colored paper;
- thin hair clip;
- multi-colored paints.
What else can be made from flowers?
There is also a method for creating completely three-dimensional flowers. To do this, take a cloth or napkins and fold them like an accordion many times, and several of these folded napkins need to be tied with thread in the middle so that the future petals “fluff”.
Using the same thread, such balls of petals can simply be hung throughout the festive space. But there is a more original idea. Carefully twist the metal frame of the number out of wire in several layers, and also make additional wire fastenings here and there from the wire, there should be quite a lot of them, since the flowers will be attached to them.
You can string beads here and there onto the wire frame, as it will be visible, and to decorate it, you can also wrap some parts with coarse thread or satin ribbon, depending on the style of execution.
And we insert flowers between the wire bases; they can be secured with threads or wire.
If you made flowers from paper rather than napkins, you can also use them. They just need to be fastened so that the rough side is not visible. For example, you can staple several colors together and insert them that way.
General rules for making flowers
You can make flowers with your own hands from almost any napkins, paying attention to the following recommendations:
- single-layer thin material is suitable for airy flowers without clear straight lines;
- In order for the craft to retain its shape for a long time, it is better to use high-density material;
To make flowers, it is better to use plain napkins.
- to add scent to decorative flowers, you can use scented napkins to make them;
- Accuracy is important in the work, since the material of the napkins is not strong enough.
Corrugated paper numbers
Corrugated paper looks much more interesting and is a little easier to use. You can also make flowers from it; to do this, you simply cut out long strips of paper, make small folds and roll it into the shape of small roses.
In addition, you can cut the paper into small squares and glue one of the corners to the cardboard base. They need to be glued very often to make the composition look three-dimensional. Due to the fact that the material is quite soft, such a figure will turn out airy and even fluffy.
Number in winter style
For work we will prepare:
- cardboard;
- corrugated paper in several shades;
- stationery knife;
- pencil;
- scissors;
- scotch;
- plain printing paper;
- glue in a gun;
- rhinestone ribbon;
- watercolor paints and brush;
- decorative snowflakes.
Draw a number of the required size on the cardboard and cut it out with a stationery knife. We make two identical blanks.
We cut out strips of cardboard of the required width to make the figure three-dimensional.
Carefully glue them with tape to one of the sides. We place a second blank in the form of a number on top and glue it with tape.
We cut strips of corrugated paper of different shades.
Cut them into small pieces, as shown in the photo.
We cut white printing paper into strips and paste over the number.
Glue pieces of white corrugated paper along the edges.
Fill the middle tightly with two colors.
To give a winter style to the figure, we apply a little white and blue watercolor paint.
Glue decorative snowflakes on top of the corrugated paper.
How to make a holiday number using balloons
Balloons are an integral attribute of any holiday, but you can not just scatter them and hang them everywhere, you can also build something interesting out of them.
First of all, we inflate balloons of not very large diameter and tie them 3-4 at the base with threads. When there are a sufficient number of such groups, you need to take a thick wire and fold it into the shape of a number. We string threads from the balls onto it one by one, so that there are no gaps between them. It is important to secure the first and last balls well so that they do not start to fall off. This can also be done using wire.
As for colors, there are many options. Some people prefer to use one or two colors, while others, on the contrary, use all the colors of the rainbow.
But basically, these theme parties are carried out in a color scheme containing several colors:
- marine theme - blue, light blue, white;
- birthday of a little princess - pink, purple, yellow;
- honey mood - yellow, orange, brown;
- spring freshness – pink, green, etc.
There are an incredible variety of such combinations; it may depend on the theme of the holiday, the time of year, its favorite characters, and often on the gender of the child.
Ideas
Deciding what a gift will look like is difficult, since the choice of ideas is very large. There are many photos on the Internet with images and master classes on making birthday numbers.
When choosing from the available options, or coming up with something new, you need to take into account your own capabilities (skills, availability of materials, tools) and the time spent creating a masterpiece.
Numbers in order
How to make one? So, in total we have examined four types of frames or bases: made of cardboard, polystyrene foam, wire and felt.
Let's figure it out in order: all we need is to just cut out the shape of the number. It doesn't matter what shape you want: curls, sticks or ponytails. It is only important to think about how to cut correctly so that there are no difficulties when fastening. Well, with polystyrene foam everything is clear, you just cut the desired shape out of it with a knife. On cardboard, paper and felt, you also simply cut out according to the design. Difficulties may arise with the wire.
Of course, you can simply bend it, for example, in the tail of a unit, but it is better if you twist the wire at the bend. This way it will definitely hold tight and will not change its shape during the decoration process. Some numbers, such as adding a four, may require the use of two pieces of wire. And at the same time, it is important to pay attention to the fact that they wrap each other at the bend. Because if you bend only one, the second one will simply slip out.
The most difficult one to perform in any material is, perhaps, the figure eight. We cut out two eights from felt and sew the inner circles first, and then do the same as for the other numbers.
We also first cut out two eights from cardboard, then cut out two small strips and also first secure the inner circles. It is important to ensure that the inner and outer edges are the same in height.
And, again, how to make a figure eight from balls and wire. Everything is very simple, we put the balls on a regular 0, secure it, then move the balls slightly apart just above the middle (for this you need to leave a small gap in advance, about 8 cm) and twist the wire several times in this place. And then again we distribute the balls evenly.
One for a year - for beginners
A very simple master class for those who have never done needlework.
- Cut out the base of the number from an old cardboard box (dimensions are given below)
- Take napkins or wrapping paper and cut it into squares with a side of 5-10 cm as desired
- Take the center of the square and glue it to the base with PVA glue.
- Let it dry for 2-3 hours. Ready!
Also below in the photo are several sizes - ready-made diagrams and drawings for the number one . You can take more or less, at your discretion.
Not only practical, but also modern
In fact, three-dimensional wire crafts, in particular numbers, are becoming increasingly popular. You can use it to create Christmas decorations in the shape of stars, balls, etc., decorations for the garden or for flowers in pots, and they also make very beautiful wreaths: New Year’s wreaths from a Christmas tree, autumn and even summer wreaths from fresh flowers.
This is because it is the most flexible material and can be matched to any design. Glitter and sparkles attached with glue fit well on the wire. For wreaths, a special tape is used, which allows you to leave the base completely invisible. Well, matte wire goes well with thick threads of natural shades, with the help of which shape and accents are so often added. And the thread can be decorated with anything, paint and additional decorations are used, the same buttons, flowers, pine cones and beads.
For a boy's birthday
If it's a boy's birthday:
- Boys will be delighted by figures with cartoon or movie characters.
- An original surprise for an active child will be a papier-mâché craft filled with sweets.
- For boys in their first years of life, you can make a floral number, but it should be made from materials in masculine colors or match the colors of the baby’s suit.
- If a boy is interested in cars, then the craft is decorated with small toys.
There are many ideas for making birthday numbers. The main thing is that the birthday person likes the craft, created with his own hands, and brings him joy. Older children can make their own holiday decorations using available materials and simple techniques for working with them.
Article design: Svetlana Ovsyanikova
You can create together with your child
Such a holiday is most often made for a child as a surprise, but it will be just as interesting to create decorations with him. Creativity develops children's imagination, their mental agility and promotes creativity. After all, they will create something beautiful with their own hands.
But when working with a child, it is important to understand that he is small and can do something wrong. And, of course, this will upset you, but under no circumstances should you be angry with him for this, because he is just learning. Besides, this is his holiday, and it’s not so important what the number looks like or what they think about it. It is much more important that your baby will realize that he helped create such a beautiful thing, and now it stands in the center of the room and everyone admires it.
Do it yourself or buy it?
Choose the suggested decoration or create it yourself? It depends on financial capabilities, free time, desire and imagination.
People who specialize in making birthday numbers usually have catalogs of their work. Sometimes you can order something new by discussing your idea with the master. Finished products are most often made from inflatable balloons, toys and sweets. In this case, not only the materials are paid, but also the work of the craftsman.
If you want to make numbers for a children's party yourself, you just need to purchase the necessary materials or select from what you have at home.
