Hi all! The question of faith is individual. It cannot be forced on anyone. But prohibiting faith is also wrong. One of the attributes of faith are divine icons. Since many people pray at home, a do-it-yourself corner shelf for icons will be an excellent solution.
Your own icon cabinet will fully meet your requirements, as well as satisfy requests for appearance, capacity and other parameters.
Yes, it will not be possible to assemble an iconostasis into a house or apartment. But making a shelf is quite possible. I propose to talk about how to make a shrine, and what is required for this.
You can take ideas from the photo. Or collect something of your own, unique, and also original. And then your idea will be copied and repeated in practice.
Design options
There are various ways to make stands for images. The main condition is the absence of objects not related to religion. The frames should not overlap each other vertically and horizontally and be placed one on top of the other. It is recommended to provide a place for a candle or lamp. If you plan to purchase new images, then the shelf for icons should have a reserve place for their installation. It is possible to provide the possibility of attaching an additional level.
The following design options exist:
- single-tier;
- multi-tiered;
- corner shelves for icons.
The choice is made based on the layout, interior and size of the room, the number of images and their configuration.
Making a shelf
If you do not have the opportunity to purchase a stand for images, or all the models that you have come across did not appeal to you or are not suitable (for example, a small number of tiers, limited space, etc.), then do-it-yourself homemade iconostasis, photos of which are presented in the article , you can make it yourself. For a standard three-tier iconostasis you will need wooden boards, a drill and screws. In order to assemble it, you need to create drawings of a home iconostasis. Using them, you can easily calculate the dimensions of the wooden panels, which will depend on the number of icons located on the iconostasis.
Materials and components
Traditionally, religious items are made from wood and materials produced from it. But there are no strict prohibitions regarding the use of metal or plastic. Craftsmen recommend wood because of its ease of processing and presentable appearance.
To work you will need the following tools:
- perforator;
- wood hacksaw;
- roulette;
- hammer;
- screwdriver.
To protect your hands, vision and breathing organs, it is advisable to purchase fabric gloves, assembly glasses and a gauze bandage.
Read on our website
DIY flower shelves Indoor flowers are a spectacular addition to the interior. Compactly and aesthetically place flowerpots and pots with…
To make a shelf for icons with your own hands you will need the following materials:
- boards made of solid oak, pine, cherry or walnut;
- plywood, OSB or chipboard;
- slats 20-40 mm wide;
- sandpaper;
- wood varnish;
- wood glue;
- steel corners and hinges;
- set of dowels and screws;
- plugs for hardware heads.
Depending on the choice of finishing method, you may need paint, stain or colored film.
History of the red corner
Every person has heard the phrase “red corner” or “God’s place”. However, not everyone knows why this place received such a name and how correctly it was located. You can often hear the answer that this is the right corner from the door. But it is not always the case.
Ethnographers claim that in past times, “God’s place” was located diagonally from the stove. And this was done for a reason. The word red was associated with spring, summer and warmth, so they tried to place icons more on the south or east side.
The north and west for the ancient Slavs were comparable to death, evil spirits and severe winter. A little later, these stereotypes diverged, and people began to simply create cozy corners with numerous icons.
Materials for the article were taken from the site pravoslavie.guru
Decoration methods
Self-made shelves for icons need finishing and decoration. This will give them a fresh and solemn look that matches the purpose of the products.
There are the following decorative options for stands for images:
- waxing;
- stain impregnation;
- varnish coating;
- adding overhead openwork details;
- artistic carving;
- engraving or burning;
- wood painting;
- applying stencils and airbrushing;
- glitter, beads and beads.
It is allowed to combine several finishing methods in one product. The main thing is that it does not look too colorful, overshadowing the image.
Wood carving
Each shelf should have a crucifix. It is made in a volumetric version by carving solid wood. In most cases, such work is entrusted to craftsmen and it is expensive. You can make an Orthodox cross yourself, using a set of well-sharpened cutters. In addition to the crucifix, relief images of domes, images of saints and martyrs, fish, birds, animals and fairy-tale characters are applied to the walls and sides. It is allowed to cut out patterns and bas-reliefs.
Execution of volumetric fragments is carried out in the following sequence:
- Selecting or making an image, transferring its outlines and small details to the workpiece.
- Sawing the part along the contour, grinding off sharp edges, removing sawdust.
- Making convex parts with cutters. This should be done in stages, with thin petals.
- Process the product with fine sandpaper. If necessary, coat it with a primer or other protective liquid.
The crucifix and overlays are glued to the back wall. To do this accurately and without distortions, you should make outlines with a pencil.
Read on our website
DIY wall shelves Making a wall shelf with your own hands is an interesting and creative activity. Everyone can be attracted to it...
Simulation process
Natural wood and good quality metal are not always at hand. Often craftsmen have to improvise to give image shelves an attractive look.
The following methods are used for this:
- Covering wood boards or plywood with adhesive film to match the color of valuable wood species, natural stone or metal. Individual pieces of film can be used to depict nature and church buildings.
- Artificial aging of wood and metal. The wood is given the appearance of an antique product by treating it with stain and steel brush. Copper and brass are soaked in salt water to create a patina.
- Adding gilding to the paint, which makes the carved domes look authentic.
Straight single-tier shelving
We have prepared the drawing, let's get down to business.
Here is what is useful to create this version of the product for icons:
- transfer the size of the sketch exactly to MDF or chipboard and then simply cut out the templates. It’s not worth using plywood as templates here, because after you cut it out, it’s worth carrying out special processing for it;
- shape each part of the shelf using a jigsaw;
- Then simply carefully process the edges using a cutter and sand them using abrasive paper;
- assemble the product mono only when all the parts have been processed and all the irregularities have been corrected;
- cover the product, when it is ready, with special varnish coatings.
Manufacturing of parts
You can make shelves for images with balusters under the crossbars. To do this, you need to buy or rent a portable lathe. It is advisable to use a pattern so that the side is made of identical symmetrical fragments.
Do-it-yourself home iconostasis is made in the following sequence:
- applying markings to workpieces;
- cutting out horizontal shelves, crossbars and vertical walls;
- leveling and sanding the edges of boards;
- production of balusters;
- drilling holes for fastening parts;
- connecting fragments into a single structure;
- finishing and decoration.
Finally, the finished product is tried on the wall. Screws are screwed into it, and the shelf is hung on them.
Single tier straight shelving
Shelves of this type are chosen to accommodate a large number of images or if all the corners in the room are occupied. The shelves are hung on the east wall of the room. Even for such a relatively simple rack to manufacture, drawings are necessary. Preliminary planning will allow you to fit all the details with high accuracy and calculate the required amount of building materials.
For a single-tier structure, it is necessary to take boards with a thickness of at least 15 mm. The height of the back wall should be more than 30 cm so that the images do not protrude above it. The iconostasis should be placed at eye level, provided that there are no other bright or decorative interior items nearby. To install a candle or lamp, a non-flammable stand should be provided. In order not to clutter the product with the side, you can run a low threshold along the bottom crossbar to fix the frames.
Read on our website
DIY book shelf Different types of shelves are used to store books and periodicals. The products differ in design,…
Corner shelves
In most cases, a corner shelf for icons is made in 2 or 3 tiers. This is due to the need to place several images in a small space. The optimal size is considered to be a height of 70-75 cm and symmetrical shelves 40-50 cm wide. A larger structure will look bulky even in a large room.
Do-it-yourself corner shelves for icons are made in the following sequence:
- Assembly of panels of a given configuration. They are made from boards by gluing or stapling.
- Transferring schematic images to workpieces. Marking the points for drilling holes.
- Sawing out parts. Processing their edges with a milling cutter and abrasive materials. Fitting the iconostasis fragments together.
- Application of decorative elements to vertical and horizontal surfaces.
- Connection of all components into a single structure. Use nails without heads, angles, screws or wood glue.
It is better to varnish the iconostasis before placing it in place, so as not to stain the wall.
Where to place the iconostasis
A home deity is a temple that is always next to a believer. The foundations of the temple are transferred to a small home chapel, and the first church law is that icons should be located on the eastern side of the apartment.
How to determine where east is? There are three ways to get your bearings:
- In the morning, go out onto the balcony and see from which side the sun rises.
- In the evening, find the North Star in the sky - it always points to the north, which means the east will be on the right.
- On the compass, align the arrows with north and south, east will be on the right side.
4 interesting ways to use old laminate flooring in your dacha
After determining the east side, you need to choose a wall or corner near the window so that natural sunlight illuminates the images.
The icon rack can be placed in any room, except for the room close to the toilet and bathroom. The kitchen is suitable for icons of Christ the Savior: he sanctifies food and protects the household. And after eating, it is advisable to thank the intercessor every time for “...our daily bread...”.
Note to believers! The holy elders do not recommend placing the iconostasis in a room where guests gather and drink alcohol. There should be no posters of stars or large photographs on the walls. The place for prayer is chosen to be spacious, bright, secluded and, most importantly, free from objects reminiscent of human sins.
Nuances of fastening
The structure, made on your own, must be firmly secured so as not to be dropped on the floor by an accidental awkward movement. In this case, it must be possible to freely remove the shelf for cleaning, maintenance or improvement.
Hinges should be attached at a rate of at least 3 pieces. for 1 product. It is advisable to choose hidden fastening hardware. It is better to recess them into the back wall of the rack so that the iconostasis fits flush against the wall. To do this, use a chisel or a wide turning drill to make a recess, the depth of which corresponds to the thickness of the loops. They are screwed with screws with a length 2-3 mm less than the thickness of the board.
The self-tapping screws should fit tightly and without slack in the dowels. If there is play, the hole is clogged with wood chips, which will ensure reliable adhesion. Before hanging the shelf, each screw screwed into the wall must be checked for strength and resistance to removal.
Stand for holy images made of plywood
Shelf parameters and design may vary. It is important that the icons you need are placed there. This plywood shelf will be made with dimensions of 30x35x4 cm. What you will need for this:
- Pine board measuring 1.5-2.0 cm thick and 15 cm wide.
- Prepared glued board to form the bottom of the cabinet, 1.5 cm thick and 21 cm wide.
- Small pieces of fiberboard and birch plywood for sketching.
- Sandpaper.
- Self-tapping screws.
- A jigsaw is best if it is electric.
- Drill and drill bits.
- Milling table.
- Lathe.
- Pencil and meter ruler.
First, we draw and prepare future templates from fiberboard. This is done simply:
- We make a drawing on the fiberboard in natural volume and cut them out using a jigsaw.
- Next, we sand it with sandpaper to the parameters we need.
- We delimit the places for screws on the templates.
- We take the prepared blanks, transfer them to plywood and cut them out using a jigsaw and grind off the irregularities.
- The result should be: side, side and bottom.
- Now mark the holes with a pencil. There should be 2 of them on the bottom, 3 on the side, 4 on the side. We drill out the marked places and get holes for connecting the template to the workpiece.
The last step is to attach the template to the workpiece using self-tapping screws.
The sides and sides are cut down in the same way, and 6 holes are marked: 2 on the bottom, 2 for the side, 2 for the side.
Now using the machine we make 2 identical parts.
Location of icons
Images on the shelves should be placed in the prescribed order. Only in this case will they fulfill their task regarding the patronage of the residents of the apartment. The optimal number is considered to be 12 - according to the number of great Christian holidays. According to church canons, all structures are crowned with an Orthodox cross.
On the top tier in the center is an image of Jesus. On the left is the image of the protector - the Most Holy Theotokos, and on the right is John the Baptist. On the lower levels there are icons of the Holy Trinity, Nicholas the Wonderworker, Archangels Michael and Gabriel, Apostles Peter and Paul, Prophet Elijah, the Burning Bush and other saints revered by people.
Corner shelves
For an example of creating a corner version of shelves, we took as an example a shelf created only from fiberboard material.
Here's how it should have been created:
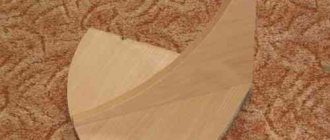
- Apply a special-sized right triangle onto a sheet of fiberboard; the recommended dimensions for this shelf option are 280/280/380;
- Take a special device called a jigsaw and carefully cut out such an element;
- The edges should be reliably processed using sandpaper;
- Now you need to turn to a sheet of veneer for help; it would be better if such a product is already treated with glue and with a special film;
- Now we apply similar triangles to such a sheet and simply cut it out using a sharp knife;
- The protective film can now be removed and the veneer can be evenly glued onto the chipboard parts using a hot iron;
- The end should also be treated with such tape;
- The sides should now receive two loops and they are fixed strictly with self-tapping screws;
- Afterwards, the finished product can be securely fastened to the wall.
