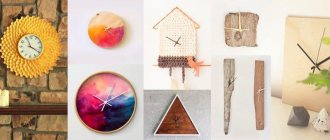
Making a round wooden frame for a wall clock
In this post, under the guidance of blogger HeARTwood, we will make a round frame for a wall clock.
The basis in the presented example is embroidery on fabric - a picture with flowers. We will start from its dimensions when making this frame. The main material will be American walnut. In order to find such material, you should go to a hunting store and buy a blank for the butt. The bars usually have a size of about 60 millimeters, sometimes even more. Their width is about 140 millimeters, and the length can be adjusted according to your interests. The cost of a bar 60 centimeters long is 700-800 rubles. The material is very good; the ends are sealed with wax or paraffin. Since the material is not very cheap, it is better to make a small drawing in advance. In this case, the drawing will help determine how many plots need to be separated. The size of each element is 106 millimeters in internal diameter and 156 millimeters in external diameter.
Making glass for a frame
To prevent the picture from becoming dusty and spoiled, it is advisable to use protective glass. To make glass you will need a glass cutter, a small block, double-sided tape and a piece of steel wire. To ensure that the edges of the glass circle are smooth, you need to sand them with sandpaper.
The diameter of the resulting glass is 29 centimeters. Now you can put its side aside and work on the frame.
Making a round frame
You need to saw off 3 lamellas about 30 millimeters thick from a walnut block. The technology is as follows. First, a base is made on a jointer, then the lamella is separated from this base on a band saw. Next - a new base, a new cut on the band saw. After this we will use a surface planer. On each workpiece, one side will be jointed and the other sawn. We pass it with the long side up, and we get calibrated parts.
Each of the resulting 3 workpieces has base planes and two planes to be processed. First, we calibrate the workpieces in width. Now, according to the internal size, according to calculations, we will measure 106 millimeters.
Now you need any block that will act as a limiter. It will be pressed against the router table. Now everything is ready and you can file the parts. If we file parts against a stop, then be sure to hold this part. Otherwise, it may vibrate and be pinched between the stop and the disk, and naturally there will be a blow. 8 parts prepared. You can put them in a frame and see in advance what the finished product will look like. All angles matched. We make sure that everything is correct, that the diameter of the glass is slightly larger than the internal diameter of the frame.
You can start gluing. You will need glue and a brush. But the most important thing is how to tighten this frame. They use cargo ties which are very convenient. You also need paper inserts so as not to stain the parts. The corners must be pressed with a clamp in order to remove possible distortions. Once the frame elements are completely positioned, you can tighten the tape. The frame has dried well and the screed can be removed.
The first thing to do is to sand the surfaces, remove the glue and possibly any steps that have appeared. This can be done with any grinding machine.
After the plane is sanded, you need to see which side is more accurate. This side will be the front side in the finished product. The front side will be smooth, the opposite side will be milled for a glass stand and a recess will be made to make the frame look more light and airy.
Rounding the frame
Now we will make a round one from an 8 carbon frame. For this work you will need an auxiliary piece of plywood. This can be any scrap to which the frame will be attached. Next, we fix the block in the center, find the center, and we will mill circles from it. Absolutely any straight basic cutter will do. We lay the frame on the plywood and outline its contours. Next, apply a ruler and roughly find the center. Received 4 control points. Self-tapping screws should be tightened as close to the center as possible.
Step-by-step creation algorithm
To create a spectacular edging, the easiest way is to use wood or polyurethane. A special original color will give the finished product a unique appearance. Here you can also show your imagination and create a one-of-a-kind mirror design.
Made of wood
The ease of processing results in a wide variety of wooden elements from which a frame can be made. Therefore, at the first stage, you need to clarify the concept of the product and select the appropriate raw materials, tools, and fasteners. When creating a frame made of wood without any frills, you can use screws and corners, glue or nails as fasteners. From the tools it will be enough to take a hammer, sandpaper, a hacksaw. A pencil and ruler will also come in handy. In other cases, if you plan to have a carved or complex-shaped frame, you will additionally need cutters, a file, a drill and, possibly, other devices.
The external design of mirrors can be made from any semi-finished wood products. Even elements of wooden door or window frames remaining after repair are suitable. They are convenient because they have a profile that is well suited for installing a mirror. The procedure for creating a wooden frame will be as follows:
- Disassemble the platband into individual elements.
- Cut them to the height and width of the mirror - you will need four parts in total. The size of the elements depends on the method of articulation. You can make it at an angle of 45˚ or straight. You will also need a glazing bead. Its size will be determined after assembling the base for the frame.
- When the layout is ready, all elements are cut to size, it is necessary to treat the wood with an antiseptic for its better preservation.
- After the wooden frame is assembled, the front surface should be sanded and then sanded. This will reveal the natural grain of the wood. Then you need to varnish the surface, or you can simply paint it with oil paint in a color that matches the interior. As an option, apply decorative elements by gluing them and covering them with colorless varnish. This composition will look great on the wall.
The frame for the mirror is ready. All that remains is to make a backing from dense sheet material and install the mirror itself. You can secure it using a bead.
Before decorating the mirror frame with paint, you should degrease the surface.
DIY oval frame
Today I want to tell and show how to make an OVAL FRAME with your own hands at home. I needed it to decorate the embroidery that was embroidered for me, namely for my shabby-style bedroom)) Naturally, I couldn’t buy it in the store, and framing workshops in Yaroslavl don’t produce such frames. An Internet search showed that prices for similar frames of the size I needed start from 5-6 thousand rubles. I didn’t find any master classes to help either, so I had to rack my brains, and I just want to show what came out of it.
I really hope that the information will be useful.
This is the first part of the master class on making the frame itself.
We will decorate it in another story))
1. 1 sheet of polystyrene. Sold in construction stores as insulation. 3 cm thick. It looks like dense foam with a fine-grained structure. A sheet measuring 60*120 costs about 100 rubles.
2. Dummy knife (stationery knife)
3. Manual small file or man’s hands and sawing unit))
4. A sheet of paper for the layout.
5. Large skin.
6. Ruler, pencil, pins.
We have embroidery in custom sizes. So as not to bother with drawings, I simply take a suitable dish, place it in the middle and take measurements.
We circle the dish on a piece of paper and add how much we decided on each side. This will be our “inner” oval.
We cut out the paper model and try it on for embroidery.
In my case, the fabric reserves at the edges are small, so I do it to the edge, and in the second tutorial I will show how I will stretch it.
Next, we pin the paper model onto a sheet of polystyrene with pins and trace it with a simple pencil.
Once we have the layout markings on the base, I make marks all over the oval. In my case, 1 cm inside the oval and 4 cm outside. Then I smoothly connect them. Thus, my frame width will be 5 cm.
If you mark the inner oval of embroidery on the layout “back to back”, then both marks are -1 cm and then already 5 cm, instead of 4 cm you need to make it outside, from the layout.
While I was drawing here, I got an assistant who drew his own lines to completely confuse everyone))
Now you can saw! This is where men's hands and a sawing machine are needed. It makes it easier to draw smooth lines. You can, of course, use a hand saw, it just takes longer. In general, polystyrene saws very well and does not melt along the edges.
I must say that this is rubbish. The sawdust is small and magnetic, so I’ll add a vacuum cleaner to the list of tools) We saw the outer edge.
Let's do a fitting! The shape suits me very much, all that remains is to work out the oval in detail.
My polystyrene sheet is 3 cm thick (in general they come in 2.5 and 10 cm)
The side on which the markings were will be the bottom. Now we use our drawn 1cm mark to make a groove into which the embroidery will be inserted.
What do you need for work?
Let's figure out what materials and equipment will be needed when carrying out the work:
| Wooden elements | These can be a wide variety of options: from slats and remnants of plinth or platband to any other similar materials. If you want to create a very skillful product, you can purchase ready-made wooden baguettes and use them |
| Saw and miter box | With this simple kit, you will be able to file joints at a perfect 45-degree angle, so the joints will be of the highest quality, which has a very positive effect not only on the reliability of the products, but also on their appearance |
| Carnations and glue | Connections can be made in two ways: either using finishing nails and reduced heads, or by using wood glue, which can also provide good reliability. If very high strength is needed, then the options can be used together |
| Special clamp | If you are going to make frames more than once or perfect quality is important to you, we recommend purchasing this type of equipment, since with its help you can press the parts very well when gluing, while maintaining the ideal geometry of the structure |
Important! And don’t forget about paints and varnishes; a wide variety of options can be used - from varnishes and impregnations to stains, acrylic paints for wood and special compositions to give products an antique look with gilding and patina.
The simplest version of slats can be made in literally ten minutes
DIY wooden frame
If you want to make a wooden frame with your own hands, then you can explore several manufacturing options and choose the one that suits you. At first glance, it is easier and faster to buy a ready-made wooden frame in a store, but in fact it will not be difficult to make such a product, and of the required dimensions (even non-standard ones), and you can decorate the frame to your liking. If you have a large collection of photographs at home that you plan to hang on the wall, you will need a lot of frames, and this will cost money. The way out of the situation would be to make your own frames.
Wooden frames can be made using simple tools or using a woodworking machine. The finished frame can be decorated with skillful carvings or a beautiful ornament can be burned out. Such products can be done by craftsmen, but it is better for beginners to try their skills on the example of a simple wooden frame made of smooth planks or slats.
Decorating a photo frame
A ready-made photo frame with glass will help simplify the design of embroidery. It is enough to stretch the canvas onto a stretcher or add embroidery to the mat, and then assemble the product according to the instructions (tighten the threaded fasteners or insert the embroidery frame differently). In this case, the dimensions of the canvas will have to be adjusted to the parameters of the frame.
To decorate the finished frame, the same techniques are used as for finishing the mat. You can complement it with glued shells or other natural material. If the frame has a relief, the convex areas can be easily covered with glitter or metallic paint. You can use beads, rhinestones, etc. in the design. The main thing when decorating is to observe moderation and not overload the frame with additions.
The procedure for making a wooden frame
- Estimate the dimensions of the frame and select transverse and longitudinal wooden planks. You can cut a wooden strip into four elements. All parts of the future frame should be as smooth as possible, so if necessary, they can be planed and then treated with sanding paper.
- Saw off the ends of the wooden planks at an angle of 45 degrees. To ensure that the corners are even and the product comes out neat, it is better to use a special device - a miter box with suitable connectors.
- The ends of the planks are greased with PVA glue and pressed tightly at an angle of 90 degrees. To fix the corners, the frame should be tied tightly with twine, making sure that the corners do not move. Can be used to secure the corners of half staples from a stapler. They are cut into two L-shaped halves. Next, these corners are inserted into the middle of the cuts at the ends of the wooden slats, and then the two sides of the frame are connected.
- The PVA glue hardens for 15-20 minutes, and after that the frame is again treated with sandpaper and coated with paint or varnish. You can use stain or potassium permanganate, which also gives wooden products a beautiful brown tint.
- The reverse side of the frame is cut out of thick cardboard or a piece of fiberboard. If the design is not intended to be collapsible, then you can glue the back side to the frame with glue, and for a collapsible frame, use special metal clips.
Tools and materials
In order to start making frames, you will have to prepare a simple set of tools and materials:
- the molding itself or its fragments (let's look at the example of foam or polystyrene ceiling plinths);
- thick cardboard (if the product being framed does not have a rigid base, for example embroidery or tapestry);
- universal glue or “liquid nails”;
- sharp knife (construction or stationery);
- miter box (you can take a protractor) for even cutting of corners;
- ruler and marker;
- acrylic paints and putty (better for wood).
Note! When choosing an adhesive, you should make sure that it is suitable for the selected material, as some types can corrode foam/polystyrene.
Wooden frame with passe-partout
This frame is well suited for framing photographs, as it will highlight the expressiveness of both color and black and white photographs. Before you start making a frame, you need to carefully consider not only the size of the frame, but also its pattern, as well as the color of the mat.
This decorative frame is made of wooden planks and thick cardboard (for passe-partout). Profiles for a wooden frame can be very different - smooth, with carvings or patterns; the type of passe-partout also varies - thickness, color of cardboard, its pattern. In this regard, you can choose frame details that will be in harmony not only with the photograph or painting itself, but also with the entire interior of the room. This is especially true if you plan to hang several paintings - they must be combined with each other. For example, light wooden frames look good on dark walls or richly colored surfaces. Accordingly, on light walls you can hang paintings and photographs in dark frames.
Summarizing
Making photo frames and canvases with your own hands from cardboard, as well as other available materials, is an exciting and exciting process. Here we have described in detail how to make a frame and stand for pictures and photographs with your own hands from cardboard, ceiling plinth, wooden parts and popular methods for improving such projects.
Experiment, and a decent result will not keep you waiting.
How to make a frame with a passe-partout
- Using a ruler or tape measure, measure the dimensions of a painting or photograph. If the edges of the image are worn out, then we reduce this size by trimming the edges with scissors or using a metal ruler. Then we measure the image again.
- In the middle of thick cardboard for matting, mark the dimensions of the inserted image with a sharp pencil. Using a special passe-partout cutter (you can use a passe-partout cutter), cut out the resulting rectangle in the center and carefully remove it.
- We measure the length of the outer edges of the mat. Using a saw, we cut out four elements of the wooden profile. In this case, we file the ends of the planks “on a miter edge,” that is, at an angle of 45 degrees. The ends of the planks must be beveled in such a way that the length of the ends on the outer side is greater than the length of the corresponding side of the mat.
- Apply a little wood glue to the ends of the wooden planks and connect them together. We wait for the glue to dry. To make the frame stronger, you can fasten the elements together on the reverse side end-to-end with two brackets.
- We cut or order glass according to the dimensions of this frame and insert it so that it rests on the protruding profiles. On the back side of the wooden frame we insert a passe-partout, which should fit very tightly to the frame. If the size of the mat does not fit the size of the frame, then the cardboard can be carefully trimmed, but if the mat is smaller, you will have to cut it out again.
- We attach a picture or photo to the back of the passe-partout using tape. It is necessary to carefully align the drawing so that it evenly fills the window of the passe-partout frame.
- For the back side of the frame we use a piece of thick cardboard or fiberboard. It is cut to the size of the frame, inserted on the back side and attached using small nails driven into the inside of the frame.
- We close the joint between the back and the frame with tape and attach a hook for hanging the picture. You can use an awl to make two holes in the back cover, thread the ears through them and attach a cord to them.
Source: sdelai-sam.pp.ua
Beauty on shelves
On MOSSLAND shelves you can easily change the display - without having to drill new holes in the wall.
Blurred edges
Open the image and make three copies using the hotkeys Ctrl+J or dragging it onto the “ create new layer ” icon. Turn off the visibility of the top two layers (click on the eye icon so that it disappears).
Activate the second copy from the bottom and in the top panel go Filter - Blur - Gaussian Blur .
Use the slider to adjust the degree of blur .
Double-click on the same layer to call up the layer styles and click on “ stroke ”.
Make all layers visible and, holding down the Alt button, click between the first two layers. This is what it should look like:
Reduce the size of the second image from the top using the free transform . We apply a stroke, gradient and inner shadow to it. We had approximately the following values:
Reduce the top image. We get a blurry frame.
You can also watch the video.
Step mask
First, let's use the rectangular marquee and draw the first part of the frame. Invert using the Ctrl+Shift+I keys.
Let's switch to quick mask mode (Q).
the filter - design - fragment in the top panel until the result suits us.
Exit quick mask mode using the Q key and invert: Selection - Invert (or Shift+Ctrl+I). Now you can fill the selected area with any color or gradient.
Blending Options
Let's create a new layer and apply the desired pattern to it, for example a gradient . Select it in the toolbar .
There we choose two colors we like. For me it will be blue and green .
We move through the photo with the left mouse button held down. A gradient appears.
Select one of the selection tools and select the area where the photo will be.
On the keyboard press the Delete .
Remove selection - Ctrl+D. Let's use the blending options. To do this, right-click on the layer and select “ Blending Options ”.
Let's try changing different parameters to get the desired result.

