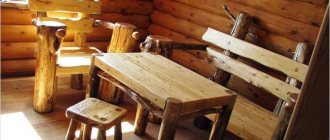
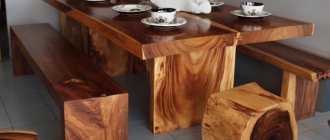
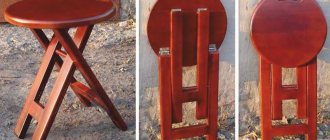
To perform bath hygiene procedures and comfortable rest in the dressing room, all rooms must be equipped with the necessary furniture. A bath stool is a universal piece of furniture that is suitable for installation in different rooms. To save money, you can do it yourself; in this article, IVF Heart will tell you how to do it.
Features of bath furniture
The main difference between a bathhouse and all other rooms is the large number of wooden objects, regardless of the size of the bathhouse and the style in which it is made. The only exception is the shower or pool, where tiled finishing is mainly done.
The heat and moisture inherent in a bathhouse impose special requirements on the choice of material for furniture.
The reasons for the abundance of wooden elements are quite justified:
- Wood retains heat perfectly, does not burn at high temperatures and is pleasant to the touch during the cooling process. Unlike metal, which gets very hot and poses a risk of burns, or unlike plastic, which simply melts when heated too much.
- Spruce, pine, linden or cedar are easy to process. Furniture for a bath or sauna is manufactured in record time. And there is always the opportunity to make such furniture with your own hands.
- Easy to attach to wooden interior items. You can do without metal nails or screws. For example, during assembly, wooden dowels are often used to connect parts.
- Wood has a low volumetric weight.
- Environmental friendliness. Being in a bathhouse with a wooden interior is not only pleasant, but also beneficial for health.
The bathhouse needs a certain set of furniture, which should include a table, shelves, and wooden benches.
The main disadvantage of wooden furniture is its susceptibility to rotting and fungus. Therefore, not all types of wood are considered suitable. And, in addition, they use treatment with special compounds.
Based on the requirements, the most suitable material for a bathhouse is wood.
Important conditions for creating an interior
When decorating the interior of a relaxation room in a bathhouse, several specific conditions and rules are observed. So, to create a beautiful design, they use finishing materials that do not contain metal parts and are moisture resistant.
This room is equipped with a good ventilation system.
Important! The dimensions of the rest room are determined by the dimensions of the bathhouse. The minimum area is considered to be 10 sq.
m.
Also, when creating a beautiful room design, perform the following actions:
- install hooks for drying several bathrobes and towels;
- construct storage areas for a variety of personal items;
- put a mirror.
This place is not cluttered with massive furniture or decor. This way the passage remains clear.
Zoning Features
The rest room usually has 3 zones:
- place for cooking;
- dining area;
- relaxation area.
Bath curtains create a feeling of security. Sometimes zoning of this place is carried out at the stage of construction of the bathhouse. Then they make a special partition wall.
The kitchen is separated from the dining area by a bar counter or a wide countertop. A fireplace is placed in the center of the room, which decorates the interior design.
Color spectrum
The rest room is decorated with light and pastel colors. These tones create a light and cozy atmosphere that relaxes guests.
Orange, light brown or yellow shades bring peace of mind and warmth to this zone. Furniture for such a place is selected according to the color of the cladding.
Variety of materials
When carrying out the interior decoration of this room, only high-quality building materials are used, which are moisture resistant and tolerate temperature changes well. When arranging the design of a relaxation room in a bathhouse, the following materials are used:
- decorative stones - artificial or natural;
- various types of tree species;
- fiberglass or non-woven wallpaper;
- majolica or ceramic granite tiles;
- decorative plaster;
- plastic.
When decorating walls, the following materials are used:
- lining made of oak, aspen, alder, pine or linden;
- various stones - cobblestone, marble, granite or sandstone;
- non-woven wallpaper;
- plasterboard moisture-resistant sheets.
When finishing a room ceiling, wooden panels and linden or cedar lining are used.
When installing floors, the following building materials are used:
- wooden boards 3.5 cm thick, the finished coating is covered with stain or colorless fixing varnish;
- ceramic granite.
After finishing, the recreation area becomes a stylish and comfortable place that gives guests homely warmth and comfort. This area is also a good place for winter holidays or a regular family vacation.
Selection of furniture
When choosing the right furniture for the rest room, perform the following steps:
- buy furniture that suits a certain design and fits well into the room interior;
- the table, chairs and other furniture items are placed as far as possible from the steam room, thus preserving the appearance of the room and increasing the life of the furniture;
- do not clutter up the resting place with various objects - make the space free;
- buy furniture made of durable, moisture-resistant material.
Comment! Wooden furniture is considered the best option when designing a relaxation room. After all, tables and chairs made of wood are covered with antibacterial impregnation.
More often furniture made of beech, oak, alder or larch is placed here.
Lighting in the bathhouse in the relaxation room
In order to create proper and pleasant lighting in the recreation area, perform the following actions:
- Small lamps are placed around the perimeter of the room, from which a lot of diffused light comes;
- install bright but unobtrusive light in the center of the room and dimmer light along the edges of the room; such lighting relaxes the bathhouse guests;
- Several spotlights are placed under the ceiling, which emphasize the youth style, this can be seen from the photo of the interior of the bathhouse and relaxation room.
There are also several narrow windows here, through which direct rays of the sun do not penetrate. This creates natural, pleasant lighting.
Decorating the relaxation room in the bathhouse with decor
Decoration of the rest room is carried out after completion of all other construction work. This completes the design of the room.
Various textiles are hung on the windows and walls, which make the room more comfortable and soft. Window curtains, sofa throws, soft pillows and tea towels create a feeling of home.
The walls are decorated with paintings or individual photographs, and open shelves are installed in the corners. Small souvenirs are placed on them: cups, figurines or vases.
Types of wood
The main criterion when choosing wood for bath furniture is not its natural beauty or density, but its resistance to moisture and temperature changes. Moreover, this matters both for the furniture in the steam room and for the rest room.
For the steam room you need breeds that respond well to humidity, for the locker room and rest room - any.
- Pine. One of the most popular types of wood for bath interiors. It is distinguished by its affordable price, natural aesthetics and ease of processing. Ideal for a relaxation room, but it is not recommended to use pine for a steam room - when the wood is heated too much, resin is released.
- Spruce. Also not an option for high temperatures and high humidity. In addition to the fact that it releases resin when heated strongly, it also differs in its tendency to rot.
- Larch. A unique breed that can withstand not only high humidity, temperature changes and extreme heating, but also looks very dignified and impressive in appearance. However, due to its high density, larch is very difficult to process. Making furniture will take a lot of time and effort. And it’s unlikely that a beginner can cope with this breed.
- Oak. One of the most expensive breeds. Its peculiarity is that under the influence of humidity and steam, the wood only becomes stronger and harder. Processing solid oak requires professional skills. And the finished products are very heavy.
- Aspen. Like oak, wood becomes stronger when exposed to moisture and steam. But only completely healthy trees have this feature. And finding them is very difficult.
- Linden. An excellent choice for DIY furniture made of natural wood for a bath or sauna. The wood is soft, not prone to rotting, and easily withstands temperature changes and exposure to steam. It has a pleasant hue, and when heated, it will also delight you with a delicious aroma. The only drawback is that linden is not as durable as, for example, larch.
- Cedar has been used for finishing rooms and making furniture, as they say, from time immemorial. The wood is very beautiful in appearance, resistant to humidity and temperature changes. An additional bonus for the lucky owners of cedar bath sets is a wonderful and truly medicinal aroma, the healing effects of which on humans have already been confirmed today.
Sizes that are comfortable for a person
There is no way to get around this point: there is a certain relationship between the size of the table and how many people can comfortably (or not) fit behind it.
Therefore, each bathhouse owner should estimate in advance how many people will most likely gather at the table in the recreation room or on the veranda at the same time. The second important factor in choosing the size (and, possibly, shape) will be the area of the room. After all, you need not just to place a table, but to make sure that a person can sit down and get up from the table freely, that there is room for passage, etc. To do this, you need to add a few more parameters to the table dimensions - the width and depth of the seat, the width of the seat for one person at the table, and also the minimum width of the passage.
For our part, we will present the standards of ergonomics, which is the science of how to adapt things to human anatomy.
REMEMBER! To sit comfortably at the table, a person needs 70 cm of space. This is called the seat depth (see picture). Add these 70 cm to the dimensions of the table on all sides - you will get a spot that you allocate for this area. The minimum passage behind the seated person, if necessary, must be at least half a meter.
Now the dimensions of the countertops themselves (according to the estimated capacity):
A person is comfortable at a table if he is provided with at least 60 cm of table space in width. It's minimum.
A two-seater table of square or round shape should be 60 cm on the side or in diameter. However, the “spot” of the zone together with the chairs is calculated as 120 by 210 for a square and 120 by 200 for a circle.
A three-seater table is only possible for a round shape, but the dimensions increase: the table diameter is 80 cm, the spots are 220 cm.
The four-seater can be either cross-shaped or parallel. The side of the square is 85 cm, the side of the spot is 225 cm. The diameter of the circle is 90, the spot is 230 cm. The rectangle is 85 by 125 cm, the spot is 185x225 cm.
Five-seater – circle 100 cm, spot 240; rectangle, size 135 by 85 cm, spot – 235 by 225 cm.
Six-seater – three types. Circle: diameter 120, spot 260, rectangle parallel seating – 85x175, spot – 235x225 cm, perimeter – 85x145 cm, spot – 285x225 cm.
We'll probably stick with eight-seaters. The circle is 140 cm in diameter, the spot is 2.8 meters. Rectangle: parallel seating – 80 by 250 cm, spot 220x285 cm around the perimeter – 85 by 195 cm, spot 225x285 cm.
Also worth mentioning is a design called a “corner”. It looks cozy and fills the space well. The module of the proposed scheme is a seat measuring 55x55 cm. A corner measuring 220 by 165 cm is folded out of them. The table is also square in shape with a square side of 85 cm. Single seats in front of the table are the same dimensions as the module.
Rattan furniture
This is a relatively new trend. Rattan is a type of liana palm. The main distinguishing feature is the unique structure of the stem: a hard top layer, a soft and porous middle layer and a very hard “core”. Thanks to this “structure,” the material bends very well, and interior items made from it are amazingly durable.
Rattan furniture is appropriate in a dressing room or relaxation room, but is not suitable for a sauna.
The natural color of rattan is almost white, but most often products made from this material are painted. Rattan palm has practically no wood pattern as such. And the process of making furniture is very interesting: a frame is made from thicker “aged” vines, and then they are braided with younger and more flexible ones.
Recently, rattan bath furniture has become increasingly popular.
Rattan palm furniture is ideal for a relaxation room, but not for a sauna. Because under the influence of high temperatures the material loses its shape.
Visually, furniture made from artificial rattan is almost no different from its natural counterpart.
Lighting
Most often, bathhouse owners prefer to abandon natural light. For this reason, the organization of artificial lighting is of particular importance. When arranging a steam room, the required number of light sources must be provided. The lamps themselves should not distract from the procedures or irritate the eyes. The optimal points for their location are above the door and above the shelves.
The lighting fixtures used can be recessed or overhead. During their installation, it is important to properly insulate the light bulbs and wires. For this purpose, to protect against overheating, the former are placed in sealed cases, and the latter in plastic boxes. The switch must be made outside.
Upholstered furniture for baths
It turns out that even soft sets can find their application in a bath complex. Of course, provided that they meet certain criteria.
A sofa for a bath is an integral attribute of comfort and the key to a good rest in a steam room.
Of course, we are talking about headsets for the rest room. If the furniture frame is completely hidden, then it can be made of any material. And in the event that any of its parts will be “visible”, the frame must be wooden. Otherwise, during the heating process, metal parts will be unpleasantly hot to the touch, and plastic parts will be close to melting.
Soft surfaces increase the comfort of using the products.
The upholstery material must also meet a number of requirements. Since the bathhouse is not always heated, the material must withstand temperature changes. And also be resistant to high humidity. After all, even in the dressing room the humidity is much higher than in an ordinary apartment or house.
Most of the furniture in the bathhouse is solid. However, in the relaxation room, sofas will not be superfluous.
- Genuine Leather. This is perhaps the best option for upholstering furniture in a relaxing bath room. The leather perfectly withstands temperature changes and humidity, does not absorb odors, is resistant to stains and retains its original appearance for a long time.
- Eco-leather or leatherette. The main thing is that this material is of high quality, then it is almost as good as its natural counterpart. The only difference between good leatherette is its shorter service life. And according to all other indicators, he does not lose in anything. If the substitute is of poor quality, then cracks appear on the surface very quickly due to temperature changes.
- Tapestry. High-quality material is strong and durable. For bath complexes, sofas with tapestry trim are additionally treated with special compounds to prevent moisture absorption.
Craftsmen, of course, will be able to make everything they need with their own hands.
Advantages and Benefits
Wooden bath chairs have a number of undeniable advantages:
- The product is compact and takes up little space.
- Full confidence in the quality of assembly, the use of harmless, moisture-resistant materials, due to the independent production of bath furniture.
- Small mass.
- The finished product can be used not only in the bathhouse. It is suitable for widespread use in a private home, on the territory of a summer cottage, and when traveling outdoors.
Bath set
Of course, a set of furniture for a bathhouse is selected depending on the preferences and financial capabilities of its owner. But the standard gentleman's set looks like this:
- Hanger. The shape and size can vary, but most often it is a wooden panel with several hooks. The calculation is as follows: per visitor 3 clothes hangers and a pair of hooks for bath accessories.
- Bench. This interior detail is intended not only for sitting, but also to provide a place where you can fold clothes. Often there is also a shelf under the seat. In some cases, chairs or armchairs are placed instead of benches.
- Closet. To be fair, it is worth noting that this element is not always present due to limited space. And yet, if the area allows, think about where you can install it. The closet can be used to store towels and cleaning supplies.
- Mirror. Ideally, the mirror should be full-length. But if this is not possible, then at least up to half.
What should be in the steam room? The entire “set” consists of a wooden shelf. Depending on the area of the bath and its shape, choose one of the following options:
- If the bathhouse is small, then the seating shelf is 60 cm wide, and the length, as a rule, is either determined by the usual number of people present, or by the length of the wall.
- If the sauna is spacious, then a recumbent shelf is installed. Then its width will vary from 80 cm to 1 meter, and the length should be comfortable for all visitors. For maximum convenience, organize 2 or 3 tiers. It’s just important to remember that on the third tier the temperature will be much higher than on the first.
- More rational use of space - L-shaped or U-shaped shelves.
Shelves are the most important component of a bathhouse interior and making them yourself is absolutely simple and inexpensive.
If there is a need and space allows, then additional stairs are installed for convenience.
Kinds
The whole variety of chairs and stools made of wood for a sauna can be divided into separate types according to design and functionality. The most common varieties that are suitable for installation inside bath rooms (washing room, dressing room) are folding ones, basin stands and compact stools.
Folding
The best option for a small area. When you need additional space for new visitors, folding chairs can be put away in a closet or taken to a private home. If you need to add additional seating at the table, just take them out of storage and lay them out. The simplest, most common folding mechanism is the legs to the seat.
Basin stand
To place a large basin of water or a bucket in a wet room, you will need a low stool. It is important that it is of small height, without a back, and as stable as possible. Can be rectangular or square.
Stool
Standard bath accessory. Can be installed inside a washing room or dressing room. It is used for storing various things, bath accessories, resting people, and performing hygiene procedures. To strengthen the structure, in addition to horizontal supports, diagonal struts are installed between them.
How to make bath furniture with your own hands
Making a bath set with your own hands is not as difficult as it might seem at first glance. Some woodworking skills will be required, as well as diagrams and drawings for the job.
Let's look at the process of making bath furniture with your own hands using a shelf as an example. Since this is the main place in the bath compartment, the shelf should be as comfortable as possible and suitable for your height and weight.
Self-production will allow you to realize all your wildest fantasies and make optimal use of the bath space.
After the necessary measurements have been made, you can begin to work. First, a frame is mounted from wooden posts (the distance between the posts is 50 cm), which are fastened together. The racks are made of wooden beams. At this stage of work, you can use metal screws, since this part of the structure will not be in contact with the body.
The frame is attached to the wall. Then boards are attached to it. When installing this part of the structure, metal parts can no longer be used. Plan the placement of the boards in such a way that there is at least 1 cm between the adjacent ones. This will allow water to flow freely and the boards will dry faster.
When making furniture with your own hands, it is important to process the parts well: round the edges, sand the surfaces until they are absolutely smooth.
The bathhouse bench is made according to a similar principle. It will require planks (for the seat), timber (for the frame), and fasteners. By the way, an important point: when making furniture for a bathhouse, a grinding machine or sandpaper must be used. Surfaces must be well treated to avoid injury later.
The bars are cut and hammered together into a frame - this is the frame. Planks are placed on the frame at a distance of 1 cm from each other. Wooden nails are used as fasteners. After the structure is ready, carefully sand all the corners and once again “walk” over the surface.
The shelf at its base may have a lattice made of wooden planks. You can also make the back of furniture from it.
The furniture set for the bathhouse is extremely laconic: bench, table, shelves. An important nuance: interior items should not only correspond to the general style, but also create coziness, promote relaxation, comfort, and pleasure.
When assembling furniture for the bathhouse, the boards should be positioned loosely against each other, leaving small gaps.
Bench
A bench is needed in the relaxation room and in the steam room. It can be purchased in a store or ordered from a master. Some people prefer to make the bench themselves.
Drawing of a bench without backrest
To make the bench shown in photo 2, you will need three boards (seat) measuring 50x100x1800 mm, two bars for fastening 50x10x170 mm, four spacer bars 35x50x100 mm, four legs 50x10x400 mm, one spacer board 50x100x1400 mm.
- We lay 3 seat boards on a flat surface. There should be a gap of 1 centimeter between them.
- We fix the laid out seat boards with two fastening bars, which should be at the same distance from the ends of the boards and their side surfaces. The distance between the fastening bars should be equal to the length of the spacer board.
- We attach the spacer bar to the leg. We attach the leg to the seat board and to the already fixed fastener bar, to its end. We secure the other three legs in the same way.
- Place the spacer board in the middle of the spacer bars.
- The bench is ready.
To secure all elements of the bench we use special screws or self-tapping screws.
An irreplaceable and necessary piece of furniture in a bathhouse is a table. Making it yourself is not difficult, you just need to follow the recommendations.
Bath table drawing
For production you will need 8 boards measuring 50x10x1200 mm, which will later become the tabletop. Two fastening strips 50x100x700 mm, four legs 50x50x650 mm, two longitudinal bars 25x100x1050 mm and two transverse bars measuring 25x100x750 mm.
- The surfaces of all table elements must be thoroughly cleaned and the corners rounded.
- We lay out the tabletop boards on a flat surface and fix the ends.
- We connect the laid out boards with fastening strips using self-tapping screws or screws, which need to be covered with a layer of glue. The cutouts on the planks (grooves) located on the sides should be directed towards the ends of the tabletop boards.
- We insert four legs into the cutouts on the mounting strips.
- We fix the tabletop boards and slats with transverse and then longitudinal crossbars.
- We sand the table placed on its legs and cover it with a protective and decorative composition.
Headrest for bath
To make a headrest you will need only two components: a 15x40 mm strip and a dowel with a diameter of 16 mm.
Drawing of a headrest for a bath
- We cut the prepared material into pieces of the required size.
- We alternately make three elements from which the headrest is assembled: the flooring under the head, its support and the rotating mechanism.
- Flooring. We lay the planks on a flat surface along the length of the fastening strips and fasten them with screws or self-tapping screws. There should be a gap between the boards. Along the edges there is a dowel, which is inserted into specially drilled holes on the mounting strips. The dowel is attached with glue and a metal pin.
Shoe rack assembly technology
Making a shoe rack does not require a lot of time and labor, so you can cope with such a task in a couple of hours.
The shoe rack in the bathhouse is assembled and installed as follows:
- 2 side parts of the structure are being prepared, 35 cm wide and up to 90 cm high, as well as upper and lower parts 60 cm long.
- The workpieces are thoroughly cleaned with fine-grain sandpaper or a grinder.
- 2 cuts are cut from the slats for the vertical shelf, the length of which is equal to the width of the side parts (35 cm). The parts are fixed to each other with self-tapping screws; the sides of the structure are reinforced with metal corners or wooden blocks.
- Markings for the shelf are made on the side elements and holes of the required diameter are made.
- The finished product is a box with sides, top and bottom slats, and a vertical shelf (or several shelves) for shoes.
Design
The element is assembled from a frame, base and boarding, which can be stationary, removable or folding. The basis is made up of support posts (vertical), as well as jumper boards - such a frame is attached directly to the wall. But between the shelves and the wall you need space for ventilation - this is about 8-10 cm. The flooring is made of narrow planks.
Ramunas
In theory, the frame is made from racks - vertically located bars. A diffuse film (membrane) and a vapor barrier are attached exactly over them, and then along these racks (vertically) an air gap is attached, forming a lath two to two and a half cm thick. And the lining is already attached to it - let me remind you, the lining is attached HORIZONTALLY with a “folder” at the top . And the shelves are attached precisely to the racks through this entire sandwich - that is, fastening occurs only at certain points of the wall and not just anywhere.
It is important to leave a gap between the wooden planks of the shelf flooring (it is better to make it removable so that it can be washed and dried in fresh air) so that the water drains and does not remain in puddles. A suitable step is usually 1 cm - sometimes a little more.
Kern:
Kern
I left 1.5 cm gaps between the boards (ours are made of abasha) - this makes them easier to wash and sweep away leaves. The sides were not sewn up, I think there should be some ventilation there
Using lining - rational or not
Definitely yes! Lining made from linden, aspen, cedar, and abashi has become popular due to its properties. It tolerates temperature changes well, high humidity, is aesthetically pleasing, and does not absorb moisture. Cladding made of clapboard has low thermal conductivity - it does not heat up, but transfers heat to the air.
Bath lining is not covered with varnish, antiseptic, or paint; it is used in its natural form.
See also: Catalog of companies that specialize in finishing materials.
What to consider when choosing a heating device
Each type described above has characteristic advantages and disadvantages. Metal furnaces cool down quickly after stopping operation and require serious protective measures and fencing. Brick ones must be laid on a separate foundation. Electric furnaces are distinguished by the absence of a chimney and easy installation, however, they require a special approach and compliance with all precautions.
Choosing a device depends on individual preferences, the size of the room and the desired result. In any case, you can always consult a professional and ask for help with your choice.
Stages of clapboard finishing
- A beam is fixed along the perimeter of the wall and ceiling . Fastenings should be every 80–100 cm.
- Cut pieces of insulating wool are placed between the wood without compacting.
- The top is covered with a waterproofing agent . The joints are sealed with aluminum tape, paying special attention to the corners.
- Provide ventilation . To do this, fill the distance rail. It will provide a small gap (2–3 cm) through which air will be vented.
- They make separate upholstery for doors and windows.
- They fasten the lining . You need to start from the corner, fixing each part vertically. This position will ensure free flow of water. If a horizontal arrangement of blocks is planned, make sure that the spikes are at the top. This will protect the lock from moisture.
- The lining located in the corners or near the walls is cut to the required size . It is especially important to cut the corner block correctly. It is necessary to accurately calculate the angle of inclination so that the adjacent block is correctly fixed.
Insulating the furnace using a metal sheet Source interistroy.ru
Next, install insulation from the furnace. For this use:
- metal - stainless steel or profiled iron is mounted on the wall behind the stove;
- red brick - placed between the wall and the fire;
- tiles resistant to high temperatures (kaolin);
- mineralite is a heat-resistant board made of cement and special components.
Chair in the rest room or locker room
You can make your own bath chair using exactly the same principle as making a sofa. It's even a little easier because you don't need to make a box. A frame is simply made from beams onto which the seat and backrest are attached. In this case, the back does not have to be tilted - it can be straight.
If you use your imagination, you can make a chair with your own hands from a thick and fairly tall stump.
In order to make such a chair yourself, you just need to saw off part of the stump horizontally. Then, using a wide chisel, level the unsawed part, turning it into a backrest. Finally, the surface of the seat and back is treated. It’s very easy to make such a chair with your own hands, and it will look very unusual.
From a fairly thick branch, sawing it in half and installing several thinner pieces of the branch, you can easily make a hanger for a changing room. You just need to process them accordingly.
When the bathhouse is furnished with furniture made by yourself, it will be pleasant not only to take a steam bath, but also to relax with friends.
Source
Communities › Do It Yourself › Blog › Corner bench-sofa in the bathhouse. Part 2.
So, the lids are ready and appear in all their glory))
Also, “slanting” boards were placed on the glue.
Well, after that, pillows from some sofa are installed and the bench-sofa is ready!))
Well, in this video I solemnly remove the last loads and test the bench
