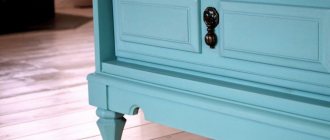
The kitchen is one of the most important rooms in any residential home. For greater convenience, you can place a kitchen cabinet or buffet in it, including one made by yourself. A sideboard is a cabinet with shelves and a closed lower compartment; it is not just another set of additional shelves, but a whole design and practical solution for the kitchen. The modern market offers many options for buffets to choose from, but it is still difficult to choose the right size and suitable design, so kitchen cupboards are often assembled with your own hands.
Features and purpose
The main purpose of a buffet is to store kitchen utensils, serving items, and cutlery. Often non-perishable foods (vases of sweets and cookies), as well as drinks, are stored in the buffet.
This unusual piece of furniture easily copes with two functions at once:
- Practical - it is convenient to store in it, and it is convenient to take out various kitchen utensils from it.
- Decorative - with a buffet, the interior becomes unusual, and the kitchen and living room are filled with homely warmth and comfort.
A sideboard can perform both practical and decorative functions.
Sometimes sideboards are compared and even confused with other kitchen furniture. However, we can safely say that despite some similarities, ultimately, the buffet is a unique thing of its kind. For example, if you compare it with a pencil case, then the sideboard is a little higher and much wider. Unlike a cabinet, it has three sections: upper, middle and lower. Finally, very often buffets are “equipped” with a table top and a niche.
dimensions
Initially, you need to decide where the cabinet will be located. This will allow you to decide what dimensions it will be.
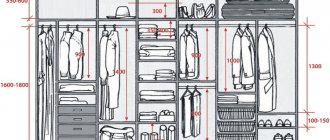
- Height. Technically, only built-in structures can be implemented under the ceiling. If the cabinet is a cabinet, with side walls and a roof, the distance from the ceiling should be at least 15-20 cm. Otherwise, you simply will not lift it due to the diagonal of the sidewalls - after all, any cabinet is assembled “lying down”. The removable mezzanine greatly facilitates assembly and allows you to reduce the gap between the cabinet roof and the ceiling to 10 cm.
- Depth. For a wardrobe with hinged doors, the optimal depth is 50-55 cm, with a longitudinal rod for hangers. In a compartment, sliding doors “eat up” about 10 cm, so the depth increases to 60-65 cm. For bookcases and pencil cases with shelves, a depth of 35-40 cm is usually set. Narrower cabinets, 20-30 cm, must be attached to the wall, since they will unstable.
- Width. An arbitrary parameter, limited only by the length of the wall. For cabinets with hinged fronts, two-door, three-door and four-door options will be easier to assemble.
The first step - measurements - is especially important at the design stage of built-in and partially built-in wardrobes.
A wardrobe for a balcony also requires extreme thoughtfulness and accuracy when taking measurements. In conditions of limited space, any design flaws are fraught with complete rework due to the impossibility of installation.
Varieties
Buffet is different from buffet. This piece of furniture can be used not only for the kitchen or living room (this is the domain of classic sideboards). There is also a distinction between a sideboard and a display cabinet. Each model differs in the presence or absence of open shelves, as well as the number of drawers.
The classic model is, after all, a kitchen option, or, as a last resort, it can be placed in the living room combined with the kitchen. Numerous shelves and drawers contain not only dishes and cutlery, but tea, coffee, confectionery and spices. The housewife uses the free niche as a worktop, for preparing snacks, brewing tea or effectively serving ready-made dishes.
The classic model is mainly used in the kitchen.
A sideboard is for a classic living room. Initially, sideboards were low buffets without an upper compartment. Modern models look very similar to their predecessor, and differ only in the absence of a niche. The sideboard has a lower cabinet with two (sometimes three) doors, and an upper compartment with glazed facades. Thanks to such “showcases”, it is possible to display expensive and spectacular dishes.
A sideboard is usually located in a classic living room.
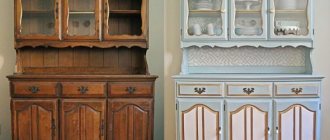
A display cabinet is another type of antique sideboard. This model is considered ideal for the dining area, as it allows you to display decorative items and dishes and also provides easy access to them. Can be with open or glazed shelves.
A display buffet is usually located in the dining area and also has a decorative function.
Kitchen cabinet for a small kitchen
Here's how to make a compact kitchen cabinet for a small kitchen.
Of course, you can and should modify these patterns to suit your specific needs. Here are some general guidelines for kitchen cabinet design. Drawings with dimensions in inches, here the dimensions in centimeters will be indicated in brackets; in the drawings you can also do this by multiplying the figures by 2.54.
- The height of the lower kitchen cabinet should be 34-1/2" (88 cm)
- Countertops are typically 1-1/2 inches (3 – 4 cm) thick, so the overall height of the cabinet is 36 inches (91 cm), which is the standard countertop height.
- Base cabinet depths are typically 24" (61cm) including back, door and front frames, but can sometimes be deeper so you can go up to 24-3/4" (63cm), but can go larger as standard The countertop is 25 inches (63.5 cm) deep and you need some overhang on the countertop.
- The sides of base cabinets should always match. Adjust the length of the horizontal board to adjust the width.
And a few more tips for making frameless cabinets
It is especially important to work with good plywood, using square sheets. Any problems can cause the cabinets to not match each other. The same can be said for boxes, since they are mounted directly onto plywood, if you don't have quality material, the boxes will have a lot of problems. Avoid placing too much weight on a cabinet without a center piece to support it. So, are you ready to DIY your kitchen cabinet? Drawer base, standard width 45 cm, but you can change these dimensions
Below, see step-by-step photos, where the diagrams show the assembly process.
So, are you ready to make your own kitchen cabinet? Drawer base, standard width 45 cm, but you can change these dimensions. Below, see step-by-step photos where the diagrams show the assembly process.
Photo source: www.ana-white.com/2016/05/free_plans/tiny-house-kitchen-cabinet-base-plan
How to make a floor standing kitchen cabinet
Do you want to make your own kitchen cabinet? Why not? Face frame cabinets are simply hardwood plywood boxes, but you can buy doors. Although doors can also be made with your own hands, this is a complex process that requires experience and expensive equipment. And you will also need a lot of clamps and even more space. It’s better to think about buying ready-made doors, it will be faster and cheaper. You can search on the Internet, where prices are always lower. To get more information on how to make a kitchen cabinet with your own hands, use the link under the gallery, the site has detailed instructions, and below see step-by-step photos.
DIY lower kitchen cabinet
Here's the easiest and fastest way to make your own kitchen cabinet!
To make it cheaper and simpler, the author came up with his own style. This is one closet, not three. Almost 2.5 m long, and the center is the base of the shell. It's much faster than building three cabinets (and using twice as much material for the side and front frames).
Another way to save plywood is to use old 2x4s to create a base. They can be painted or finished later, so it doesn't matter what they look like. The boards simply lift the cabinet and eliminate the need to cut out tabs on the side panels.
The bottom of the cabinet is continuous in all three cabinets, which helps make the cabinet more durable and easier to build.
Also an original solution with drawers. These are not many small boxes, but just decoration, like in a pharmacy, but the design turned out to be interesting.
How to make a cabinet with your own hands, see the step-by-step photos below.
Photo source: www.ana-white.com/2015/12/free_plans/diy-apothecary-style-kitchen-cabinets
A little history
The sideboard has been used as a piece of furniture since the 15th century. France is considered its homeland and initially it was available exclusively to the wealthy noble class. We used it only for storing dishes. The first models had two compartments: one for storing porcelain, and the other for silver cutlery. To ensure maximum safety of the contents, the buffet doors had special locks.
Initially, the buffet was a piece of furniture in the homes of French nobles.
It is worth noting that the word “buffet” itself is literally translated from Latin as “brilliant table”.
Only in the 17th century did these kitchen cabinets acquire the form we are familiar with today. The upper part of the structure either remained open or was equipped with elegant doors. In the middle there were drawers for storing cutlery, and in the lowest compartment with massive doors they stored heavy dishes to make it easier to get out.
Over time, the buffet began to take on a more modern form.
In the middle part of the structure, between the upper and lower compartments, there was a tabletop. It was most often used to prepare cutlery for serving or to prepare quick snacks. It is believed that it was thanks to this function that the word “buffet” received another meaning - a place for a snack.
Rus' had its own prototype of a modern sideboard, which was a metal cabinet on legs. The model was used to store samovars, various containers for heating water, as well as jars of jam.
Modern buffets are not very different from their “ancestors”. Like the tables and chairs we are used to, kitchen cabinets have not lost their relevance and are still in demand in a wide variety of styles and interiors.
A buffet or sideboard can be found in many modern homes.
Drawings, diagrams
Before starting the manufacture of any furniture, you must draw a drawing indicating the dimensions. The procedure is as follows:
- Determine the installation location and its dimensions.
- Draw a diagram by hand with the location of the main parts and elements inside the cabinet body;
- Create a drawing based on the drawing.
- Make a specification of all assembly elements, indicating dimensions and quantities.
- Select the type of wood from which you will make the china cabinet.
Design features
Traditionally, a buffet consists of three parts: top, middle and bottom.
The upper one is usually used to store dishes and kitchen items that are not used every day, such as glasses, wine glasses, fine dinner sets and guest sets. The topmost shelves can be glazed, or they can be completely open. The glazed option is more preferable, since the dishes at the same time remain visible and, at the same time, are protected from dust, moisture and grease.
The upper part is usually used to store dishes that are rarely used.
The middle section has special drawers for storing cutlery and other useful items. In modern sideboards, such departments are located immediately under the upper compartment, and in a buffet they take up space under a niche with a tabletop. A niche is usually intended for storing frequently used dishes, as well as for vases of fruit or sweets. A vase of flowers also looks very impressive on the tabletop.
Some buffet models are equipped with retractable tabletops, which makes the design even more functional. On such a surface you can cook or sort dishes before placing them in their places.
The lower part of the buffet consists of large compartments with shelves, closed with opaque facades. It is there that large kitchen utensils - pots, pans, dishes - find their “shelter”. There is also room for household appliances.
The lower part of the sideboard is designed for storing large items.
Completion
1. Apply finishing coat to all surfaces that have not been previously finished.
2. Install doors with hinges and latches. Congratulations, you have completed the project!
Facade options
The appearance is largely determined by its facade (front panels, doors). Depending on the design, they can be:
- Solid - continuous canvases. Such facades are durable and easy to use. Since they have no seams, they are easy to wash and wipe clean.
- Frame - a base with a frame. Typically, such structures are made from different materials. Externally they look very attractive, but otherwise they are inferior to solid facades.
For decorative framing of panels use:
- Carving (patterns applied to wood). This is a classic design option for buffets.
- Engraving is a design or inscriptions applied to metal or other durable metal.
- Glazing. Option for decorating the top of the buffet. If you don't want the contents of the shelves to be visible to everyone, use stained glass instead of regular transparent glass.
- Veneering. The facade is covered with a thin layer of natural wood. As a rule, this is an excellent option for saving money, since a sideboard made of MDF with veneer is no different in appearance from a piece of furniture made of natural wood.
Selection of base material
Many types of wood are suitable for creating a cabinet. Among them there are both hard and soft. Each type of wood has its own characteristics, so you need to select them taking into account personal wishes and operating conditions.
Base material options:
- birch - the material has a beautiful light shade, is easy to process, its cost is quite low, but its use at the base of a cabinet can cause problems in the future, since high humidity quickly destroys its structure;
- beech is one of the strongest materials, it can withstand a lot of weight, which is why it is excellent for storing any things, but it is difficult to process and has insufficient moisture protection;
- pine – solid pine cabinets have a beautiful texture with a light golden tint, are lightweight and durable, but their surface gets scratched very quickly and breaks from impacts;
- oak – the use of oak wood in the cabinet makes it especially strong and durable, while the material tolerates high humidity well and is not the target of harmful insects, but you will have to spend a lot of money to buy it;
- alder - the material has sufficient strength, is quite moisture resistant, it can be painted in any shade, but it is difficult to purchase panels, since most companies do not work with alder.
Spruce, poplar, fir, aspen, walnut, maple or elm wood is perfect. As an alternative, you can consider materials made from ash, cherry, rowan or chestnut.
Choosing a style
It doesn’t matter whether you buy a ready-made buffet or plan to make it yourself, decide on the style in advance. The most popular are classic, modern, and country.
Classic. Furniture items in this style are distinguished by a noble shade. Brown, beige and all pastel colors look ideal. The decor should be moderate, since the classical direction of design does not tolerate excesses.
Modern. This style is dominated by light and pastel colors. As decorative elements, preference is given to carvings, ornate patterns and ornaments. Lines should be smooth, plant patterns and semicircular shapes are welcome.
Art Nouveau style is characterized by pastel colors and ornate decor.
Country. It is generally considered to be a rustic design. Thanks to this style, any room becomes warm and cozy. The main requirement: the sideboard must be made of natural wood or MDF with veneer finishing. The predominant colors are warm.
The rustic style is characterized by a predominance of wooden finishes.
What do you need?
Many people think that making furniture is an incredibly difficult and overwhelming task, and before starting work, you should at least read the book “How to make a cabinet with your own hands.” But that's not true. In fact, the production of a comfortable, spacious and beautiful piece of furniture can be divided into appropriate stages: preparation of the necessary tools and materials, production of individual parts, assembly, installation.
First of all, you need to decide what the cabinet is for and where it will be located. After all, the furniture will serve for many years, so this issue needs to be taken seriously. Often cabinets are installed along the entire length of a blank wall, in the opening of the interior partition. As for cabinet furniture, you can use it to divide a one-room apartment into zones; this type will look good in a Khrushchev-era building.
Next, you need to calculate the dimensions of the cabinet. It should be taken into account not only the width and height, but also the distance between the shelves and their number. For clarity, you need to transfer your idea to A4 sheet. This will also help you decide on the material for the product: wood, lining, MDF, fiberboard. Often the frame is made of wooden beams and the doors are ordered separately. Making it yourself is a good alternative for your home or garden. The design of the cabinet can be adapted for small-sized apartments; it will look advantageous in a Khrushchev-era building.
How to make a buffet with your own hands
The main advantage of hand-made furniture is maximum comfort and correct dimensions. You choose what you will make the buffet from and what its finishing will look like. By the way, an unusual color of a piece of furniture, molding or stained glass can be chosen as decor.
Materials and tools
Today, a wide range of materials for making furniture with your own hands is available. Most often used:
- Fiberboard. The material has a budget price. The main performance characteristics are resistance to a humid environment (which is important for the kitchen), and comparative ease of processing. Typically, fiberboard is used to make the back walls of wall cabinets, drawers and classic cabinets. The material does not deform and is securely held on the fasteners. Thanks to its use, you can reduce the weight of the future buffet.
- Chipboard. Easy to process and also a very common material. It is actively used for the manufacture of a wide variety of furniture. It is distinguished by its aesthetic appearance - the surface may have “woody” patterns. The only caveat: it is recommended to keep finished furniture away from heat sources. Otherwise, the process of evaporation of harmful substances may begin, which will cause allergic reactions.
- MDF. Environmentally friendly material. It is valued for its resistance to moisture and decent appearance. It is not afraid of heat sources, so furniture made from this material can be installed anywhere in the kitchen, even next to the stove. MDF is also actively used for the manufacture of decorative elements.
- Solid wood. The most expensive and environmentally friendly material. For a buffet, pine, oak or larch are best. To save money, it is recommended to make only the facades from natural wood, and make the side and rear walls from more budget-friendly materials.
Having decided on the material to create a buffet, you need to select a set of tools. You will need:
- Drill.
- Screwdriver.
- Wood drills.
- Tape measure and sticky tape.
- Pencil for drawing.
- Vise.
- Milling and grinding machine.
- Sanded sheet.
- Varnish coating.
To work you will need quite a lot of tools and materials.
Well, you need to start the process of creating a sideboard with your own hands from a drawing. Thanks to the right project, you will be able to accurately determine the amount of material and decorative elements you need.
After all the necessary measurements and cutting, the parts are assembled according to the following plan:
- Preparation of large elements, and then smaller parts.
- Mounting the housing and installing internal parts using screws and angles.
- Installation of a façade slab with projections for the doors and rear wall.
- Installation of hanging parts: hinges, doors, decorative parts.
- Reinstallation and checking the functioning of all elements.
- Final decoration: attaching handles, varnishing or decoupage.
A sideboard is a piece of furniture with a centuries-old history. Thanks to modern design solutions, it becomes even more functional. And its decent appearance will effectively complement any kitchen design.
Required Tools
To make a kitchen buffet to your liking, you will need an individual set of tools, but among them there are those that you cannot do without, regardless of what material, design and configuration of the product the master chooses.
In the classic version, there are work surfaces. This part is always decorated with decorative elements.
Standard set:
- drill;
- wood drills;
- jigsaw;
- a circular saw;
- Sander;
- screwdriver
and other tools and devices that should be at hand.
The most common are closed cabinets.
Types of buffets in the photo
Benefits of DIY
Buying a ready-made wooden table is not difficult, but making it yourself has certain advantages:
- reduction in product cost;
- the ability to independently select working material;
- strength and durability: even an inexperienced craftsman will try to make the structure reliable.
A person can also independently choose the design of the product, the dimensions that will correspond to the parameters of the room. A table made of boards can fit into any interior, as it comes in various shapes and designs. The resulting product will become exclusive, because you can always independently develop a unique project for it.
From plywood
To make a sideboard from plywood, you will need almost the same list of tools and materials that were used in MK No. 1. Only boards and beams are replaced with sheets of plywood (at least 18 mm thick for the frame and 9–12 mm for the panels). You can only refuse a surface planer and a jointer (depending on the quality of the shields).
You can assemble a cupboard using the same pattern and dimensions, but there are two nuances:
- It is better to install the buffet on ready-made furniture supports;
- It is easier to assemble the product for confirmations.
Plywood is not as durable as natural wood, so instead of hinged doors it is better to make drawers. You will also have to abandon figured panels and decorative elements. It is advisable to use a simple and concise design.
Having drawn up a drawing and decided on the dimensions of the finished buffet, you can begin manufacturing.
| Cut the plywood according to the diagram. | |
| Secure the sheet with clamps and cut along the cutting lines. | |
| It is more convenient to cut a large number of identical workpieces using a circular saw. During the process, you need to monitor the geometry of the parts. All angles must be strictly 90 degrees. | |
| Assembly begins from the bottom of the buffet. An even rectangular beam is pressed against it with clamps, as shown in the photo. | |
| On the other side, the side wall is located similarly. This is done to ensure that all corners of the future cupboard are strictly straight. | |
| The fixed parts are sealed with confirmations. The remaining sides of the frame are assembled in the same way. | |
| Then the shelves are screwed to the frame. The caps that remain on the sides will subsequently be hidden under a layer of putty and paint. | |
| After assembling all the pieces, the upper half will have compartments for drawers, and the lower part of the cabinet will consist of open shelves. | |
| The ends of the shelves are hidden under thin plywood strips. This is done for two reasons: · so that the fronts of the drawers do not protrude forward after assembly; · to hide possible cut defects. | |
| Decorative strips are attached with wood glue and additionally nailed. | |
| The frame of the drawers is assembled from the same plywood. The sizes of the buffet drawers are selected based on their intended contents. | |
| For façade panels, thinner sheets will be required. | |
| The boxes are assembled on confirmations, having previously secured the sides with clamps. | |
| Quarters are made in the blanks for the façade frame on a milling machine. | |
| The panel will subsequently be glued into these recesses. | |
| The façade frame is assembled using dowels. | |
| The panels are glued into ready-made frames. The products are pressed with clamps until completely dry. | |
| It is better to make the tabletop from natural solid wood. Or choose thicker plywood for it (at least 30 mm). | |
| The corners of the tabletop are given a rounded shape using a jigsaw. | |
| The ends are processed on a milling machine. | |
| The finished frame is sanded, puttied, primed and painted. Marks are applied to the completely dry surface for attaching the fittings. | |
| Furniture supports are screwed to the bottom. It is better to choose adjustable models, so it will be easier to level the finished buffet. | |
| At the top there are guides for drawers. In order to clearly maintain the distance both on the frame and on the box itself, it is advisable to make a “stencil”. | |
| The bottom cabinet of the buffet is ready. |
The details of the assembly are shown in more detail in the video: The upper part can be made based on MK No. 1, or you can be creative and make open shelves, for example, from old drawers. To do this, you need to disassemble them, remove the top darkened layer of wood (with a plane or jointer), and then put them back together and hang them in random order. If desired, open with varnish or paint.
The details of the assembly are shown in more detail in the video:
Making a chest of drawers from plywood. DIY furniture
It is worth noting that such a cupboard is better suited for a dining room or living room than for a warm and humid kitchen.
Antique
Every antique sideboard is a masterpiece. The unique carving and finishing make this piece of furniture a true decoration of the home.
But not every professional is able to do such work. If you don’t have the appropriate skills, but you still have the desire to own an antique cupboard, you can use a trick.
Made of wood
This master class will discuss the process of making a sideboard from individual bars and boards. But to create a furniture panel, you will definitely need a surface planer and a jointer.
Without these two machines, it will not be possible to make a high-quality workpiece. If they are not available, it is better to make a buffet from plywood or ready-made boards (MK below).
Tools
The list of necessary materials and tools includes:
- boards for making furniture panels;
- plywood, fiberboard or wooden slats for the back wall;
- dowels and glue for joining parts;
- router and set of cutters: molding, edge, radius, etc.;
- thicknesser;
- jointer;
- accessories;
- clamps;
- sander;
- jigsaw;
- a circular saw;
- ruler;
- pencil;
- level;
- priming;
- wood glue;
- putty;
- paints and varnishes.
Hypothetically, instead of power tools, you can use a regular saw or jigsaw, but in this case the cost of effort and time will be much higher. Yes, and the chance of spoiling the part increases significantly.
Step-by-step instruction
The model of a wooden cupboard with open shelves is quite simple and versatile. If desired, the upper part can be closed with the same doors as in the lower half.
First of all, you need to make furniture panels, from which parts will subsequently be cut. The steps for this work are quite simple.
| Sort out the available timber and boards. You need to divide materials based on quality and cut (transverse, radial, rustic, etc.). Blanks with minor defects can be placed along the edges of the future shield. In this case, they will subsequently fall under the cut and help save quality materials. The type of cut is also important. Otherwise, the lamellas will dry unevenly, and the finished shield will crack. | |
| Prepare each piece. Adjust the thickness and length to the dimensions of the required panel (they are selected to match the parts of the future cabinet, taking into account the margin for cutting and grinding). Dry the surfaces with a thicknesser and jointer. | |
| For a more reliable connection, it is advisable to make quarters or shaped grooves (with a router) in the long ends of the workpieces. If the lamellas are of sufficient thickness and width, they can be connected to dowels. | |
| Glue the ends (joiner's PVA is suitable) and connect the beams into a shield. Before complete drying, the workpiece must be secured with clamps. |
The finished panels are re-processed with a jointer and thicknesser. After which they can be used to make furniture.
The buffet will consist of two parts: upper and lower, which will be connected into a single whole.
The bottom half is assembled first.
| The bottom of the future cabinet is cut out of the shield. Dowels are inserted into the processed ends. | |
| The walls are cut out of two blanks. In order not to complicate your life, the legs are made separately - they are cut out with a jigsaw at the bottom of the sidewalls. | |
| Holes for dowels are drilled in the side walls to connect to the bottom. | |
| In addition to dowels, the side walls are fixed with glue and screws. The shelves are attached in the same way. | |
| At this stage you need to check the geometry of the cabinet . All angles must be strictly 90 degrees. | |
| From the back side, secure the free edge and diagonal of the sideboard with two slats. | |
| Cut the tabletop to the desired size. If the thickness of the shield is small, beams can be placed along the edges to the width of the protruding part. This will make the product stiffer and will not sag during use. And a buffet with a massive tabletop looks much more solid. | |
| The beams used for thickening are attached with furniture glue. | |
| In this position, they need to be fixed with clamps until completely dry. | |
| The back wall is cut from fiberboard or plywood. | |
| Dowels are glued into the upper end of the sidewalls. Holes are made symmetrically in the tabletop. | |
| The structure is assembled into a single whole. The joint is fixed with wood glue. | |
| Flutes are made on the decorative strips on a milling machine. These elements will cover the vertical ends of the side walls. In addition, doors will be attached to them. | |
| The longitudinal ends of the decorative strips are also processed with a milling cutter. This way they will look more aesthetically pleasing. | |
| The lower part is closed with a decorative strip. It is cut out with a jigsaw, and the edges are processed on a milling machine. | |
| The ends of the side walls are covered with previously made decorative strips. | |
| When assembling parts into a single whole, you need to pay attention to the joints. | |
| If the connection turns out to be sloppy, you need to make a quarter in the decorative strip, as shown in the photo. | |
| In this case, the decorative element will go deeper and will not protrude beyond the bottom bar. | |
| To hold the bar more securely, a beam must be glued to the back side. Additionally, it can be fixed with self-tapping screws from the side (this can also be done from the inside, the main thing is that they are not visible from the front part). | |
| It is advisable to refine the ends of the tabletop using a milling machine or cover them with decorative strips. | |
| To make panels on the doors you will need two cutters shown in the photo | |
| The finished panel will consist of three parts: a frame and an internal part made of solid wood, and a base made of plywood. | |
| Each frame will require 4 blanks. | |
| They need to be prepared by treating them with a jointer. In the upper part, you can make a shaped cut with a jigsaw. | |
| The parts are connected to each other in the same way. | |
| The main thing is not to damage the workpiece when drilling holes for dowels. | |
| It is more convenient to work when the part is clamped with clamps. | |
| To prevent the glue from the dowel holes from leaking onto the front part, the edge needs to be slightly widened with a crown or a thick drill. Then the excess adhesive will collect in the resulting recess. | |
| You need to assemble all parts of the frame at once. It is advisable to press the parts not only against each other, but also against a flat table surface. If this is not done, the frame will move when it dries and it will turn into a “propeller.” | |
| The inner perimeter is processed with a moulder. | |
| The outer perimeter is the same. | |
| On the back side it is necessary to make a groove along the inner perimeter of the frame (about 10 mm wide). A plywood base will subsequently be glued into it. | |
| The photo shows the finished groove for the base. In addition, it is necessary to make (with a crown) recesses for the canopies. | |
| Step back 10 mm from the edge of the plywood (the width of the groove) and draw a line parallel to the end. | |
| Place the frame so that the inner edge coincides with the line. Trace the inner perimeter with a pencil. | |
| Draw cut lines , retreating 8-10 mm from the resulting line. This gap will “fit” into the groove in the frame. As a result, only the visible part (which was outlined with a pencil) will remain inside the door. | |
| Use a jigsaw to cut out the internal trim for the façade (its size and shape depend on the design of the cabinet). | |
| Sand the ends with a sander. | |
| Use the same calving cutter to process the perimeter of the workpiece from the outside. | |
| All that remains is to assemble the three blanks into a single whole. | |
| To do this, the plywood base is glued into the groove. When making glazed doors, glass is glued in place of the base, without additional overlays. | |
| A decorative overlay is glued on top. At this stage, you need to keep an eye on two things: · the glue should not extend beyond the borders of the decorative overlay; · the distances to the frame must be the same on all sides. Then all that remains is to sand the surface. | |
| All imperfections can be removed with putty. The products are primed, painted, and after drying, fittings are attached to them. | |
| The top of the cabinet will be open. Therefore, it is better to make the back wall for this half from lamellas or plywood, and not from fiberboard. | |
| This way the appearance will be much more aesthetically pleasing. | |
| To assemble the upper part you will need 5 parts: · two side walls. Dowels are inserted into them at the upper and lower ends, and holes are drilled for fastening the shelves; · top cover; · two shelves (with dowels at the ends). | |
| All parts are assembled according to the same scheme. | |
| The top and side ends are covered with decorative strips. | |
| The lower edge is attached to the tabletop using dowels. | |
| The finished facades are screwed onto the canopies. | |
| The finished product is puttied, primed and painted in the desired colors. |
For convenience, this master class is divided into two videos.
Manufacturing of facades:
Panel. Easy to make. Do it yourself.
Cabinet assembly:
Beautiful buffet on the veranda! With my own hands.
Beginning craftsmen can refuse all decorative elements. The finished buffet will not look as attractive, but will not lose its functionality.
Wardrobe design
The first step in making a wardrobe is designing it. To do this, you can schematically draw a cabinet with all dimensions, designation of internal compartments, cabinets and drawers.
This “old-fashioned” approach is quite lengthy and inconvenient, especially in the presence of high technology. Nowadays, almost all companies use special computer programs to design furniture, allowing them not only to evaluate the future result, but also to fully calculate the specifications of the product.
One of such programs is “Basis-Furniture Maker”.
This is a fairly powerful design tool that includes a number of supporting programs. The basis is designed to create both simple and quite complex furniture elements. If you are interested, you can go to the manufacturers’ website and familiarize yourself with it in more detail.
To design a cabinet, it is not necessary to complete the full “young fighter course”.
A fairly simple and accessible interface allows even beginners to use the program effortlessly. To install Basis, you need an emulator, since it uses hardware protection, but for “confident PC users” this has long ceased to be a problem.
https://youtube.com/watch?v=tTqmnsTgKRU
If you have never used Basis, you can watch demo videos on design.
In our case, this is the video “Basis-Closet 7.0 Video Clipboard Construction”. Viewing it will clearly introduce you to all stages of design, as well as the capabilities of the program.
It will take a little time (about 30 minutes), but even a beginner will be able to figure out what’s what without any problems.
Designing a wardrobe in the Basis-Furniture Maker program takes about 1 hour, taking into account the calculation of the specifications of the necessary materials. Manually it would take much longer and would not eliminate possible errors in the calculation.
The process of creating a virtual closet includes the following steps:
- choice of wardrobe dimensions;
- dimensions of the bottom, base and lid of the cabinet;
- selection of material and dimensions of the rear wall and its stiffeners. The back wall is made of fiberboard, and the stiffeners are made of chipboard;
- division of the internal space of the cabinet into horizontal and vertical sections;
- filling the resulting sections with boxes (if necessary);
- entering basic door parameters;
- adding a mezzanine and open side sections (if necessary);
- designation of the ends that need to be edged;
- selection and arrangement of fittings;
- printout of drawings of individual cabinet components and specifications.
If you wish, you can also print out a three-dimensional image of the finished cabinet, which can then be used to easily assemble it.
Cabinet shape
For interior design, it is important to choose the right shape for the future cabinet:
- Classic pencil case. The most convenient type of furniture, especially for a small apartment. The height of the pencil case can reach the level of the ceiling, which allows you to increase its capacity. One door is installed, usually a traditional hinged model.
- Linear cabinet. It is a design with a solid body, inside of which there are shelves, compartments for hangers, and racks for shoes. Hooks on the side walls and drawers can be installed.
- A corner cabinet is the best option for saving space. It has two bodies juxtaposed at an angle of 90 degrees relative to each other.
It is quite rare to find a radial cabinet, the front facade of which has a rounded shape, often equipped with mirror surfaces.
Recruitment Tips
To open a profitable canteen, you need to find good employees. In addition to looking for chefs and technologists, hire administrative workers. Find the canteen director and accountant. The establishment employs: cooks, workers on the distribution line, cashiers, dishwashers, mechanics. They must strictly comply with sanitary requirements.
If you plan to open a small establishment, then you don’t need to hire an accountant. It is advisable to contact a company that will handle your accounting affairs.
