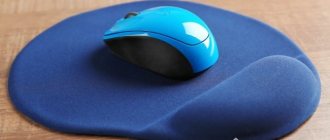
A mouse stand is not just an accessory, but a necessary thing that makes your work easier. And although there is a sufficient selection of different models in stores, it is quite possible to make a rug yourself. And such a stand will have a lot of advantages: it fits perfectly in size, is pleasing to the eye, and, finally, it’s just nice that you made a creative and useful thing with your own hands.
A computer mouse is an important accessory for any computer user, and making your own mouse pad can be quite a fun activity.
What can replace a mouse pad?
It turns out that there are no irreplaceable things. And the stand can also be replaced with what you have on hand. For example:
- notebook;
- tiles;
- thick cardboard;
- glossy magazine wrapped in a file.
A mouse pad will make your work at the computer easier.
For laser models, mats with any surface are used: from glass to leather. The trajectory does not change and the speed of response to commands does not change either.
Specialized computer hardware stores offer various options for mouse pads.
And for optical ones, it is better to use accessories with a matte surface, otherwise the mouse may “slip.” You should not take a fabric stand either, since the beam will be “held up” between the fibers.
Prices for such accessories are often unreasonably high. Therefore, we suggest combining business with pleasure and making a mouse pad with your own hands.
Additional materials
There are additional materials that can temporarily replace a mouse pad. Any product with a smooth surface is suitable as a substrate. For example:
- A notebook with a varnished cover (the number of sheets does not matter).
- Tile.
- Hardcover book.
- Cardboard.
- Paper in a file.
- Envelope. The dimensions of the product are slightly smaller than necessary, but it can be a good temporary substitute for a rug.
- Magazine.
These are the most common replacement methods. But the house is full of other things that can become a substrate. It is important that they are in perfect contact with the surface of the mouse.
Attention! It is not recommended to use glass products as a substrate. They reflect light and this may damage the product. There is also a risk that the light will be reflected directly into a person's eyes.
How to make a mouse pad with your own hands: instructions
Linoleum rug
A piece of flooring will help you create another alternative at home.
First, cut out a square from linoleum.
We cut out a stand measuring 24x20 cm. We make the edges slightly rounded to make it easier to work with such an accessory.
Attach a round glass and carefully cut them along the contour with a stationery knife.
Let’s complicate the task and make a truly exclusive thing. Let's try to make decoupage on the surface of linoleum. We will need napkins with an interesting pattern.
Whitening the surface in decoupage is done to make the picture brighter
We cut out the fragments and glue them onto the linoleum. Carefully coat with glue. When the surface is dry, apply several layers of special decoupage varnish.
Now we repeat the procedure of painting the background with a sponge once again, only with blue paint.
Cardboard mat
That's true, a rug made from scrap materials. For work, you can use corrugated cardboard or part of a regular shoe box. To prevent the accessory from “driving” on the surface of the table, we use a special anti-slip layer for furniture. To prevent the cardboard surface from looking dull, use craft paper or wrapping paper with an interesting print.
This will give you a great working surface for your rug.
To best secure the fabric decorative layer, use regular or aerosol textile adhesive.
We glue the wrapping paper onto the cardboard surface with glue. And we fix it on top with self-adhesive film. As you work, smooth the film well so that there are no folds or bubbles. Thanks to this surface, the mouse will glide better, and the service life of the accessory will noticeably increase.
A transparent self-adhesive film will protect the decorative layer and allow the mouse to easily move around the mat.
From a paper clipboard
It has the required density and dimensions.
Take any paper clipboard and place it on your desktop.
Attach black paper on top of the tablet (to prevent glare from the mouse beam).
Place the black sheet into the mouse deglare clip.
Place a white sheet on top of the black layer. The elementary model is ready. But you can make it more interesting, for example, take a colored sheet or with an ornament. Be careful not to make the stand too smooth.
Place the white sheet over the black sheet for the final coat.
Leather rug
A homemade leather stand is a very creative thing. Even the simplest model looks stylish. Such a masterpiece is created without much effort: two pieces of leather are folded and glued together. If you have the skills to work with a sewing machine, it is better to sew.
You can additionally sew the edges on a sewing machine if you know how.
For this model, the tops of boots, a leather suitcase or bag, and fragments of a jacket are suitable. It is better if the skin has a dense texture.
And if you take pieces of different leather and apply a little imagination, you will get such a masterpiece. An unusually pleasant thing both in appearance and to the touch.
Handmade mouse pad.
Important! It is better to glue a layer of foam or a piece of a travel rug to the back of thin leather.
Plexiglas mat
Only those who have the skills to work with this material can create a mouse stand from plexiglass. But the result is amazing!
If you have the skills, you can cut a shape out of plexiglass, place LEDs, attach a USB connector to them, and connect it to a computer.
To work you will need:
- LEDs;
- plexiglass;
- a sheet of thick paper;
- USB cable;
- wine bottle cork;
- piece of wire;
- Super glue.
You will get a glowing rug.
Let's get to work.
- First, we check the “operability” of the LEDs. To do this, we connect the cable wires to the LEDs and secure them with pliers.
- The base of the future rug is cut out of plexiglass. The shape and size are chosen at your discretion.
- We will make “legs” for the rug from cork. To do this, use a stationery knife to cut 4 pieces from the cork, each 5 mm wide.
- Glue the legs to the plexiglass.
- On the same side where the legs are, we glue the LEDs.
- Glue a sheet of thick paper on the front side.
Backlit mouse pad.
Thanks to the sheet of paper, the light is soft and diffused, which makes working with the mat more comfortable.
A computer mouse will have better contact with a dark-colored mat.
From ornamental foam
You will need:
- foam;
- sharp knife;
- acrylic paints (you can gouache);
- scotch;
- aerosol sealant for final surface treatment.
Trace a paper shape and cut out the same one from craft foam.
We cut out the base from the foam. We tape the borders of fragments of different colors with tape. We paint the product. Finally, we cover it with several layers of sealant.
The result is an unusual geometric rug.
Cork rugs
To make such a stand at home, absolutely no skills are required. A piece of cork sheet is given the desired shape.
The rug is either painted or a piece of fabric is glued on.
To make your work easier, use masking tape as a stencil. Thanks to it, you get smooth and clear boundaries when painting the stand.
Features of making a play mat
It must have special characteristics. First of all, slippage is eliminated. On the other hand, the mouse should move as easily as possible on the mousepad.
From a piece of karemat (isolon is also suitable) we cut out the base of the future stand. This model is much larger in size than regular stands.
As a rule, such a mat should accommodate not only a mouse, but also a keyboard, that is, approximately 30x60 cm.
Then we place a self-adhesive film on the upper part (the foil remains at the bottom). To prevent it from curling, complicating the process, we first iron it with an iron. Then we glue double-sided tape to the bottom plane and fasten the mat to the table.
From a paper clipboard
This is a ready-made part that does not need to be cut, it only needs external decoration. To do this, you first need to attach a black sheet of paper so that there are no glares, and then white on top of the black and you can decorate. The rug should be moderately smooth; if the lower part is too slippery, you can sheathe it or cover it with fabric. Please note that tablets come in both small and large sizes.
Take any paper clipboard and place it on your desktop.
If you order from the Internet or ask someone to buy, then immediately take into account the desired size. If the tablet is sliding on the table, you can glue down pieces of felt or any similar material so that the mat rests securely on the table surface. The clip can be left or removed if desired. With the first option, the decorating process will be quite simple and it will be possible to prepare several options that will change. Also, the tablet can perform its previous functions in its free time from working at the computer.
Be careful not to make the stand too smooth.
Is it possible to do without a rug?
Just a few decades ago, it was almost impossible to imagine working at a computer without this accessory. It was the same mandatory component as, for example, a keyboard or a system unit. And all because the mice were exclusively mechanical, which, without a special surface, greatly “slowed down” work on the computer.
So to be or not to be? Today this question is very relevant for active computer users. The main reason why stands for computer mice are used is maximum ease of use. If this accessory is not used, then scratches will appear on the tabletop very quickly. And the mouse itself will wear out faster.
By following simple recommendations, you can make a stand according to all the rules.
In general, if you answer the question unequivocally, then yes, you can do without a rug. But this decision will entail a number of consequences. Firstly, the computer desk will quickly lose its original appearance and become unusable, and secondly, the mouse will need to be changed frequently.
If you “live” at a computer, then it is better to use a special accessory. If you are not a frequent visitor to your computer desk, then perhaps there is no point in purchasing this accessory.
You can create a creative mouse pad at home. It will be cheaper than buying in a company store, and, at the same time, no less convenient.
From ornamental foam
Such a mat requires foam, a knife, acrylic paints or gouache, tape and sealant. The desired shape is cut out of the foam and you can begin to decorate it with paints, creating an unusual geometric pattern or any other design of your choice. Scotch tape is needed so that when creating a geometric pattern, the paint does not go beyond the boundaries. Finally, the surface is treated with a sealant for protection.
We cut out the base from the foam. We tape the borders of fragments of different colors with tape. We paint the product.
Postcards and applications with mice
A three-dimensional postcard that includes simple shapes in the form of hearts, ovals, and stripes. Easy job for children.
Applique with mice and Christmas tree
Various materials were used in the work. These are cardboard, colored paper, cotton pads, buttons. An interesting and creative idea for children. A template is also provided.
Mouse in a boot
Bright New Year's applique with a mouse in a boot. There are quite a lot of small details, but the review also contains a template that makes it easier to create an application. The work turns out voluminous, thanks to the peculiarities of gluing paper parts and pom-poms.
ROOM
REPORT 1
RESULTS, ASSURANCE, ASSURANCE, ASSURANCE, ASSURANCE, ASSURANCE, ASSURANCE ROOM RESEARCH SOS. " S. дин из Ð½Ð¸Ñ â ÑÑо линолеÑм.
RESPONSIBILITY:
- regurgitation;
- ножниÑÑ;
- RESULTS.
RESULTS °ÑÑ Ð¿ÑÑмоÑголÑник. RESULTS 20 24 24. RESULTS ROOM SS. RESULTS. RESULTS ½ÐµÐ¼Ð½Ð¾Ð³Ð¾ поÑанÑазиÑоваÑÑ.
RESPONSE 2
RESULTS RESEARCH, RESEARCH или ÑоÑогÑаÑии. RESULTS µÐ¹ÐºÐ°. RESULTS, RESULTS Ñ Ñ Ñовп°Ð´Ð°ÑÑ Ñ Ñ Ð¾Ñновой из линол еÑма.
RESULTS нкÑ, его нÑжно заÑониÑоваÑÑ Ð°ÐºÑиР»Ð¾Ð²Ð¾Ð¹ кÑаÑкой. RESULTS RESULTS Ð½Ñ Ð½ÐµÑ Ð½ÐµÐ¾Ð±ÑодимоÑÑи. OPTIONAL RESEARCH ASSURANCE RESEARCH Ñ Ð¿Ð" енки. RESULTS.
RESULTS
RESULTS ROOM ASSURANCE, RESULTS RESULTS ¶Ð¸ÑÑ Ð½Ð° ней ÑвеÑодиодÑ, пÑиÑоед USB port USB port S. RESPONSIBILITY AND RESPONSIBILITY RESULTS Ð¾ÐµÐ¼Ñ ¼Ð°Ð³Ð°Ð·Ð¸ Ð½Ð½Ð¾Ð¼Ñ ÑобÑаÑÑ.
ROOM
ROOM, ROOM ROOM RESULTS This is the case. RESULTS. RESULTS Ñ, ÑÑо иÑклÑÑÐ°ÐµÑ ÑколÑжение по повеÑÑноÑÑи. RESULTS ¸ SOSANIA дойÑÐ ¾ RESEARCH, RESEARCH Ð´ÐµÑ Ð·Ð °Ð²Ð¸ÑеÑÑ ÑÑÐ¿ÐµÑ Ð² игÑе.
RESULTS:
— regurgitation;
— ножниÑÑ;
— каÑандаÑ, линейкÑ;
— пленкÑ-ÑÐ°Ð¼Ð¾ÐºÐ»ÐµÐ¹ÐºÑ Ñ ÑиÑÑнком;
— двÑÑоÑонний ÑкоÑÑÑ.
RESULTS RESULTS. RESULTS, RESULTS ¸ÑÑÑÑ ÐºÐ»Ð°Ð²Ð¸Ð°ÑÑÑа и мÑÑка. ROOM м 30 на 60 Ñм. RESEARCH - RESEARCH ASSURANCE, ASSURANCE ней можно пÑойÑиÑÑ Ð³Ð¾ÑÑÑим ÑÑÑгом.
RESULTS, RESULTS ³Ð¸Ñованного Ñ"оÑ, можно нанеÑÑи ÑамокÐ"еÑÑÑ ASSESSMENT. RESULTS AND CONNECTIONS Ñ Ðº ÑÑÐ¾Ð»Ñ Ð¿Ð¾ÑÑедÑÑвом двÑÑÑоÑоннего ÑкоÑÑа. RESULTS, RESULTS ²Ñика Ð´Ð»Ñ Ð¼ÑÑи, Ñвоими ÑÑками Ñозда registry, regurgitation ASSURANCE WITH ASSURANCE.
Internal organization
Having an idea of the internal structure of a mouse is very useful, since a sudden failure of the mouse can cause a lot of problems. Further, the nuances of the repair will be discussed, but for now it’s worth turning to the inside of the mouse. Since the most popular type is an optical device, the description will be devoted to it.
In the standard version, a computer mouse contains a so-called optocoupler - that is, two optical sensors. Both of these elements form a tandem of emitter and receiver - the first consists of an LED, and the second is a phototransistor. These elements are located close to each other on the printed circuit board.
ROOM
ROOM RESULTS ·Ð´ÐµÐ»Ð¸Ðµ из линолеÑма. RESULTS ÑÑок ÑвеÑдой вÑделанной кожи. RESULTS ºÐ¸. registry °ss и ÑклеиÑÑ Ð¸Ñ, иÑполÑзÑÑ ÐºÐ»ÐµÐ¹ «ÐоменÑ». RESULTS ¼Ð°Ñинкой, кÑÐ°Ñ Ð¸Ð·Ð´ÐµÐ»Ð¸Ñ Ð½Ñжно ÑÑиÑÑ.
OPTIONAL RESEARCH RESULTS. RESULTS OPTIONS ¿ÐµÑвоР·Ð´Ð°Ð½Ð½Ñй вид.
Progress
If you are making a mouse pad with your own hands as a gift to a friend or relative, do not forget that the product should ideally be the color that the recipient likes best.
Cut out the basic shape of the rug using the prepared paper template.
You may want to add decorative elements such as paw pads, eyes or letters. Make separate small templates for them and prepare felt in contrasting colors. Remember that any decorative additions should be subtle enough so that they do not interfere with the rug's intended use.
What's wrong?
RESULTS the ¼ÐµÐ½Ð½ÑÑ Ð¿Ð¾Ð´ Ð»Ð¾Ð¶ÐºÑ ÑамоÑÑоÑÑелÑно. RESPONSIBILITY:
- CONDITION 96 REPORT, REPORT ºÐ¸ÑованнÑÑ Ð¾Ð±Ð»Ð¾Ð¶ÐºÑ;
- RESEARCH;
- ÑонкÑÑ ÐºÐ½Ð¸Ð³Ñ Ð² ÑвеÑдом пеÑеплеÑе;
- regurgitation;
- жÑÑнаÐ", облаÑеннÑй в Ñайлик.
RESULTS ¸ÑоваÑÑ, и Ð¸Ð´ÐµÑ Ð¾ÑноÑиÑелÑно Ñого, Ñем з RESULTS, RESULTS ´ÐµÑ в головÑ. ROOM ¾Ð½ÑÐ°ÐºÑ Ñ Ð¿Ð¾Ð²ÐµÑÑноÑÑÑÑÑ. RESULTS ºÐ¾Ð²Ñика оно не годиÑÑÑ, Ñак как пÑеломР»ÐµÐ½Ð¸Ðµ лÑÑей не Ð¿Ð¾Ð·Ð²Ð¾Ð»Ð¸Ñ Ð¼ÑÑке ÑабоÑаÑÑ ÐºÐ°Ðº ÑледÑеÑ.
Completion
The felt blank should be attached to a piece of self-adhesive foam base, cut according to a similar pattern, or to a special anti-slip material for gluing shelves. In the second case, you will need simple glue or threads with which you can sew the felt onto the base. Fasten the layers of the product as carefully as possible so that wrinkles do not appear on the surface of the fabric.
You have made an excellent mouse pad with your own hands. All that remains is to put it on the computer desk and see how smoothly the mouse glides over it.
fb.ru
Floor rugs made from old T-shirts, for chairs, stools: photo, description, step-by-step production
Instead of throwing away old cotton T-shirts, you can give them a second life. In skillful hands, wardrobe items that have already served their purpose will turn into a cozy, cute rug. Several decades ago, similar rugs could be found in almost every home. Such carpets are called “grandmother’s rug.”
The advantage of rugs made from old T-shirts is their light weight, durability, and easy care. If rugs of this type do not fit into your interior, you can find a place for them on the balcony or cottage.
To make rugs, you can use not only T-shirts, but also other old cotton items (sheets, bathrobes, children's colored tights, etc.). Before making, select the color scheme:
- Lots of bright colors will create a cheerful mood, but may look too pretentious and tacky, especially if you have a subdued interior color scheme.
- Two colors that combine with each other will look laconic and discreet.
- A solid color scheme is also possible if the color matches other items in the room.
To make a rug from old T-shirts, prepare the following materials:
- Old T-shirts - 5-10 pcs.
- Scissors
- Threads and large needle
- Sewing machine (if available)
Materials for making a T-shirt rug
Step-by-step production:
- Cut off the bottom seams of each T-shirt.
- Then cut the T-shirt into strips about 5 cm wide, not reaching the edge.
- Turn the T-shirt over and continue cutting strips diagonally. This should create a long continuous ribbon.
- Roll it up into a ball.
- Do this with each T-shirt.
- Then take three ribbons of different colors and start braiding them into a regular braid.
- When the ribbon ends, tie another one to it in a knot and continue braiding.
- When all the starting material is gone, you will have a very long multi-colored braid, roll it into a tight circle.
- Secure the rug with threads on the wrong side to prevent it from unraveling. If the rug is thin, you can sew it using a sewing machine.
Now the rug is ready to decorate your home. It is done simply and quickly enough. Depending on the number of T-shirts, you can make small and large diameter mats. These rugs are suitable for chairs and stools. Since they are soft and comfortable, they are very comfortable to sit on.
Step-by-step making of a T-shirt rug
Bright rug made from old T-shirts
Rug made of T-shirts in green colors
Useful tips
If the mouse pad is too dirty or has begun to fall apart, it is easier to replace it than to resuscitate it.
While the product dries, you should clean the mouse's wheel and ball. You can wash the mouse pad in a basin with warm water, but washing it in a washing machine is not recommended. If the product is too dirty, you can pre-soak it for half an hour in warm water with a small amount of shampoo. This will make it easier to clean dirt without much effort.
After soaking, the mat is washed under running warm water. After this, its surface is thoroughly soaped with a mild shampoo and the fabric is cleaned with a soft bristle brush. Then rinse thoroughly. A few additional recommendations:
- The mat should dry thoroughly, especially if it is placed on a wooden table.
- Do not place the mouse on a wet mat. Be sure to wait for it to dry completely.
- To clean it, it’s better to take a washcloth or a piece of cloth that you don’t mind throwing away later.
Template selection
To create an original rug, you will first need a template of an interesting shape. You can cut it out of ordinary thin paper. If the rug is intended as a gift to a friend, think about which shape will best reflect the individuality of the recipient and will definitely please him. There are countless options. Here are just a few of them:
- Animal: cats, dogs, hamsters, snakes, crocodiles, pigs, etc. An excellent choice would be the recognizable silhouette of the animal or a characteristic detail that belongs to its appearance or is simply associated with this animal (such as the shape of a symmetrical bone).
- Animal paw. Despite its menacing sound, such an accessory will look very cute and is suitable as a gift for a girl. Don't forget to add cat pads to each toe.
- Animal head. You can, of course, create a homemade mouse pad in the shape of a large dog or a round pig, but not all animal silhouettes will look equally adequate. A horse, for example, will not work, as its silhouette looks too bulky. An alternative compact option would be a horse's head. You can even add a magic horn to it.
- Geometric shape. Regular rugs have a rectangular format. Use your imagination and choose the most extraordinary geometric shape - a circle, triangle, hexagon or even a five-pointed star.
How to enable pointer on android?
2 answers In Android 4.0, go to Settings > Developer Options > Location Tracker and turn it on. This is very convenient for presentations.
Interesting materials:
Is it possible to replace a photo on Instagram? Is it possible to be invisible on Instagram? Is it possible to change the order of photos on Instagram? Is it possible to write a private message on Instagram? Is it possible to chat on Instagram? Is it possible to see when a person was online on Instagram? Is it possible to call on Instagram? Is it possible to hide photos from some followers on Instagram? Is it possible to hide the likes I make on Instagram? Is it possible to hide a page on Instagram?
