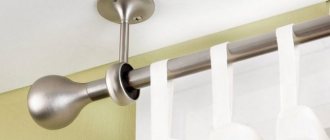
What are the types of curtains for a plastic window?
Designers go to all kinds of tricks to make plastic windows look homely: they install the usual vents, add frames. But if the windows in your apartment still resemble office windows, curtains will help correct the situation. Ordinary floor-length curtains and tulle curtains on high cornices do not harmonize with such glazing. Here you need suitable curtains for plastic windows that will not violate the laws of aesthetics.
To decorate your plastic windows with the latest in design, you should pay attention to the following types of curtains:
- Pleated curtains – also known as “Pleated curtains”. The fabric with an antistatic coating gathers like an accordion when you need to roll up the curtain and let sunlight into the room. Depending on the design, the window can be opened slightly either from the bottom or from the top.
- Roman blinds - when unfolded, they are a straight piece of fabric, but when you need to open the window glass, they, starting from the bottom edge, gather into beautiful horizontal deep folds. It is quite possible to sew such a design yourself with your own hands.
- Roller blinds are perfect for living rooms, kitchens or balconies. They are made of fabric and fastened with Velcro or brackets.
There are open and closed types of roller blinds. Open ones are fabric twisted into a dense roller, which is placed directly above the window. When closed and folded, they are hidden in a special cassette and are practically invisible.
Closed roller blinds for plastic windows (video)
Placing tulle on the balcony block
A balcony block is most often an asymmetrical and rather bulky structure. Choosing the right curtains for it turns out to be difficult, especially when it comes to cases where the balcony is used quite often (for example, as a summer dining room or dressing room).
Tulle will be an excellent solution in this case too. But the question of its proper placement on the window block should be taken seriously.
The main task in this case is to choose a curtain model that will not weigh down the structure of the balcony block and interfere with the free passage through the balcony door.
Tips for placing tulle on the balcony block:
- using tiebacks on long curtains will help you quickly and easily move them aside for free access to the balcony;
- A huge selection of accessories for curtains and tulle can be found in specialized stores. These include hairpins, magnets, bows and other devices that will help create a beautiful drapery and open the passage to the balcony door;
- if there is sufficient free space, you can hang the tulle on the ceiling cornice, while retreating from the block the distance necessary to open the door to the balcony;
- Another interesting way to cover a balcony block with tulle that does not interfere with the passage is to use not a solid curtain, but small strips (10-20 cm) wide, similar to thread curtains and vertical blinds. Special weights on the bottom will help them always remain in a straight hanging position.
All these tips can also be applied to those cases when the block between the balcony and the room is partially or completely dismantled. Instead of standard partitions, you can use weightless tulles, creating interesting combinations of colors and patterns and complementing the interior with unusual draperies.
Subscribe
Types of sun blinds on plastic windows
For owners of apartments whose windows face south, a pressing issue is the choice of curtains that serve as reliable protection against sunlight entering the room on hot summer days. Such products are subject to increased requirements.
In particular, they should be:
- Made from high-quality fabric that will not fade in the sun;
- Reflect the sun's rays to protect the apartment not only from bright light, but also from the heat in hot weather.
For this purpose, those who prefer roller blinds need to choose a product made from heat-resistant and light-proof blackout material. This fabric ensures a comfortable sleep even in white nights, as it is capable of blocking the sun's rays up to 100%.
A popular option for plastic windows are day-night sunshades, also known as zebra shades. They are easily recognized by their distinctive feature - an unusual design in which transparent horizontal stripes alternate with opaque lamellas. Due to this, you can adjust the level of penetration of bright sunlight into the room, up to complete shading of the room.
Blinds are effective in combating the bright scorching sun. Blinds with wooden slats or horizontal stripes of fabric will fit well into your home interior.
Multi-textured blinds with vertical slats will give plastic windows an original appearance. Combinations of wood, fabric, plastic, and metal allow you to create unique compositions that will become a unique highlight of the interior. Such products are often complemented with lambrequins.
Installation recommendations
Follow the recommendations of professional masters:
- Fasteners must be suitable for the selected installation method.
- Follow the installation instructions carefully. Fastening recommendations have been developed taking into account all possible consequences and should not be neglected. Do not assume that double-sided adhesive tape will replace self-tapping screws for non-wall or ceiling installations.
- Prepare the surfaces for installation thoroughly. If the roller shutter is attached to the window sash, thoroughly wash and degrease the mounted surfaces. This procedure will allow you to securely secure the curtain with double-sided tape.
- Take correct measurements. Remember that the width of the fabric does not correspond to the width of the curtain. Consider the size of the fasteners and the box if the structure is closed.
- Use a building level. Do not do it “by eye”, otherwise the unevenly mounted curtain and inaccurate attachment will require rework. And this will take extra time.
- Keep the receipt from the purchase of roller blinds for 14 days. If the components are missing fittings or fasteners, request them from the seller. The receipt will prove that the purchase was made in this store.
- Study the design features of the rolls before purchasing. Some types of roller blinds have a non-removable control mechanism. To avoid purchasing two right- or left-sided curtains, carefully check everything in the store or when receiving the goods by courier delivery.
- Consider the length of the blade when determining the mounting height. Compare the size of the window and the length of the fabric. Do not raise it too high so that light does not enter the room when the curtain is completely lowered.
- Choose the correct position of the holder brackets. Determine the position of the roller blind on the window. Check whether the design interferes with opening the window, turning the window handle, and whether the roll rolls/unfolds well. Consider all the details. Only then begin installation.
Knowing all the intricacies of installation and possible mistakes, you can install the roller blinds yourself without any problems.
Features of fastening for curtains on plastic windows
Curtains for plastic windows do not have the usual hooks or loops, and they do not use eyelets. Therefore, such curtains cannot be hung on ordinary curtain rods or threaded through baguettes. To attach roller blinds or blinds, it will be necessary to mount the structure directly on the plastic profile.
There are different installation methods.
For curtains on the window fixation can be used:
- Latches;
- Self-tapping screws;
- Brackets;
- Liquid Nails;
- Double sided tape.
Each method has both its tangible advantages and some disadvantages. Self-tapping screws and brackets, if used carelessly, will break the tightness of the plastic window, but they hold the heavy structure well. It is recommended to attach lightweight curtains with Velcro. Using liquid nails for installation will make it difficult to replace old curtains with new ones in the future. The latches are not suitable for all types of structures, but they cling directly to the window sash and are easy to replace open roller blinds with.
Manufacturing materials
The following materials are used for manufacturing.
Organza
Made by twisting threads. The fabric is strong and almost transparent.
The most successful curtain option for a balcony is tulle
Net
Material with multiple holes. They can be square or round. This fabric perfectly transmits light and air. But it is prone to dust accumulation.
Mesh tulle harmonizes perfectly with embroidered curtains and looks good as an independent decorative element
Veil
The material is less transparent than organza. The fabric is soft to the touch and wrinkles quickly.
For a balcony, you should choose the material according to your preferences.
It is advisable that the tulle is not continuous over all the windows of the room.
The best option for balcony rooms would be to hang it on each window. It is also fashionable to hang structures like Roman blinds, which have a lifting mechanism.
Tulle veil is often used to decorate window openings in various rooms.
How to attach curtains to plastic windows with your own hands
The most popular type of fastening of common roller blinds, suitable for a plastic window, is fixing directly on the window. To avoid drilling unnecessary holes in the profile, it is recommended to use removable latches that can be attached directly to the sash.
For this:
- It is necessary to first degrease the junction of the plastic and the latch.
- Cut out the appropriate size of double-sided tape, which will securely secure the latch and the window sash.
- Secure the movable shaft holders to the installed latches.
- Install a shaft with curtain fabric between them.
- Attach a spike with a gear for the chain mechanism to the shaft.
Step-by-step instructions for installing roller blinds
Installing roller blinds is a stylish, modern design solution. They can be installed in a private house, apartment, office, or commercial premises.
Such curtains are not afraid of temperature changes, wet cleaning, dust, and dirt. Depending on the weight of the structure, its type, and design solution, there are several mounting options. Let's look at them in more detail.
Step-by-step instructions for installing open-type curtains (using self-tapping screws)
With such fasteners, the structure will last as long as possible and reliably. However, the use of self-tapping screws involves drilling holes in the frame or wall. To drill, you need to prepare a drill and suitable screws.
Let's present the installation process itself step by step:
- Purchasing curtains, checking the contents. You need to make sure that everything you need is in the package.
- Product assembly. To do this, follow the manufacturer's instructions. Usually for assembly you just need to connect the shaft with brackets and gears.
- Marking. You need to take the finished product with one hand and apply it to the place where installation is planned. With the other hand, use a pencil to mark the installation locations of the brackets. Use a level to check that the marks are placed correctly.
It is necessary to determine the location of the curtain as accurately as possible
Important! Be sure to unfold the canvas when trying it on a window. Make sure that it does not overlap the handle.
- Drilling, installation of fasteners. Drill holes for fastening, secure the elements with self-tapping screws, and put on the plugs. Installation completed. You can adjust the work of the canvas and enjoy the result.
The procedure for installing MINI curtains on self-tapping screws
Features of installing closed curtains (using self-tapping screws)
Securing a closed system has a number of subtleties. In addition to the brackets, it is necessary to fix the box and guides. In this case, you can’t do without adhesive tape.
The top box of the cassette curtain is secured with self-tapping screws, and tape is used to fix the side guides
When installing, use the following instructions:
- Checking the complete set and serviceability of the curtain. Closed solar shading systems are usually sold pre-assembled.
- Degreasing surfaces. The installation site should be thoroughly wiped with alcohol. This will ensure a secure fit.
- Fitting, marking guides. You need to make sure that the guides are long enough. These strips are needed to guide the blade when lowering. If necessary, the guides are shortened using a regular breadboard knife. We mark the locations of the guides with a pencil.
The procedure for marking the mounting points for cassette curtains
Helpful advice! The guides should be shortened from the top. This will preserve the factory cut.
- Trying on a protective box. We set it according to the guide marks. We check the correct operation of the system. We make marks for placing fasteners.
Sequence of installation of fasteners - Fastening the box and guides. Using a drill, you need to drill holes and secure the box with self-tapping screws. Apply adhesive tape to the guides, remove the protective film on the other side, and install them in place. We close the sides of the box with special side covers.
Securing the guides with double-sided tape
Fastening with spring bracket
If you do not want to spoil the integrity of the plastic double-glazed window, you can secure the roller blinds using a simple spring bracket. This fastening option is often chosen for opening sashes.
This method is good because you don’t need to make extra holes in the plastic frames.
First you need to unpack the curtain and assemble it according to the manufacturer's instructions. Then try it on the window. It is important to place the canvas exactly in the middle of the sash using a building level. The locations of the brackets should be marked with a pencil.
The spring bracket consists of two parts. A small corner must first be inserted only slightly into the groove, and complete snapping must be done only after installing the curtain on the sash
We hang the brackets on the sash. Next, all that remains is to put the side covers on the brackets and insert the shaft with the fabric.
For reliability, the brackets can be additionally glued using double-sided tape
After this, home owners need to properly configure the sun protection system.
Installation using adhesive tape on a blind sash
This installation method is almost identical to the previous one. The only difference is the use of double-sided tape. It is needed to improve the fixation of the structure on the frame.
The installation kit consists of support pads fixed to the frame with adhesive tape, and brackets installed in them, secured with latches
So, you need to assemble the curtain and mark the installation location of the brackets. The next step is degreasing the surfaces and gluing Velcro onto the brackets. It is better to degrease with simple alcohol. We remove the brackets from the protective film, hang them on the sash, and press lightly. Next, you just need to put on the side covers and insert the roller blinds.
When you are sure that the curtain is installed correctly, remove the curtain and let the fastenings stick well without load for several hours
How to install roller blinds on a plastic window (video)
There is no need to doubt whether a plastic window will fit into your home interior. The modern market is overflowing with offers that are designed to decorate this type of glazing in the best possible way both in residential high-rise buildings and country houses. And attaching curtains to a plastic window is not difficult if you know some of the subtleties of such installation.
There are many methods used to attach curtains. Among them are Velcro, with which you can install curtains made of various materials.
Velcro curtains are convenient and practical primarily because they do not require holes drilled in plastic or wood
Preparing curtains
When asking yourself how you can hang curtains separately from the curtain rod and choosing your mounting method, prepare the curtains first. You need to sew neat loops along the top edge.
Option 1:
- Think about the distance between the loops.
- Measure the width of the curtains.
- At the top edge, measure the appropriate distance and make a dot or stitch.
- Mark the remaining openings in the same way.
- Make a loop of soutache just above the edge.
- Make loops at the markings and then stitch them.
Velcro curtains, description, fastening features, design options
Velcro - that's what it's officially called - has proven its effectiveness. With its help, you can install curtains without cornices on plastic and wooden windows. They are especially convenient to use in small rooms, where the cornice may look bulky, and a curtain that does not fit closely to the wall makes the room visually even smaller.
Using Velcro for small windows allows you to get rid of bulky curtain rods
What is Velcro
This type of fastening is used quite widely: in the manufacture of garments, shoes, accessories and other goods. It consists of two tape elements: on one there are microhooks, and on the other there are the same small loops. When both tapes touch, the hooks cling to the loops, sticking tightly to each other.
Self-adhesive Velcro tape or Velcro
Product advantages
The convenience of Velcro is that they can be mounted on windows even if there is no cornice, which saves space and money. Other advantages include:
- long service life and preservation of technical characteristics;
- ease of installation and maintenance: they are easy to remove, wash, dry and iron.
- Velcro curtains can be used for any interior and style direction.
Velcro fastening to a plastic window does not violate the integrity of the window
Roller shutter design
There are many types of light-protective sheets, but they have common features.
All of them consist of a metal tube-roller, or rod, on which fabric is wound: bamboo or cotton material. The length is adjusted using a chain that is attached to a rotating mechanism on one side of the roll. Usually at the bottom of the curtain there is a steel or wooden weight bar that protects it from deformation, allows it to hang evenly and fit tightly to the glass. The latter is achieved using a pair of small magnets that are glued to the bottom of the frame and attract the weighting material, if it is metal.
You can take a more complicated route and thread a fishing line through the guides, which will hold the roller shutter during wind fluctuations and opening in the “window” mode. It must first be threaded into the upper fasteners several times so that when tensioned it does not pull out. Unwind it all the way and insert it into the special eyelet on the weight bar. At the bottom of the frame, attach small corners with holes for fishing line. Pull it there, tie it, cut off the excess.
Sometimes manufacturers install a spring inside the shaft. In this case, there is no need to fiddle with the cord with your hands to open or close the “roll”. It is enough to pull the plumb line located on the bottom bar with a little effort.
How to install curtains on a window without drilling
Traditionally, to hang a curtain, you first need to install the curtain rod by first drilling holes in the wall. Then install the holders for it and secure them securely.
Fastening individual sheets of Japanese curtains with Velcro
However, many novice home craftsmen are interested in how to attach a curtain to a plastic window, but avoid drilling. This can be done by taking advantage of the Velcro fastening options for curtains. This fastening method can be used when installing:
- Roman blinds, including roller blinds;
- curtains made in the oriental style, in its broadest sense;
Japanese Velcro curtains will look good in a small living room
Curtains with Velcro loops are similar to regular curtains; to remove them, just undo the Velcro
Installing curtains with Velcro yourself
Before you start decorating the curtain with Velcro, you need to decide where to attach it: to a wall, a plastic or wooden window, and then:
- cut a strip of fabric from 5 to 12 cm wide, depending on the purpose and density of the curtain;
We take measurements of the window with allowance for Velcro and seams at the top and bottom
We cut out the curtains according to size, fold the sides of the curtain, then the bottom of the curtain using the soft part of the Velcro on the wrong side
For each curtain we sew 4 ties from the same or a different fabric
To the top of the curtain from the front side, pin soft Velcro, measure 7 cm from the edge of the curtain, place one tie under the Velcro from below, stitch
String cornices in the interior – 50 photos:
PreviousCurtainsHow to choose the correct width of the cornice and curtains for the window
Next
CurtainsHow to sew ribbon to a curtain: step-by-step instructions, photos
Loggia or balcony: how to attach curtains with Velcro
Today it is customary to use a balcony or loggia as a living space, which often turns into another makeshift room. In addition to other fastening methods, loggia curtains can be installed with Velcro.
Velcro curtains are often used to cover windows on balconies and loggias.
However, their use requires compliance with additional conditions that will ensure the strength and reliability of the curtains.
Do-it-yourself Velcro curtains for the balcony have a certain difficulty in installation, since the windows installed here reach the very top, and they can be strengthened with great difficulty. It is impossible to install a cornice, curtains on nails are not aesthetically pleasing, and the most effective and aesthetic way would be to use Velcro.
An excellent option is to use Roman blinds. They have a number of advantages:
- do not interfere with opening windows;
- do not flutter from gusts of wind;
- do not require significant material costs;
- used in various colors.
Attention! Do not forget that the design features of balconies and loggias require significant air movement, so heavy fabrics are inappropriate here.
The best choice for balcony curtains would be tulle, muslin, organza, silk, cambric, curtain fabric.
The fabric can be attached to a block with Velcro, then installed on the window frame and secured with fasteners.
Adhesive tape is attached to the wooden slats using glue or a stapler, and the slats are attached to the wall with self-tapping screws
Design options for balconies and loggias can be found on websites where color photos are posted.
Types of string cornices
According to the installation methods, curtain rods are divided into ceiling and wall options. They are mounted above the window opening, above the entrance arch, if there are no doors, between the walls for zoning the room, suitable for sloping attic windows. Mounted on the ceiling, such a curtain will visually increase the height of the room.
The main feature that distinguishes string curtain rods from other models is their special design.
Important! To use denser and opaque materials, you need to choose brackets with three holes and secure 2-3 steel cables. They will be able to withstand more weight or several canvases of different densities.
Ceiling models, description, mounting method, interior photos
Ceiling models of curtain rods with fishing line or string for curtains are mounted on standard-shaped brackets and are not suitable for suspended ceilings. Under the weight of the curtains, they sag, and at the point of attachment, air gets under the surface. Brackets are difficult to mount on drywall, as this material crumbles.
A string for curtains can reach five meters in length, but this is not the limit.
The scheme for attaching a string cornice to the ceiling is simple:
- marking the space for brackets;
- drilling holes for fastening;
- installation of dowels, then installation of brackets;
- inserting the strings into the holes of the brackets and tensioning them using a special screw by hand;
- securing the string, installing caps or covers, if they are included in the kit;
- hanging curtains on hooks.
Such a thread can be placed not only in one, but also in two or three rows (between the brackets).
The marking is carried out taking into account the distance from the wall of 10-15 cm. The curtain should not touch the window sill, the heating radiator or its protective screen. At least 5 cm must be left between the ceiling and the string so that large decorative rings or eyelets can be used.
A string cornice allows you to combine several tulles of different colors and create an unusually beautiful interior.
Wall models, description of how to attach to the wall, photos in the interior
Installing a string curtain rod for curtains on the wall differs little from the ceiling version, since the brackets in both cases are of the same type and differ only in the angle between the part with which they are adjacent to the wall and the part for fixing the string.
After adjustment, you can remove the excess length of the thread using wire cutters or roll it up and carefully hide it on the side.
Therefore, the operating algorithm is universal:
- marking the position of the brackets on the wall (taking into account the equal distance with respect to the edges of the window);
- drilling holes and installing dowels;
- installation of brackets;
- if curtains are hung on grommets or rings, they must be put on a string;
- threading the strings into the holes of the brackets;
- tensioning and securing the string.
Only light textile fabric can be hung on string curtain rods: chiffon, tulle, and veil are most suitable for them.
Important! The strings included are sold in lengths of 5 m. If the length of the cornice exceeds 3 m, then it is necessary to install an additional bracket in the middle of the distance. This applies to any case where the free span of the string is more than 2 m on each side.
Curtain string, what it is, description, appearance, where it is used
The main element of string cornices is the wire itself. Its texture resembles thick guitar strings or fishing line. Its external finish and the color of the brackets can be very elegant, in shades of gold, copper, or brass. The fastening of the curtains is very compact, invisible and allows you to freely move the fabric along the window.
Lightweight jacquard, satin or cotton curtains are best secured with hooks on two ropes at once.
With all its versatility, this method of hanging curtains helps to focus all the attention on the textile decor of the room. The curtain seems to hang in the air, making it look weightless and make the room more spacious.
To place lambrequins, you can use the third row of strings.
In terms of installation method, curtain rods based on curtain rods are one of the simplest. Even a novice repairman can handle the installation. The operation scheme is very simple; if the fishing line is sagging, you can tighten it using a special bolt in the bracket. They are suitable for both city apartments with concrete floors and brick walls, and for wooden buildings.
Installation of the cornice does not depend on the type of surface.
Video: We sew curtains on loops with Velcro.
It is not always possible or desirable to hang curtains in the traditional way - on a cornice. After all, it must be attached to the wall with special tools, screws, a drill and who knows what. And this will lead to debris from crumbling plaster, dust and, as a result, cleaning. You will have to spend time on installation, cleaning, and then hanging the curtains... And now, everything is beautiful, great, but there is no energy left for joy.
But there are options when you can do without drilling and complex installation. In this case, the view of the window opening will only benefit.
How to hang curtains without a curtain rod
Tags
“Textiles on windows make the interior more beautiful by 80%!” — my friend, who has been working as an interior designer for more than 10 years, once said. A window opening with beautiful curtains will not leave anyone indifferent. However, there are situations when it is not possible to decorate a room or loggia in the traditional way. Then you have to hang curtains without a cornice.
Today the editors of “So Simple!” offers you to familiarize yourself with an excellent selection of effective ways to hang curtains without using curtain rods and a drill. And I didn’t have to bother my husband!
© Depositphotos
Mounting options and variety of designs
- cascading. In any form, they fall in cascading waves;
- classic. Both folded and unfolded, they fall in an even rectangle;
- frameless. They do not have cords in the mechanism, so when closed they fall in beautiful arcs.
- on the window sash. The window sill will remain free, and the functionality of the window will remain the same. The only drawback is the sagging of the curtain when closed. Easy to fix with magnets;
- on the frame . An excellent option if flowers are grown on the windowsill. Even with the curtain closed, the window sill will be free. And with frontal ventilation, no difficulties will arise;
Advice! If you need to combine different curtains, you can hang classic ones in addition to Roman ones.
- above the window opening. Suitable if there is a need to visually enlarge the window opening or hide slopes;
- to the ceiling . Used when you need to cover an entire wall or nearby windows.
Advantages and disadvantages of point fixation
If the hooks fit tightly enough, you can hang any curtains on them. For example, curtains, drapes on the sides, lambrequins - and all this with the same fastenings.
The holders themselves can be very effective.
In addition, this method of fastening allows you to beautifully decorate a window of the most bizarre shape, be it an arch or a dormer window.
Important! As for the disadvantages of this method, there is only one. You won't be able to open the curtains.
Mounting method
When mounted on a sash or window frame, no additional tools are needed. The window opening will not be damaged and its tightness will remain the same. If you use ready-made Roman blinds, the kit includes double-sided tape.
Step by step instructions:
- Align one part of the adhesive tape to the width of the window and attach it to the frame.
- Sew the second part of the tape to the blinds.
- Align the fabric, press both parts of the adhesive tape against each other. This completes the installation.
Another way is to mount it on a spring bracket. The integrity of the window opening will not be damaged. This method is suitable for opening doors.
Step by step instructions:
- Attach the blinds to the shutters, mark the position of the fasteners.
- Secure the bracket in the desired location.
- Place the side covers on the structure.
- Insert the roller with the blind into the connection.
- Make sure everything works correctly.
- Install the position limiter at the bottom. Sticky tape or a magnet will do.
Telescopic cornice
This mounting option does not require installation and upon purchase, the price will pleasantly surprise you. The only feature that needs to be taken into account is that it is suitable for light fabrics weighing no more than 5 kg.
Mounting method
- Mark the attachment points and measure the length of the opening.
- Secure the device. To do this, press on a tube of smaller diameter and install it between the walls.
- Release this part of the bar. The spring located inside will fix the crossbar.
Important! Not all models have a spring for fixation. In another option, you will need to screw the moving part of the pipe along the thread until the desired size is reached. Next, secure with a clamp.
On hooks
For this method you will need hooks. When choosing, pay attention to how much weight one hook is designed for . This will determine how many pieces you need to purchase.
For example, if the weight of curtain fabric is 5 kg, and one hook can hold 2 kg, then you need to buy 3 hooks. You will need a cornice, it should be light. To install hooks, degrease the surface. Attach hooks, install curtain rods, hang curtains. At this point, the installation will be completed, and the walls will remain intact.
Suction cups for curtains, scope of application and installation
Another way to attach curtains is to use suction cups. Most often, they are used to secure curtains in the bathroom, shower, or combined toilet. It has its advantages:
- simplicity;
- cheapness;
- saving time;
- no need to drill into walls.
However, such products are not always pleasing: after a short period of use they lose strength and fall along with the curtains.
When purchasing, you need to pay attention to the integrity and smoothness of the surface of the suction cup. If they are broken, then the period of use will be short.
But even absolutely high-quality products will not adhere tightly if the wall has defects: potholes, cracks, remnants of the previous coating. It will be difficult to strengthen them on the embossed surface of the facing tiles.
To securely fasten them, you must use:
- degreasing agents;
- petroleum jelly and petroleum jelly-based preparations;
- lining made of self-adhesive PVC film;
- silicone sealant.
Useful tips
Professionals shared practical tips for installing roller blinds. Study them carefully:
- the same curtain will be of different lengths depending on the chosen attachment option.
- When attached to the ceiling, it is easier to model curtains. It’s okay to make a mistake of 1-2 cm, since the fabric will cover the window opening. Take the roller shutter fabric 10 cm wider than the window frame, and as long as you need;
- when mounting to the wall, take into account the box size of about 5 cm;
- when installing in a window frame, the material should be 4 cm narrower than the window niche;
- The width of the fabric for roller blinds with PVC guides should be equal to the width of the glass. In this case, the guides are attached to the glazing beads;
- for Mini roller blinds, canvas = glass width + 3 cm: one for the glazing bead at the window handle, two on the hinge side;
- if the roller blind has a guide string, then the width of the material should be equal to the width of the glass plus 3 cm so that there are no gaps;
- Before installation, measure the length of the bracket. It should be sufficient so that the shaft does not touch the wall;
- with any type of fastening, the uncovered section of the chain mechanism must be directed downward. If you place it incorrectly, the roller blind will not work;
Now you know how roller blinds are attached. Installation is simple and does not require professional skills or special tools. Use the recommendations of experts from our article, and attaching the curtains will not be a problem.
