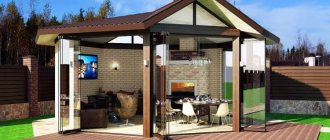
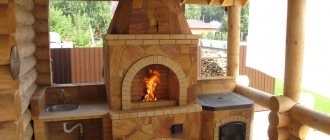
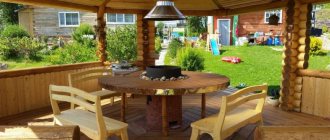
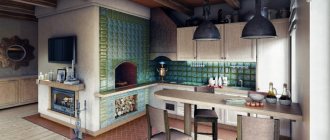
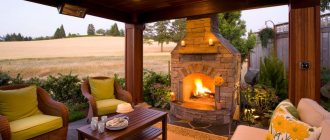
In this article we will look at how to make a brick grill for your dacha with your own hands (there will be models for both the street and the gazebo). Models with a place for grilling kebabs and with stoves for installing a cauldron. Let's consider portable and stationary, simple (small) and real (large) barbecue complexes with barbecue, grill, sinks and places for cutting meat. Below you will find more than 18 projects with step-by-step photos, recommendations, instructions and construction tips.
Article menu:
This article contains 22 projects with step-by-step manufacturing photos:
- with a metal frame (.) Brazier made of brick + stove for a cauldron with your own hands (.) Brazier made of brick and metal - portable
— Simple
- Brick BBQ Grill
- Brick grill with table
- Do-it-yourself small stationary brick grill
- Brick grill in the gazebo. Master Class
- Construction of a garden barbecue made of bricks
- Do-it-yourself barbecue with an arched roof in a gazebo
- Outdoor brick grill in the letter W with a roof
— Barbecue complexes = Barbecue complex of 300 bricks (barbecue) = Corner grill made of brick into a gazebo + oven + stove for a cauldron = Project of a wooden gazebo with a brick grill. + Photo = 3 in 1 : brick grill, barbecue, smokehouse
— To the gazebo ☀ Wooden gazebo with barbecue ☀ Wooden gazebo with a simple brick barbecue inside. ☀ Brick gazebo with barbecue ☀ Gazebo with barbecue under the same roof as the house (Annex) with your own hands
— Braziers made of blocks ✨ 3 MODELS of grills and grills made of blocks ✨ Grill smokehouse made of blocks ✨ BBQ grill made of blocks photo gallery ✨ DRAWINGS of grills and barbecues made of blocks
Right choice
In order for construction to be successful and with a minimum number of errors, you need to carefully prepare. First of all, draw up a project for the future construction. It indicates the dimensions, main components of the stove, and the required material. You can take a ready-made drawing from the Internet and adapt it to your conditions.
What type of hearth to make depends on the following nuances:
- ease of use;
- material strength;
- stove dimensions;
- temperature range produced by the hearth;
- street landscape and gazebo design.
With careful preparation, you can build exactly what you originally intended.
How to build a gazebo with a stove?
After the project has been drawn up and all the drawings have been completed, you should prepare the material and tools for building a stove for the gazebos and the gazebo itself. When drawing up a project, certain calculations are made that will allow you to purchase a sufficient amount of ceramic bricks and fireclay. It may need cladding.
Stage No. 1. Laying the foundation
- Clear space for a gazebo with a barbecue stove.
- Make markings according to the project, install beacons and pull the rope. This way you can see the foundation line. It is dug for both the gazebo and the stove at the same time. The width of the trench should be 5 cm larger than the gazebo. Depth – 50 cm.
- A 10 cm drainage pad is placed at the bottom of the tape. It is made of gravel or slag.
- It is necessary to make formwork from boards or wooden panels. The formwork must be strong and withstand the pressure of the foundation monolith.
- Reinforcement tied with wire is placed in the trench.
- Fill the tape with concrete and leave to dry. The monolith must be compacted and leveled.
- After the concrete has dried, the formwork is removed.
The foundation can be columnar, piled or made of asbestos pipes.
Stage No. 2. We build the floor of the gazebo
If the foundation is strip, then it must be covered with a layer of roofing material so that moisture does not destroy the posts of the gazebo. The entire area of the gazebo is covered with waterproofing material. A screed of cement and sand is poured onto it. The floor is laid out with fire-resistant material. If wooden material was chosen, then the space for the stove complex must be separated: with tiles, bricks, stone.
On the pile foundation, a sheathing is made of timber, which is placed on installation studs. The studs are attached to the piles. Clapboard, plywood or OSB boards are laid on the sheathing, which can be covered with ceramic tiles or other coating.
Stage No. 3. Installation of gazebo walls
The walls of the gazebo will consist of supports to which the wall material is attached. Brick racks are laid out immediately from the strip foundation. The ceiling can be a forged or wooden lattice. Colored polycarbonate looks good with brick.
For wooden racks, 10*10 cm beams are used. They are reinforced with long screws. The walls can be open to allow more air, or closed with polycarbonate, glass, or wooden lattice.
Stage No. 4. Building a furnace
- It is difficult to make stoves for gazebos with your own hands, but using construction rules, this is quite possible. The foundation for the furnace complex is covered with roofing felt. The first row is done dry to adjust the bricks to size. They make it continuous. Before laying, the brick is soaked in water so that it does not draw water out of the mortar. Then the bricks are lubricated one by one with the mortar and laid again in the measured place.
- Rows 2-5 are made in the shape of the letter “W”. At this stage, niches for firewood, a fireplace and kitchen utensils will be visible. The seams must be tied. For greater strength, the masonry is made with reinforced mesh.
- The 6th row is laid out across the main masonry, making a ledge. The iron sheet for the pallet will be strengthened on it. This niche is lined with fireclay in several rows. There must be an air gap between the pallet and the brickwork. In another niche, where the table is located, a tabletop is attached to the ledges.
- Rows 7-9 are performed in the usual way with ligation of the seams.
- Row 10 – a protrusion is made. The barbecue grill will be attached here. The walls of this niche are made of fireclay bricks.
- Rows 11-14 – regular masonry.
- Row 15 – ledge. Bricks can be cut 30 degrees to begin laying out the arched vault. The same operation can be done with the ledge that begins the arch of the fireplace.
- A chimney must be installed above the stove. It can be purchased or made from a metal sheet by welding.
- The place for the pipe in the roof of the gazebo is treated with insulating material. It must have fire-resistant properties.
- A cap is put on the pipe. It will serve to protect the stove from precipitation, debris and provide good traction.
Stage No. 5. Roof construction
build a gazebo roof
The frame is sheathed with lathing. The pitch size between the slats depends on the type of roofing material. The sheathing must have a hole for the chimney.
It is quite possible to build a gazebo or a barbecue oven for gazebos with your own hands. You need to stock up on patience, some knowledge and materials for construction. Then you can please your friends and family with a cozy evening in front of the fireplace or a delicious barbecue with baked vegetables.
Base
Due to the large weight of the brick structure of the gazebo, you will have to take care of a high-quality foundation. For such a gazebo it can be slab or strip. It is better to use the second option, because the first will require more material for construction. In addition, if it is exposed to uneven pressure from the gazebo, then it may simply burst. The territory is marked at the selected location. On the first pass, you can roughly mark the boundaries. After this, the turf layer is removed.
When the area for the gazebo has acquired more specific outlines, you can move on to precise markings. To do this, a wooden peg is driven into each corner. A rope is stretched between them and the diagonals are checked to ensure that each angle is accurate. If an octagonal gazebo is selected, then the marking will be somewhat more complicated. The first step is to draw a circle. Its diameter will be equal to the width of the gazebo. A circle can be drawn using two pieces of reinforcement, between which a rope will be loosely stretched. After this, inside the circle you need to place two ropes perpendicular to each other. From the formed points it is necessary to set additional points at the same distance to form an octagon.
Next, a trench 50 cm deep is dug. Its width should be 15 more than the wall of the future structure, if it is present. The walls of the trench under the gazebo are leveled, and sand is added to the bottom. It compacts and levels well. After this, the formwork for the foundation under the gazebo is installed. The foundation should rise slightly above the ground level. A metal sheathing is laid inside the formwork and concrete mortar is poured. It is well compacted using a vibrator or a piece of reinforcement. The foundation will gain strength over several weeks.
Some construction features
In order to start independently building a brick stove in a gazebo with your own hands, you can find plenty of material, but let’s dwell on some of the construction features.
Any brick oven must be installed on a foundation. If you deliberately provide for the construction of a stove and a gazebo at the same time, the process will be easier and faster. Ideally, it is easier to build a stove and arrange a gazebo around it. No matter how funny it may look, some experienced craftsmen do this. Otherwise, it will be necessary to dismantle not only the floor covering of the gazebo, but also the elements of its supporting part.
If there is no goal to heat the room, then the stove can be built in the corner. Then its walls will serve as load-bearing walls of the gazebo. But this approach is rare, as there is a large loss of heat.
Construction is in full swing
Despite the advice for beginners on arranging gazebos with the simplest models, you need to choose only those projects that implement smoke removal. Over time, it will become clear that a barbecue stove with a chimney for a gazebo will provide a comfortable stay, and a chimneyless simple brick barbecue will fill the space with smoke. Even a ventilated structure will not help.
Some elements of the furnace complex are not tied together with the furnace, but the same foundation is prepared for them. This means that you need to immediately decide from which components the desired complex should be built, and then begin to search for a suitable project. Make sure that the project contains all the comprehensive information for an inexperienced craftsman.
I would like to pay special attention to preparing the solution. It cannot be prepared in the same way for all elements
The foundation is poured with liquid cement-sand mortar. The proportion of components is the same as for conventional masonry. The furnace body should be built using clay mortar. Today you can purchase a ready-made mixture, which just needs to be diluted with water. Try to check the graininess of this mixture. Since the size of the seam between the bricks from which the firebox is formed should not exceed 5 mm, then to fulfill this requirement you will need well-sifted sand and crushed clay
Popular articles Options and ideas for glazing a veranda with aluminum profilesIf there are coarse particles in the mixture, then you should pay attention to another manufacturer.
Usually, it is not recommended to make changes to the order, since building a furnace is quite a responsible undertaking, and any inaccuracies can cause a lot of trouble later. But still some improvements can be allowed.
Note the overlap that covers the lower firewood compartment. It is presented in the form of a tabletop
Undoubtedly, the usable area of this countertop will be useful for cutting food. However, if on the other side the picture is symmetrical, then the countertop can be used to embed a sink and arrange a sink.
In winter, the water supply will have to be dismantled, because even the location of the main line at a certain depth will not save the system from freezing, since the gazebo is not a constantly heated room.
Chimney device
When the chimney continues to be laid out of brick, the order of work is as follows:
- The top of the combustion and facing parts are brought out to one level.
- To lay the smoke collector, a solid brick is taken. The solution is cement-sand. Cement grade – from M150.
- The first row is flush with the inside of the firebox. All subsequent ones are shifted by ⅓ of the brick.
There is no need to shift it over a greater distance, otherwise the bricks will simply fall inside the firebox over time.
- The laying is carried out until a small opening remains (30*30 cm, 25*25 cm).
- The finished brick chimney is covered with a protective cap on top to prevent moisture and precipitation from getting inside.
There is an option for mounting a chimney made of heat-resistant concrete or a double-circuit chimney made of sandwich pipes.
Read step-by-step instructions for installing a chimney made from sandwich pipes.
Where to begin?
The construction of any building must begin with two interrelated aspects: the development of a project and drawing, as well as the choice of location. Which of them will have priority depends on the area of the plot. If there is enough free land, then any project can be developed. There are a sufficient number of ready-made options on the Internet with detailed drawings and cost calculations. If there is not enough land, then the size of the gazebo with barbecue should not only meet the needs of the owners, but also fit harmoniously into the landscape. The same applies to the appearance - it should not stand out from the general landscape.
In addition, when choosing a location, important points should be taken into account:
- It is recommended to arrange gazebos, grills, barbecues and various recreation areas so that they are as far as possible from the road, as well as from neighboring areas, if possible.
- When cooking on any Dutch oven, quite a lot of smoke is generated. If the gazebo is located next to the house, the smoke will penetrate into the living quarters.
- For safety reasons, braziers of all types, like simple fires, should not be built near gas pipelines, electrical wires, buildings made of flammable materials, or garages.
During the development of the project, special attention should be paid to the materials that will be used. A stone or brick gazebo with barbecue is the best option
However, it is also quite expensive. Especially when it comes to natural stone. In addition, you will need more cement and sand to prepare the mortar for masonry. Construction will also be more labor-intensive. An undoubted advantage in this case will be the non-flammability of the materials. You can reduce the cost of construction if you use used bricks.
Wooden buildings look very beautiful, but wood has a number of disadvantages. First of all, it burns. Secondly, good wood is expensive. Thirdly, wood is not as durable as brick or stone. The advantage of a wooden structure is that it can be made collapsible and, if necessary, moved to another place or stored.
Quite often metal is used for construction. As a rule, this is a frame made of reinforcement, square, openwork forged gratings, etc. In addition to absolute fire safety, the advantage is that this design does not look too massive.
Well, of course, it is possible to build a gazebo with a barbecue with your own hands, using combinations of various materials. As for the braziers themselves, they are made of stone (brick), metal or even foam concrete.
Wooden and metal versions of gazebos with barbecues do not require such a capital foundation as stone and brick ones.
Preparing the site for construction
It is necessary to remove all interfering plants. Including plants near the site of the future brazier. The site will need to be leveled.
Marking is usually done using pegs and rope. It must be remembered that a separate foundation will have to be made for a capital stationary roaster. Accordingly, you need to mark a place for it.
If wood is used in construction, it is also pre-prepared by treating it with antiseptic and anti-flammable agents.
Required tools and materials
To build summerhouses with barbecue, you will need:
- building material for the gazebo: solid red brick or stone, wooden beams of appropriate sizes, boards. The quantity is determined by the project;
- wooden beams measuring at least 50×50 and boards for roofing;
- flooring board or other material for the floor inside the gazebo;
- liquid for fire-resistant impregnation of wood, if you plan to build a wooden gazebo with a barbecue;
- liquid for antiseptic impregnation of wood;
- solid red brick, fire-resistant brick for the construction of the brazier itself. The quantity is individual and depends on the design of the fryer;
- sifted river sand;
- cement;
- crushed stone for drainage;
- reinforcement for foundation reinforcement;
- red clay (preferably oily). It will be required to prepare the solution if the gazebo with barbecue is made of brick;
- construction mixer or concrete mixer;
- bricklaying tool;
- construction level;
- bayonet and pick-up shovel;
- construction tape;
- container for soaking clay (barrel, boiling volume about 50 l).
Furnace finishing
The Stonehenge stove does not require special finishing, since the bricks were carefully prepared during laying. All you need is to join the wide seams, which is ideally done during the laying process, but it can be done later. The jointing is done with a special tool. Its purpose is to give the building an aesthetic appearance.
Joining the seams allows you to give the stove an aesthetic appearance
It is better to prime all metal parts and paint them with stove varnish or any heat-resistant paint.
The door of the cauldron compartment must be coated with heat-resistant paint
Peculiarities
A luxurious brick oven with a barbecue area, hob, and other attributes is a complex device that is not easy to build without experience in the construction industry. The main feature of a brick stove is the mandatory presence of a concrete foundation. If the gazebo is made in a lightweight version and has a plank floor, you should make do with a portable barbecue. If you decide to build a stone stove, it is worth understanding the design features in more detail.
Safety
Do not allow parts of the stove to come into contact with objects that can easily ignite. It is necessary to use special screens as protection
This feature is worth paying attention to if the stove is located in a wooden gazebo
Moisture and frost resistance
The stove in the gazebo is used in the warm season, but the structure will be located in the yard permanently. Therefore, construction materials should not absorb moisture. The accumulated liquid, freezing, will tear the brick, which can cause cracks to appear, and the stove itself will begin to collapse.
Heating temperature
Even if the inside is very hot, the outside of the device should not become hot. Hot surfaces can cause burns if accidentally touched. This can be eliminated by special surface finishing. Tile and stone are suitable as non-combustible cladding.
Environmental friendliness
The material chosen for an outdoor stationary stove should not contain harmful components that, when heated, will spread, harming the health of those who will be in the gazebo.
Fire safety measures during operation
The floor in the gazebo must be made of concrete.
A brick barbecue in a closed or open gazebo must be used, observing certain rules.
- Wooden benches and sofas cannot be placed near the brazier.
- When removing the chimney, the place of contact with the roof is isolated with an asbestos sheet. If the chimney is metal, install a capsule with waterproofing, non-combustible material.
- It is not recommended to lay a wooden floor in such a gazebo. Sparks from the firebox can hit the deck and cause a fire.
- You can prevent fire by finishing the floor around the stove with iron or asbestos sheets.
Not far from the gazebo you need to place a fire shield and keep a container with sand.
Simple brick grill
Any brick structure requires a foundation. And even such a small barbecue, as presented below, is very undesirable to place directly on the ground. The foundation will have to be poured. It can be made strip or slab. The slab is more reliable: it will not move in winter and the masonry will not fall apart.
Popular articles Planning and design of landscape design for a plot of 5 acres
Even a beginner can build this simple brick grill with his own hands.
The dimensions of the foundation for a brick grill are 10-15 cm larger than its dimensions. First, the plant layer is removed; if necessary, the pit is deepened by 10-15 cm. Its bottom is leveled and compacted. A 10 cm layer of crushed stone is poured and compacted again. It is advisable to use a vibrating plate: you will not compact the soil enough with a manual tamper. The height of the tape is 20-30 cm, the thickness of the slab foundation is 10 cm.
Depending on the type of foundation chosen, the appropriate formwork is constructed. For greater strength, reinforcement is made with a rod of 10-12 mm in diameter. For the tape, two threads are laid around the perimeter; for the slab, a “cage” is made: rods are laid lengthwise and crosswise in increments of 20 cm. Everything is filled with concrete of a grade no lower than M200.
If the temperature during construction stays around +20°C, after about a week you can continue work: the concrete has gained more than half its strength. Two rows of waterproofing are laid on it (roofing felt, roofing felt, modern roll waterproofing), coated with bitumen mastic or other liquid waterproofing solution. After this, you can begin laying.
Dimensions and materials
You can build this small brick grill with your own hands even without any experience. It is a structure in the shape of the letter “P”. There are two parts: the brazier itself and the table next to it. The design is simple and easy to modify. You can add another section nearby, make it wider or narrower, deeper or shallower. You can make two protrusions for the grates - this is if you will be preparing a large number of kebabs.
In the basic version, the dimensions are as follows:
- width 180 cm;
- depth 90 cm;
- barbecue height 100 cm.
To lay this garden barbecue, you can take solid ceramic bricks, you can also use fireclay SHA-8. For the order given below, 202 bricks were used.
For the lower part - up to the 5th row - a cement-sand mortar 1:3 is used or with the addition of one part of lime. Further, where heating will already occur, a clay-sand solution is used. Its proportions are selected based on the qualities of the clay (oily, normal, skinny). In terms of thickness - it should not be too liquid, but not too thick. About the same as good thick sour cream.
Order and order of work
This country grill is made of bricks laid “on a bed”. Two protruding rows (bricks laid crosswise) serve as support for the brazier sheet and the grill grid. Here you can also place it on a spoon (place it on the narrow part), then the sheet will rise a little higher. In the lower part you can store firewood or use it for other household needs.
The rows are placed in a bandage - offset, for this you need halves of bricks. They can be cut with a grinder. The first six rows form the brazier and table on the right. Starting from the 7th row, the masonry goes only in the part where the grill itself will be located.
Seam thickness 5-8 mm. It should be the same.
Arrangement of a small country barbecue made of bricks
In order not to disturb the geometry during construction, you can pull the cords and align all the rows along them. But you check each brick and each row with a level for horizontalness. You must constantly check the verticality of the walls and corners. To do this, use a plumb line (a cord with a weight at the end). You can check the verticality with a level, but it has an error, especially if it is not a professional, but an amateur instrument. So, with such a check, there is a good chance of getting a roasting pan with slanted, clogged walls.
The procedure for this brick barbecue is simple and does not require additional explanation. Questions may arise regarding drying. If the weather is dry, leave the grill to dry for three to four days. Then you can build the fire little by little. Heat in a gentle mode for a couple of days, using thin wood and little by little. Then you can fry the first batch of kebabs.
One of the options for a simple brick grill. It differs from the basic version in that there are two rows of protruding bricks. Another difference is that the table is smaller.
If rain is expected and there is no canopy over the grill, cover it with oilcloth. After about a week, you can begin slow drying: turn the fire low and not for long. Drying will also take 2-3 days. Then you can test a brick grill built with your own hands.
You might be interested in reading “How to make a metal grill with your own hands”
Waterproofing is an important point
The space under the floor should absorb excess moisture well and not let it into the room. To do this, the ground inside the foundation contour is compacted and covered with a thick layer of sand. It is better to immediately lay roofing felt or thick film on the ground; they will not allow grass to grow through the floor.
Crushed stone is laid on the sand and insulating material is laid again. The same roofing felt or roofing felt is laid on top of the foundation (both the main one and a separate one - the stove). The brick should not have direct contact with the concrete, otherwise it will become damp.
Layout options and ideas
A gazebo on the site can be built completely open, organizing a resting place by the fireplace under one canopy, half-open and closed. When choosing an option, you need to take into account the time and financial costs of each. If the dimensions of the building allow, the stove is placed along one wall. A permanent structure can even replace it. In a small area, a corner location would be appropriate.
For several sources of fire they make a common hood, so they are located in close proximity to each other. The chimney must be designed in accordance with all the rules that exclude smoke in the direction of residential buildings.
The central place of the gazebo usually remains empty or occupied by a seating area. There is a table, chairs, and a sofa. If the building requires a portable brazier only for shish kebab or barbecue, it is installed in the middle, ensuring a good flow of smoke.
Video description
You can see the entire process of constructing the furnace in the video:
- The most critical stage of work is laying the brazier . It is advisable to use the most heat-resistant brick (fireclay) for it. Ceramic or clinker bricks are used to build the rest of the structure.
- If necessary, a canopy, a chimney , an extractor hood is installed, a sink is installed with the necessary communications connected.
- The final stage is decorative finishing . It is necessary in the case when rough brick was used during construction, and it is necessary to improve the appearance. Finishing can be done using artificial and natural stone, porcelain stoneware, facing tiles, terracotta.
Stone finishing is a classic that always looks just great Source yandex.uz
Materials for the construction of a stove and gazebo
For the construction of both the stove equipment and the gazebo itself, you need to choose non-combustible materials. This is a prerequisite for fire safety.
Particular attention should be paid to metal fragments of furnace equipment. Cast iron elements for the stove are considered optimal
It is also advisable to make the following elements of a stove with a barbecue or grill in a gazebo from cast iron:
- grate, grill or barbecue;
- firebox;
- lining;
- spit;
- baking tray with stand;
- grate
Heat-resistant steel can also be used. But under no circumstances should you use standard sheet or stamped steel, as it begins to oxidize when heated over an open fire, releasing iron oxide, which spoils the taste of cooked food, causing harm to human health.
When constructing a summerhouse building as in the photo, facing brick or stone is used
The structure should not be closed, as it is very important that it is well ventilated. For the construction of the floor surface, it is important to use non-combustible materials - fire-resistant tiles or ordinary concrete
It is very important to arrange a slope to allow water to drain from the stove to the outer edge of the gazebo. This will prevent water from entering the stove during heavy rains.
Popular articles Carnation Shabot: planting, care
If the owner of a summer cottage prefers buildings made of wood or he already has a ready-made wooden gazebo, then it is very important to remember about fire safety by arranging a non-combustible foundation made of concrete or metal under the stove or using a collapsible metal barbecue or other portable equipment
Classification
All versions of barbecues and outdoor ovens will be conventionally referred to as garden barbecues. There are a huge number of projects that can be roughly divided by location, size and configuration.
Placement
Barbecue stoves are placed in an open area. In this case, they are called street (garden).
Or they are located in specially constructed premises. Most often, these are gazebos, verandas, open or closed terraces. In the latter case, it is possible to insulate the room, which will ensure its comfortable use at any time of the year.
BBQ oven in the gazebo
Dimensions and configuration
It is difficult to list all existing options in one article. We will name only those that are used more often than others. Similar designs include:
- barbecues of simple designs;
- with equipped smokehouse;
- hob;
- cauldron;
- grill;
- barbecue oven;
- designs with a countertop and sink;
- barbecues combined with a fireplace;
- complex multifunctional barbecue complex;
- versions designed for laying in the corner of a room.
Types of barbecue ovens
When choosing any of these options, you should carefully consider all the issues related to the decision to build it. Decide on your financial capabilities. Decide who exactly will carry out the masonry and carry out related work on a turnkey basis, you personally or a professional stove maker. How often and in what composition do you plan to use the grill. All this will allow you to make the optimal choice of the desired project, which you will not regret in the future.
How to choose?
The choice of material for building a stove today is quite wide. In the modern building raw materials market, leading brands offer an extensive range.
Several types of bricks can be used.
- Heat resistant. This brick is red in color and has no holes.
- Ceramic (made of clay). Retains high temperatures, efficiently accumulates heat. Visually, this type of clay brick is difficult to distinguish from other options that do not have heat-resistant characteristics.
- Fireclay brick. It has fire-resistant qualities, but it is more often used as cladding or for decorative inserts.
Construction projects typically involve the use of materials in an integrated manner. But you can use one type of material for the entire structure. The choice of materials for constructing an outdoor stove determines its functionality.
A barbecue-type device can be built in the form of an oven. The operating mode of the device will remain similar to the barbecue. At the first stage of use, the device is well heated. Then you can place the meat on skewers in the firebox. Due to uniform heating, the kebabs will not need to be constantly rotated, and there will also be no need to monitor the cooking process. The leader in the choice of design is the barbecue; it is built according to the prototype of mobile braziers. What distinguishes a stove from a kebab maker is a stationary grate on which you can cook meat.
The stationary design requires mandatory flame protection from precipitation and wind. The covered device promotes long-term heat retention. Outdoor barbecues are made of metal. The body of a stationary stove can be made of brick with high fire-resistant characteristics. Gazebos often house stationary complexes that include stove equipment, sewer systems, sinks, furniture, tables (everything that can be useful for cooking outside).
Varieties by location
Installation is permissible both indoors and outdoors. Taking this factor into account, barbecues come in two types.
Street (garden)
It is mounted under a small canopy so that precipitation and moisture do not get inside the chimney, and you can cook in any weather.
Another option is to do it outdoors, in the garden, near a gazebo, near the house. In any case, a reliable foundation is poured under the structure. A monolithic slab is considered optimal.
The masonry of the barbecue is made of fire-resistant bricks, the cladding is made of moisture-resistant materials.
It is important to choose the right location for the garden structure, taking into account the direction of the wind, so that there are no dry trees or wooden buildings nearby. To avoid conflicts with neighbors, it is better to first familiarize yourself with the SNiP standards.
To the gazebo (veranda or terrace)
Installed in open and closed buildings. At the project development stage, fire safety requirements are taken into account, and the location for the chimney outlet is carefully considered. Requires pouring a separate foundation.
It is recommended to lay out the floor covering near the stove from non-flammable materials:
- paving, ceramic tiles;
- clinker bricks;
- artificial, natural stone.
An alternative is to place a sheet of iron or steel on the floor at a distance of 1.5 m from the stove.
Visually, the room is divided into zones: kitchen and dining.
