Furniture for a bathhouse differs from any other not only in its purpose, but also
in the materials used. A bathhouse needs a certain set of furniture, which should include a table, shelves, and wooden benches. When choosing pieces of furniture for a bath, its specific features, such as a high degree of humidity, should be taken into account. The heat and moisture inherent in a bathhouse impose special requirements on the choice of material for furniture:
- good humidity tolerance;
- the ability of furniture to withstand high temperatures;
- low heat conductivity;
- the material should not emit toxic compounds hazardous to health.
The most suitable materials for bath furniture
Based on the above requirements, the most suitable material for a bathhouse is wood.
- Conifers.
Pine and spruce are not suitable, since their wood is resinous, and the resin softens when the temperature rises and heats up. Hot resin can cause burns and also stain the body. There is an option when resins are removed from pine, but as a result of this process there is a significant increase in the cost of the wooden material. Independent de-resining is a long and rather difficult process, so it would be more correct to choose wooden furniture pieces made from deciduous trees for the bathhouse.
If you really want it and have the means, then the ideal furniture option for a bathhouse is a luxurious cedar interior. Cedar wood is not rich in resin, the texture is most suitable, but the cost is quite high. The advantages of bathhouse furniture made from Canadian cedar include the provision of a significant healing effect on the body through the release of essential oils from the wood as a result of its heating. Such oils perfectly disinfect, deodorize and have a beneficial effect on the skin and respiratory system.
Furniture made from Canadian cedar has a beautiful texture, high strength, a very pleasant aroma and has a beneficial effect on the human body.
- Hardwood.
With all the variety of deciduous species, preference as a material for furniture should be given to aspen and linden. These species have wood of a pleasant light shade, which can withstand changes in temperature and humidity well, without losing its original shape. In addition, linden has a pleasant smell and is easy to process due to its softness. Among the disadvantages of linden, there is susceptibility to infection by fungus and rot, to combat which chemical compounds are used, which are very undesirable in a steam room.
Linden furniture has a pleasant aroma, has a healing effect, is easy to process and does not heat up.
Aspen wood is also light at first, but after some time it begins to darken. Aspen was previously used to make the top of wells, as it is well preserved in high humidity and does not rot. The downside is that wood fibers wear out, leading to dents and abrasions. The cost of aspen lumber is very low.
Aspen furniture is easy to process and is highly moisture resistant
- Exotic breeds.
As an exotic material option, you can use abashi wood, which grows in Africa. Its color shade changes as the temperature around it rises: from milky or light yellow to dark brown. At the hottest temperatures in the steam room, this wood does not heat up above body temperature, so there will be no burn from it. The downside is that this material is not cheap.
Abasha furniture is ideal for a steam room, does not heat up and does not accumulate moisture
If we talk about wood species for other rooms, then for the washing room you need species that respond well to humidity, for the locker room and rest room - any.
Coming from the East
In fact, to tell the truth, the divan is the legislative and executive body in a number of Islamic states, as well as its highest official. Who knows, perhaps the owners of furniture salons under the sonorous and popular name “Mr. Sofa” are very enlightened and erudite in all respects and are not as far from iron logic as it seems to us at first glance.
An indispensable attribute of any office are chairs; in the East, in the same legislative body, the function of such furniture was performed by benches with soft padding, so as not to particularly bother the users, or rather, their individual parts of the body. Actually, from there these important items went around the world, along the way, also acquiring a high back for greater comfort.
What items should a bath furniture set consist of?
You need to focus on individual tastes and financial capabilities, but there is a certain standard minimum.
- Shelves must be made in the steam room of the bath. They can have different shapes and sizes: single-stage or have several steps; located along the walls of the bathhouse or be in the shape of “G”, “P”. Wooden headrests and footrests are often placed in the steam room. Due to the fact that the place where they steam is small, it does not need to be cluttered with unnecessary objects, as they will serve as an obstacle to the movement of air. For convenience, you can add a small bench to place basins and ladles and attach hooks.
Shelves are the most important component of a bathhouse interior and making them yourself is absolutely simple and inexpensive.
Types and shapes of shelves for baths - The washing compartment of the bathhouse should be equipped with a shelf, and benches of various configurations and sizes can be made.
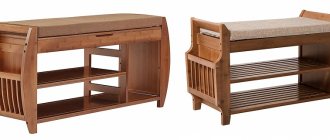
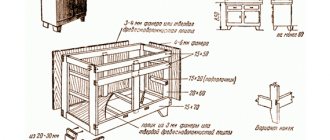
Details such as stools for tubs, buckets and other bath utensils would be useful here. Place a hanger away from possible splashes. Scheme and drawing of a bench for a wooden bath
Varieties
To decorate your steam room and dressing room colorfully and elegantly, you should pay attention to the types of furniture that are most often used for furnishing. The photo below shows the most popular models and accessories for bathing.
First you need to figure out what items must be present in the steam room. The first thing you need to buy is shelves. This is a special design designed for sitting. This is where people steam in a sauna under the influence of hot air. Requirements for shelves:
- Long length;
- Stable seat;
- The presence of several tiers.
Tiered furniture in a bathhouse is necessary so that the shelves can accommodate several people at once. At the same time, people should not interfere with each other. It is advisable to purchase shelves in 2 - 3 tiers. The width of the products is 60 cm, and the length is at least 180 cm.
Experienced sauna owners recommend also having footrests and headrests. The first ones are necessary to sit comfortably without disturbing other steamers. Headrests are needed to relieve stress on the neck. Benches are the second thing that is important to have in any sauna. They are also placed in the steam room, against the walls. The legs of the benches should not interfere with steaming, so they are made with a recess inside. The bench should have a wide seat and back. In addition to the items listed, the following furniture for baths and saunas must be included:
- Tables – there are a lot of options for choosing tables: figured, carved or classic square and round. The scope for imagination is limitless, everything depends on financial capabilities;
- Chairs or stools - upholstered furniture for a bathhouse is also important. For example, chairs may have a soft seat. The upholstery material should not deteriorate when exposed to moisture. Chairs can be decorated with antique carved backs, and stools can have figured legs;
- Wooden fonts are the place where a person plunges after a steam room. This easily replaces a swimming pool, because it is not always possible to equip one at a summer cottage. The average size for a font is 1.5 m in diameter. Several people can be here at once;
- Basins or tubs - it’s hard to imagine the procedure of being in a bathhouse without these items. Photos of basins and tubs are presented below - you can also make them yourself.
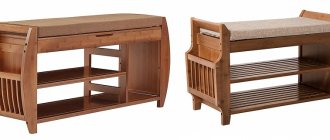
In addition to tables and chairs, furniture for the relaxation room in the bathhouse is selected at your discretion. These can be small storage areas for accessories and towels, cupboards for dishes, sofas and shelving.
Chair
Pelvis
Table
Stools
Fonts
Making bath furniture yourself
Basic drawing of a table for a bathhouse: all dimensions can be changed and adjusted according to individual needs
You can make simple bath furniture with your own hands if you follow the tips. Self-production will allow you to realize all your wildest fantasies and optimally use the space of the bathhouse, maximally designed for comfortable relaxation, following your tastes and preferences.
Bath shelf drawing
First you need to decide on the design and construction. To do this, depending on the size of the bath room, a plan must be drawn up for the location of furniture inside, their sizes and shapes must be determined. It’s good if everything in the bathhouse is done in the same style and selected in accordance with the expected number of people.
Bath flooring installation diagram
When making furniture with your own hands, it is important to process the parts well: round the edges, sand the surfaces until they are absolutely smooth. To avoid burns from the metal heads of the screws, they are recessed 5 mm deep and covered with wood putty on top. No part of the bath furniture should be varnished.
Stylistic design
Bath furniture is designed in the following styles:
Classical
This furniture has a strict design and clear lines. The items are not luxurious, but provide comfort to the premises. However, they cannot be called cheap. They look elegant and sophisticated. To make furniture, smooth boards of the same dimensions are used.
Antique
They are massive interior items with rounded backs, edges, and unusual cutouts. Products are artificially aged to give the desired look.
Making a wooden bench
Bath bench assembly diagram
This part is necessary for use as a replacement for the lower part of the shelf, footrests, basins and buckets.
To make a bench with your own hands you need:
- cut the block into several 40 cm pieces (future supports);
- transverse posts 60 cm long are cut out from another block;
- nail the supports from below, and attach the base for the seat on top, formed from boards 1 m long;
- cover the base of the bench with wooden boards, leaving 1 cm gaps;
- coat the finished furniture with an antiseptic containing vegetable oils.
Drawing of a simple bathhouse bench to make yourself
Features of choice
The choice of furniture for a bath should be taken responsibly. Then bath procedures will bring joy and pleasure. When choosing furniture for a bathhouse or making it yourself, it is important to pay attention to some points.
Furniture for a bath should have:
- smooth surface without protrusions or roughness;
- beneficial properties, environmental friendliness;
- reliability and convenient design;
- external attractiveness.
A prerequisite for steam room furniture is the absence of metal parts. Fastening is done using wooden dowels and dowels to avoid careless touches to hot parts.
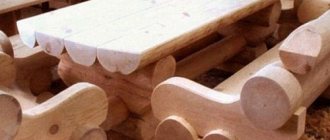
Rough antique handmade furniture looks colorful, just right for a Russian bathhouse. Uneven edges, surfaces where cracks and knots are visible, darkened details give the setting a special atmosphere of a Russian bathhouse.
Bath procedures will bring pleasure if you pay attention to the competent selection of furniture for all rooms. Health and safety depend on it. Properly chosen bath furniture will last a long time and give positive emotions.
Pull-out shelves in the steam room (sauna)
A convenient design option is a pull-out type of shelves. It allows you to sit comfortably on the upper tier with your feet on the lower one. Also, the lowest shelf slides in, which frees up the passage and increases the space for movement. Steamers use a pull-out shelf to place a container with water for supply, a steamer with brooms, etc.
To create shelves with a sliding mechanism, place bars on the end walls of the room. The next step is to secure the axes. Attach one end to the block on the wall, and the other to the end of the lounger (from the inside). Then put special wooden strips on the axle, which will act as levers. We make cuts on the upper parts of these planks (at the corners), which will allow the mechanism to work easily and freely.
The thickness of the bars that are fixed in the wall should be the same as the thickness of the end elements of the board. According to the principle of operation, this mechanism resembles the device of a sliding sofa. Therefore, when designing it, be guided by an already familiar scheme. This mechanism allows you to extend the shelf to almost any required distance. The lounger is supported on the legs.
The main condition for installing fasteners is careful camouflage of metal elements. Under no circumstances should any part be placed on the surface of the wood, otherwise there is a risk of burns. Recess the caps of the elements as deep as possible into the surface of the shelves. It is also possible to place the screws on the back side of the wooden device.
The safest (and also environmentally friendly) option is to use special oak wedges. They are hammered into pre-prepared holes. However, this method is difficult to implement and requires strength, dexterity and experience.
It is possible to mount a special backrest on the wall for future shelves. It is made of three boards that are attached to vertical posts. Thanks to this backrest, the risk of skin damage or minor burns in contact with the steam room casing is eliminated.
Design
If you want to create a country style in your bathhouse, then you can and should use antique furniture. To give the headset the solidity of its age, simply clean it of the old coating. After this, it is worth covering the “cleaned” furniture with paint or glaze. Using a sponge, we randomly remove a layer of paint to create a worn-out feeling.
After all the above steps, we coat the set with varnish to protect it from external influences.
To create a “original Russian bathhouse,” use linden. Choose tables with carved stands, make the chairs wicker.
Add some design flair: scatter some elements around the bathhouse area in the form of birch brooms for the steam room and bunches of dry herbs.
The minimalist style is currently at the peak of popularity. Wooden furniture and a minimal number of accessories will give the bath an ascetic style. This design is well suited for small baths, because with a minimal amount of furniture, the space will visually expand.
How to do it yourself?
Even if you don’t have much experience, you can make simple bath furniture with your own hands.
Tools that will be needed along the way:
- hammer;
- plane;
- drill;
- a circular saw;
- pliers;
- roulette;
- square;
- Grinder;
- clamps;
- set of cutters;
- hacksaw.
First you need to make a table. You will need:
- boards 30 x 145 mm and 40 x 250 mm;
- wooden slats 40 x 40;
- bolts and “curly nails”;
- antiseptic primer.
Assembly is carried out in a simple sequence:
- Saw boards measuring 30 x 145 mm into four pieces of 1.2 m each. Make flanks on them on the right and left at an angle of 45 degrees. Stepping back 10 cm from the end of the blanks, cut off the excess material.
- Sand the workpieces properly. Coat everything with an antiseptic and let the boards dry.
- Fold the blanks crosswise.
If using clamps, mark where the mounting bolts will be located. There will be two bolts on each side. You also need to drill holes for the fasteners.
- Attach our blanks with bolts. Place the legs at a distance of a meter. From the boards that are left, make and attach two spacers.
- From boards of a different size, cut or saw three pieces measuring 1.75 m in size. Process the prepared pieces for the tabletop with a sander. Apply antiseptic and allow to dry.
- The slats should be divided into two parts measuring 77 cm. Treat with an antiseptic primer. Connect all the boards of the tabletop.
- Turn the finished tabletop over. Place it on the legs of the future table. Use self-tapping screws to secure the result.
Now you can safely use your handmade creation in your bathing life.
Console table
Materials required for work:
- five boards 30 x 200 mm, 0.8 m long;
- block 40 x 50 mm, length should be 1 m;
- two bars 40 x 50 mm, 0.75 m long;
- self-tapping screws
Assembly must be carried out in the following order:
- Choose a place where you will place your future table. Make a mark approximately 0.7–0.8 m from the floor level. Using it, when using a level, the width of the table surface is determined and measured.
- Process the bars with a sander thoroughly, without missing a detail. Coat the boards with an antiseptic primer. Dry the materials thoroughly.
- You need to create a tabletop from the existing boards. Fasten the boards using 0.75 m long bars. One of them needs to be attached to the table top with a distance of 7 cm from the end. The other is attached exactly along the edge.
- Place the assembled tabletop against a mark on the wall. The crossbar should be as close to the wall surface as possible. Attach the tabletop with self-tapping screws.
- We make the installation. Place the block under the table surface. Mark the locations of future cuts and make notches at an angle of forty-five degrees. This is necessary to completely press the bar against the wall. We install the support in the intended place, securing it with self-tapping screws.
