How to make a chair for a summer house with your own hands + drawings and photos
Using ordinary screws and boards, you can make a chair for a summer house with your own hands, which will be as comfortable as store-bought furniture.
Do you want to buy a wicker rattan lounger or a plastic chair? You shouldn’t spend money right away, because simple and at the same time comfortable pieces of furniture can be made from natural wood with your own hands.
We invite you to familiarize yourself with simple and step-by-step instructions for self-assembling a country chair from wood boards. But first, you should decide what kind of furniture you would like to see on the site of a country house.
Types of chairs
If we talk about the types of chairs, they are usually:
- With solid construction;
- Soft;
- Semi-soft quality;
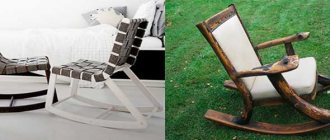
- In the form of rocking chairs.
In the first case, all elements are first manufactured separately. Then they are processed by making holes and applying paint or varnish. What is noteworthy is that chairs with a solid structure do not require upholstery material.
The soft type is completely upholstered in material and looks good in a home interior.
The version of the semi-soft chair must be made with a pair of armrests. They should have upholstery fabric, as well as internal padding where the back, seat and possibly armrests are located. Such models are convenient to use for the garden.
A universal option is a swinging chair, which can be placed both in the room and in the garden or on the terrace.
Preparation of the drawing
On the drawing of the chair, the configuration of each part is indicated and the necessary dimensions for manufacturing are indicated.
Dimensions are determined according to the standards developed by design specialists for seating comfort:
- height and width of the chair in the axes - 70 - 90 mm, no more than 60 cm, respectively;
- seat depth - 54 - 70 cm;
- the seat is placed at a height of 42 - 50 cm;
- The height of the armrest above the plane of the seat is 18 – 24 cm.
These dimensions are adjusted if the garden chair is made for children or teenagers. The width is also made taking into account the build of family members.
Material for making a chair
It is selected differently for different chairs. Here you can use both pallets and boards, as well as vines, along with bars.
- Many original and convenient items can be made from scrap materials. Craftsmen even use folding beds that have fallen into disrepair.
- You can take new fabrics for lining, or you can simply use the remaining pieces with shreds.
- Chair products made from chests or iron hoops have a decent appearance.
- Pallets, along with crates and pallets, are great for linear silhouettes.
If the chair is assembled from beams, as well as boards and bars, then you can get an original version with connections in the form of all kinds of angles.
Creative individuals with a fair amount of patience will certainly enjoy weaving chairs using wicker. Moreover, there are so many woven patterns that you can always choose a model to your liking. And any durable material of suitable size will be used for the frame.
Longboat products, along with soft ones, require much more time to complete. In addition, they are more expensive, and material consumption increases.
Conditions for use of country furniture
In order for hand-made furniture to serve you for a long time, the design must meet certain parameters.
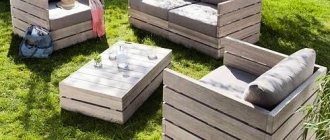
This chair is ideal for relaxing in the country and looks great in the garden.
| Transportability | As a rule, wooden chairs are used for relaxing in the fresh air, in the open air. In case of a sudden change in weather conditions, it is convenient to move the chair under a canopy if it is transportable. |
| Selection of quality raw materials | One of the important conditions in making a chair yourself is hardwood. Despite the high pricing policy, the design result, thanks to high-quality material, will be excellent. These species include: aspen, oak, pine, cedar. |
| Maximum weather protection | Exposing the chair to direct sunlight or heavy rain for a long time leads to a deterioration in its external condition. Preparation for protecting the finished chair begins at the earliest stages of design. High-quality, dry lumber is the key to success. If you initially purchased low-quality raw materials, dry the boards while working. Sand, saturate the workpieces with an antiseptic, and apply hot drying oil. At the final stage, after the finished product has completely dried, it must be opened with varnish. The material to get started is ready. |
Making a garden chair is not difficult; there are no complex connections or parts.
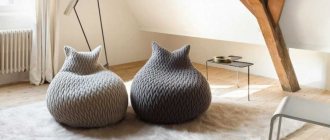
Bean bag model
Despite the familiarity, this design is considered special, both for home and garden.
It is necessary to prepare for work:
- Material that will be used for the outer cover;
- Fabric for inner lining;
- A couple of lightning bolts;
- Filling material;
- Threads.
In addition you will need:
- Pencil with tape measure;
- Sharpened scissors;
- Sewing machine;
- Graph paper.
The chair consists of a couple of parts, one of which is the cover, and the second is the lining. The cover is double-sided.
- A zipper is sewn into the upper part so that it can be removed and, if necessary, cleaned.
- The cover of the inner part is filled with ball filler in about two parts.
- Due to their small size, polystyrene foam balls help the chair easily take the shape of the human body.
- Lightweight fabric is best. It should be breathable and smooth.
- A pattern is made on graph paper according to the calculations performed. It turns out a wedge, bottom part and top.
- It should already be transferred to the fabric with allowances of one and a half centimeters.
- You should end up with a hexagon-shaped top with a base and six wedges.
- Together with the handle, all this will be used to sew the top cover. The same elements are prepared for the case from the inside, but without the handle parts.
The edges are processed in a zigzag, then the side wedges must be folded facing each other. The long edge on both sides is ground down to a length equal to fifteen centimeters.
Here the rivet elements are placed and the zipper is installed. Then the seams of the remaining wedges are sewn down. The individual parts are connected, after which the inner cover is assembled according to the same scheme.
Painting
For painting, I took for testing decorative impregnation for wood FH-015 from FORUMHOUSE in chestnut color, suitable for both interior and exterior work. For painting you can use a brush, roller or spray gun.
The first point that I immediately liked: on all such cans it is always written “stir thoroughly before use”; this was not the case with this one. The impregnation, carried out in mid-2022, turned out to be completely homogeneous and immediately ready for use.
Second: the smell that we are used to feeling during painting work is completely absent; you can safely paint even in unventilated areas.
Third: the paint is very plastic and not flowing. I painted all the parts in two layers, and only the tip of the brush was dirty.
Fourth plus: drying speed. Yes, the can says 12-24 hours, but I don’t know under what conditions this is. Because I applied the second layer 1 hour after the first on completely dry parts, and the chair was assembled after 4 hours after the painting had started.
Fifth: efficiency.
It took me 100 grams for the first layer, no more than 50 for the second!!! This is what the jar and all the details looked like after two layers:
The coverage of the paint is excellent; you actually brush it once, and all the paint from the brush is applied in an even layer to the surface.
Now all that remains is to check its durability.
Soft chair with armrests
First you need to plan the dimensions of the chair and perform the necessary calculations in order to obtain the desired bend of the transverse slats, as well as the angle of inclination and dimensions.
You can choose the height of the seat - forty-four centimeters, then the total width of the product will be seventy-five centimeters, and the height - ninety-three. The depth of the chair should be eighty-seven centimeters.
Now you can start making templates from cardboard, then transfer them to plywood and then cut them out. Wood elements must be sanded.
- To strengthen the ends you will need metal rims. The sides need to be painted.
- The glue will help attach the foam cushions to both the seat and the back.
- A stapler is used to secure the material. The rims are fastened with screws into pre-made holes.
- First, the back of the back is trimmed with fabric, and only then all the remaining parts. The individual parts are connected using self-tapping screws.
Cutting and primary assembly
The first and most complex element of the Adirondack is the side supports, two in number. When marking and cutting them, it is necessary to pay special attention to all sizes. It is clear that it is enough to carefully mark only the first support, and simply mirror the second.
We cut exactly 980mm, the cut should be clean, not requiring significant processing of the ends.
Next, we plan one side of the board and the lower edge with a plane to make the markings better (the upper edge will be cut off).
We apply markings on the board according to the project.
All dimensions and angles shown in the drawing have been fully tested and correspond to the assigned tasks. All points marked in red must be placed exactly as shown. The only doubt I have is the 75 degree angle at point “D”; I didn’t need it at all to apply the markings correctly, and I didn’t check it.
First I marked the left side to point “A”.
Then to the right from point “E”, an angle of 162 degrees - this is the angle of inclination of the support relative to the surface of the floor or platform.
Then I marked the cutout for the lower support of the chair back. Why, first, measure 380 mm from the right edge of the board and oh, measure another 92 mm and oh. From point “B” we draw an angle of 12 degrees, measure 90 mm on the ray of the angle, and o. We connect points “C” and “D” with a segment.
On the left side of the cutout, a curved cut is made on the support, forming a seat. The easiest way to make such markings is to mark three points and, using a metal ruler and the third hand of an assistant, draw an arc.
On the right side of the cutout there is an arc formed by part of a circle with a radius of 116 mm. If you don’t have a compass, then it’s enough to make 5-6 marks using a ruler and then connect them by hand with a curved line.
Next, we begin cutting out the first support.
It’s better to have a good jigsaw that keeps the cut vertical, but I wasn’t lucky with mine - it cut complex areas at random. Knowing this feature, I retreated 1-2 mm from the marking line, which I then removed with a grinder.
For convenience, when cutting the boards, I secured them with clamps to my improvised workbench.
Then we carefully grind the support blank and transfer its size to a second board prepared in a similar way.
The next stage is making the armrests. For some reason, the authors of the project made their width not corresponding to standard lumber. After the fact, I can say that this part could also be made from an inch, limiting the width to 150mm. Although I won’t lie, this armrest is very comfortable; a bowl of watermelon, a dish of shish kebab fit perfectly on it, and there is still room for your elbows.
After almost an hour of marking the support, working on the armrest took literally 5 minutes. Smooth contours (the right side in the drawing) were made using a pencil and a glass without any precise radii. Just like the support, the second armrest was mirrored.
Next came the smaller parts: the upper backrest crossbar, the lower crossbar and the armrest supports. In the drawing of the top crossbar there are two red arcs showing the new cutting line - my personal optimization of this part, it will be clear later why I made it.
The next step is “making the legs”, in the sense that we cut out the front and back legs. After the figurative tricks of the previous parts, these ones are done right.
The drawing of the rear leg also has a red line - the cutting line. This is also my optimization, the need for which arose after the initial assembly.
At this point, the preparation of the frame parts was completed, and I decided to assemble it to make sure that it was manufactured correctly. Assembly begins by screwing the front legs to the Adirondack legs. To do this, I simply laid them on the floor and aligned them strictly with the edge of the floorboard.
If the front legs are screwed from the outside, then the rear legs are screwed from the inside and strictly at a distance of 575 mm from the front ones. We are assembling without bolts for now, but only with self-tapping screws.
Next, we fasten the upper and lower crossbars of the backrest and the armrests with supports.
Only after this do you begin to understand exactly how each angle works and what comes out of what. All that remains is to make the seat and backrest strips and the chair is ready! The project required 7 backrest slats and 8 straight seat slats with the following parameters. The bottom (in the drawing) irregularly shaped strip was not intended at all.
However, during the assembly process, it turned out that 7 backrest slats simply did not fit into the space allotted to them; I didn’t want to remove a few more millimeters from each of them, and I was content with 6 pieces. But for sitting, it turned out that 10 straight slats are needed instead of 8 and 1 figured one.
To make the planks, I cut one board lengthwise with a circular saw and sawed it to size. I gave the back slats a wedge shape with a plane. After which I planed, chamfered and assembled the chair into a rough one.
In addition to the fact that the back of the classic “Adirondack” chair has a slightly rounded shape at the top, which without proper experience can only be drawn on the assembled chair, and then disassembled and cut out, three more small inconsistencies emerged, which I mentioned above.
1. The back leg of the upper part turned out to be wider than necessary and protruded unsightly beyond the edge of the top crossbar. Therefore, I cut off the protruding part with a wedge, as shown in the project.
2. The top crossbar turned out to be wider than necessary and protruded from both sides of the back. At the same time, the armrests did not allow the armrests to expand the backrest slats into a wider fan to eliminate this drawback. So I rounded these protruding parts as shown in the project.
3. The last seat bar did not provide an aesthetic connection to the back of the chair, so I replaced it with a curly one.
Before disassembly, I also drilled out the places for future bolted connections.
In principle, the chair is already ready and can be used, but I wanted, firstly, to correct what the eye was clinging to, secondly, to polish the parts again, and thirdly, to paint, and paint such a thing when assembled form and for it to turn out well - this is a disastrous idea.
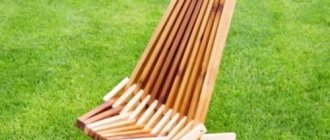
Kentucky. Garden chair
The option is stylish so that it can be used both at home and in the garden area. An excellent option for a terrace.
When choosing a material, you should avoid using coniferous trees and larch. It is best to use either beech or oak wood to realize your plan. Walnut or elm are well suited for this design.
It all starts with the seat, onto which elements from the backrest are then applied. The upper part of the backrest is attached to the front of the seat, and its lower part is installed behind the seat.
There should be bars from the back on the seat parts. By moving the adapter bars apart, the piece of furniture opens up like a fan. The backrest parts are fixed between the bars. The wire is used as a connecting element between the lower part of the backrest and the edge of the adapter bars.
Preparing for work
Choosing the right wood is important for a quality product, as not all types work well outdoors. Prepare tools for work. The structure is made according to a drawing or diagram, so as not to make mistakes when cutting and assembling.
Material selection
Well-dried wood is suitable for work; its humidity should not exceed 20%. A product made from raw material will dry out, crack, and wobble over time.
Choosing the type of wood for the street:
- Western red cedar, cypress, and redwood are the most suitable - they do not need to be treated with protective agents, but such materials are expensive;
- walnut and teak are more often used - durable types that also have a high price;
- Oak, cherry, birch, acacia, and conifers (pine, larch) are popular for garden furniture among craftsmen ; they are processed to increase durability.
For individual parts, moisture-proof plywood is used, for example, laminated chipboard, fibreboard, OSB and others. There are multilayer materials, but they are more expensive.
Tools
It is easier to work with electric tools, but for small volumes manual labor is used.
Prepare the set:
- jigsaw, drill, screwdriver, grinder with discs for grinding;
- tape measure, pencil, square, level (bubble);
- clamps, pliers, construction knife, hammer;
- brush for glue, impregnation, rags.
An electric jigsaw can be replaced with a wood hacksaw. It’s good if you have a manual router with a set of cutters. Instead of a grinder, take a block of wood on which sandpaper is fixed for manual sanding.
Workplace
a workbench is placed in a barn or garage to carry out work conveniently. Woodworking tools are within walking distance. They place the necessary materials and workpieces so as not to waste time searching, and determine the storage location for the processed parts.
Select the area where the chair will be assembled . Trimmings and shavings are regularly removed here. Organize good lighting and comply with fire safety requirements.
Photo of a homemade chair
Selection of timber
Which timber is optimal for creating furniture or household utensils? Whole, chamber drying.
Why him?
- Timber with natural moisture requires long-term (up to six months) atmospheric drying. In addition, uneven evaporation of moisture can lead to its deformation or the appearance of deep cracks;
- Using laminated veneer lumber will expose the glue seams, significantly degrading the appearance of your masterpiece. In addition, the price of glued material is at least twice as high as that of solid material.
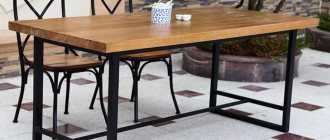
Coffee table. Material – solid oak timber.
What type of wood should you prefer? Unambiguous instructions are impossible here: each option has its own advantages and disadvantages.
| Wood type | Key Features | Cost per cubic meter, rubles |
| Pine | Light, light, resinous with an unexpressed texture. Rot resistance is limited | 8000 – 11000 |
| Larch | Bright, pronounced texture. Does not absorb water, does not rot | 14000 – 18000 |
| Oak | Does not rot, gains strength with prolonged contact with water. Extremely resistant to mechanical stress | 40000 – 80000 |
| Ash | Has all the properties of oak with a more pronounced texture | 35000 – 70000 |
Ash timber.
Useful: a special method of surface treatment - brushing - will help to emphasize the texture of pine and make it more expressive. We will talk about it in the corresponding section of the article.
