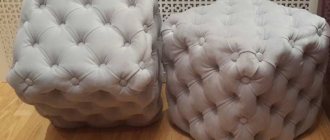
Currently, furniture stores offer a large selection of ottomans of various shapes and materials. But as soon as you look at the prices, it becomes clear that such a thing is beyond your means. But what to do if you really want to have it at home? There is an alternative replacement for a store seat - a DIY bucket ottoman . You ask, how is this? In principle, you can sit on an inverted bucket, but it’s just a bit harsh. What if you attach a soft seat to it? It's not at all difficult to do. Moreover, the financial costs for materials will be minimal, and the result will be a very original and cute ottoman.
DIY version of an ottoman made from a bucket
Types of ottomans
Poufs can be of completely different shapes - rectangular, square, round and triangular.
- The upholstery for soft stools in production is also used in different ways - jacquard, velor, tapestry, leatherette, flock, microfiber, chenille.
- At home, you can use used fabric: Old curtains, blankets, jackets, etc.
Models are made with legs, on wheels or without them. The sizes can be completely different - from miniature ottomans to large and wide full-fledged “chairs” or “sofas” without a back.
Such upholstered furniture can be used anywhere. The pouf is placed in the living room next to the sofa so that you can comfortably stretch your legs while relaxing. Or in the hallway to sit down while putting on your shoes. In the kitchen or in any other room - for additional seating.
Poufs made with your own hands in the country are irreplaceable. It is not cost-effective to furnish a small garden house with new furniture, so ideas from improvised means are used.
Ottoman in the room: advantages
An ottoman is an oversized piece of furniture, which is a modified chair or even a small armchair. It is distinguished by the following parameters:
- small height;
- low legs or lack thereof;
- lack of backrest;
- configuration - the ottoman resembles a large pillow, with or without a frame.
Classic ottoman model
The main advantage of any type of ottoman is its versatility. This piece of furniture can be used as a footrest while watching TV or working on a laptop; you can sit on the ottoman in the hallway while putting on or taking off your shoes. You can place your child on the ottoman to help him get dressed.
In the bedroom, an ottoman can serve as a bedside table, a small armchair at the makeup table, or act as a box for things or bed linen.
You can read about how to make a bedside table with your own hands in our article.
Ottomans that have a folding top and wheels are convenient - they can be used both as storage space and as a high chair.
Ottoman with wheels - a mobile part of the interior
In a children's room, an ottoman can be a play element, a small child can sit on it, and the internal storage compartment can accommodate small toys, magazines or coloring books. Even a baby can move the pouf around the room - another plus for mobility, and its small dimensions and the absence of sharp corners make this piece of furniture truly the best solution for the room where a preschooler lives.
Another advantage of ottomans is the variety of their shapes, types and design solutions, so you can find this piece of furniture to decorate any room. Below we will tell you what types of poufs there are.
Table No. 1. Variations of ottomans according to purpose
| View, illustration | Description |
| Decorative | Design options that decorate the room more and are decorative rather than have a functional purpose. You can sit on such an ottoman for a short time or comfortably place your feet on it. Such ottomans can be made in the shape of animals, as well as other objects: miniature cars, drums and others. In the Bedroom it can serve not only as decoration, but also as a place where you can put a robe or other home clothes before going to bed. |
| Transformer | Quite large ottomans that have a folding mechanism. If you unfold such an ottoman, you can get a small ottoman-type sleeping place on which you can lay your child. There are models of transformable poufs that turn into a small table or chairs. Such pieces of furniture are convenient in oversized apartments, as they are functional, and when folded they take up almost no space. Would be a good option for a small guest bedroom or children's room. |
| Banquette | The ottoman-banquette is a classic model, which is a square or rounded small piece of furniture. Typically, banquettes are located in the corridor area or in a small kitchen. Some versions of ottoman-banquettes offer a folding top and storage space inside. In the bedroom it can serve as a bedside table, on which the necessary items are placed: a charger for a mobile phone, a small floor lamp, glasses, a book and other things so that they are always at hand. |
| Addition | An ottoman addition is a piece of furniture that usually goes together with a bed or sofa. Such poufs are “companions” of larger interior items, and are made in the same style. If necessary, such a pouf can be moved aside and you can get a full-fledged seating area. Some options for ottoman additions come with a solid lid and can be turned into a coffee table or bedside table. Such a pouf will decorate a large bedroom, in which it will serve as a place where you can put clothes, allow you to sit in front of the mirror, and you can drink your morning coffee on such a pouf. |
| Frameless | Frameless ottomans are incredibly popular as furniture for children's rooms. They are soft, light, adjust to the parameters of the person sitting, the child will not be able to hit such an ottoman even during active games. Frameless ottomans can also be used as an aesthetically pleasing bed for pets (dogs or cats). Large soft poufs successfully replace upholstered furniture in the living room; they are often purchased by young families. Often these ottomans have a removable cover with a zipper or Velcro that can be washed. In the bedroom, such an ottoman can easily replace an armchair; you can sit in it to read or watch TV. |
Some types of ottomans can be further divided into hard and soft. So, budget options are poufs with an open frame, which are essentially small chairs without a back, upholstered in soft material. The frame can be made of wood or metal. Poufs with a closed frame are more comfortable, since the hard parts are hidden deep under the finishing materials. Such poufs can have legs or wheels, or they can look like a large pillow that holds its shape.
Important. Very rigid ottomans are a wooden frame that is only covered with decorative material. You won’t be able to sit on such a pouf for a long time, but these pieces of furniture can serve as an aesthetic storage container, a footstool, a TV table or a bedside table for a night light.
Example of a hard ottoman
Tools for creating an ottoman
To make your own pouf at home, you need to prepare the following tools:
- Screwdriver with different attachments;
- Self-tapping screws and self-tapping screws;
- Glue gun;
- Sandpaper;
- Jigsaw or saw;
- Furniture stapler.
Materials for homemade products can be very different - plastic bottles, old boxes and pallets, sheets of plywood, fiberboard, plastic containers and others.
What you will need for work
Before you begin, you need to prepare:
- plastic bucket with a volume of 15 liters;
- a fabric mat long enough to wrap around the bucket (you can use any other fabric);
- glue gun;
- chalk for marking;
- scissors;
- the wooden circle is several centimeters larger than the diameter of the top of the bucket;
- construction stapler;
- 1.8 m batting;
- 2.8 m of felt;
- polypropylene foam 2.5 cm thick and 50 x 50 cm in size.
Ottoman from a drawer
A wonderful stool on wheels with a soft seat cover can be made for a summer house or garden, or even for the home (in a hallway with a marine theme, for example).
To work, in addition to tools, you will need one wooden box (after storing food), four wheels, canopies for the lid, a piece of plywood, white paint for wooden products, a piece of foam rubber and padding polyester, and a piece from an old curtain.
Work process:
- The box must be prepared: cleaned of dirt and sanded. If there are protruding nails, remove them with a pry and carefully nail them again.
- Attach four wheels to the bottom with self-tapping screws (purchase in a store or unscrew from an unnecessary item).
- Make two holes on the two smaller sides with the same distance from each other. This is for rope handles.
- Take a can of white paint and paint the outside of the box (you don’t have to touch the bottom and inside).
- Leave the product to dry.
- Thread a piece of rope through the side holes and staple it inside.
- From plywood (used or new furniture) cut a rectangle of the size corresponding to the box - for the lid.
- Glue a piece of foam rubber onto the plywood, cut off the excess.
- Take upholstery fabric - a piece of curtain and wrap it around the future seat cover, securing the edges from the inside with a stapler or glue.
- For the inner bag, make a pattern in the shape of a three-dimensional cross from lining fabric (you can use almost any fabric or upholstery fabric from which the lid is made), taking measurements first and leaving 1.5 centimeters at the edges for hemming.
- Sew all four corners and turn the bag right side out. Place it in the box and secure it around the edges with a stapler.
- Cover another piece of plywood identical in size with fabric and staple it to the inside of the pouf lid.
- Secure the mechanism for raising the seat: screw small canopies onto the box and plywood with foam rubber using small screws. Poof is ready!
Various small items are stored in the ottoman. The presence of wheels allows you to easily move the pouf throughout the house or throughout the garden terrace.
Connecting the ends of the rug
After this, take the cut piece of the mat and wrap it around the bucket. Prepare a large needle and thick thread to sew the edges. If there is no dense thread in the house, you can fold a regular one in four. Test it to make sure the connection is fairly strong. You should not use hot glue for this purpose, since there will be serious pressure on this connection, and it is not a fact that it will withstand the load.
Now you need to decorate the bottom of the bucket. Glue all the edges of the carpet to the bottom so that it has a neater appearance. Then take the top edges and fold them inward. Secure them with hot glue. Look at the photo, there are still folds visible in the fabric, which is ok as we will be covering everything with fabric.
“We are still friends”: Derevianko commented on the breakup with his wife
A student at the Vietnam Police Academy shared how she takes care of her facial skin.
Why French children behave well: eight ways to raise them
I needed a long piece of felt to glue it along the raw edges because I ran out of fabric. I originally planned to cover the interior surfaces, but I think pink looks good too.
Bottle ottoman
To quickly and easily make a pouf for a country house, you need to take 23 empty plastic bottles. Connect them together using tape (in other words, wrap them).
- Cut two circles from a sheet of plywood with a diameter corresponding approximately to the diameter of the bottles assembled together (measured from below).
- Glue two circles to the bottles on top and bottom, secure with small screws.
- From old artificial leather, cut out two circles (slightly larger than plywood) and a rectangle around the circumference of the bottles. Sew a cover from the pattern.
If you don’t have a sewing machine, you can baste it by hand or glue the material to the base. That's all! The country ottoman is ready.
Anyone who doesn’t have enough chairs while relaxing in the garden at a barbecue can sit on it. Or put an impromptu stool on the terrace in front of the house.
DIY pouf from a chest
What do you think of this idea of creating a pouf? I really like these things. In general, I love to create and I believe that something created with my own hands is the best. After all, a person puts his soul and warmth into it.
Now I will show you how you can make an ottoman yourself from a chest, wooden box or drawer at home. My option will stand out from the others in that it can be used not only as a place to sit, but also as a table.
First we need to prepare the necessary materials and tools. If we take the chest as a basis, great. It does not require additional processing and decoration, unlike a wooden box or box. In this case, the base must be painted or covered with fabric or leather.
In order to make a pouf we need:
- base for an ottoman - for us it’s a chest
- two sheets of plywood to fit the base cover
- stain
- transparent varnish
- brush and rags
- foam rubber about 4 centimeters wide, the size of plywood
- padding polyester is 10 centimeters larger than foam rubber on each side
- seat upholstery fabric
- furniture stapler
- nails or screws with neat heads (furniture)
It is better to cut it with a sharp knife. I tried it with scissors, but it didn't turn out smooth. Cut off the padding polyester and fabric.
Starting from the middle, we attach the padding polyester to the wood using a furniture stapler.
Pay special attention to the corners. If you do them haphazardly at this stage, the pouf will look sloppy.
Slowly stretch the padding polyester and fold it as shown in the picture.
Here comes the final part of our work on making a homemade ottoman and, in combination, a coffee table.
As I said earlier, we will need screws with a beautiful and neat head, as in the picture. The nails for door frames suited me perfectly. Using them we attach the second piece of plywood to the back of the seat.
Now we can install it on our base. This is what happened (do-it-yourself pouf-chest).
Turn it over and we have a table for board games or tea drinking.
All this is done in one evening. Simply and easily. And most importantly, it’s functional, because you can store whatever your heart desires in it!
In the east, in ancient times, people's homes were decorated with various poufs. It was not only comfortable, but also beautiful furniture. After some time, such furniture appeared in European homes. People all over the planet liked them so much that now they can be seen in almost any home.
Pick up any modern home design magazine and you will see images of a wide variety of poufs. Be on the wave of fashion without ruining yourself. A beautiful piece of furniture can be created from scrap materials. By following simple instructions on how to make an ottoman with your own hands, you can make a wonderful decoration for your interior.
Bucket ottoman
An unusual pouf with a soft seat can be made from an ordinary plastic bucket.
To work you will need:
- Large plastic bucket (after mayonnaise or paint);
- Shovel handle;
- Jigsaw or saw;
- Screwdriver and screws;
- Faux fur (formerly plaid);
- Foam rubber and synthetic winterizer - according to the cut;
- PVA carpentry glue.
Process of creation:
- Remove the handle from the bucket and turn the bucket upside down.
- Cut the cutting into 3 parts (approximately 45 cm each).
- Glue the legs inside the bucket at the same distance from each other and secure with screws on the outside.
- Measure the required diameter of the bottom of the bucket and cut a circle from foam rubber. Glue a piece of foam rubber to the bottom of the bucket.
- Cut the required size of padding polyester and wrap it around the bucket (place the fabric on glue).
- From an old blanket (imitation faux fur), cut out a rectangle and a circle (the size of the bucket). Sew a cover and pull it over the bucket.
- Fold the fabric inward from the wrong side.
- Cut out a suitable circle from cardboard, wrap it with any lining fabric and attach it to the inside of the ottoman, covering the empty space of the bucket. Poof is ready!
Preparing for work
Since the main idea was to make a thing from what was in the house or left over from other projects, nothing new was deliberately acquired and it was interesting. I removed the handle from the bucket because it is not needed for the ottoman. I have leftover padding polyester, so these are quite long but narrow strips that I glued directly to the bucket.
The surface of the bucket was simply coated with PVA glue and the padding polyester was pressed down. I treated the entire bucket and lid this way.
An unusual effect after taking medications for Covid has been named
Taking his friend’s wife away was the right decision: Pavel Maikov has been happy with her for 15 years
Tatyana Arntgolts gave birth to a child from Mark Bogatyrev: the first photo of the baby
Of course, to make the ottoman softer and more voluminous, more than one layer of padding polyester was needed. But the beauty of this material is that the second and third layers no longer require as much glue as the first, where the padding polyester is glued to the plastic. To fix the second and third layers of padding polyester, a few drops of glue are enough.
To add weight and stability to an ottoman, you need to fill it with something. You can fill yours with any unwanted items from old clothes to towels or even rocks if you want it to be really heavy!
I used a whole bunch of fabric scraps from all my recent sewing projects as filler. My stuffing included pieces of thread, thin pieces of fabric, and even pieces of old jeans and men's shirts from some of my other projects. I filled it as tightly as I could before closing the lid on the bucket.
The famous roaring lion from MGM films has been replaced with graphics (video)
He runs a YouTube channel and hangs out with young people: how Bogdan Titomir lives now
What habits and phrases should you give up to overcome self-doubt?
Round ottomans
Homemade ottomans are also made in a round shape from plywood and a flexible fiberboard sheet, fastening all parts using a screwdriver, self-tapping screws and a stapler, and then upholstering them with any fabric. You can attach wheels or legs to the bottom, which can be straight or oblique (three pieces).
If desired, they can be made with an internal drawer and lid, attaching canopies to the frame and seat.
Handmade furniture looks very original, original and creative. By choosing the shape, size and color scheme of the upholstery, you can make a pouf that will suit any interior design of your home or cottage.
Let's sum it up
An ottoman is a multifunctional piece of furniture that can be used not only in the bedroom, but also in any other room. However, moving it will not be difficult - its small size and maneuverability allow you to move the ottoman around the apartment at will. When choosing a bedside ottoman, you need to take into account not only its configuration, but also its appearance - if this furniture attribute is in harmony with the interior of not only the bedroom, but also the rest of the living space, you will get a very convenient and practical item!
Photo of a homemade ottoman
The tire model has enough space for two
If there is a car in the house, then there will be an unnecessary tire. It will make a large, comfortable pouf, and quite durable. You just need to prepare two circles of thick plywood or MDF with a diameter slightly smaller than our tire to close the holes. We attach them at three points using self-tapping screws or bolts with nuts.
Now you can start finishing the exterior. For example:
- Country style option. Wrap the pouf with thick braided rope, securing it with glue. First we paste both circles in a spiral, then the sides of the tire. We hide the ends of the rope and varnish the top for strength.
- We cover the top plywood circle with foam rubber, and attach the foam rubber to the side of the tire with a furniture stapler. Then we make a cover and put it on top. If desired, you can make legs from square pieces of bars, painting them or covering them with artificial leather.
The following video will tell everyone how to make an ottoman with your own hands from a tire:
https://youtube.com/watch?v=rIeGuiqF2aA
Pouf bag
This product is unique in that it has a soft back. To make it you will need:
- Create a pattern in the form of a vase with a narrow bottom (maximum width – 50 cm, neck length – 40 cm);
- According to the pattern, make six pieces each from denim and thin fabrics;
- Guided by the previous pattern, make six blanks again, but from colored fabric (because these petals will be used to assemble the cover);
- Create a new pattern in the form of six semi-ovals for the bottoms of the petal vases, as well as two hexagons for the bottom and top of the entire product - with 40 and 10 cm sides;
- According to the pattern, make blanks for the inner shell and cover, respectively;
- Sew all the pieces together;
- Fill the inner case with polystyrene foam balls;
- Place the inner cover into the outer one, and add the latter with a zipper for fastening and unfastening.
Note!
How to make a house out of cardboard: 140 best photos of children's crafts with your own hands + step-by-step manufacturing instructions with simple diagrams
DIY rose lamp - step-by-step instructions for creating a lamp with your own hands + original design ideas with photo reviews
- Furniture decoupage: TOP-140 photos of non-standard decoupage options. Step-by-step instructions for decorating furniture with your own hands
The finished ottoman bag with your own hands welcomes the handle, which is also made of fabric. Without a handle, carrying a large, baggy product is not so much difficult as it is inconvenient.
Master class on making a garden stool
1
.
Saw off the “ears” from the bucket and remove the handle. 2
.
Paint the bucket with blue metal paint in 2 layers, dry well. 3
.
On a piece of furniture board, draw the outlines of slightly curved legs. In fact, they should be such that the finished stool has a standard height of 40 cm. 4
.
Cut out the legs using a jigsaw. 5
.
Treat them with Texturol, it will protect them from atmospheric influences and reveal the beautiful structure of the wood. Dry well. 6
. Attach the legs to the bucket, mark the attachment points, and drill holes in these places. Attach the legs to the bucket using bolts. For each leg, take 2 bolts with nuts.
7
.
Cut a circle out of plywood to the diameter of the future seat. 8
.
Cut the same circle out of bright fabric, but with a larger diameter, to cover the seat. Place several layers of spunbond on the plywood circle (to soften the seat) and staple it to the plywood. 9
Wrap the seat with bright fabric on top and staple it in the same way. Insert the seat into the stool - to do this, press firmly and hit it several times so that it fits tightly into place.
Source
Ottomans with a rigid frame
More complex but reliable models of poufs are made on a rigid frame made of wood or plywood. They can have almost any shape and size, but to make such an ottoman you need woodworking skills and tools.
Pouf with drawer for small items
A square ottoman on a wooden frame will serve not only as a reliable place to sit, but also as a storage box for toys, tools and other irreplaceable small items.
Pouf - general view
For the pouf you need:
- plywood 12 or 16 mm thick;
- block 20x40 and 40x40 mm;
- furniture wheels or plastic legs;
- piano hinge for hinged lid;
- foam rubber 50-100 mm thick for sitting;
- padding polyester for covering the frame;
- thick bright fabric for upholstery;
- jigsaw or hacksaw;
- screwdriver, set of drills and screws;
- furniture stapler for fastening upholstery;
- wood glue or universal “Moment”.
The size of the ottoman depends on its purpose. For children, an ottoman with a height of 35-40 cm is sufficient; for adults, it is better to make it taller - 50-55 cm. The dimensions of the blanks for an adult and a child's ottoman are shown in the table.
Table. Dimensions of plywood blanks for the pouf.
| Name and quantity of parts | Children's pouf made of plywood 12 mm | Adult pouf made of plywood 16 mm |
| Front and rear walls – 2 pcs. | 350x250 mm | 400x370 mm |
| Side walls – 2 pcs. | 326x250 mm | 368x370 mm |
| Ottoman bottom – 1 pc. | 350x350 mm | 400x400 mm |
| Ottoman cover – 1 pc. | 350x350 mm | 400x400 mm |
| Bars for fastening the sidewalls – 4 pcs. | 40x40x250 mm | 40x40x370 mm |
| Lid bars – 2 pcs. | 20x40x310 mm | 20x40x350 mm |
| Fabric for upholstering the sides of the pouf – 1 pc. | 350x1450 mm | 550x1650 mm |
| Synthetic padding for upholstering the sides of the pouffe – 1 pc. | 300x1410 mm | 450x1610 mm |
| Furniture foam rubber for seating – 1 pc. | 350x350x50 mm | 400x400x100 mm |
| Fabric for soft cover – 1 pc. | 500x500 mm | 650x650 mm |
Note! A children's ottoman will be much lighter than an adult, but the load on it should not exceed 75 kg!
Step 1. Using a jigsaw, cut out the blanks according to the dimensions indicated in the table. The edges are sanded with sandpaper. The workpieces are assembled into a box using 40x40 mm bars. First, the bars are placed on carpentry or universal glue on the side walls flush with sides 250 mm (370 mm). After the glue has set, the front and back walls are glued to the side walls.
Glue the bars
The structure is reinforced with self-tapping screws, screwing them into the plywood at the place where the block is attached. The screw caps are recessed by 1 mm so that they do not catch the upholstery. Lastly, attach the bottom of the ottoman with self-tapping screws into the block, having previously coated the places where the parts come into contact with glue.
We fasten the walls with self-tapping screws
Step 2. Cut the upholstery fabric and padding polyester to finish the sides. Wrap the side walls with padding polyester with an overlap on the sides, secure the padding polyester with a furniture stapler. The pouf is wrapped in upholstery fabric over the padding polyester so that about 2 cm of allowance is left at the bottom. The fabric is attached to one of the corners with an overlap, having previously folded the cut inward. If necessary, the excess can be trimmed. Then the fabric allowances are secured inside the pouf. The fabric is also folded at the bottom and secured with a furniture stapler in 3 cm increments.
Fabric upholstery
Step 3. The blank for the pouffe cover is carefully sanded to avoid splinters and damage to the upholstery. Stops from a 40x40 mm block are attached to it from below, as shown in the picture, for a removable lid, or from a 40x20 cm block parallel to two sides at a distance of 18-22 mm from the edge for a hinged lid. The block is first attached with glue, then reinforced with self-tapping screws.
Making the lid
Step 4. On the top side of the lid, glue a piece of foam rubber of the required thickness using universal glue.
Fastening foam rubber
After the glue has dried, the lid is wrapped in upholstery fabric and secured to the bottom of the lid with a furniture stapler, after tucking in the edges. The fastening step is 2-3 cm.
Covering the lid with fabric
Step 5. Wheels or plastic legs are attached to the bottom of the ottoman with self-tapping screws. If the ottoman cover is hinged, it is attached to a piano hinge to one of the walls of the ottoman.
Attaching the wheels
Such an ottoman can be made not only from plywood, but also from old furniture chipboard. The manufacturing process is shown in the video.
Video - Pouf from old cabinet furniture
Note! Having experimented a little with the design, a pouf on a wooden frame can be adapted into a house for small pets, for example, a cat.
Round pouf on a wooden frame
An ottoman on a frame can be made of any shape, including round. The step-by-step technology for assembling a round or oval pouf is described below.
For the pouf you will need:
- Chipboard 16 mm thick;
- block 20x40 mm;
- Fiberboard for side walls;
- synthetic winterizer and foam rubber;
- upholstery fabric or artificial leather;
- a tool for cutting materials and fastening fabric.
You can choose the size and shape of the pouf yourself; to cut the materials correctly, it is better to make a pattern.
Round pouf - general view
Step 1. Using the prepared pattern, make two blanks from chipboard - the bottom and the lid of the pouffe. Mark the position of the bars on it: marks are made on the circle at equal intervals of approximately 15-17 cm. Using a thin drill, holes are drilled for attaching the bars.
Several holes with a diameter of 1 cm are made in the blank for the lid in random order - they are needed to allow air to escape from the foam while sitting on the pouf.
Preparing the bottom and lid
Step 2. Cut the required number of bars using a machine or hacksaw.
Cutting a block
If necessary, the bars are cleaned with sandpaper.
Blanks for the ottoman frame
Step 3. Using the drilled holes, the bars are attached first to one workpiece, and then to the second.
Attaching the bars to the bottom Attaching the bars to the lid
Fastening is done using wood screws. The screw heads are recessed into the chipboard by 1 mm.
Wood screws
Step 4. A rectangle is cut out of a sheet of fiberboard with a width equal to the height of the frame and a length equal to the length of the circle or oval.
Fiberboard cutting
The fiberboard is fastened using a furniture stapler, starting from one of the support bars.
Fastening fiberboard to the beam
Continue fastening along the side surface of the bottom and lid, as well as along all support bars.
Fastening fiberboard to the bottom and lid Fastening fiberboard to intermediate support bars
The fiberboard sheet is joined on a block; if necessary, it can be trimmed slightly.
Pouf side wall joint
Step 5. The pouf is wrapped with padding polyester on all sides. It is attached with fabric glue or a furniture stapler. The seat is cut out from thick furniture foam according to the size of the lid and secured with glue.
Covering the pouf with padding polyester
Step 6. Sew a pouf cover from fabric or artificial leather.
Making a cover for a pouf Ready-made cover for a pouf
Step 7. The cover is placed on the ottoman and secured at the bottom with brackets using a stapler. The bottom can be hemmed with upholstery fabric or satin.
Attaching the cover to the bottom of the ottoman
Furniture legs or pads are attached to the bottom to make the pouf move easier and not leave scratches.
Finishing the bottom of the ottoman
Video - Techniques for assembling and finishing ottomans
The designs of ottomans are extremely diverse, and their functionality depends only on your imagination. For example, a small pouf can be turned into five separate stools, as shown in the video, or into a folding bed.
Pouf folding bed
