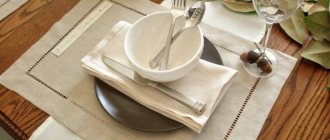
Home stores offer a huge range of different textile items for the kitchen: towels, aprons, potholders, napkins, seat cushions. All these little things are practical, decorate the interior, and can add comfort and charm to even a faceless room.
This is not to say that finished products are very expensive, but why not save on something that you can do yourself and without any additional costs? It is best to start sewing experiments with basic things.
For example, first, study the question of how to sew oven mitts for the kitchen, and then begin to implement it. The simplest ones in shape - round or square - do not require any special sewing skills, or even a sewing machine!
Where to begin
Before you start working, you need to understand why you need a potholder. If it performs only a decorative function, then the composition of the fabric does not matter. For items used for their intended purpose, it is necessary to select only natural fabrics.
Help: you can use old clothes, including denim, unnecessary sheets, and towels. They will serve as free consumables and will receive a “second life.”
Then you need to select a filler. It is needed so that the product reliably protects your hands from burns. Suitable for laying inside:
- batting;
- felt;
- felt;
- terry or waffle towel.
If it is necessary for the finished potholder to hold its shape well, then you will additionally need adhesive interlining.
You also need to think about decorations and a loop holder at the idea stage. By the way, you can involve children in the implementation of your plans; they will definitely come up with something unexpected and original. For example, make an oven mitt that resembles their favorite T-shirt or toy. However, for the first experience it is better to choose a simple form.
The simplest potholder is square. First you can try to sew it. The standard size is 20x20 cm, but each housewife selects the optimal parameters for herself.
Internal filling
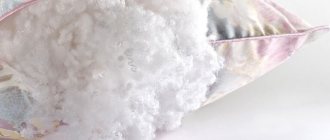
You need to immediately decide what the kitchen accessory is made for. If you need a thin pot holder used to remove the lid or rearrange a frying pan or pan, then sometimes two layers of material are enough. For dense items that are used to remove baking sheets from the oven, you will need filler. Usually this is a thin padding polyester, although it does not have any positive properties, it does not hold temperature well. Batting, drape, or another layer or two of fabric will do.
To start sewing potholders, you first need to assess your strengths and, based on your skills, choose or come up with a model for the future product.
By the way, felt is very popular now. The material is easy to work with, does not require an overlocker, is dense, holds high temperatures well and is excellent for tacks. It can also be used as a filler.
Classic square potholder
For such a product you need to prepare: 2 pieces of main fabric, material for laying inside, braid, scissors, threads and needles.
How to sew a square potholder:
- wash and iron the selected main fabric;
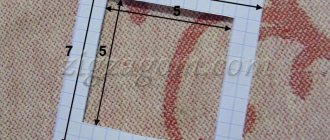
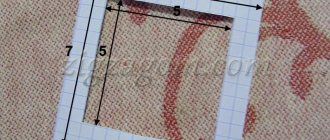
- make a template out of paper to determine the size and avoid defects when cutting the product;
- attach the templates to the fabric and trace them, adding 1 cm for allowances on each side;
- cut two squares from the main fabric;
- transfer the templates to the cushioning material, folded in half;
- cut a square without taking into account allowances;
- fold the squares of the main fabric facing each other, put insulation on top;
- sew three sides either on a machine or by hand using a needle or chain stitch;
- Turn the product inside out, iron it, fold the free edges inward, insert a loop of braid into the corner, and sew everything together.
Beginning needlewomen are afraid that when turning the product inside out, the corners will lose their shape or the laid batting will be deformed. Another way will suit them: repeat the first six steps from the previous description.
The seventh step will be the following: put insulation on the wrong side of the first main square, cover it with the second main square, right side up. Sew all sides, departing 0.7-1 cm from the edge. In order to decorate the cuts, you will need bias tape.
To make binding, lines are drawn diagonally at a distance of 5-6 cm on a suitable or contrasting fabric, cut, folded in half, and smoothed. The resulting tape can be used to edge the edge of any product. It’s better to start from the corner where the loop will be. It is formed at the final stage of finishing from the “tail” of the trim.
If desired, you can quilt the potholder, trim it with braid around the perimeter, sew an applique on it, or decorate it in some other way. It is important to remember only one thing: rhinestones, beads, and synthetic lace are not suitable for decorating kitchen accessories that will come into contact with hot objects.
Tip: if you don’t have a hot stand, then a potholder can successfully replace it.
Other classic potholders
Among the many shapes, square, round and mitten-shaped potholders are considered classic.
Round
It is made similarly to the square one. If desired, you can make a whole set of identical potholders of different sizes. For example, in order to remove a hot lid with a metal handle from a pan, a small-diameter oven mitt is suitable, but in order to remove a frying pan from the oven, it is better to take a larger oven mitt.
Important: every home has a stencil for a pattern - an ordinary plate for second courses has the ideal diameter for making a template for a small potholder.
Mitten
It is good because it protects not only the back of the hand, but also the outer side. Using a oven mitt is convenient for removing the baking sheet from the oven; it is indispensable when working near a wood-burning kebab grill.
To sew a pot mitten, you will need a pattern. You can find it on the Internet or make your own. To do this, place your hand on a sheet of paper, circle it, and duplicate the resulting line at a distance of 3 cm.
Important: for easy putting on, the bottom of the product should have the same width as the middle part.
After the pattern is ready, it must be transferred to the fabric. Unlike a square potholder, a mitten has 2 parts cut from the main fabric, 2 from fabric for interior decoration and 2 from insulation.
Technology:
- fold like a cake: the main part for interior decoration face down, insulation, the main part face up;
- sew along the perimeter, lay additional seams across, along or diagonally so that the mitten does not lose its shape during use;
- make a second similar part;
- fold both blanks, sew, leaving the bottom open;
- turn it inside out, trim the edge with braid, trim, and attach a loop for hanging.
Stylish heart
The work process begins with a good choice of material for making potholders; it must be dense and reliable, because some containers in the oven will become very hot, which can lead to burns.
The heart-shaped model can be an excellent gift for a loved one; the specimen is quite practical and will definitely find its place in the kitchen.
At the preparatory stage you need to collect the following list:
- Natural fabric.
- Felt.
- Sewing accessories.
- Stencil made of thick cardboard.
- Binding for edging.
You need to form a heart out of paper, after which the sketch is transferred to the material using chalk or a bar of soap. It is better to select the fabric in advance; if two or more colors are used, the blanks must be combined in structure so that the appearance is not affected.
At the time of sewing, paper clips are a great help; they will fix the parts, and the master will be able to eliminate possible bevels when joining. In the middle of the heart, you should make room for your palm; squeezing the shape in half will allow you to safely pick up and carry various containers in the kitchen.
Modern options for potholders
Not long ago, silicone potholders in the shape of a duck beak, a dog's mouth, and a frog's face appeared on sale. They consist of two halves: one for the thumb, the second for the other four fingers. With the help of such an oven mitt it is convenient to remove baking dishes from a hot stove.
Is it possible to sew something like this? Certainly! The main difference between this potholder and the others is three parts: one large and two smaller. As a training sample, you can sew an oval or rectangular potholder.
Manufacturing technology:
- Draw a 25x20 cm rectangle on a sheet of paper;
- transfer it to the main fabric folded in half, cut it out to make 2 parts;
- using this template, make parts from cushioning material;
- fold so that the filling is between the wrong sides of the base, sew;
- repeat steps 1-3, but cut each part into two identical parts;
- Sew two blanks from the resulting halves and finish the outer sections with braid or trim;
- place two small ones with processed cuts facing each other onto a large workpiece to create pocket-flaps facing each other;
- sew around the perimeter, decorate the seams, sew on a loop.
Now you can roll up the pot holder to check the fit.
Tip: An oven mitt with flaps can be used as a cutlery pocket for table settings.
Using this pattern, you can sew an oven mitt, which can be used to conveniently hold a saucepan or ceramic pot. It looks like a scarf with pockets on the edges. The length of the largest piece is calculated based on the size of the largest pan used. It is necessary to measure the diameter and add 20 cm. Width – 20 cm. For two small parts, cut out rectangles 15x20 cm.
What to do if there is not enough fabric
This problem often arises when unnecessary things are used as material for tacks. Sometimes it is impossible to cut out the required number of identical parts from them. There may be several solutions:
- cut each piece from a different fabric;
- First, “assemble” each part from several rectangles, squares, triangles, iron it, and then start sewing the finished product.
Options for using oven mitts for the kitchen
The main and main purpose is to protect your hands while cooking. But its possibilities are wider: home decor, implementation of creative ideas, teaching sewing skills to small children, gifts.
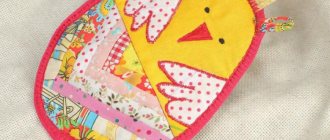
Potholders made using the patchwork technique are an excellent souvenir that you won’t be ashamed to give to colleagues, friends and relatives for any occasion. A New Year's potholder can be sewn from fabric with a themed print or in the shape of a Christmas tree, snowman, or symbol of the year.
Making potholders with your own hands is a creative process that brings pleasure, and, importantly, can distract us and our children from endless sitting in front of gadgets. Perhaps the first potholder you made yourself will be a step towards diversifying or completely changing the interior of your kitchen.
Main features of cutting and sewing
Potholders can be made of any size and type, but you don’t always get easy-to-use accessories. Therefore, patterns of simple shapes are often used. You need to be more careful with the decor. Beads, buttons, applique made of satin or other flammable materials are not the best solution. When choosing a model, you need to take this into account.
It is much more pleasant to use potholders made by yourself.
Basic moments.
- If the fabric frays, treatment will be required. In the classic version, an overlocker is used for this purpose. You can pass the needle by hand using a blanket stitch. It’s even easier to tape the seams or hide them inside.
- Regardless of the pattern, be sure to leave an allowance of about one centimeter for stitching and security.
- Potholders are usually hung on a hook, so you should immediately take care of the loop and the attachment point.
- You should not use felt-tip pens or markers for patterns; they do not always wash off and often appear on the other side.
To sew potholders, you will only need the skills acquired in labor lessons at school.
The last point is the most important: you need to determine the size. If the hand is large, for example, a man often works in the kitchen, then the pattern will have to be slightly enlarged. To do this, add 1-2 cm on all sides.
