Savig
8367 0 0
Savig November 1, 2017Specialization: master of interior finishing works. I am well versed in power tools for repair and construction. Formerly a teacher at a radio engineering college.
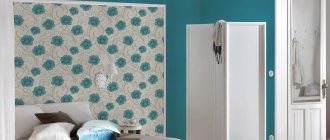
Wallpaper can radically change the appearance and visual perception of interior doors
Do you want to update old interior doors or give new ones an unusual look? Try using wallpaper for this. I suggest you familiarize yourself with how this can be done.
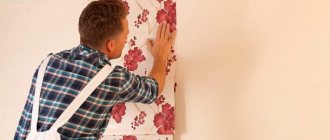
How to glue wallpaper to a door: installation technique
Sometimes, when decorating the interior of a room, they resort to a rather unconventional move - they paste wallpaper on the door, and this can be done for different purposes, both to veil the passage and to emphasize it. After all, such a move can make the entire wall monotonous, making the door almost invisible or not attracting attention, but you can emphasize this place using another drawing or painting.
Below we will discuss design options, types of suitable materials, installation techniques, and also, as an addition, watch a thematic video in this article.
Room doors - hidden under wallpaper
Heating radiators, sockets, switches
Do not mark the location of the socket or switch on the canvas and cut a hole in the material. If the vertical reference is followed, the two holes may not line up. It’s better to stick the strip on the wall (after removing the decorative items), keep it vertical, level it, and then use a sharp knife to carefully “draw” a cross in the place of the socket or switch. The material will be easily cut, leaving straight edges and triangles, which can then be easily folded inward or trimmed.
When gluing a wall with a battery (pipe), the procedure is even simpler. Having reached the radiator (pipe), cut the strip of material in several places. It is easier to push small strips of wallpaper behind the radiator (pipe) and smooth them out with a roller or brush.
The following instructions will help you avoid mistakes and create the perfect room design.
Materials and installation techniques
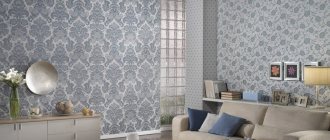
What wallpaper can you use?
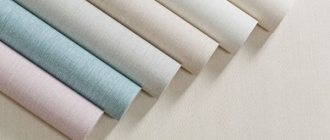
Note. Standard roll wallpaper is 0.53 m or 1.06 m wide and 10.05 m long, but if the texture is made for painting, the roll will reach 25 m in length. In addition, you can use photo wallpaper, but their sizes are very different from each other, and they can also be made to order.
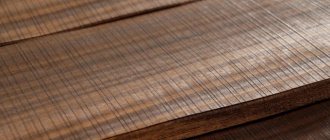
Door wallpaper can be made of cork
Which doors are suitable for this finish?
Before we talk about how to wallpaper a door, it is important to note that for this, its surface must be flat, without panels or relief patterns, because the requirements here remain almost the same as for a wall or ceiling.
Of course, in the case of the presence of panels, gluing can be done - for this you will simply have to cut the sheet in the places of the recesses, but the end result can hardly be called effective in terms of design and aesthetics. So it’s best when you have to work with a flat surface made of wood (fibreboard, chipboard, OSB, board) or metal (sheet).
In addition, the instructions for any wallpaper will require that the surface be clean and grease-free, therefore, grease and oil stains need to be removed from there and the most common white spirit or solvents will be suitable for this.
It is also important to pay attention to the paint that was previously used on the surface - it may peel off - in this case, you will have to clean it completely. If it is, for example, oil paint or nitro enamel, which has only peeled off in places, then it should also be removed, since the thickness of the layer will not make it possible to hide the differences, except with thick wallpaper (vinyl or cork).
Note. In order to remove paint from doors with your own hands, you can use a scraper, making it from an ordinary metal spatula, cutting the blade to 2-3 cm in length for rigidity (do not sharpen it - it will cut wood). You can also use various removers for paint and varnish materials - modern solutions do not contain volatile substances with a strong odor and can be used in closed but ventilated areas.
Installation work
Wallpaper under doors bleached oak – wood imitation
So, as mentioned above, wallpapering doors begins with cleaning the surface, but a clean and smooth surface is not the final condition for creating good adhesion, especially for wood. But in order to return the door to its original condition for gluing, it must be removed from the hinges and all the awnings, handles and side linings of the mortise lock must be unscrewed - all the fittings will be fixed only after finishing and complete drying.
Pay attention to whether there are any chips, gouges and cracks, and if any are found, then fill them with wood putty, and after drying, clean these places with sandpaper.
As you understand, the ends will not be pasted over, so it is very important to pay special attention to the edge so that the cutting line is smooth, without a torn texture, especially when you have light doors and dark wallpaper on the walls or vice versa, that is, when the transition is especially noticeable.
Gluing is best done with PVA - this glue is suitable for wood, paper, and non-woven fabric. Just don’t forget that you don’t need to smear the non-woven base with glue, and if you have a paper backing, then both the door and the wallpaper will be smeared.
Pasting works. Photo
Everything looks a little simpler when you use adhesive wallpaper for doors - you don’t have to coat the canvas and the sheet itself with glue, which creates additional problems and increases the complexity of installation. But in this case, you will need a perfectly smooth surface, and if the door is old, and the paint has still been removed from it, then, of course, there will be a relief there and the self-adhesive will repeat it down to the smallest detail.
To prevent this from happening, the canvas should be treated with sandpaper (first coarser and then finer), and in some exceptional cases it will even be necessary to completely putty the surface with a wood mixture.
price for wallpapering
Gentlemen, masters, the following question arose: when estimating the cost of work for wallpapering, how to evaluate openings (windows, doors)?
where the wallpaper does not stick, but pasting such places also requires labor. It’s just that the price varies depending on the complexity of the pasting. Ours ranges from 100 to one hundred and eighty.. exclusive ones are even more expensive
In linear meters, this is clear to the horse. In this case, the areas of windows and doors are discarded. Otherwise, you can also charge for floors that are not painted)
ssvkrym wrote: how to evaluate openings (door windows)? where the wallpaper doesn't stick
Labor without art is barbarism!
but you also need to spend time and effort on pasting the window; for me, it’s easier to glue a strip of wallpaper a meter wide than to go around the window with wallpaper.
The worker wrote: In linear meters, this is clear to the horse.
ssvkrym wrote: what about windows? to count or not these, for example, two squares of a window?
why consider that they didn’t paste over
ssvkrym wrote: or not to count these, for example, two squares of a window?
No. The area of the walls is calculated, then the area of all openings is subtracted from it.
ssvkrym wrote: but pasting such places also requires labor
Which ones?
It’s easy to calculate yours by the wallpaper used - the dimensions are indicated on each roll and at the end of the work you can estimate plus or minus a meter... in general, the wall area is the floor area multiplied by 2.5 for a typical housing
Explain. If you cut the wallpaper around the window, then it takes about 2 minutes of labor, but if you cover the slopes with wallpaper (once in my life I glued them with painter’s non-woven fabric), then you can count the squares, or, if the slopes are narrow, then the shoulder straps.
thanks ussur, that means we don’t count openings, which is what I wanted to know.
Let me explain, all this fuss near the window, radiator, trimming for the trim is very tiring.
ssvkrym wrote: I’ll explain, all this fuss near the window, radiator, trimming for the trim is very tiring
I agree, but where can you find such a fool who will pay for this?
It’s easier to increase the price per square meter, but even here you can’t jump much higher than the city average. So, no matter where you go, you can only get money for what is done, and not for the fact that we work hard.
lvov7104 wrote: you can only get money for what is done
I agree, and I only take it for what I did
Yes, it’s not evaluated in any way, you either include it in the total price or not. I don’t understand what’s so difficult about a doorway or window. There is a laser on it and you check the stripes, well, to the extreme plumb line.
Doorways in some cases even make work easier, but a window wall is often the opposite. If the radiator is not removable, there is also more than one, pipes, window sill. Some don't subtract openings.
GKL wrote: There is a laser on it and you check the stripes
laser, that is, but I haven’t used it yet when gluing wallpaper, I think that SUCH precision is not always needed.
The laser gun is a very good assistant when gluing wallpaper - all sorts of inserts, vertical control, corners, etc.
Why are you all fussing? I count without subtracting anything and announce the total. arranges? then we work. and then.. window
1.5. this is from 300 to 500 rubles. If the customer is such a penny-pincher, then you should think hard: do you need it?
Masters, are you interested in the customer’s opinion? (I often speak on behalf of customers here on the forum). In my opinion, this approach is the most correct.
spaceeggs wrote: why are you all petty? I count without subtracting anything and announce the total. arranges? then we work.
When I hired craftsmen, I never asked them for calculations by square meters, by linear meters, with deductions, without deductions. Well, I’ll force him to subtract the openings - so he’ll add a price per sqm, introduce a surcharge for trimming, and for gluing behind the radiator he’ll generally charge the same. and will still adjust the amount to the desired amount. You tell the master what you would like to have, he tells you how much he would like to receive for it. If it seems expensive to me, I can try to bargain, but bargaining is also not for individual transactions, but for the amount as a whole. They didn’t make a deal - they shook hands and went their separate ways.
How to properly glue wallpaper on hidden doors
Changing doors is a very complex process that must be taken very seriously. It is necessary to choose a solution that can last for several decades without the need to replace it. The choice will be difficult if you do not understand which options are gaining popularity in the market.
That is why it is better to turn to professionals who will offer various product options and can also make them to order. One of the best solutions at the moment can be called invisible doors to the apartment. This is a type of structure that can be installed in almost every room, and can also be completely hidden from prying eyes.
Vertical spaces in the interior
As stated above, the main goal of photo wallpaper is to visually increase the height of the room. For this purpose, skilled designers create special paintings and images with predominant vertical lines, subconsciously perceived by a person as an expanding space.
Paper based sticker
In this case, images with trees are often used. Other photographed objects that focus on the desire to expand the height of the perceived object will also be suitable.
Properly selected, they will create the illusion that the picture depicted is larger than the actual size, increasing the height of the room. However, the elongation of the installed door itself also acts as a secondary factor. Designers have learned to use this psychological technique deftly.
What companies offer when installing hidden doors
A company that is ready to undertake the manufacture and installation of a turnkey structure usually has a large number of different design variations in its assortment. They can be painted or wallpapered, or additional elements can be installed that will improve functionality.
The peculiarity of such products is that they are installed in a special box, which is flush with the wall. This allows you to make the transition from wall to door more unnoticeable, and if installation and styling are done correctly, the structure will not stand out from the general background.
In order for the design to be styled the way the client wants, a special coating is applied to it. You can glue wallpaper on it or paint the door any color. This is very convenient for those who want to create a single space for the entire room. Hidden doors under wallpaper are ideal for any space.
Among the additional elements are hidden handles, which are necessary for the door to become a single part of the space. They are made in the same colors and are completely hidden from view. They are installed directly into the sash, making the handles completely invisible.
Slopes are different!
There are different slopes: door and window; made using plasterboard or simply plastered; covered with wallpaper, laminate, tiled, simply puttied and painted. I will tell you about the types of slopes that I have at home, justifying their use in this form. Let's start with the general:
All the slopes in our house are made using plasterboard: a layer of rodbunt is applied to the primed surface (it is used as glue), and a pre-prepared sheet of moisture-resistant plasterboard is glued onto it. To strengthen this structure, we used a metal corner, which was also “glued” with a rod band. We glued it only to the outer corners, those that, as they say, can be caught with a shoulder or torn down with a foot or a toy (in our case). We prime the almost finished “rough” slopes again, putty, clean, putty (if necessary) and prime again. Now the slope is ready, all that remains is to decorate it. And now the most interesting part begins: We only have a door to the combined bathroom, but there are no other interior doors (due to financial difficulties after the renovation), and no one knows when they will appear, maybe in a month, or maybe in a month. year. And living with unpasted, unfinished door slopes waiting for doors, with our little children, is simply not realistic: in a couple of days they would have “removed” all the wallpaper for us, peeled off everything they could: it would be a sin not to pull and pick where something came unstuck or began to slowly come off.
How to order and install
A hidden door for wallpaper is ordered on a turnkey basis from a company that is ready to take on all the work. The company independently takes dimensions, adjusts all materials, and after the production process, installs the product in the client’s apartment. This allows a person not to think about each stage of the process, thereby facilitating the repair process.
Company employees can also take on styling, or you can do everything yourself. Thus, it is enough to simply order a design that will delight a person for many years.
Source
Sequence of work
Success, the speed of achieving results, depends on proper preparation for work. Purchase the necessary tools and available materials:
- Table for cutting and applying wallpaper glue.
- Step ladder.
- Clean container for glue.
- Grater with mesh for grinding.
- Sharp scissors, wallpaper knife with spare blades.
- Tape measure for measuring the length of panels and the height of walls.
- Level, wallpaper ruler.
- Wide wallpaper brush for applying glue.
- Painting fur, rubber roller for rolling wallpaper.
- Plastic spatula for wallpaper.
- Rags, sponge for removing excess glue.
- Hammer, insulating tape, pliers.
Tile countertop, tiled countertop
There is a need to tile the countertop. This option was supposed to be (criticism, advice?) 1. Take a standard tabletop (23 mm chipboard). A tabletop, but not plywood or just chipboard, simply because tabletops are sold at hand, but everything else still needs to be brought. Plus, the standard tabletop fits perfectly, no need to trim anything. 2 On top of the liquid nails we glue one layer of moisture-resistant gypsum plasterboard, plus we fasten the gypsum plasterboard with self-tapping screws. GVL, but not DSP already because GVL is available. 4. Glue 10x10 porcelain tiles onto Flexleber on top. 5. Grout it with LITOCHROM STARLIKE epoxy grout. This option was assumed and it remains in force for now (therefore criticism and advice are welcome). However. The other day they brought me kitchen furniture and the company seems to have collapsed. Along with the furniture they brought a tabletop, which I did not order and did not pay for at all. At the same time, the freight forwarders even forgot to take a receipt stating that the goods were delivered. Well, I modestly remained silent. Well, I think the company will not become poor, because when ordering furniture, after calculating the price, we subtracted the cost of the tabletop from the price, it turned out to be minus 7,000 (SEVEN) thousand, despite the fact that prices for tabletops of this size (3 meters with kopecks) start from 900 rubles. (23 mm) up to 1800 r (38 mm). So, they brought tabletops 38 mm thick. If you put GVL (10 mm) on top of all this, plus tiles (another 10 mm), then you get a tabletop 60 mm thick, which seems a bit thick. Or not, does anyone have any experience or thoughts? Kitchen in the so-called “Castle style”, a version of a similar kitchen below. And so. What if you don’t bother with GVL, but just glue the tiles onto this laminated countertop with liquid nails? The grout is the same. Do you think it will hold up?
Surface preparation
To ensure that the surface of the arch after finishing looks aesthetically pleasing, smooth, and not wrinkled or bubbly, complete the following list of works:
- Clean the drywall base from dust.
- Open it up with base plaster.
- Fix the leveling corners with glue without waiting for the plaster to completely set.
- Rub the squeezed out mass of solution from under the corner with a spatula.
- If you choose steel corners, fasten them on a dry surface with self-tapping screws.
- Open the leveled surface of the arch with a finishing solution of plaster or putty.
- Lightly sand the surface to roughen and increase adhesion.
Important! If necessary, additionally prime the base of the arch that you plan to wallpaper. This will ensure a higher degree of adhesion, and therefore make it easier for you to glue the wallpaper.
Choosing a coating for an arch
Wallpaper for an arch must be durable and able to withstand constant loads and abrasion, since the arch often takes on mechanical loads, and its edges often crumble due to the material used. The following types of wallpaper are suitable:
- Paper of any kind: structured, smooth, photo wallpaper, embossed and others. They are quite strong, but at the same time lightweight, which gives a chance to securely fasten them to the arch without worrying about the covering falling off.
- Washable. This coating is distinguished by its practicality, which is very important for finishing an arch, since any dirt can always be removed. This type of wallpaper has a huge range of colors and patterns, so you can choose the right option. The joints of the wallpaper can be covered with decorative corners that adhere best to this coating.
- Double-layer, for example, textile, bamboo or vinyl. Wallpaper is distinguished by its durability and beauty, which is very important for an arch. But you need to be careful with bamboo wallpaper in your apartment, since the overall style must be maintained.
- Liquid wallpaper. It is a very convenient material for arches in terms of application, as it has the qualities of decorative plaster; it is applied and smeared over the surface. The coating does not have much in common with conventional wallpaper. There simply cannot be any joints or inconsistencies in such material. It is very convenient that a damaged piece of wallpaper can be easily removed and a new one added in its place. Their main drawback is rapid abrasion.
The difficulty is to ensure that the wallpaper is in harmony and combined with each other. Thus, the coating applied to the arch is very difficult to match the pattern with the wall covering, so it is recommended to use plain wallpaper or companion wallpaper with a small pattern that is not so noticeable when decorating the arches, having a common background.
Video description
When should interior doors be installed?
The “first wallpaper, then doors” method also has disadvantages:
- Installing a door is a messy and dusty process. After installation is complete, the wallpaper will have to be washed, and in the worst case, vacuumed.
- When forming the desired geometry of a doorway in a concrete wall, damage to the wallpaper is inevitable. If there are defects, the concrete may fall off in large pieces.
- No one is safe from human mistakes. Incorrect measurements, negligence of the door manufacturer and other factors lead to the fact that in some cases the doorway has to be reduced. After building up with a cement-sand mixture, an additional, unpasted wall surface appears, very different in color from concrete. Most often, decorative trims cannot cover this deficiency. There is a need for puttying and additional wallpapering, and with them a lot of difficulties: adjusting the pattern, a large number of scraps, etc.
- When finishing a doorway, it is almost impossible to avoid splashes of cement-sand mixture and other materials. Unlike dust, such contaminants are very difficult to remove. In addition, some door models do not have trim, which means you will have to tear off the wallpaper around the perimeter of the opening to form a solid corner.
What else to pay attention to
To avoid additional problems, you need to consider the following points:
- The relationship between adjacent corners and the door.
- The location of window openings relative to each other, the entrance to the balcony.
- Placement of heating elements: pipes, radiators, etc.
- Arrangement of furniture.
- Availability of other important interior details.
If the room has a stationary cabinet that is not planned to be moved to another place in the future, you can start gluing from it, so that the junction of the strips is hidden behind it. The same applies to the furniture in the kitchen.
Saving the appearance of an old door with photo wallpaper
No matter how intimidating the word “repair” may sound, sometimes a creative wave hits us, and the soul demands change. It’s just desirable that they be inexpensive, quick and without a lot of labor. Is it really possible to come up with something with such requests? Quite! Photo wallpaper on the door will help you add something new to your interior without having to undertake complex work and spend a lot of money on it. Perhaps this highlight will seem insignificant to some, but believe me, with the right design solution, such wallpaper will make the interior truly unique.
Changing the appearance of the entrance transforms the room
After that, questions immediately started pouring in. And I told a friend what the photo wallpaper on the door was. How to make a decoupage cabinet with them and why canvas 60 cm wide is rarely produced, mostly to order. Is it possible to decorate a door with regular wallpaper? What are the benefits of self-adhesive vinyl stickers?
Photo wallpaper on the door
The following wallpapers are available for finishing various types of doors:
- paper;
- non-woven;
- vinyl;
- fabric;
- door stickers.
The subjects of 3D images are very different:
- nature;
- flowers;
- cities;
- perspective views from above;
- children's pictures;
- Art Deco;
- abstraction.
The choice is very large. There are many manufacturers and each has its own catalog. Additionally, you can bring your photo or picture. Each major store has its own website and offers home delivery.
Each manufacturer selects its own sizes. They all take into account that the minimum door width is 60 cm, height 2 meters and make them larger. It’s easier to cut to size than to leave stripes around the perimeter that aren’t covered with wallpaper.
Door stickers are made from vinyl film. The front side has a matte or glossy three-dimensional image. The back is covered with an adhesive composition. Self-adhesive ones are easy to attach to any surface and can be quickly removed without damaging the door leaf. They can be changed frequently.
Canvases 60 cm wide are made to order or cut
Photo wallpapers are made with the expectation that they will be larger than the door. Each manufacturer has its own sizes. In stores, the width usually starts from 86 cm for wallpaper, and from 80 cm for self-adhesive films. If the image can be cut to size without damage, then take ready-made photo wallpaper. Otherwise, by paying a little more, in a few days you will receive canvases 60 cm or larger, whatever sizes you ordered.
Photo wallpaper on the door in the kitchen
This applies to a decoupage wardrobe, when there may be 2-3 non-standard doors and you want to unite the entire facade with one theme. Sometimes the door exceeds the standard dimensions and then you also have to order wallpaper or self-adhesive film.
Children's wallpapers are highlighted in a separate section. They are designed to suit the interests of boys and girls of different ages. Favorite characters, educational pictures and themes that correspond to teenage hobbies. Non-standard furniture sizes are also taken into account. Photo wallpapers that are glued to the door have a protective film that allows them to be washed. Marker marks can be easily removed from the surface.
