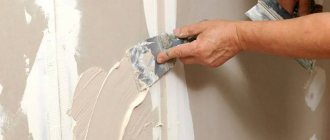
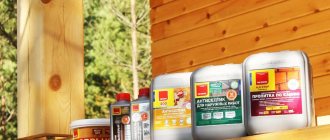
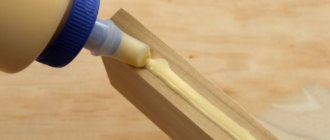
Over time, the wooden surface becomes covered with defects, cracks appear, which, as their number increases, spoil the decorative qualities of the material and also affect its durability. For this reason, it is necessary to additionally strengthen the material; wood putty is used. The rules for its selection, application features and properties will be discussed further.
Why putty wooden surfaces and what does it give?
Wood is not a perfect building material. It has small cracks, burrs, and traces of knots. The putty will eliminate imperfections, hide imperfections, and level the surface. It is applied to obtain the following results:
| Goal | What gives |
| Renewing old window frames, door jambs, floor partitions before painting. | Fills gaps, scratches and cracks. |
| Preventing moisture from penetrating new wall surfaces before wallpapering. | Protects the material from swelling and deformation. Extends the period of operation. |
| Increased adhesion. | Improves grip qualities. Provides durability of the decorative coating. |
| Leveling walls before painting, under wallpaper or cladding with frameless clapboard. | Surface unevenness is reduced to zero. |
For putty
There is a lot of variability in its use. It is used for:
- Restoration of wooden structures;
- Preparing freshly laid parquet for painting;
- Repair of floor coverings;
- Restoration of window frames, door panels and jambs.
Its advantages:
- environmental cleanliness;
- ease of application.
Against putty
The only argument put forward against puttying wooden surfaces is the fear that they will swell when exposed to moisture. But this is refuted by the fact that all wood putties are waterproof and protect against the harmful effects of precipitation, temperature changes, and ultraviolet rays.
DIY wood putty
It is possible to make the putty solution yourself, saving money. But quality ingredients are chosen. The chalk is crushed to a powdery state and mixed with PVA glue; it is necessary to create a homogeneous mass in the form of sour cream. You can add sawdust to the mixture. Drying lasts 24 hours.
Or the chalk is dissolved in varnish with an acrylic base, which is water-soluble. Achieve a consistency that is not too liquid; it should resemble toothpaste. Drying the layer takes 12 hours.
Cooking should be done in small portions, any smudges that form should be wiped off immediately.
Cooking should be done in small portions.
Puttying wood can improve the external qualities and strengthen the material. The process is not very difficult to carry out, for this reason you can do it yourself. But they choose the mixture carefully, taking into account the operating characteristics. To save money, it is possible to prepare a putty mixture with your own hands according to the recipes described earlier; you don’t need a large number of ingredients.
What types of putty can be used
Putty is available in the form of a dry or liquid mixture. It is chosen taking into account its composition, color, purpose (basic or finishing). The following types of putty are suitable for working with wood.
Acrylic
The purpose is universal. Suitable for laminate, chipboard and other finishing materials. Used for exterior and interior decoration. Characterized by:
- Elasticity;
- No shrinkage;
- Increased strength;
- UV resistant;
- Ease of tinting;
- Fire resistance;
- Excellent thermal insulation properties;
- No smell.
Epoxy
Material providing maximum joint density. It is applied for
- sealing cracks and joints when repairing floors;
- eliminating scratches, potholes, cracks and other defects before painting.
It has a significant drawback: it is incompatible with stain .
Plaster
Water-soluble type of putty. Doesn't fit well on wood. Requires priming of the surface before filling. After drying, a heterogeneous structure is formed, prone to cracking and crumbling. Suitable as a topcoat over a base layer of polymer mixture.
Polymer
Made from latex. Doesn't bubble. Withstands temperature changes. Available in a wide range of colors.
Oil-adhesive
Cheap plastic material with an unlimited shelf life. The main binding component is drying oil. Fillers:
- glue;
- lime or chalk.
Intended for treating residential and office premises, facades, bathrooms and toilets.
Types of materials - how to choose the best one
Wood putty is a material that is most often needed when it is necessary to hide cracks that have formed in wood. But in order to get the desired quality result, you should approach the choice of putty with special attention. Then the work will be easier, and the coating will cope with the task.
There are a huge number of putties that can be used to putty on a wooden surface on the construction market. This allows you to find the best option for any request, but also complicates the choice due to the need to study the features of the compositions. Therefore, descriptions of the most popular types that can be used for wood will be given.
There are a huge number of putties that can be used to putty on a wooden surface on the construction market.
Polymer putty
Latex can be used as a polymer. Latex is suitable for covering seams, filling small flaws, creating a textured structure on the surface, working with niches and corners, cannot be used on metal, and is not resistant to low-temperature influences.
The composition includes:
- Latex is a binder;
- Fillers;
- Antiseptic elements;
- Substances for regulating the curing process;
- Plasticizing elements;
- Water.
Latex is suitable for covering seams, filling small flaws, and creating a textured structure on the surface.
Epoxy putty
Based on epoxy resins, putty solutions are used when it is necessary to repair doors, windows, and other wood structures that need to be significantly strengthened. When the polymerization process is completed, the putty gives the base high-strength and stable characteristics. Does not emit a strong odor and does not shrink after drying.
After treatment with epoxy putty, the base will be waterproof and resistant to chemicals. But one of the disadvantages is the impossibility of applying over stain.
When the polymerization process is completed, the putty gives the base high-strength and stable characteristics.
Acrylic
Acrylics are classified as polymers, stand out for their popularity, and can be used for various surfaces. They note elastic and durable properties, do not shrink after drying.
The presence of polymers and plasticizing elements as components allows the putty to be applied in rooms with dry and humid microclimates.
Acrylic putty for wood is moisture resistant, can withstand changes in temperature, and is resistant to mechanical shock. These advantages allow them to be used on wood floors that are subject to increased loads. It is considered a putty solution for interior decoration, but can be used for exterior use. Thermal and moisture-resistant mixture is suitable for treating wooden surfaces in the bathroom and saunas.
The following properties of the composition can be distinguished:
- High level of elastic characteristics. This feature makes it possible to easily cover any minor flaws; the use of putty when working with parquet is in demand to remove cracks;
- Does not shrink, for this reason you can limit yourself to applying one layer; the resulting coating will not change its structure after drying;
- Durable result, the duration of operation is influenced by environmental conditions, the period varies from 3 to 10 years;
- Reasonable price considering the quality obtained. Cheaper water- or oil-based compositions may become cracked after 12 months and the layer will begin to deteriorate;
- Wide range of colors.
They note elastic and durable properties, do not shrink after drying.
Moisture and water resistant
Water-based products can be classified as moisture-resistant; they are distinguished by their harmlessness to humans. The composition does not use diluents. It is easy to apply the product to the timber due to its high elastic property. It is easy to remove excess putty; for this purpose, it is enough to use a rag soaked in water. The best option for working with wall surfaces.
The solutions harden slowly, which increases the period for using the product after opening the package. They have a high degree of adhesion and can be used on smooth surfaces.
The following are the positive properties:
- Versatility, they can qualitatively seal any type of unevenness on the surface, a suitable product for the joint areas of floorboards;
- Eco-friendly composition, no toxic substances will be released either during application or during operation;
- Water resistance, withstands natural factors, suitable for outdoor use;
- Durable;
- Resistance to changes in temperature, increased resistance to fire;
- The coating is elastic, so it’s easy to get the necessary reliefs.
The characteristics begin to appear after the drying stage is completed. It is necessary to use the formulations correctly.
Water-based products can be classified as moisture-resistant; they are distinguished by their harmlessness to humans.
Preparation of wooden surfaces
The preparatory stage begins by removing metal objects and nails, removing dirt and old paint. Nail marks should be painted with enamel to prevent rust stains from appearing on the applied putty. Clean the surface first with a dry brush and then with a damp cloth. Perform priming. The primer is selected on the same basis as the putty.
Putty before wallpapering
Final putty before wallpapering
In order to hang wallpaper with high quality and to make it last longer, it is advisable to do it on the most flat surface possible.
Some people prefer to use drywall as a base for wallpaper.
However, this is a rather expensive choice.
And there will be a lot of hassle with laying drywall.
What does it cost just to buy screws, hangers, profiles, and even the plasterboard sheets themselves.
A simpler and more cost-effective way to level walls is putty. It is especially practical on wooden surfaces.
But how to putty wood under wallpaper? How to choose the right mixture for such purposes?
Wallpaper putty has its own characteristics. To ensure quality work, first of all the walls are sheathed with plywood. Then you need to apply the base plaster.
After this, you can apply one or two layers of finishing plaster, which will provide a smooth surface. To obtain an ideal result, after drying the surface should be treated with sandpaper.
Even plywood that is resistant to high humidity needs putty. This is necessary for several reasons:
- To prevent the occurrence of fungi, mold and similar parasites on the surface of the walls.
- So that the surface is smooth enough for high-quality wallpaper gluing.
To cover wooden surfaces, both dry and ready-made putty mixtures are used. The dry composition is sold in bags of twenty-five kilograms each.
It is a powder that must be diluted to the required consistency before use. After this you can start applying.
You need to cope with the task within twenty thirty minutes, since the solution dries quickly, after which it can no longer be used. The liquid mixture is sold ready-made.
The solution is in a bucket (or jar), after opening which you can immediately start working. This option is much more practical and faster.
Acrylic putty is quite suitable for covering wooden surfaces under wallpaper. Its main advantages in this area: ease of application, environmental friendliness, ease of finishing with sandpaper.
In order to putty walls under wallpaper, there is no need to bring the surface to perfect condition. Therefore, there is no strict rule about what type of solution to use.
It would be most practical to give preference to universal mixtures that will fulfill their role perfectly and will not require large expenses. All small defects left after putty will be successfully hidden under a layer of wallpaper.
How to putty
The process of puttying a wooden surface is practically no different from puttingtying ordinary walls.
- Surface preparation
- Padding
- Putty 2 layers
Surface preparation
The first step is to prepare the surface. Many inexperienced “masters” do not pay due attention to preparing the surface for putty, believing that putty will cover all the unevenness. Before applying putty, it is imperative to prepare the surface. Namely, remove old paint, dust, dirt, nails and other metal objects.
Where there were metal objects, it is advisable to cover the holes with enamel. This is necessary so that rust does not come through the putty when it is applied. After this, brush over the surface to remove small, stuck particles of debris, and then wipe with a slightly damp sponge.
Surface priming
The next stage, as in the case of puttying walls, is applying a primer. Primer, mandatory work before puttying. A primer is necessary for better adhesion of the putty to the surface, as well as for additional protection of the wooden surface from rot and mold. Choose a primer with a similar putty composition. If your putty is oil-based, then use a drying oil-based primer. For nitro putty, use a similar primer composition.
Puttying the surface
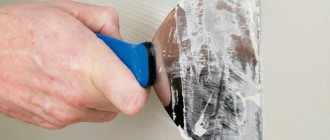
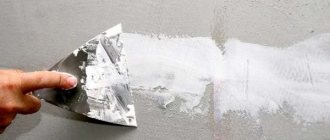
After the primer has dried and polymerized (from 4 hours or more, depending on the composition and manufacturer), first you need to fill up the cracks and other irregularities.
The first layer of putty should be no more than 2 mm thick. We are waiting for the mixture to dry. We correct it and smooth it out with sandpaper. Apply the next layer of putty, leveling the surface as much as possible. The second layer should be no more than 1.5 mm thick. After the second layer has dried, we clean the surface with sandpaper.
Puttying wooden surfaces is a rather troublesome process, but it is worth it to “breathe” new life into an old item. Follow the instructions of the manufacturer of the material you have chosen and there will be no problems with completing the work.
Inspiration and easy repairs for you!)
Subscribe to our Yandex.Zen channel
