Nowadays, the term “gilding of furniture” usually refers to the process of simulating gold plating. Various shades of gold and options for its application, as well as a combination of foil, waxes and paints create many beautiful and unique decorative coatings for furniture and its elements.
Gilding has been a favorite type of furniture finishing since ancient times. Gold decorative elements will look harmonious not only on antique items, but also on modern pieces of furniture.
The question of what patina on furniture is is now asked by many novice decorators and just amateurs. Patina refers to the corrosion (oxidation) of metals over time or the appearance of a dark patina on painted surfaces. Through oxidation and other processes, patina is created as a decorative effect. And patination is the aging of the surfaces of an object using any means and technologies to give a magical touch of time.
Working with gold leaf: step-by-step master class
Imitation gold in the form of gold-colored foil is called potal. Sheets of foil can be not only gold, but also the colors of bronze, copper, and silver.
Potal can be glued to undried acrylic paint or varnish. However, it is recommended to use a professional adhesive composition - Mordan, if you want to get a good result and a reliable coating. It comes in water and oil based.
Water-based Mordan is easier to use, so we’ll focus on it. It is called “glue milk” and it dries very quickly. You can apply the potal 15 minutes after applying the composition, when the glue has set. Before applying glue, the surface must be leveled, primed and free of dust. When working with the glue you choose, always follow the manufacturer's instructions.
The technique of applying gold leaf is a decorative gilding of the surface, which must then be protected by covering it with oil varnish or a special finishing varnish for gold leaf. But such protection may not be necessary if you want natural abrasion that will highlight the exquisite antiquity of the furniture.
In order to give new life to your furniture, we offer a simple step-by-step master class - gold leaf on furniture.
To gild with gold leaf you will need:
- Glue for gilding (mordan);
- synthetic flute brush (for applying varnish);
- gold leaf;
- scissors;
- chalk or tooth powder.
- To make a patina on furniture with your own hands , apply the glue with a soft flute brush in an even layer over the entire surface so that it is ready for gilding at the same time. Let the glue set, wait about fifteen minutes.
- If you need to cut the foil, sprinkle your fingers and scissors with chalk, and the desired piece will be easy to grasp with the backing paper.
- Lift up the leaf along with the backing paper. Try to keep the sheet straight. Carefully begin applying it to the glue-coated surface, keeping one edge at an angle to the surface.
- Quickly lay the entire sheet of foil over the surface. Using a dry brush, gently press the sheet down without removing the backing paper until the foil adheres to the surface, then remove the paper.
- If there are gaps on the surface, you can seal them with pieces of foil on top. After the surface has completely dried, polish the gold leaf with a soft cloth.
You should work with gold leaf in a draft-free room, as the foil leaves may fly apart.
Look at the photo of patina in the interior to see how impressive and beautiful old furniture can look:
Using gold leaf you can create a texture on the surface of furniture and interior items. To do this, it is enough to deliberately unevenly apply the gold leaf onto the surface of the product.
To obtain relief, the best result will be achieved when using sheets of gold leaf of maximum thickness. And to reveal the relief, you can wipe the resulting surface with bitumen varnish.
Useful tips
To make patination of wooden crafts with your own hands as successful as possible, it is important to listen to the following advice from experts:
- In order for the silver, gold or bronze shade of the patina to look natural on the wood, it is important to properly prepare it first. If the wood is dark in color, the material is coated with an appropriate patina to deepen the color. If the product is light or was previously painted with white paint, then select a silver or gold color.
- If there are a lot of carvings on a wooden craft, it is recommended to treat it at home with wax or bitumen. It is better to cover a dark background with acrylic silver mass.
- It is recommended to patina at home only on a matte surface. Since a glossy craft gives too much shine, it won’t be possible to create an antique finish.
- Gold or silver details should be harmoniously combined with the corresponding fittings.
When applying metallic paints at home, it is important not to overdo the layers. Otherwise, the result will not be an elegantly aged piece, but a shiny, polished trinket.
Advice! Patina should not be used to cover areas with which a person will often come into contact during use. Since the decorative coating in such places can quickly deteriorate.
How to quickly make a patina on furniture: step-by-step instructions
Finishing furniture elements with light surfaces with gold leaf will be a worthy decoration, but the main thing is not to overdo it in the amount of gold decor.
Gold leaf goes well with the dark surface of furniture, for example, when it acts as noble abrasions.
The following step-by-step instructions with photographs will tell you how to make a patina on furniture quickly and easily:
- On the face-covered surface of the ends of the stool, as described above, apply a gold leaf with lining paper, previously cut into small longitudinal pieces.
- After waiting for the glued gold leaf to dry completely (the drying time is recommended by the glue manufacturer), walk over the surface with medium or fine-grained sandpaper.
- Rub the surface across the grain or in a circular motion until you achieve the desired abraded effect.
- The end parts are subject to abrasion when using the stool, so be sure to cover them with a protective layer of gold leaf varnish.
Wood aging methods
There are three effective ways to age wood - mechanical, chemical and thermal. Depending on the chosen method, the end result has certain differences.
The mechanical method includes two types of processing - brushing and patination. Both types can be used together or separately, depending on the material and the desired result:
- brushing - the surface is treated with a wire brush to remove soft fibers and expose the annual rings. As a result of this treatment, the top layer acquires a pronounced relief, which is further emphasized by applying glaze compounds. This method is the most labor-intensive and is used mainly for hard wood - pine, larch, spruce, oak, walnut;
Wood brushing
- patination – surface treatment with coloring compounds followed by polishing. It is used for soft species, as well as wood with a weak texture - maple, cherry, beech and others. Wood wax and stain can be used along with paint to give a brighter pattern.
Patination
The chemical method involves treating the top layer of wood with various compounds that change the color of the fibers. Ammonia and products containing alkali, such as stove or drain cleaner, are suitable for this. This method can only be used for species containing tannins, that is, deciduous. Chemical treatment of coniferous wood will not give the desired effect.
The thermal method involves burning wood with a gas torch or blowtorch. The type of tree does not matter. They do not burn it too much, just so that the texture of the fibers appears more clearly, and then remove the carbon deposits with a metal brush. Next, cover the surface with stain or varnish to give the wood a more decorative appearance. In general, the process is not complicated, but it requires caution and compliance with safety precautions.
Burner-aged wood
Working with gold leaf: a simple master class with video
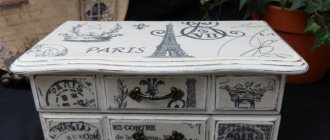
Using gold leaf, you can decorate a simple wooden chest of drawers. Below is a simple master class on working with gold leaf, where it is used in a “mosaic” version as an ornament on the flat surface of a chest of drawers. Also, the ornament can be applied through a stencil not in pieces, but as a continuous coating.
You will need:
- gold leaf in sheets (light gold);
- stencil with ornament;
- glue for gold leaf;
- synthetic brush for applying varnish;
- masking tape;
- ruler, chalk;
- oil varnish or finishing varnish for gold leaf
Whatever glue you use for gold leaf, always read the manufacturer's instructions and follow them strictly.
- Use masking tape to glue the ornament stencil onto the surface of the chest of drawers. Apply glue for gold leaf on it.
- Stencil small pieces of gold leaf onto the surface with glue, leaving gaps between them.
- Use masking tape to mark an even strip 2 cm wide, limiting it on both sides. Cover the strip between the pieces of tape with glue.
- Place pieces of gold leaf on the glue. After they stick, carefully remove the tape.
Watch the video of the master class on applying gold leaf to wood, which clearly demonstrates the stages of this process:
Thermal aging
First of all, take care of safety precautions. When burning wood, there should be no flammable objects or liquids nearby, and it is better to generally carry out such work in the fresh air. Be sure to check the serviceability of the burner or blowtorch.
Prices for various types of gas burners and blowtorches
Gas burners and blowtorches
Step 1. The workpiece is placed on a non-flammable surface or placed vertically, after which it is fired with a burner. The material is processed as evenly as possible, the top layer should be charred approximately 2-3 mm in thickness.
Processing wood with a torch
Technique for burning wood with a blowtorch
Thermal aging method
Step 2. After cooling, the charred carbon deposits are removed manually with a brush or using a grinder. The intensity and duration of this treatment depends on the desired texture.
Sanding burnt wood
Step 3 . Having formed the desired relief, take the grinding attachment and process the workpiece again. Here it is important not to overdo it and not remove excess, otherwise the aging effect will be insignificant.
Step 4. Since the color of the wood changed during firing, dark and light areas appeared, there is no need for painting. Now all that remains is to coat the material with colorless varnish or protective impregnation.
Thermally aged wood
How to make furniture with a golden patina using wax
A win-win option for the final stage of decorating furniture is to imitate patina with gold wax. Metallic wax is available for sale in various shades of gold, bronze, tin, silver - in jars or tubes. It is applied in a very thin layer so that the imitation looks like a real patina.
To make a patina on furniture with your own hands using wax, follow these rules:
- Wax can be applied to the painted surface with your finger, gently rubbing, here and there creating the appearance of slight abrasion.
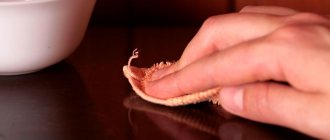
- Wax can also be applied with a swab made from a cosmetic disc or cotton cloth.
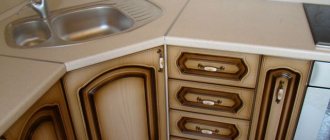
- Gold wax is especially suitable for patination of panels and corners on cabinet doors.
- Gold wax will help highlight the beauty of the carved part.
And in conclusion, we suggest that you familiarize yourself with a selection of photos of furniture with golden patina in various interiors of houses and apartments:
Features of the patination technique
Initially, the concept of “patina” characterized only a darkened coating on copper products - over time, a film of oxides gave the metal an “aged” appearance. Later, the word began to be used to reflect the vintage look of other materials - wood, bronze, iron, plaster. Recently, houses, cottages and even city apartments have been decorated in an antique style. Artificially aged wooden furniture with “antique” fittings looks especially stylish.
Modern technologies help to age – patina – any materials. Industrial methods are difficult for home use, but there are various patination compounds on sale that allow you to increase the age of materials in a simpler way. They help imitate the natural color changes of products by applying special coatings. When patination, conventional paints are replaced with specialized compounds without affecting the internal structure of wood or other material.
The simplest aging method is to rub wax into the corners, raised protrusions, and edges of the product. The result is an effect of “age-related” changes in the surface, ideal for decorating a room in a retro style. Such a coating also has a practical function - it protects the base from external influences and imparts water-repellent properties. If the result is unsatisfactory, the home patina can always be removed without significant harm to the product.
Chemical aging method
The use of chemically aggressive substances requires special care and precision in work. Protective gloves must be used and the room must be well ventilated. The workpiece is pre-treated with coarse sandpaper and wiped from dust. Then apply alkaline agents or ammonia with a brush and leave for several hours. To slow down drying, you can cover everything on top with film. Under the influence of ammonia and alkalis, the surface acquires a gray tint, characteristic of old weathered wood.
Chemical aging method
When the color of the workpiece has completely changed, it is rinsed with water and then wiped with a vinegar solution (a tablespoon per glass of water) to remove the remaining alkali. If ammonia was used, a vinegar solution is not needed. After drying, the wood is brushed, sanded and a protective coating is applied. There is no need to paint such material, because then there is no point in chemical processing, and it is easier to do everything mechanically.
Artificial aging
