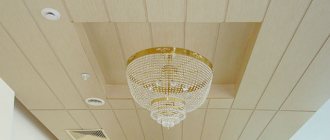
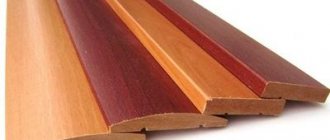
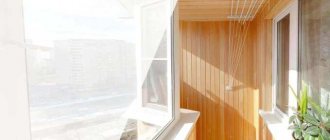
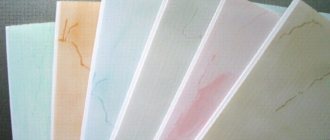
Plastic panels are becoming more and more popular due to the combination of their positive qualities, which suit the majority of consumers. These include an aesthetic appearance, a variety of colors and patterns, easy cleaning, practicality and affordable cost. This type of finishing is especially suitable for places that require strict sanitary standards, such as the bathroom and toilet. In addition to bathrooms, PVC panels are also used to decorate the walls and ceilings of hallways, as well as balconies and loggias.
Finishing the toilet with plastic panels
Finishing the toilet with plastic panels is the best option for those apartment owners who are undertaking renovations, but are faced with budget limitations. There is a double benefit here: in addition to the fact that the material belongs to a generally accessible price category, its installation can be done on your own. The absence of the need for additional costs for inviting craftsmen is also an important advantage of plastic panels over other types of finishing.
Wall decoration with plastic panels
How to decorate a toilet with plastic panels? For assembly, a construction stapler is usually chosen - in this case, it turns out that it works very conveniently and quickly. Special plastic transition corners must be installed in the corners.
You can choose plastic panels both by pattern and color, but the main advantage of this material is its excellent moisture resistance. Of course, there are other finishing options - you can, for example, choose MDF cladding: in this case, the toilet will be decorated like wood.
The fact is that repair is a rather acute, painful topic for any modern person. This becomes especially worrying when renovations are being carried out on a toilet or bathroom. If you choose traditional tiles, you will need a lot of money - it is unlikely that the usual family budget will cope with such “damage”.
For which styles is plastic finishing suitable?
When choosing options for decorating a bathroom with plastic panels, you need to take into account the overall design of the room. For example, if we are talking about classics, it is better to avoid plastic altogether. The same advice applies to a bathroom in the Provence, country or art deco style - here it is more appropriate to use natural materials and decorate the walls with plaster or waterproof wallpaper, in combination with tiles for the bathroom.
Modernism or minimalism is another matter; in such directions, plastic is used very actively.
The design of the panels is very diverse - from imitation of ceramic tiles, natural wood or stone, to ornaments reminiscent of wallpaper and spectacular panels with photo printing. Therefore, you should not be afraid that plastic will not allow you to bring creative design ideas to life.
In addition, the panels can be perfectly combined with other finishing materials. A striking example: the lower part of the walls is covered with clapboard and the upper part is plastered.
Bathroom decoration in Provence style using plastic panels
Bathroom decoration in Provence style using plastic panels
Decorating a bathroom in a minimalist style using plastic panels
Bathroom decoration in art deco style using plastic panels
Techniques for finishing a bathroom with plastic panels
- A bathroom made of plastic panels with different patterns, which are combined in a certain sequence, looks modern and stylish. For example, around a mirror or in the shower area a panel with a pattern is made, and the rest of the room is made one color.
- Sometimes three types of panels with different prints and textures alternate in stripes, creating an interesting play of surfaces. This technique is especially good for large rooms with low ceilings - the walls visually “stretch” upward and the proportions seem more harmonious.
Bathroom finishing with plastic panels with frieze | imitation tiles
Bathroom finishing with plastic panels with frieze | imitation tiles
- When studying the photos of PVC panels for the bathroom in the catalog and thinking about the design of the bathroom, you should pay attention to the varieties with 3D images - they will decorate any interior. “Volume” panels visually expand the space, as if they create another dimension. One significant “but”: panels with 3D paintings are suitable only for spacious rooms, since they need to be perceived from a great distance.
Bathroom finishing with plastic panels with 3D images
The design of a bathroom made of plastic panels can be different, but you definitely can’t call it boring or unaesthetic. This is exactly the case when budget does not mean “too simple and cheap.” Do you need quick and high-quality bathroom renovations? Then, without a doubt, you should choose plastic panels.
What are the positive sides of PVC
In recent years, this finishing material has gained great popularity, but the most interesting thing is that not everyone knows about all its advantages. For example, the panels do not rot - even after several years the material will not change its properties.
In addition, the panels are very beautiful, especially in a modern style, it is unlikely that something better could be found at the same price. Speed of installation: finishing the toilet with PVC panels will not take much time. If the toilet has a standard shape and you have all the necessary materials and tools on hand, you can do the lining if you like in one day (this does not include finishing work, of course).
Today, efficiency is a priority for many jobs, especially since you can forget about cement, tiles and other tedious procedures.
Monochrome interiors
Using panels of just one tone you can create the most amazing and unique interiors:
- Green. An unusual design can be created using the entire gamut of green, from noble malachite to light shades of olive fruits. All of them will fill the “corner of thoughtfulness” with natural serenity and give the opportunity to rest the eyes and brain.
- Grey. It just seems that gray color is boring and can only be used in government institutions. In fact, his palette is very wide: morning fog, river mother-of-pearl, smoking coals, thunderclouds, antique silver, coal or stylus. Gray panels will fill a small room with confidence and calm. It is best to use them from black shades near the floor to light panels near the ceiling.
- Bright colors. Toilets in yellow, red, and orange colors will look stylish and unusual. Such elegant rooms perfectly lift the spirit of a person who has just woken up, but can quickly become boring.
What you need to work with PVC panels
First, select the panels themselves. Here you can do everything according to your taste - the choice of color schemes today is wide, so everyone will find something for themselves. You should also remember that you need to purchase consumables and necessary tools - without all this it is difficult to cover the walls of the toilet with plastic panels.
What to buy for finishing? High-quality knife: You need to make sure that it is optimal to be able to cut the panels. Thinking about using a kitchen knife for this job? This can happen, but at your own peril and risk - plastic usually dulls the metal, the cutting lines turn out to be crooked.
Self-tapping screws, screwdrivers : during work you will have to attach the panels to the wall. You need rods with a cross section of 3 by 10 cm or you can choose an aluminum profile, the main thing is that it has a similar configuration. If you plan to throw panels directly onto the wall, you will need liquid nails, a gun to use them, and foam. Repair work should not begin without a tape measure, level, decorative skirting boards and profile corners.
Sea style
The unusual design appeared quite recently, but quickly became popular due to its brightness and cheerfulness. There are a lot of design options:
- Classic white and blue colors or interior with the addition of red on a background familiar to this style;
- Combination of yellow on top and blue on bottom;
- Using panels with shells, fish, dolphins, octopuses and other marine life.
An unusual option would be panels with palm trees, sailboats and other exotic objects.
Rugs in the color of the seabed, sandy beach, or wooden deck of a ship will help complement the panels.
Selecting a cladding method
If the decision has been made, first you need to understand which method of attaching the panels to the walls to use. There are two possible ways: using a metal profile and using foam. Which method should you personally choose? If the toilet in the apartment is quite spacious, there are even brick or concrete walls, there is no point in attaching profiles. Plastic panels are best attached to liquid nails.
Don't forget - you will have to be patient while working, the PVC will not stick after a few seconds. Additionally, you will have to hold the panels in place yourself or install washers between the walls. Gluing panels to liquid nails - there is nothing complicated in this work.
Panel care
How to properly care for the panels, what products can be used and what forms of cleaning can be used depend on the type of cladding you have. Panels are:
- laminated;
- simple.
Both of these materials are perfect for finishing a toilet. Keep in mind that material without a laminated layer better absorbs dirt and stains that cannot be removed later. Therefore, you should get rid of new contaminants immediately after they appear.
Surfaces that do not have a protective film should be cleaned “dry”, that is, using the “dry” method. Use a vacuum cleaner or dry cloth. If the stain cannot be removed, dampen the cloth and treat the stain again.
Surfaces not protected by laminate should not be rubbed vigorously. The abrasions may not be very visible, but as soon as dirt gets on them, they will immediately appear.
Laminate flooring is cleaned in the same way. However, the presence of a protective layer allows you to apply more force when washing the plastic. Grease stains, dried blots and stains can be wiped off at any time, even if quite a lot of time has passed. If necessary, non-aggressive and non-abrasive detergents can be used. Avoid chlorine-containing compounds, as they can cause irreparable damage to the paint of the panels. You can use a homemade soap solution, dishwashing detergent, or a slurry made from water and baking soda - applied to the stain for a couple of hours, after which it is washed off with warm water.
You can also care for the panels using cleaning chemicals from the store. It can be either a solution or an aerosol.
Preparing for paneling
Before starting work, it is necessary to prepare the toilet - all decorative elements that may interfere with work must be removed, including sockets and lighting fixtures. If the work can be complicated by hoses or pipes, in an ideal situation it is better to disassemble everything, otherwise it will be much more difficult to finish the toilet with PVC panels .
There is another important point - you may often come across information that wood is not the best material for fastening panels. They say that it can become deformed and swell - because of this, the wall will immediately begin to look not very attractive. If the humidity level in a room does rise regularly, you should consider the following statements: common sense. But there is a way out - right before lining the toilet with plastic panels, carefully treat the wood: any wood preservative is suitable for this. If the humidity level is normal, there is no cause for concern.
Types of bathroom renovation
Before undertaking any bathroom transformation, you should decide on the type of repair. He can be:
- cosmetic - the simplest and most cost-effective type of repair, which consists of surface finishing of walls, floors, ceilings, without affecting electrical and sanitary units, or demolition of structures;
Cosmetic repairs of a combined bathroom are intended to eliminate minor finishing defects
- capital - larger-scale and expensive renovation of the premises associated with the replacement of communications, old structures, plastering, finishing work;
Major bathroom renovations can take several months
- European-quality renovation - finishing the premises according to European standards using modern building materials;
European-quality renovation allows you to make the room exclusive and original
- renovation with redevelopment - large-scale re-equipment associated with a change in the layout of the apartment (demolition of walls, installation of partitions, relocation of communications).
Redevelopment work - renovation of a combined bathroom, photo
Features of bathroom renovations
Owners of a separate bathroom and toilet will have to spend more money on their repair (finishing the dividing wall, replacing doors). If these rooms are small, they can be combined into a shared bathroom, gaining additional space by demolishing the dividing wall.
Bathroom renovations begin with replacing the door. It is better that it opens outwards, or is sliding, made of moisture-resistant material.
Next comes the replacement of plumbing. Old pipes must be replaced with new ones. And so that they do not spoil the interior of the room, it is better to hide them in a niche in the wall and cover them with plasterboard, close them with a metal door or roller shutters.
Examples of masking pipes - bathroom renovation, photo
The next stage of repair is the installation of plumbing. It is better to equip small rooms with a compact shower stall, then the bathroom will fit a sink, toilet and washing machine. In large bathrooms you can install full-fledged bathtubs and hydroboxes.
Photos of combined bathrooms after renovation with different types of layouts
The final stage of repair is finishing the floor, walls and ceiling.
Bathroom renovation in Khrushchev, before and after photos
Start of work on finishing the toilet with PVC panels
First, the sheathing is attached. Since the panels will almost always be placed on top, you will need to attach the slats perpendicular to the floor. Dowels are usually used for this job. Since we need to do something with the ceiling, we also attach the sheathing to it. It is recommended to maintain a distance of 400-500 mm between individual planks.
The correct fastening of the slats is constantly monitored. Before finishing the toilet with plastic panels, you need to attach decorative corners in the corners - the same ones into which the corner panels will be inserted later. You need to start work from the corner. One edge of the PVC panel is inserted into the profile, after which the other side is attached to the screws. The screw must be screwed into a lock that is flexible and large.
How to cut plastic panels correctly? - many people ask this question. In fact, there is nothing complicated about this: we turn the panel inside and place it on a solid base, and then cut it with an office knife. Already on the next panel everything will be easier: you need to insert it until a clear click appears. Then reattach with screws.
You can also finish the PVC toilet ceiling in the same way (if work data is planned, the profile should be installed on its surface). In addition, you can take decorative overlays and skirting boards, thanks to which you can easily hide defects and various technological gaps.
Something like this, anyone can decorate a toilet with plastic panels. There are no particular insoluble difficulties at work. The most important thing in the repair process is to carefully attach the panels to each other so that there are no gaps. It is better to glue ceiling skirting boards with glue - they are needed only for finishing.
Flaws
- prone to damage - only a small mechanical impact is enough to permanently damage the plastic;
- reducing the area of the room after finishing - this drawback can be mitigated by leveling the walls, but in this case you can forget about quickly repairing the room;
- meager choice of colors - in fact, manufacturers are working hard to expand color solutions, and you could see this above, but the fact remains: ceramic tiles have much more aces up their sleeves in terms of design, texture and color;
- deformation from temperature changes is a natural deformation of PVC panels, which most often occurs during a sharp temperature jump;
- flammability of the material - it’s easy to find a counterargument to this minus - everything burns, but in this case the greatest danger is posed by harmful combustion products.
MDF finishing panels (lining)
We have described in detail how to decorate a toilet with panels, now a few words about MDF panels. These are very thin, light panels, the top layer of which imitates expensive wood. Often this design option is chosen for large toilets or in cases where you want to decorate the room in a classic style.
The panels are resistant to moisture, perfectly resistant to the action of various microorganisms and harmful fungi - thanks to this, MDF panels can be called hygienic and safe for home use. Yes, this renovation option will cost more, but compared to natural wood there are significant savings. In general, the walls in the toilet can be anything - the main thing is that they are waterproof and smooth.
If we consider a toilet with wall decoration, we can say that this is the cheapest and fastest way to decorate the room. The main condition for such work is smooth walls. But there is one drawback - many wallpapers are very susceptible to a wet wall. If you choose wallpaper to decorate the toilet, it must be resistant to moisture.
The process of installing panels on walls (do-it-yourself step-by-step instructions)
Installing the panels is quite simple, and if you have the time and desire, you can do everything yourself and save a lot of money on paying for the services of a specialist. You will need a minimum of tools. This is a level, a cutting tool, a screwdriver, a pencil and tape measure, and a hammer drill.
Step 1. First of all, you need to do a little preparatory work. It is necessary to remove all old coating from the walls (tiles, loose paint, etc.). Also, if a major renovation is planned, even before installing the PVC panels, it is necessary to replace the water supply and sewerage pipes. Before installing the panels, the walls should be treated with a primer and dried well.
First you need to remove the old coating
Advice! You immediately need to outline the places where cabinets and shelves will be installed, if they are intended by the designer. This will allow you to arrange places for their attachment - you won’t be able to simply hang furniture on walls with PVC trim. You also need to immediately lay the ceramics on the floor or finish the base with another material.
Step 2. The panels need to be brought into the house and left alone for several hours so that their temperature becomes equal to the ambient temperature. It is impossible to install panels that have just been brought in from the street (especially from the cold). You also need to immediately purchase starting profiles and overhead corners for decoration.
PVC panels
The panels should rest for several hours
Step 3. It is worth making a box right away in order to close the water supply and sewerage pipes. They can be made from a metal profile and then covered with plasterboard.
Box for closing communications
The box is lined with plasterboard
Step 4. Now you need to glue the starting profile for the panels onto the sealant. It is glued down along the wall and along the doorway in the corner. In this case, the walls in the toilet are flat, which means that when installing the panels you can do without a frame.
Sealant applied to the starting profile
The starting profile is glued
Step 5. Next you need to measure the height from the floor to the ceiling or to its frame. The result obtained must be transferred to the panel and drawn a straight line with a marker or pencil using a square. By the way, the panel cutting line should be slightly less than the length obtained during the measurement process - about 5 mm. This will make it easier to install the panels.
You need to measure the height from the floor to the ceiling or to its frame
Panel marking
Step 6. Now you need to cut off the excess panel along the marked line. You can cut PVC with a grinder or a stationery knife. Thus, it will be necessary to adjust the height of all panels. If you need to cut the panel to length, then you should cut it with a stationery knife along the edge of the desired honeycomb from the front and back sides.
Cutting PVC panels
Prices for angle grinders (grinders)
Angle grinders (grinders)
Step 7. Next, you can install the first panel. It must be entered into the starting profile and be sure to be leveled. The evenness of the rest of the row will depend on how evenly the first panel is installed.
Installation process of PVC panels
It is important that the panels are installed level
Step 8. The panel needs to be secured. This can be done using a self-tapping screw screwed into the side of the panel, or by placing it on a sealant.
Fixing the panel with a self-tapping screw
You can also use sealant
Step 9. Next, you need to finish the entire wall with panels according to the same principle.
Installation of PVC panels
Another process
Prices for polyurethane sealant
Polyurethane sealant
Step 10. After the panels are installed on the wall, you need to close their joints with corners placed on the sealant.
The joints are closed with corners
Step 11. After finishing the installation of the walls, you can begin finishing the ceiling. If it is made using PVC panels, then you need to follow the same principle - gradually attach each panel to a metal profile. True, fixation will be carried out precisely due to self-tapping screws.
Now you can start finishing the ceiling
If the installation of PVC panels will be carried out on a frame, then the walls must also be prepared, and then the base of the frame must be secured to them - wooden slats or a metal profile. The starting profiles are then attached to them, and then the panels are installed. You can fasten them to the slats with self-tapping screws or a construction stapler.
Video - Installation of PVC panels on a frame
Video - Installation of PVC panels with glue
How to finish a toilet ceiling
The second stage of renovation work in this room is aimed at the ceiling. Everyone knows that the toilet is a place where you need to carry out wet cleaning regularly. This means that a moisture-resistant ceiling is ideal. Today, stretch ceilings are often chosen; this material is very attractive.
This is a big plus for small rooms - the fact is that light is reflected from lighting fixtures on shiny surfaces, so the space can be optically enlarged. An alternative solution that will tell you how to finish a toilet is to plan the ceiling using decorative foam boards. However, you can simply paint the surface a nice color. Shelves in the toilet made of PVC panels are a really good, practical solution.
Design options
The design that will hide communications is selected depending on several factors:
- the size and nature of the direction of the pipes;
- the location of the pipes relative to each other;
- presence of auxiliary devices and taps;
- general environment in the room.
Box
It is a simple design that even a beginner can handle. The frame is created from metal profiles or wooden slats. Next, the base is sheathed with the material that was chosen. Full or partial cladding is possible depending on the availability of metering devices or taps near the riser. In this case, it is necessary to leave a window so that there is access to them.
The frame of the box can be covered with PVC panels, moisture-resistant plywood or plasterboard. Drywall is usually decorated with the same materials as the main walls. There are ready-made box options. But this option may be more expensive. By making the box yourself, you have the opportunity to immediately take into account all the nuances. While the finished box will have to be adjusted to the required parameters.
The box design is available in several configurations.
- False wall. A good solution to hide several pipes located nearby. It looks aesthetically pleasing, but takes up a lot of space.
- Square. It can be positioned both vertically and horizontally, hiding the fan pipe. Suitable for rooms where pipes are located in the corner.
- Slanting false wall. A middle option between the previous ones. The structure is attached at an acute angle to the side or rear wall. Just like a false wall, it allows you to hide several pipes, but significantly saves space.
- Multi-level. Installed in case of chaotic arrangement of pipes in the toilet. To save space, boxes are created in places where communications are located.
Built-in sanitary cabinet
A structure with doors on the wall behind the toilet is called a plumbing cabinet.
Using this method of camouflage, several problems are solved at once.
- An additional niche appears for shelves on which cleaning products and accessories can be stored.
- The presence of doors does not impede access to meters, filters, collectors and pipelines.
- In the event of a pipe break, the cabinet will not impede access to the accident site. Replacing metering devices in a toilet with a plumbing closet will not be inconvenient.
The choice of material for making doors is quite large. Particularly popular are plywood, PVC panels, chipboard, metal, wood or glass doors. You need to choose a material that fits into the overall style of the interior. For example, in a toilet decorated with plastic, plastic doors would be appropriate. And for a country wooden house, wooden doors are suitable.
Do not forget about the convenience of the location of the doors in the cabinet. They should be located at a suitable height so as not to block access to the required pipe junctions. The handles on the doors should also be suitable.
Installation of swing doors in a sanitary cabinet occurs like any other doors; they are attached to hinges to the base. Regular doors are suitable for a spacious toilet. It is better to equip tighter rooms with compact accordion doors, sliding models or curtains.
Hidden installation - gating
Grooving is an alternative to decorative types of masking pipes. When concealed wiring involves sewing parts in specially punched ditches, which are called grooves. Such technological holes are made using a wall chaser or a hammer drill. Pipes hidden in the floor screed also belong to hidden installation. In this case, the wiring is filled with concrete solution.
The weakness of the method is the complexity, cost and inaccessibility of pipes. You can sew up the pipes yourself, but you will have to study a lot of literature to get everything right. The use of hidden installation is not possible everywhere. The method will be good in private houses built of brick or solid blocks, as well as in multi-storey buildings with walls of increased thickness. In other places, this method will run counter to SNIPs. The grooves significantly weaken load-bearing walls, which are already heavily loaded.
Some requirements can significantly complicate installation:
- Only one-piece pipes can be sutured; others require free access;
- there should be no electrical wires running through the wall on which the work will be carried out;
- it is necessary to take into account the linear expansion of the pipe material;
- you have to use clamps in order to have good sound insulation.
Finishing the floor in the toilet
Many people start finishing the floor at the last stage of renovation in the toilet. Of course, the best suggestion is to finish the floor with tiles. This method looks great and is very easy to clean as long as you use cleaning products. On the floor, tiles are selected taking into account certain requirements, for example, they must match well with the covering on the walls.
A carefully chosen design for laying tiles on the floor surface will make the toilet more visible. The floor in the toilet is often subject to changes in temperature, as well as high humidity. In the toilet (compared to the bathroom) you can only do waterproofing - it is usually applied not only to the floor, but also to the surface of the walls - at least 20 cm. The ideal solution is tiles in the toilet, both for the floor and for the walls. But there are also more economical, practical options, for example, linoleum .
No special skills are required to install this material; these floors are easy to clean. At the end of the floor installation, baseboards are installed. Interestingly, a toilet usually has various connections: sewerage, water supply, etc., so it is important to complete the renovation in such a way that all these elements are hidden.
But there should always be access to them - if necessary, special doors are installed so that you can quickly get to one or another communication center. Often these boxes are made of plasterboard and plastic - many people usually choose the same material as for wall coverings. This is the only way to achieve the ultimate goal - a practical, convenient and comfortable toilet in the apartment.
more
Characteristics and types
The flexible hose for connecting plumbing is a hose of different lengths made of non-toxic synthetic rubber. Thanks to the elasticity and softness of the material, it easily takes the desired position and allows installation in hard-to-reach places. To protect the flexible hose, there is an upper reinforcing layer in the form of a braid, which is made from the following materials:
- Aluminum. Such models can withstand no more than +80 °C and retain functionality for 3 years. At high humidity, aluminum braiding is prone to rust.
- Of stainless steel. Thanks to this reinforcing layer, the service life of the flexible water line is at least 10 years, and the maximum temperature of the transported medium is +95 °C.
- Nylon. This braid is used for the manufacture of reinforced models that can withstand temperatures up to +110 °C and are designed for intensive use for 15 years.
The fasteners used are nut-nut and nut-fitting pairs, which are made of brass or stainless steel. Devices with different permissible temperatures differ in the color of the braid. Blue ones are used to connect to a pipeline with cold water, and red ones for hot water.
When choosing a water line, you need to pay attention to its elasticity, reliability of fasteners and purpose. It is also mandatory to have a certificate that prevents the rubber from releasing toxic components during operation.
Finishing the bathroom with ceramic tiles
Even though the price is higher, toilets are finished with tiles even more often than with PVC panels. A bathtub finished with modern design tiles looks stylish and presentable.
Invalid Displayed Gallery
In addition, it is much more difficult to damage tiles than plastic. The only drawback of ceramics is that it is somewhat difficult to install. Of course, you can renovate a bathroom using tiles yourself. However, when performing this work, you must strictly adhere to all required technologies.
Alignment of walls
Repairing a combined bathroom in a Khrushchev-era building or a separate toilet usually begins with leveling all surfaces. It is better not to glue tiles to curved walls. Otherwise the room will look sloppy.
When renovating the walls in the bathroom for tiling, they must first be carefully leveled
The alignment procedure includes the following steps:
- Old plaster is peeling off the walls and ceiling. Used tiles are removed from the floor.
- The repair continues by gluing (on the gypsum mortar) plaster guides.
Leveling the walls of the bathroom for finishing with tiles during renovation is carried out according to the beacons
- Once the plaster has set, you can begin applying new plaster. The solution is poured between the beacons in large pieces, and then carefully leveled with a rule.
- The walls of bathrooms in Khrushchev are leveled using the same technology.
- A screed is placed on the floor along the beacons.
Floor repairs begin with pouring screed
The minimum thickness of the concrete screed is 3 cm. To create a thin layer, special leveling mixtures are used.
Repairing a bathroom in a panel house can be carried out without first leveling the surfaces. The walls in such buildings, unlike block and brick ones, are usually quite smooth.
When carrying out renovations in an apartment of a panel house, tiles can be installed without first leveling the walls
Tile installation
Tiles for a bathroom - especially a shared one - are only suitable for special ones, designed for use in conditions of high humidity. You can buy this variety at any hardware store. The tiles are installed in the following order:
- At the first stage of repair, the walls and ceiling are carefully coated with a penetrating primer.
Walls for tiles must be pre-marked
The first step is usually finishing the walls. Then the tiles are glued to the ceiling, and at the final stage - to the floor.
- Next, the surface is marked according to the height of the tile.
- Installation of elements begins from the bottom.
- The glue is applied to the wall using a notched trowel or a special grater.
Photo of finishing the bathroom with tiles. Apply tile adhesive using a notched trowel
- It is not recommended to cover too large an area.
- The first tile is pressed tightly to the surface and carefully aligned vertically and horizontally.
- Install 2 dividing crosses on the side.
- All other tiles are installed in exactly the same way.
Photo of finishing bathrooms with tiles. The process of pasting a wall
You can install tiles in the bathroom either in even rows or in staggered rows.
- A day after installation, the crosses are removed, and the seams are rubbed with a composition of a suitable color intended for this purpose.
Tiles for the bathroom. Photo of the grouting process
Floor tiles are installed using the same technology. You can walk on the floor after its installation only after the glue has completely dried.
