Colors, shapes and three-dimensional patterns on the tiles allow you to create ceilings of any appearance; they can imitate rough plaster in the country style, and the luxury of stucco in the Rococo style, and coffered caissons in the antique style. Any design request can be satisfied with foam ceiling tiles.
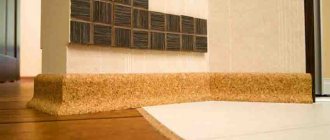
A necessary addition to such a ceiling are decorative skirting boards that cover joints and irregularities. If desired, you can mount an LED strip on them for illumination. To prevent the foam from shining, after installation it is painted with water-based or acrylic paints.
Which paints should I choose, matte or glossy?
In addition to composition, paints can vary in degree of gloss.
Glossy paints visually increase the height of the room. The glossy surface is less susceptible to contamination and is easier to clean. But at the same time, giving the surface shine, they will make all irregularities noticeable. Matte - will help hide surface imperfections. We paint in one direction then, then at an angle of 90° to this movement
It is worth considering the question of how to paint polystyrene foam, or rather, some of the features of this process. Before starting painting, it is worth applying sealant or putty to the joints between the tiles, thanks to which the paint will lie more evenly. To reduce paint consumption, you need to pre-treat the ceiling with a primer. If the ceiling tiles are embossed, it is better to paint them using a special sprayer. You need to start painting not from the center, but from the corner. Only with the correct choice of paints, based on the previously described properties, and compliance with the specifications of painting work, can you obtain a high-quality result.
Tool
You need few tools to work with foam tiles, and they are all quite accessible.
You will need:
- painting cord for marking the ceiling before gluing;
- scissors or a special mounting knife for cutting tiles;
- spatula (as well as putty) for leveling the surface of the ceiling before gluing;
- application roller and primer;
- thread, tape measure and pencil for marking tiles;
- a brush (or gun) for glue, a clean cloth to remove excess glue.
Which is better: suspended ceiling or ceiling tiles?
The undoubted advantage of ceiling tiles is the ability to cope with the work without professionals. It is enough to buy the appropriate brand of glue and calculate the amount of material, and the gluing process will not be difficult. Also, the advantages include low cost. Perhaps this is all that can be said about the benefits of this material, now let’s talk about the disadvantages:
- Cannot be used in the kitchen: the surface is difficult to clean from the inevitable layer of soot and dirt.
- The products are flammable and do not comply with fire regulations. Expanded polystyrene is “famous” for its record-breaking short combustion period - less than 4 seconds.
- It cannot be installed in the bathroom, as the material has a low moisture protection threshold. If there is a leak from above, the adhesive may break down and peeling may occur.
- Installation requires a flat surface, only minor cracks are allowed.
- It should not be used in new buildings where the building is subsiding, leading to peeling of the ceiling covering elements.
- The glue does not erode for a long time, an unpleasant odor is felt, and air toxicity increases.
- It will not be possible to reliably hide communications, for example, electrical wiring.
- Even a slight increase in temperature is undesirable. Lighting fixtures get hot, so they need to be mounted as far as possible from the ceiling (minimum distance - 30 cm).
- The aesthetic appearance of the room suffers. The seams between the elements are noticeable and yellowness appears. Tile finishing does not fit into most interior solutions due to its excessive decorativeness.
Stretch ceilings, on the contrary, are distinguished by their aesthetics and ability to fit harmoniously into the interior. A smooth surface is provided, without the slightest defect. The widest choice of colors and the possibility of photo printing are attractive.
Installs within a few hours. Easy to clean: wipe with a soft cloth dampened with a small amount of detergent. It is environmentally friendly and not harmful to humans and animals.
When starting a renovation, everyone decides for themselves what is better - a suspended ceiling or affordable ceiling tiles. It is worth considering that in most respects, an environmentally friendly stretch ceiling is superior to a coating made of foam elements, creating a beautiful modern interior and maintaining health.
Decorative finishing
Foam trim glued to the ceiling of a kitchen or bathroom requires additional decorative finishing, for example, covering with acrylic varnish or painting with water-based emulsion. The initial white surface absorbs vapors very quickly and loses its original whiteness, so painting the decor to match the walls will only add expressiveness.
An excellent solution is to use laminated tiles; this material is more expensive, but much more durable, and can be used to decorate the ceiling, starting from the kitchen, living room, loggia, ending with the corridor or bathroom of the apartment.
Installation work
Gluing the tiles is best done by two people. One person stands on a stable sawhorse while a second person spreads and feeds the foam squares.
The work is carried out in the following sequence of operations:
- The first elements are fixed in the central zone of the ceiling, at the intersection of diagonal lines. Apply the glue to the back of the tile and pause for 2-3 minutes to improve adhesion. Next, the squares are applied one by one according to the markings: they need to be pressed lightly so that the glue spills over the base. If the solution protrudes at the edges, remove it immediately with a soft, damp sponge. If you postpone this procedure until the end of the work, traces of glue will remain on the surface.
- If there is a chandelier on the ceiling, then at the location of its stand in the tile you need to cut a hole of the required size. To do this you will need a sharp wallpaper knife. A similar cut will have to be made on all 4 tiles adjacent to the chandelier.
- Next, work is carried out on both sides of the center line, by building rows in both directions. The tile can be easily adjusted to size using a knife. When approaching the edge of the ceiling, trimming does not require special precision, since small gaps near the wall are covered with ceiling moldings.
- During the procedure for gluing polystyrene tiles, it is recommended to avoid drafts. In this regard, the work is reminiscent of decorating a room with wallpaper, when closed windows and doors allow the glue to dry evenly without undermining the applied product.
- The ideal density of ceiling elements is not always achievable. If there are noticeable gaps between individual tiles, white silicone sealant is used to fill them.
After the entire surface of the ceiling is sealed, a pause is made to allow the glue to dry. Usually 12 hours is enough for this. To make the decoration look decorated, a ceiling plinth made of polystyrene foam is used. It is installed around the perimeter of the room, closing the gaps between the tiles and the walls. As a mounting compound, you can use the same mastic as for gluing foam squares.
How is marking done?
Before pasting the ceiling, you need to determine its location. This is done in this form:
- The central part of the ceiling is determined.
- On all walls you need to find the middle and mark it, and then stretch the thread between the walls located parallel to each other - you will need to connect the marks. The thread must be pulled through the center of the ceiling.
- Most likely, the walls will have different lengths, the thread itself will be displaced - in this case, the position will have to be corrected.
- You will have to draw straight lines along the threads that will be in a tense position - they will act as a guide during the pasting procedure.
Installation of foam ceiling panels
- The second line should be drawn perpendicular to the first. So, the surface will be divided into four sectors.
- But before this, standard organizational work is carried out to prepare the ceiling, including cleaning of past coating or peeling putty. Do not forget that if narrow tiles were chosen, then black spots will be visible through them. Based on this, it is better to plaster the surface at least once to give a uniform snow-white color.
- It is mandatory to apply a primer that suppresses the growth of mold and mildew and removes construction dust from the surface, which significantly increases adhesion.
Later, the ceiling is marked, where perpendicular diagonals are drawn, serving as guides for laying the panels. After carefully checking the accuracy of the angles and the evenness of the lines, you can begin to apply the sticker.
Here you will need a small set of tools:
- An assembly, stationery or regular sharpened knife;
- Pencil, tape measure;
- Soft fabric;
- The tile itself and the glue.
Stages of work
It doesn’t matter how the slabs will be laid: parallel to the walls, in other words, from a corner or from the central part of the ceiling obliquely, do not forget, the first 2-3 panels determine the appearance of the entire surface
Based on this, you should pay special attention to the correct placement of foam products - in accordance with the markings. Pay attention to the arrows or embossed inscriptions depicted on the back of the slabs. They show the direction in which installation should be done.
If there are none, it means that as soon as you open the package, you must mark them down without the help of others, for example, with a light pencil, but you should never use a marker. There are two reasons for this: firstly, in daylight the panels will differ significantly in color - from snow-white to deep grayish. This is especially true for smooth products. Secondly, it’s quite common to see slabs where one of the sides can differ by a fraction of a mm, in my opinion not much, but when laying 10 parts it “adds up” up to 0.5 cm. Without hesitation, what can be said about the complete There will be no need for even seams. As follows, if you glue foam panels strictly in one direction, the difference will not be noticeable either in the work or in the end. Almost always, the glue is applied pointwise along the perimeter of the panels; for more reliable fixation, the adhesive composition can also be used to mark the diagonals of the product. When finished, you need to wait a couple of minutes. And only then glue the slab.
The material itself is quite narrow, so the pressure should be applied not with the fingers, but with the palm. Excess glue is carefully removed with a cloth immediately after installing the slab. Later, the placement of the slab is checked; it must be strictly parallel to the marked strip. The placement of the ceiling panel is adjusted as necessary.
The following panels are installed in the same way. When laying products from the corner, gluing is carried out in rows. If you have chosen the option where the installation begins from the central part of the ceiling, then it is recommended to glue two slabs alternately in each sector, in other words, in a circle relative to the chandelier
In this case, it will be possible to avoid noticeable displacements of the seams. When working, it is important to ensure that there is no difference in the height of the product, which is possible due to an excess or insufficient thick layer of glue. At the time when all the whole slabs are fixed, the distance to the wall is measured and the required part is cut off using a knife. Each panel should be measured separately, since the room usually does not have the correct dimensions
If there is a gap of less than fifteen mm between the wall and the whole panel, then it is not necessary to close it; the fillet will hide here.
If, after completing the installation of polystyrene foam ceiling panels with your own hands, you find gaps between the slabs, you should not be upset; you can knead a little final putty and carefully seal the gap with your finger. Excess mixture is removed from the product using a damp lip.
Such slabs do not require special care. Here it is enough to wipe laminated products with a damp cloth and soapy water from time to time. Other tiles can be vacuumed using a soft attachment. Alcohol will help get rid of greasy stains, and minor stains can simply be removed with an eraser.
Panel selection criteria
When choosing foam ceiling panels for ceiling decoration, you need to carefully inspect the product, paying special attention to:
- no dents or creases on the edges;
- evenness of corners. They must be strictly 90°;
- clear drawing without defects.
To check how strong the material is, you need to take the element by the corner, placing it in the horizontal direction. A quality product will not bend or break under its own weight.
When choosing the type of tile for a specific room, take into account its specifics:
- extruded can be used to decorate the ceilings of any room;
- injection is used where it is necessary to ensure maximum evenness of the ceiling and the absence of seams;
- stamped tiles can be used to decorate ceilings in rooms that have minimum requirements regarding heat and sound insulation.
Features of the material
Expanded polystyrene ceiling tiles are made from a type of foam - polystyrene, which is foamed in a special way. The result is a very light material with considerable aesthetic and technical advantages.
The photo shows polystyrene foam ceiling tiles
The material is very easy to process, so you can see many options and varieties of this ceiling covering on sale - they all provide good advantages for decorating a living space. The size most often of the tiles is standard - 50 cm x 50 cm. The thickness of the coating is from 6-8 mm to 9-14. The sizes of plastic ceiling panels have more options.
The edges of polystyrene foam tiles can be smooth and even or wavy. The latter option will perfectly hide the shortcomings and flaws of the material, but requires compliance with the installation scheme.
pros
The tiles have a very good price/quality balance, which makes it possible to offer the buyer high-quality material at a decent price.
A variety of options make it possible to realize any design fantasies. The tiles are easily painted in different colors and plastered. It imitates stucco molding; various ornaments and patterns can be depicted on it.
Expanded polystyrene ceiling tiles are an environmentally friendly product. Despite the fact that styrene, which is the main component of the tiles, has toxic fumes, these fumes can only be released at very high temperatures. In an ordinary apartment, such a temperature can only happen in the event of a fire, but in normal times the tiles are absolutely safe. The material itself is not flammable.
On video, polystyrene foam ceiling tiles:
Expanded polystyrene boards are easy to paint, cut, and plaster. This makes it easier to process the material and decorate it.
The slabs are not afraid of moisture, nor are they afraid of temperature changes. Thanks to this resistance, ceiling tiles can be used in a damp bathroom or kitchen, where hot steam rises to the ceiling.
The tiles are easy to clean - a small vacuum cleaner can handle this. And household detergents and a damp cloth will perfectly wipe away dust and remove dirt from the surface.
Expanded polystyrene is a wonderful heat and sound insulator. Therefore, it will additionally protect you from the tramp of neighbors from above, and will also protect you from the cold, especially if you live in a private house or in a high-rise building on the top floor.
But what reviews exist about fabric suspended ceilings and whether it is worth using such a building material, this article will help you figure it out.
Minuses
Having highlighted all the advantages of this material, it is necessary to dwell on some of its disadvantages. If temperature changes are frequent and sudden, then over time the glue may not hold up and the tiles will begin to fall off. Careful selection of high-quality glue will help correct this problem.
If yellowing and severe contamination of the slabs occurs, it will no longer be possible to clean the material. That is why regular washing and cleaning of polystyrene foam ceilings is recommended. In addition to the factors listed above, insects can also contaminate the ceiling. Clean the ceiling as soon as you notice dirt, yellowing or stains on it.
The material is soft and easily deformable. It requires careful handling, storage and transportation.
If the ceiling light is placed too close to the ceiling covering, the polystyrene foam may turn yellow over time. Choose a lamp that is long enough so that there are no unsightly yellow circles on the ceiling.
Some people believe that polystyrene foam ceiling tiles do not allow air to pass through, causing the room to “not breathe.” However, one can confidently argue that the ceiling will not “breathe” only if the slabs are fitted too tightly and the gaps between them are completely covered with adhesive. If you do not use too much glue and leave small gaps during installation, the coating will be quite “breathable”.
Kinds
The following types of foam ceiling tiles are available for sale:
- Pressed. They have a thickness of up to 7 mm.
- Injection. They have a thickness of up to 14 mm. They are made by sintering foam at high temperatures.
- Extruded. They are made by extruding polystyrene mass, after which the tiles are either painted or covered with a film with a pattern.
The tiles also differ in shape. Most often they are square with a side of 50 cm, but tiles are also found in the form of rectangles, rhombuses, and regular hexagons (honeycombs). Also popular are tiles that imitate the shape and color of clapboard boards.
On the front side, the tiles can be smooth or have a relief, plain or covered with film, laminated. Film, like painting, can imitate the texture of stone, fabric, plaster, wood, stucco, or even wood carving. Laminated tiles are used in rooms reserved for the kitchen. Panels with waterproof properties are more suitable for bathrooms and toilets.
Placing tiles on the ceiling
There are two rules that builders use when gluing ceiling tiles:
in a small room it is placed on the ceiling surface parallel to the walls. In this case, work begins to be performed from the corner located opposite the entrance to the room
The fact is that the eye first falls on this particular place in the room, so it is important to ensure parallelism between the walls and tile joints there; in large and spacious halls and in those rooms where the walls and partitions are not parallel to each other, tiles installed from the center visually benefit. It is not glued parallel to one of the walls, but diagonally. Conventionally, the center of the room is chosen to install the ceiling chandelier.
Of course, with this option for finishing the ceiling surface, the consumption of tiles is much greater than in the first case, but since the price of the material is low, there will not be much overspending on the family budget. An example of such installation of finishing material can be seen in the photo.
Conventionally, the center of the room is chosen to install the ceiling chandelier. Of course, with this option for finishing the ceiling surface, the consumption of tiles is much greater than in the first case, but since the price of the material is low, there will not be much overspending on the family budget. An example of such installation of finishing material can be seen in the photo.
In practice, these two methods are often combined. For example, tiles are glued starting from the center, but at the same time they are placed parallel to one of the walls. You can also find a diagonal sticker that starts from the wall. Using simultaneously two types of tiles of different colors (preferably in contrasting colors), the ceiling is made into a checkerboard pattern, and a spiral or snake is run along its surface. Thus, finishing costs will be minimal, and the appearance of the room will significantly improve.
When carrying out work on gluing tiles, the elements have to be cut in place, for which they use a regular knife, only a sharp one. It is convenient to cut polystyrene foam boards in a straight line, placing them on one side of the tabletop, which in this case will be a guide.
Based on the above, we can conclude that polystyrene tiles are an ambiguous finishing material, but if you need to make inexpensive ceiling repairs and not waste a lot of time, this option is quite acceptable.
Ways to arrange tiles
Often, the installation of foam ceiling slabs begins from the corner of the room (with edges along the walls). However, this method is only suitable for rooms with perfectly flat ceilings of regular geometric shape. For standard apartments, it is better to use a diagonal arrangement. Using this method you can visually enlarge the space.
The starting point is to choose the location where the chandelier is mounted on the ceiling. This makes it easier to “fit in” the segments, and the trimmed edges can be disguised with a decorative base of the device. If your room has lamps instead of a chandelier, then it is better to glue the tiles from the corner along the wall opposite the entrance.
Installation of a seamless tiled ceiling
How many tiles do you need?
Before starting installation work, we need to decide how many tiles need to be purchased. Calculating the volume of material required for purchase is quite simple:
Tile adhesive
Installation of a seamless tile ceiling How many tiles are needed? Before starting installation work, we need to decide how many tiles need to be purchased. Calculating the volume of material required for purchase is quite simple:
- If we use 50x50 cm tiles to decorate a room, then one package (8 pieces) is enough to decorate two square meters.
- For tiles of a different configuration, the area of one package is most often indicated by the manufacturer.
- If the size of the room does not correspond to the size of the tiles (i.e. 50 cm), then it is necessary to purchase tiles with a margin in order to be able to join the tiles around the perimeter of the room.
Tiles around the edges of the room
Preparing the base for tile installation
As we noted above, the process of installing a seamless ceiling made of polystyrene tiles is quite simple. You do not need any specific skills, and the tool used is the simplest.
Ceiling primer
However, before you start gluing tiles to the ceiling, you need to perform a number of preparatory operations. The quality of our work at this stage determines how firmly the tiles will hold and what the ceiling will ultimately look like:
- Before starting work on gluing the tiles, we clean the ceiling from the remnants of finishing materials: remove the old wallpaper with a spatula, remove the paint with a wire brush, and wash the whitewash down to the concrete.
- If there is a chandelier on the ceiling, remove it, leaving only the wires (we carefully insulate them, of course!)
- We cover the ceiling with several layers of primer. Of course, you can glue tiles directly onto concrete - the properties of modern adhesive compositions allow this - but preliminary priming significantly enhances adhesion. So it’s better not to skimp on primer.
When the preparatory work is completed, we move on to the process of gluing tiles to the ceiling.
Tile installation
Sticking seamless tiles to the ceiling is done as follows:
Markup options
- At least a few hours before we plan to stick the tiles on the ceiling, we open the packaging and let the tiles lie in the room where they will be installed.
- We apply markings to the ceiling itself, drawing diagonals and connecting the midpoints of opposite walls. In the future, we glue the ceiling tiles, guided by these marking lines.
- We begin finishing the ceiling from the center (the point of intersection of the diagonals), or from the place where the chandelier will be installed.
- Lubricate the first tile with special glue for polystyrene tiles and apply it to the ceiling.
We glue ceilings
- We align the tiles along the marking lines and press, avoiding strong pressure - this can damage the tiles.
- Having installed the first element, we glue the tiles in a row, pressing them as tightly as possible to the already installed ones.
- We remove the glue protruding from the gaps between the tiles immediately, since in the future it will be almost impossible to do this without damaging the tiles.
Seal the joints between the tiles (where they exist) with white acrylic sealant. Silicone-based sealant should not be used, as it sometimes turns yellow.
Glue
Foam tiles are attached to the ceiling using glue, and when choosing it you need to know some subtleties. So, it is very important how quickly the glue sets, how long it takes for it to dry completely, and also how thick it is. All this will affect the quality, speed and complexity of the work.
- Choose thick glue; it will not “bleed” from the tiles and get dirty. Moment Liquid Nails glue, for example, has the right consistency and also sets in 10 minutes - which means you don’t have to stand for a long time with your arms outstretched, waiting for the moment when you can release the tile. In addition, the consumption of this glue is small - on average, about 6 ml is consumed per square meter, or four tiles. Thus, for a medium-sized room, one tube with a capacity of 400 ml is enough, but it is more profitable to take a tube with a volume of 450 ml - these come with a gun, with which it is easy to apply glue, in addition, some reserve is needed for gluing the ceiling plinth at the end of the work.
- Another suitable glue is “Titan”. It is very durable and sets quickly, but there is one subtlety in its use: after applying it to the tile, it must be applied in place, and then removed, and left in the air for one minute, after which it must be applied again to the same place and pressed tightly. The main difficulty in this case is to get exactly to the same place, especially at the beginning of work.
- You can glue foam tiles to the ceiling using cheaper adhesives such as “Dragon”, “Eltitans”, “Power”. They are made in China and are not of high quality. The main disadvantage of these adhesives is the long setting time, so you have to stand for a long time with your arms raised up, which is quite difficult for untrained people.
Advantages and disadvantages
Extruded polystyrene foam, like other materials, has advantages and disadvantages.
The main advantage of foam ceiling tiles is that they can be easily glued to any surface. The low weight of the material, as well as the ease of cutting, contribute to quick and easy installation.
This material is characterized by excellent heat and sound insulation properties. It can even be used for arranging children's rooms, since it is safe, because it does not contain harmful substances.
Many people prefer this finishing material because it is inexpensive, and the installation adhesive is affordable. If you choose the right finishing material for the ceiling, then it will last for many years. When using large tiles, ceiling cladding can be done very quickly. Since foam tiles are thin, the ceiling height remains virtually unchanged after installation.
Foam tiles can be painted. White material can take on any shade. Tiles can be painted up to seven times.
But besides its advantages, foam tiles also have some disadvantages, which you should familiarize yourself with before deciding to work with this material.
The main disadvantages of polystyrene foam include its fragility, so you need to be very careful with it. A significant disadvantage is vapor permeability. The ceiling can no longer absorb excess moisture. It is quite difficult to mask the seams between the tiles. You should not buy very cheap polystyrene foam, as it is prone to yellowing quickly.
Calculation
Before gluing foam tiles to the ceiling, it is necessary to determine how many and what tiles will be needed, why, make a calculation, purchase the required quantity, and prepare the ceiling surface for installation.
- Method 1: mathematical
To correctly calculate the number of tiles needed for repairs, you need to know the length and width of the room. Multiplying these numbers will give the ceiling area, but you shouldn’t buy tiles based only on this number. Since some of the tiles may be damaged when cut, and the shape of the ceiling is not ideal, excess material consumption is inevitable. Therefore, be sure to provide a reserve of at least 15% of the total area.
For example, in a room measuring 2x3 meters, the ceiling area is 6 square meters. To cover 1 square meter you need 4 tiles of a standard size of 50x50 cm. Thus, you will need 24 tiles to cover the entire ceiling, and another 2-3 tiles as a reserve. In total you will need to buy 26-27 tiles.
- Method 2: on paper
On a piece of paper you need to draw a plan of the room, maintaining the scale. Next, you need to draw diagonals and place the tiles with maximum accuracy from the central part to the edges of the room.
If there is a gap of less than 1/2 tile left on the wall, then 1 piece of tile will cover 2 such gaps. If the gap is more than 1/2 of a tile, then it should be noted that a whole tile will be used up.
No. 8. Do-it-yourself installation of polystyrene foam tiles
One of the main and most important advantages of the material is the ease of its installation, but the preparatory work should be given maximum attention.
Ceiling preparation is carried out as follows:
- the old finish is removed. The wallpaper can be pre-soaked, then it can be easily removed with a spatula. With paint it is more difficult - you will have to heat it with a hair dryer or treat it with a special solvent. If the ceiling was plastered, then you will not have to remove the finishing. True, it is worth identifying weak points with the help of light taps with a hammer and repairing them at the next stage;
- the cleaned ceiling is cleared of dust and dirt;
- priming the surface and sealing cracks, holes and other defects, if any. Putty is ideal for these purposes, which, after drying, is sanded with sandpaper. The smoother the surface, the more neat the resulting ceiling will be. If there are strong irregularities, the tile will be deformed, hold weakly and will soon come off;
- When the ceiling is dry, you can start gluing.
Another difficulty when gluing polystyrene foam tiles is to mark and correctly install the first elements. There are two markup options:
- straight. Involves installing tiles parallel to the walls. Since the geometry of the room may not be ideal, and it is better to install partial parts of the tiles at the edges, special markings are made, and installation is carried out from the center of the room. Diagonals are drawn from opposite corners of the room; cords can be used for this. The place where they intersect will be the center. From this point, using a pencil and a level, draw two lines crosswise, each of which is parallel to the wall. The first slabs are mounted in the corners of the resulting intersection, then you can focus on the already installed elements. If there is a chandelier hanging in the center of the room, then it will become the central point. This installation option allows you to avoid distortions, even if the walls in the apartment are far from ideal. Direct installation variation - installation of each new row with a shift relative to the previous one;
- diagonal. To begin with, you will also have to stretch diagonals from the cords. The tiles will be mounted along the formed diagonal lines, also from the center. The result will be an interesting layout, and oblique lines will visually expand the space.
The installation process itself looks like this:
- Glue is applied to the tiles; it is best to use liquid nails and apply them dotted or in strips. This will save glue and provide the tile with maximum breathability. You can apply a little glue to the end to guarantee;
- the tile is pressed to the ceiling surface in a pre-designated place quite tightly, but without excessive force. After a few minutes, the tile should already stick if a high-quality fast-setting adhesive was chosen;
- if some of the glue gets on the front side, it is better to immediately wipe it off with a damp sponge, otherwise traces may remain;
- The remaining elements are mounted in the same way; if necessary, they are trimmed with a paint knife. Trimming will be needed for the outer elements, as well as for the central ones, if there is a chandelier in the center of the ceiling;
- installation of baseboards. It is also attached with glue. Craftsmen recommend fixing it additionally with small nails in several places, since it will be difficult to keep a long plinth pressed to the surface. The next day, the carnations are removed, and the holes from them are sealed with acrylic putty;
- If discrepancies or seams appear between the tiles, they can be sealed with white sealant.
All work is carried out in the absence of drafts. After the glue and sealant have dried, you can paint the tiles if desired, and it is not necessary to use only one shade: relief areas can be highlighted with a different color.
If you pay attention to the choice of polystyrene foam ceiling tiles and carefully install them, the result will delight you for many years. The article was written for the site remstroiblog.ru
The article was written for the site remstroiblog.ru.
Frieze installation
The final stage of work on your ceiling will be the installation of a frieze. There are an unimaginable number of them - in a variety of sizes, shapes, colors and designs. Choose the option for yourself according to the size of the room and its design. It is not necessary that different rooms with the same tiles have the same friezes. Create variety and be more unique!
Although you can glue the baseboards before starting work, it will be much easier for you to stick them on after installing the tiles. Then you won’t have to adjust each sheet with millimeter precision and be afraid of making a mistake by a hundredth of a degree. The baseboard should be the element that will save you if something goes wrong.
Therefore, you should not be afraid of mistakes. Panic can only hurt. Try to do your work efficiently and know that any shortcoming can be eliminated, but it all depends on the cost. Be successful and all the best to you!
Rules of care
It is not enough to properly glue foam panels to the ceiling; you need to know how to properly care for them. Otherwise, in a year, maximum two, they will lose their original appearance, and you will have to make repairs again. Care requires compliance with the following rules:
- laminated tiles can be wiped with a damp cloth, and dry cleaning can be carried out using a soft brush or vacuum cleaner;
- Small stains can be removed with a simple eraser.
And remember that the surface of the slabs is afraid of UV radiation. The abundance of sunlight will have a negative effect on the coating.
When installing lighting devices, maintain a minimum distance from the ceiling to the lamp - at least 30 cm.
How to clean foam tiles
There are no special difficulties in caring for foam tiles. To clean the surface from dirt, you can use a damp cloth. If the ceiling is in the kitchen and is constantly exposed to grease and stains, it is necessary to use a special detergent. The use of ceiling tiles in the interior is quite common. This is due to its advantages and performance properties. To ensure the quality of installation is as high as possible, it is important to follow the instructions and adhere to the installation rules.
Recommendations for selection
You can drown in the stream of recommendations for choosing tiles, there are so many tips. Some relate to technical characteristics, others to operational ones. When studying the technical parameters, you should pay attention to:
- on the integrity of the panel. Here they look at the back side - there should be no shells, depressions or swellings. If they exist, the technological process is disrupted; there may be hidden defects in the products that will appear during operation. Then the edges are inspected - they should be perfectly smooth, especially in seamless models. After all, the slightest chip will hurt your eyes;
- quality. The easiest way to check is to slowly lift it around the corner. A high-quality panel should rise, slightly bending, without a network of cracks;
- scope of application - the manufacturer indicates for which premises the tiles are intended;
- geometry - the diagonals of a square or rectangle must be the same in length. A millimeter discrepancy will lead to the formation of noticeable seams, which are difficult to hide;
- material safety. The marking shows flammability (G), flammability (V), smoke formation (D), toxicity (T). The class should be within 0 or 1. It is better to refuse a higher value. You can always find a good alternative;
- availability of certificates so as not to run into counterfeits or products that do not meet sanitary standards.
When it comes to performance characteristics, experts advise:
- for the bathroom and kitchen, choose moisture-resistant finishes;
- For modern style, metal and polystyrene with an original shape and seamless connection are better suited. In the classic interior design, only white polystyrene foam tiles with stucco relief or golden inserts do not disturb the harmony;
- suspended ceilings look good with relief tiles. Coffered - with wood, which has decorative recesses and perforations;
- with noisy neighbors above, tiles made using injection technology will help (you can tell by their thickness - more than 10 mm);
- a small room will be visually enlarged by finishing with a 3D effect;
- for frequent repairs, it is better to buy panels that can be painted repeatedly;
- thin slabs are translucent. There are two options here: buy transparent glue or thicker panels.
