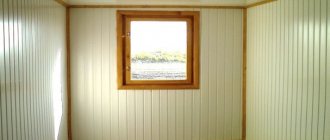
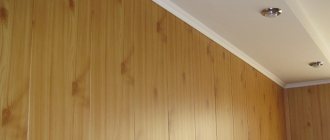
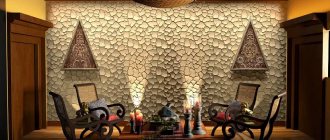
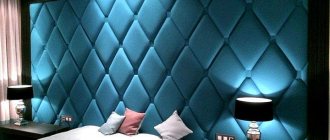
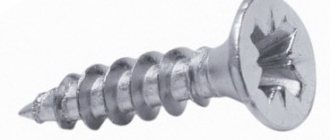
Before attaching MDF panels to the wall, you need to choose the optimal installation method, taking into account the quality of the partitions and the size of the room. The material is lightweight, resistant to moisture, and does not emit harmful substances. Decorating walls in apartments or offices with panels allows you to avoid a lengthy and costly procedure for leveling surfaces.
Before attaching MDF panels to the wall, choose the installation method.
Scope of application of MDF panels
Finishing material is used for:
- wall cladding in residential or office premises;
- floor finishing (laminated parquet);
- formation or design of arches or other curved surfaces in interiors;
- coffered ceiling finishing;
- production of facade parts of interior doors or finishing of metal panels;
- production of furniture and interior items (for example, window sills).
For production, fine wood chips with urea resins are used, the density varies from 600 to 800 kg/m³.
During mechanical processing, dust is released, which makes it possible to cut out ornaments or deep cavities. The material is used for the manufacture of speaker enclosures or containers. It is found in the interior trim of trams and buses (in areas not exposed to moisture).
The best synthetic resin liquid nails
Synthetic resins have increased adhesion and tensile strength. The substance is resistant to negative temperatures and open exposure to water. Optimal for use outside the house/apartment and has a long service life.
Moment Installation Universal MP-40 - with a low price
These liquid nails are the best due to their affordable cost. For 400 g of the substance you will have to pay only 120 rubles. The product from the German brand is distinguished by its universal use. Suitable for metal, glass, wood, stone.
Pros:
- you can use finished products with this glue at temperatures of +70 degrees and -40 degrees;
- It is allowed to apply the composition even at a frost of -12 degrees;
- liquid nails are resistant to water;
- Something can be corrected within another 15 minutes.
Minuses:
- the cartridge does not have a screw cap and you need to use the entire container at one time, otherwise it will dry out;
- final drying time reaches 168 hours.
Types of MDF panels
The material is usually classified according to:
- Due to dimensions, slats with end locks and rectangular tiles are often used in domestic conditions. There are MDF sheets with a length of 1 m and a width of 600 mm.
- The method of finishing the façade surface. Budget versions are covered with synthetic enamel, which provides protection against moisture penetration, but does not increase resistance to mechanical damage. There are laminated panels coated with glossy or matte polyvinyl chloride film. They are highly durable, but the layer comes off when heated or exposed to moisture. To finish MDF planks, natural veneer can be used, which has a beautiful structure and low strength.
The material is classified by size and surface finish.
The best rubber-based liquid nails
The rubber base provides increased strength characteristics and resistance to frost and moisture. The substance is good for use both inside and outside the home. Excellent holding of building materials under load.
LIQU >
These are the best liquid nails for attaching foam, drywall or plastic. The glue interacts well with polystyrene foam. Available in a brown and blue tube for a construction gun.
Through the transparent nozzle it is convenient to see the beginning of the material supply. The synthetic rubber base tolerates frost and constant moisture well. The cartridge contains 310 g of product.
Pros:
- low consumption - with a seam width of 6 mm, the tube is enough for 10 meters;
- has antiseptic properties and prevents the formation of fungus;
- pronounced moisture resistance;
- you can work at a minimum room temperature of +5 degrees;
- not fluid - dry residue is 75%.
Minuses:
- you have to wait 20 minutes for it to set;
- only for interior work;
- not suitable for harder materials (stone, metal, tiles);
- the brown color of liquid nails does not suit the design everywhere (in places where it is visible in the seams).
Krass Builder Universal - record resistance to negative factors
These are the best rubber based liquid nails for use in harsh conditions. The product comes in a cartridge with a screw-on spout and its own cap to prevent drying out. The container contains 300 g of substance.
The adhesive is suitable for brick, stone, concrete, plaster, PVC. It can be used at street temperatures of -20 degrees in winter and +50 degrees in summer.
Pros:
- cost for 300 g from 150 rubles;
- resistant to direct rainfall;
- the beige color is not so noticeable and matches most building materials;
- chemical resistance to paints and varnishes;
- suitable for parts working with vibration (after hardening it will firmly hold the sides in the same way as on static structures).
Pros and cons of the material
Advantages noted by installers:
- Strength. MDF can withstand light loads and does not collapse when installed with nails or screws.
- Homogeneous structure. There are no voids or areas of low density.
- Providing thermal insulation and protection from external noise.
- Mold resistance.
- Ease of machining.
- Easy to clean from dirt.
- Increased resistance to moisture.
- Stability of geometric dimensions.
Disadvantages of the material:
- flammability of MDF, the material ignites upon contact with hot objects;
- low mechanical strength;
- delamination of edges at the joint line;
- unsuitable for exterior decoration due to insufficient resistance to precipitation;
- formation of fine dust when cutting or drilling;
- increased cost (especially for MDF finished with natural veneer);
- the formation of voids between the finish and the wall, which negatively affects the area of the room.
MDF can withstand heavy loads and is durable.
What is a kleimer? Types of clamps. How to choose the size of the clamp? What is attached to the clamps?
Hidden fasteners are increasingly being used for interior and exterior finishing work. After installation, they remain completely invisible, so the surface of the wooden panels remains intact and undamaged. One of the most common hidden fasteners is a clamp
. Due to its simplicity and reliability, this type of fastening element significantly reduces the installation time of decorative panels.
What is a clamper and where is it used?
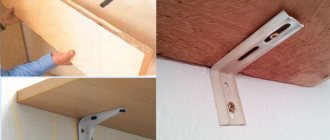
A clamp is a perforated metal plate complemented by a metal bracket. Using the holes located on the plate, the fastening element is fixed to the sheathing with self-tapping screws
, nails or screws, depending on the material of the frame itself. The spacer bracket is used to securely hold the back of the wood panel groove in place.
Fasteners are made from galvanized steel. The use of these metals is due to their high mechanical strength and the minimum required elasticity.
Photo No. 1. Reinforced clamps No. 6 Rusconnect and galvanized self-tapping screws
Kleimers
can be classified as universal fasteners that are suitable for both interior and exterior use. Clamps are used for installing vinyl siding, wall panels made of plastic, MDF and chipboard, all types of lining, imitation timber and block house.
Reinforced fasteners are used for installing ventilated facades, decorative roofing materials and solid floorboards.
Using clamps rather than standard screws or nails provides a number of advantages:
Types and sizes of clamps
Clamps are produced in different sizes, so suitable fasteners can be selected for any type of decorative panels. Fastening elements are classified into 6 types according to the height of the tongue. The first type corresponds to a minimum height of 1 mm, the second - 2 mm, and so on. The sixth type has the maximum height of the tongue - 6 mm, respectively.
To understand which type of clamp is suitable for your wood panel, you simply need to measure the thickness of the back groove. This indicator will correspond to the number of the fastener.
Areas of application depending on the type of clamper:
Fastening elements differ not only in the height of the tongue, but also in shape, so finding a suitable clamp for a specific panel will not be difficult.
Photo No. 2. Clamps No. 4 and galvanized self-tapping screws
To fix the block house, imitation timber, roofing elements and massive floorboards, a reinforced clamp
.
Unlike a standard fastening element, it is made of galvanized steel with a thickness of 0.7 mm. The reinforced clamp has an enlarged tongue for a tighter and more reliable fixation. There are more holes on the surface of the metal plate for fixing with self-tapping screws. The length and width of the fastener will also be significantly greater than that of a standard clamp. The numbers of reinforced clamps start from 4
and end with
10
.
How to choose a clamper for your material?
You need to order fasteners for installing interior finishing, facade, roofing material or floorboards only after purchasing the finishing material. To select the appropriate fastener, you need to have a decorative panel on hand to take several measurements.
The first thing you need to pay attention to when choosing fasteners
- his number. To find out what clamp number is needed for a specific panel, you need to measure the thickness of the rear groove. In most cases, its thickness will be the same throughout, so the ruler can be placed anywhere in the back groove. The result obtained in mm will correspond to the required clamping number.
Photo No. 3. Fastening the lining to reinforced clamps No. 6
The second point that needs to be decided when choosing fasteners: a standard clamp
or you need to order a reinforced one. If you need to install vinyl siding, MDF, chipboard or lining up to 14 mm thick, a regular clamp will do. It will withstand the light weight of these panels and securely fix them.
If you need to install larch or pine boards with a thickness of more than 14 mm, solid floor boards
, imitation timber, block house, decorative roofing or solid floorboard, you need to choose a reinforced clamp. Thanks to the large thickness of the metal and a more durable, elongated bracket, such fasteners will support a panel weighing up to 25 kg.
Another indicator that needs to be calculated is how many clamps are needed to install wooden cladding.
Calculations are made as follows:
Using this simple formula, you can calculate the exact number of clamps needed to install decorative panels on your site.
Source
Necessary tools for work
To carry out installation work you will need:
- hydraulic or laser level or plumb line;
- metal square;
- electric screwdriver or drill;
- a set of nozzles for tightening screws;
- hammers with metal and rubber heads;
- metal scissors (in case of assembling a frame from a profile);
- construction gun for applying glue;
- wood hacksaw or electric jigsaw with a set of files;
- tape measure, metal ruler and several sharpened pencils.
General information
Main requirements for glue
Nowadays, glue for MDF is presented in a wide variety, but, despite this, all adhesive compositions must meet certain requirements:
- the glue must have a specific purpose, for chipboards or for general use;
- reliable adhesion to any substrate;
— highly resistant to humidity;
Typically, adhesive compositions for MDF do not require frost resistance, because such panels are mainly installed indoors.
Types of glue
Despite the large selection of adhesives for MDF, their main purpose is to adhere to the walls and securely adhere to them. All types of glue for MDF are divided into the following groups:
Preparing the premises and marking
At the initial stage it is necessary:
- Select installation technology.
- Clear the area along the walls from furniture or interior items.
- Clean surfaces from old finishing material.
- Soak the walls with antibacterial primer.
- Remove nails or other protruding elements, cover large cracks or holes with gypsum mortar. If the edges of the faults have a loose structure, then it is necessary to cut the damage with a chisel or perforator.
- Check the quality of the surfaces using a building level; if distortions are detected, you will need to plaster the walls (when using a frame, there is no need to remove the planes).
- Draw marking lines corresponding to the installation locations of the frame parts or MDF starting strip. If wall insulation is necessary, then sheet or panel material should be fixed in accordance with the manufacturer's requirements.
At the initial stage, it is necessary to saturate the walls with soil.
The best water-based liquid nails
The name suggests that the water-based liquid nails are environmentally friendly. This substance is well suited for use on materials with which people come into contact (decorating a bedroom, children's room, furniture repair). They emit less unpleasant odor. But due to their water base, their strength indicators are slightly lower than their analogues, so they are suitable for non-critical structures (not subject to excessive loads).
Moment Installation Express MV-50 - for decorative panels
These are the best liquid nails for use in finishing living rooms due to their environmental friendliness. Suitable for metal, polystyrene foam, wood and plaster.
They are best used when installing wooden panels due to their low consumption and ability to interact with all types of chipboard and MDF. Available in 400 g packs.
Pros:
- convenient tube with a long spout and a screw cap;
- each m2 treated with glue can withstand weight up to 50 kg;
- if something is attached crookedly, then you can make adjustments within 15 minutes;
- moderate frost resistance;
- safe for respiratory organs.
Minuses:
- you have to wait 15 minutes until it hardens, and the total drying time is 48 hours;
- can be applied at temperatures not lower than +10 degrees.
Ultima 309 - for brick
These are the best liquid nails when you need to attach something to bare brick. To avoid drilling into the wall with a hammer drill, just drop some glue onto the surface and press down for 5 minutes.
The product is available in cartridge-type packaging and requires a gun for squeezing. The long spout allows you to reach hard-to-reach places. Supplied in 360 g containers.
Pros:
- there is a special ring on the tube so that after use you can secure the nozzle in it and screw the neck on for a tight seal;
- cost for 360 g from 150 rubles;
- Setting time is only 5 minutes;
- suitable for use both outdoors and indoors;
- water resistant;
- after 24 hours it is allowed to give a full load;
- sticks to concrete, brick, stone.
Minuses:
- you need a construction gun;
- cannot be used if the outside temperature is above +35 degrees.
Methods for attaching MDF panels to the wall
The finishing can be installed:
- using a frame made of wood or steel profile, which allows you to level the walls;
- using screws or nails driven into a flat and soft base;
- with applying glue to slabs or planks.
On a metal frame
The use of a frame made of galvanized profile is advisable in the following cases:
- unevenness on the base that is difficult to correct manually;
- high humidity in the room;
- the need to install a layer of insulation.
A profile frame is used if the wall has unevenness.
The location of the frame elements depends on the orientation of the MDF panels. If horizontal installation is planned, then the profile is installed in the vertical direction in increments of 400 to 625 mm. If the finishing is in a vertical position, it is necessary to install a horizontal sheathing. Frame elements are attached to the wall using dowels, screws or nails. The sheathing is leveled and a right angle is provided between adjacent walls.
MDF planks are secured with screws or clamps, followed by finishing the corners and installing skirting boards along the floor and ceiling.
On a wooden frame
If wood is used as a frame, it is recommended to use bars with a cross-section of 20x40 mm that do not have cracks or knots. To prevent rotting or mold, the workpieces should be impregnated with an antiseptic composition. The frame is attached to the wall surface with nails, dowels or screws (depending on the base material). When installing, you must use a building level and an angle. The sheathing should be horizontal, and adjacent walls should meet at right angles. The fasteners should enter the wall by 30-40 mm, the pitch of the planks should be 600 mm.
The wooden frame must not have cracks or knots.
To properly install MDF panels on a wooden frame, vertical corner bars should be provided. The upper and lower guides should be located at a distance of 10-15 mm from the ceiling or floor. The bars are used to fasten skirting boards. If you need to bypass door or window openings, you should install bars around the perimeter. The panels are fixed with nails, metal clamps (clasps) or screws.
The corners are covered with plastic or wooden overlays, giving the finish a finished and harmonious look.
Without self-tapping screws using glue
The planks can be fixed with glue according to the following algorithm:
- Soak the base with soil, clean it from dust or loose finishing material. The technique is suitable for walls made of monolithic concrete or brickwork that have a smooth surface without depressions or protrusions.
- Draw a vertical line to ensure the correct orientation of the starting bar.
- Apply glue in a dotted line to the back side of the panel, wait a few minutes (the time depends on the manufacturer and brand of material).
- Carefully attach the plank to the wall and set the position to the building level. If there is a box for installing a socket or switch in the installation area, then it is necessary to cut a hole for the device.
- Wait for the glue to polymerize and install the remaining panels sequentially, ensuring that there are no gaps.
- Install protective covers on external or internal corners, floor and ceiling skirting boards. Liquid nails, screws or dowels are used to fix the overlays.
MDF panels can be attached using glue.
Without sheathing
If the walls are made of wood or a soft board made of a mixture of gypsum or shavings, then you can attach the planks using self-tapping screws and do without lathing. The screws are screwed into the mounting edges in increments of 400-500 mm; to adjust the position, profile trims or plastic wedges are placed under the trim. The technology allows you to quickly sheathe walls, but if the base is made of soft material, then over time the tightening force weakens.
The coating is not designed to withstand mechanical loads; when the planks warp at the joints due to temperature changes, cracks appear.
For liquid nails
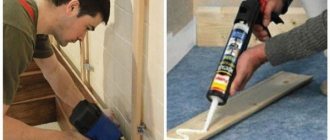
MDF wall panels can be installed with liquid nails (polymer glue), which are supplied in a plastic tube. The material should be applied to the back side of the plank in even lines or dots, and then press the part against the wall. The surfaces must first be leveled and the protrusions cut off, otherwise the finish will be uneven. Any glue that gets onto the front surface should be quickly removed with a clean cloth. Polymerization of liquid nails occurs within 24-36 hours; before carrying out work, it is recommended to saturate the walls with soil and remove dust.
Wall panels are often installed with liquid nails.
Using clamps
To fix with clamps you need:
- Install metal or plastic frame mesh on the walls.
- Cut the starting panel blank according to the markings. If necessary, drill holes for a socket or switch using a hole saw with the required diameter.
- Place the bar in the corner, secure it with screws on one side and steel clips on the other side to the frame. Check the correct position with a hydraulic level; the end part must be strictly vertical.
- Insert the next panel into the lock and secure with clips. Repeat the procedure for all other planks, cutting holes if necessary and adjusting the configuration in accordance with the design of the adjacent walls.
- Place the corner covering the screw heads on the glue, and then wipe the surface to remove dirt.
Other options
There are combined technologies using lathing and glue (for example, in the case of large defects on one wall and smooth surfaces on others). It is possible to install panels on a thin layer of polyurethane foam. It is necessary to accurately dose the supply of material using a construction gun, and keep the planks from moving when hardening. During polymerization, the polyurethane foam expands, which can cause distortion of individual planks and the formation of cracks at the joint lines.
How to speed up the repair process
To speed up the process, the composition can be applied to several canvases at once, which are pressed against the wall and then opened. They need to be left for a while so that the glue begins to polymerize a little. Having torn off the last of the panels, you need to glue the first one, after which you can proceed to the second.
When installing the canvases, you should press them well against the surface, and for better fixation, each of them can be secured with self-tapping screws in two places. Screwing is carried out into the groove of the panel, then the screw is closed with the tenon of the next one. But usually glue is enough. In addition, additional mechanical fixation prolongs the work and makes it more labor-intensive. Yes, and you will have to spend extra money on metal fasteners.
What is better for a concrete wall
If there are no irregularities on the surface of the partition, and the plane is located vertically without blockages, then for installation you can use liquid nails or any glue with similar properties. When there are depressions or protrusions on the walls, you will have to mount a frame made of a wooden block or metal profile. To drill holes you will need a hammer drill and a set of drills. MDF panels can be attached to the frame with screws or metal clamps; the technology is chosen by the master at his own discretion.
Installation of a decorative corner
How to attach PVC panels to the wall
Decorative corners are used purely for aesthetic purposes. They are attached upon completion of fixing all components of the finish. To install a corner, it is better:
- first secure with mounting tape;
- then glue it securely.
The best solution for gluing corners is the “Liquid Nails” adhesive mixture, which will not damage the coating and will securely fix all decorative corners.
MDF panels are beginning to gain more and more popularity. Among the advantages of this finishing method, it is significant that such installation can easily be carried out by one person without anyone’s help. Moreover, this does not require any special experience. You just need to first familiarize yourself with how to properly attach MDF panels to the wall.
Mounting Tips
During installation, it is necessary to periodically check the position of the panel edge; small gaps lead to gradual distortion of the finish. When installing the frame on hangers, fixation points should be placed at intervals of no more than 600 mm. Metal brackets allow you to adjust the position of the sheathing from the wall and compensate for unevenness. Vertical guides should have a length 10-15 mm less than the distance between the floor and ceiling. Laying insulation reduces the likelihood of MDF panels warping due to temperature changes and condensation settling on the surface.
Care
The panels are not washed with products containing acids.
Powders are also not used. It is necessary to use a general cleaning product once a month. Once a week, wipe the surface with soft microfiber soaked in water at room temperature without chemicals.
Steam cannot be used. When directing a jet from a steam generator, the panels will immediately lose their original appearance and become deformed.
The panels are fixed to a frame base - which is more durable - and to glue - in rooms without fumes and sudden changes in temperature. Surface care does not require expensive products or effort.
Installation development
After the markings have been applied, they begin, in fact, the main step of work with the introduction of glue for MDF panels. Watery nails of all the varieties discussed above are quite expensive. But their consumption when installing MDF panels is usually not very huge. Such material is installed on the walls or ceiling using the following technology:
- strips of glue are applied around the perimeter of the sheet without interruption;
- the same strips are drawn with glue along the diagonals of the panel;
- In addition, glue is applied to the entire area of the panel in thick drops with a pitch of no more than 20 cm.
The panel coated in this way is then pressed tightly against the wall, after which it abruptly breaks away from it. This is necessary so that the stripes and points of the watery carnations are slightly weathered. Then the panel is again pressed against the wall, now for good. After the first sheet is fixed, according to the markings they begin to install the second one. Small MDF panels on the surfaces to be finished should be placed staggered in rows.
