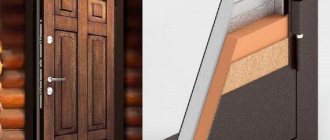
The main components of a door block are the frame, the leaf and the trim. Unfortunately, when installing a product it is rarely possible to get by with this minimum set. SNiP regulates only such parameters as the height and width of the doorway, while its depth depends on the size of the wall material. To ensure that the finished products are suitable for any opening, regardless of the thickness of the wall, the industrial door frame has a minimum width of 7.5 cm. The dimensions of the frame provide sufficient structural strength, but for the aesthetic design of the opening it is necessary to take into account the finishing of the door slopes. To do this, you need additions to the entrance doors.
Types of door extensions
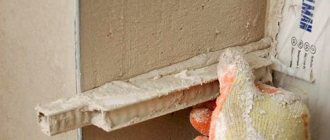
Simple design Telescopic strip
Door extensions consist of three strips: two side elements and one top. They are not included in the required package of the door block, but it is better to purchase them together with the door leaf and frame, so as not to subsequently encounter difficulties when choosing the desired shade and texture of the product. Standard product sizes depend on the design. The length of the planks is 2100–2200 mm, the width varies between 90–200 mm.
You will have to find out what extensions are if the depth of the doorway is more than 8 cm. With such parameters, there remains an empty wall space between the frame and the platband, which is covered with an additional strip.
According to the design, the extensions should be divided into two types:
- An ordinary door panel is a strip covered with finishing material (veneer, laminate) or without external finishing. The width of the products has several options - 100, 120, 150, 200 mm.
- Telescopic door panels have a groove, due to which the strip is attached to the frame. Installation of this design takes place without the use of fasteners. Standard parameters for the width of the telescopic bar are 90, 120, 150 mm.
Calculation of the number of elements
Before counting the additions on the door, it is worth getting acquainted with their sizes, which correspond to door production standards.
Width of standard extensions
Domestic manufacturers make doors of different widths and 2 meters high for serial production, while European sets have a height of 2.1 meters. The platbands, accordingly, have the same length.
In this case, the width of the door panels can vary from 50 to 550 mm, and the thickness is selected according to the thickness of the groove available at the end of the main frame. High-quality panels made from MDF, solid wood, laminate, usually have a thickness of 10 mm.
Tip: If the width of the groove of the extension does not correspond to the required dimensions, when installing the door frame, it should be increased by milling.
Many private houses, built without complying with standards and regulations for construction work, have doorways that are very wide and high, which makes it impossible to select a frame for the full width and height.
Installing an extension in the doorway
Next, we consider the question of how to calculate the addition for the door so that you do not have to buy it in addition during the work.
For this:
- The presence of a groove in the door frame is determined. During installation, the extension will go inside, which will reduce its size.
- The tape measure is installed at the extreme point of the door frame.
- The mark of the edge of the wall is located. Dimensions are checked in at least three places: on the left, on top and on the right of the opening.
- The largest value is taken as the basis.
Tip: If you have an old door, measurements should be taken of the entire wall, with the existing frame. When choosing the dimensions of the door, you need to subtract the width of the new frame from the resulting value.
For example, for a partition with a width of 250 mm, and a door frame with a width of 75 mm, the extension must be set to a width of 175 mm. A standard additional strip is suitable with a width of 200 mm. And during installation, the excess can be sawed off.
If the wall width is very large, it is better to use inlaid additions with a special connecting lock to connect the elements.
Tip: It is necessary to choose the sizes of door trims in accordance with the dimensions of the doorway, taking into account the color scheme and texture of the door.
To better understand how to measure a doorway, it is better to watch the video in this article.
Advantages of installing an additional strip
Is it really necessary to add an extension to the door, if to finish the slope that is not covered by the frame, you can choose another finishing method, for example, plaster followed by painting, or wallpapering? An obvious advantage in favor of installing the strip is the speed of the finishing process. Installation is carried out directly during the installation of the door and takes a few minutes, after which the opening has an aesthetically completed appearance.
Plastering can hardly be called an appropriate design method, since the raw solution will be in direct contact with the box. As you know, it is better not to test wood and MDF for prolonged exposure to moisture, otherwise deformation of the product and peeling of the outer finishing coating may occur.
Another advantage of the extensions is that they hide the junction of the box and the wall. Even a very firmly installed door, when the sash moves, transfers some of the vibration to the frame. For this reason, cracks appear quite quickly on the plaster or wallpaper adjacent to the frame. Extensions for the entrance doors camouflage this area, so there is no need to rush into the next renovation.
What to consider when choosing a product
The first thing you need to do before purchasing a door block and accessories is to accurately measure the opening. If its depth does not exceed 80 mm, strips are not required. In other cases, for a beautiful, harmonious design of the opening, an addition is needed.
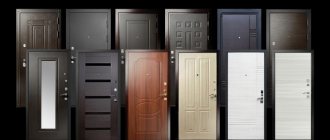
An important role in the choice is played by the correspondence of the texture and shades of the canvas and the strip - they must be the same. Therefore, it is more convenient to purchase additional accessories for the front door when purchasing a frame and a door leaf.
To determine the width of the product, the opening is measured in several places. It will be better if the product slightly exceeds the parameters of the opening, since it will be more difficult to increase the missing millimeters than to remove the excess.
Materials and finishing options
As a rule, owners try to choose extensions from the same material as the entire door structure. Therefore, manufacturers produce these elements in several variations. The most common are wooden products. Various species are used, but the most popular is pine.
Coniferous panels are easier to process and cheaper than other wood. But due to their poor resistance to moisture, such door panels must be treated with protective compounds, otherwise they will not be suitable for entrance doors.
From the same series of products made from MDF. Chipboard, fibreboard, OSB or plywood are also used. The slabs are much cheaper than natural wood, but in terms of basic characteristics they are in no way inferior to it. Products also need to be processed. Otherwise, with high humidity, the material will swell and deteriorate.
In this case, a complete replacement of parts will be required, since the products can no longer be repaired. Therefore, many manufacturers recommend installing such products only on interior openings. But if the extensions are covered with a reliable insulating film, then their service life increases significantly and they successfully withstand negative influences.
If a plastic box is installed, it is better to make the extensions from the same material. It fits on the front door for two reasons. It resists moisture well and easily tolerates any temperature changes. But the material is quite fragile and can be easily damaged even by mild mechanical influences.
At the same time, the best accessories are made of metal. The material tolerates frost, rain or heat well. Tough enough to withstand any impact. And most importantly - it is universal. It will be nice to combine with a door structure both from its “native” environment and from wood or plastic.
Technically, each type is easily replaceable. No one forbids installing extensions on a metal entrance door made of wood or plastic ones on a wooden one. In this case, only personal preferences matter.
Especially when everything needs to be subjected to general finishing. After this, the difference in materials will be completely invisible. The only exception is the option of applying varnish. Only then can the differences be seen. The simplest method is coloring. Although it is not ideal, it is used in most cases, because the paint adheres well to any surface.
Veneering and lamination are also common. In the first case, you can imitate any type of wood. In addition, veneer is a completely natural material. The second method involves the use of artificial films or special paper. At the same time, in addition to changing the design, there is reliable protection against aggression from the external environment. Most often, products made from MDF or chipboard are designed this way.
Preparing door panels for installation
In addition to their decorative role, the extensions serve as the basis for installing platbands, so measurements must be made in such a way that the end of the plank is in line with the wall. An accurate calculation of the width of the strip is performed after installing the door frame in the opening. Measurement is carried out as follows:
- Holding the ruler strictly perpendicular to the wall, place the end against the box. Instead of a ruler, you can use a square. For vertical slats, you need to take two measurements in the upper and lower parts, for horizontal ones - in the left and right corners. Since openings extremely rarely have ideal geometry, it is necessary to make marks for the right and left elements of the extension separately.
- For telescopic extensions, the measurement is slightly different. First you need to find out the depth of the groove located in the box. To do this you will need a thin ruler. Then measure the width of the opening from the box, as in the first option, and add the size of the groove to the resulting value.
- Next, determine the height of the left and right strips, as well as the length of the horizontal element.
The final process of preparing the boards for installation is sawing the planks along the marked marks.
Dismantling
Removal of platbands is usually required when cash is replaced. There is no need to worry about their safety, but the work is done carefully. Taking an ax with a sharp blade and a hammer in their hands, they begin to dismantle:
- To remove the trim carefully, the interior door is placed in an open position. Positioned in the doorway, the tip of the ax is inserted in the upper corner between the bar and the frame.
- The hammer is used to hit the butt of the ax until the blade plunges under the cash.
- By pressing the handle on the ax, the bar is separated from the box. The further procedure consists of similar actions. They use an ax in a circle until the dismantling of the platbands is completed completely.
The procedure must be carried out carefully so that no dents are left on the door frame. Instead of an axe, homemade sharpened strips of durable metal or other similar devices are suitable
Installation of simple additional strips
Installation of the front door extension can be done in several ways.
Self-tapping installation
This is a rather complicated method, since it requires mastery of a drill, but the result is justified by the strength and durability of the structure.
First you need to make a countersunk hole for attaching the screws. To do this, you will need a drill and two drills: with an elongated needle nose and a wood drill, corresponding in diameter to the size of the screws. Our task is to prepare 4 holes on each vertical element, and 3-4 on the horizontal.
We take a needle drill and make 4 holes, departing from the front side at least 1.5 mm. It's okay if the drill comes out through the back wall of the extension.
Then we turn the bar over with the other end and change the drill. Now the hole will have to be made at a slight slope - this is the most difficult moment. We install the drill strictly opposite each hole made. The slope must be made from the edge of the plank towards the drilled recess, the direction of the drill is indicated in the photograph. It is necessary to drill through the entire width of the plank until the drill reaches the hole located at the other end.
We insert self-tapping screws into the finished holes and tighten them until they come out on the back side. First of all, we install the vertical panels on the door , then install the horizontal strip.
To ensure the preservation of the geometric shape of the installed structure, spacers made of slats are installed between the bar and the opening. Next, you need to moisten the gap and foam it.
Installation on studs
For this method we will need finishing nails, a drill, a small diameter drill, wire cutters and a hammer.
First, we make a line of holes along the edge of the extension that will join the box. The distance between them should be approximately 20 cm. The depth of the hole must be calculated so that the length of the nail is 3–5 mm longer.
When the holes are ready, use pliers to remove the heads of the nails and insert them so that the sharp edge comes out.
We attach the extension to the box, press the bar tightly to the side of the seat and nail it in using a hammer and a wooden spacer.
Upon completion of installation, we wedge the planks with tape or spacers, spray the wall surface with water and fill the cracks with sealant.
Installation on foam
The simplest method, which requires only polyurethane foam.
We install the accessories prepared for installation in place. We use wedges to ensure a tight fit of the planks to the box seats. We install spacers or masking tape so that the product does not warp during the foaming process. Fill the space between the opening and the strip, previously moistened with water, with sealant.
Preparatory work
When installing platbands from the extension side, as a rule, no problems arise. But on the side of the door frame, carpenters quite often encounter a situation where the door block is either slightly recessed into the opening or protrudes outward. In this case, it is necessary to carry out work to hide these shortcomings.
The box is recessed
If the structure of the door block is recessed into the opening, and there is no way to correct the mistake by adding more, a thick platband is taken and an undercut is made in the wall under it. The work order is as follows:
- the platband is attached to the box;
- the line of the platband is marked on the wall;
- using a grinder with a cutting wheel for concrete or brick, an incision is made into the wall along the drawn line;
- use a chisel and hammer to knock out a recess for the platband - no need to be afraid to make the cut deeper or go beyond the line;
- a small amount of cement mortar is made (it is better to use ready-made putty);
- the knocked-out recess is lightly covered with mortar and the casing is immediately applied, as tightly as possible. Excess mortar that appears is removed first with a trowel or spatula, and then with a rag or rag;
- The casing is removed, and the solution is given time to set.
To prevent the solution from sticking to the back of the plank, it is first moistened with water.
The platbands will look strange if the box is slightly recessed into the opening.
The box protrudes
If the box protrudes beyond the wall, a plane and wooden trim will help. The technology is simple: the size of the box is marked on the back side, after which a quarter is selected from the back side of the casing using a plane. You need to work slowly, constantly monitoring the process of selecting a recess for the box.
Installation of telescopic extension strips
It is advisable to install a telescopic extension if the frame and platbands have a tongue-and-groove fastening. If you have a stationary circular saw and the appropriate skills, you can cut the tenon yourself.
Installation of finished structural elements is carried out without any particular difficulties. The planks are installed one by one in place. By adjusting the tenon-groove seating depth, the product is aligned along the plane of the wall and the joint line with the frame. Then we protect it from spacers in the standard way - with spacers or construction tape, moisten the dust-free surface of the opening with water, and fill the space with sealant.
If there is no quarter and the walls are slanted
If the quarter was not selected, you can do this:
- Having delved into the wood ½ of the thickness of the extension and taking a width of 10-12 mm, make the reverse quarter with a hand router. In case of a slight slope of the wall, a quarter can be made oblique in width; this will not affect the tightness of the elements.
- Or you can knock out a groove in the brick wall for the frame and insert a backing board there. This option may be preferable for those who find it easier to do rough and labor-intensive work instead of delicate work that requires saving energy.
In both cases, the extensions are installed by adjusting thin wedges, as is the case with straight slopes.
Some useful tips
- Installing extensions on polyurethane foam is the simplest and cheapest way, while the strength of the installation does not suffer at all from the absence of nails or screws. More complex installation options were necessary before spray foam was so common. Installation, which requires drilling holes and using fasteners, is not a cheap process. In addition to the extra installation costs, there is a risk of damaging the strip during drilling, in which case you will have to purchase additional material.
- If a small gap has formed at the junction of the vertical and horizontal planks, you should not try to fasten the trim elements with nails: this can cause the plank to split. When the polyurethane foam expands, this gap will disappear on its own. To be sure of the quality of the work done, you can drive a wedge between the plank and the opening.
- It is not necessary to install the extensions completely assembled. The U-shaped structure does not have a rigid base and will warp. All defects will still have to be eliminated on site, and the installation process will take much more time and effort.
If you need outdoor floodlights, then on the page https://ledin.kz/ru/catalog/prozektora today every modern consumer has the opportunity to get acquainted with one of the most practical, reliable and attractive solutions.
How to do it yourself?
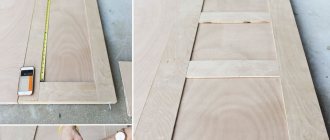
Extensions are ordinary planks or boards that perform a decorative function. Therefore, you can make them yourself from various materials. They are often formed from natural boards of small thickness or sheet products (chipboard, plywood, etc.).
The process of making accessories at home can be divided into several successive stages:
Initially, measurements of the opening are taken
It is important to measure slopes in different places to eliminate inaccuracies in dimensions. This procedure must be carried out for each side of the slope separately. Based on the data obtained, a workpiece should be made
To do this, the dimensions of the future addition are marked on the board. Please note that it is best to provide a small margin so that after installation, gaps do not form at the joints. When the markings are ready, the board is cut into extensions. It is better to perform such operations using a circular saw, as it will provide a more even and high-quality cut. The procedure ends with fitting and finishing of the frame. If the board is slightly larger, then the ends should be leveled using an electric plane. To give the board a unique design, the wood needs to be sanded and painted with stain or varnish. If laminated chipboard is used, then care must be taken to cover the ends with special tapes. They are glued to the material using an iron or a special hair dryer.

