Each of us at least once in our lives has had or will have to make repairs in our homes. And this process, as you know, requires a lot of investment not only in time, but also in effort, not to mention the financial side of the issue. Therefore, I want the result to be as good as possible, and spending time at home always brings pleasure and contributes to good rest.
Sometimes, to make your favorite bedroom or office feel cozier and fresher, all you need to do is change the curtains and paint the walls a different color. However, you also need to approach this wisely, thinking through everything down to the smallest detail. For example, now many are wondering whether it is possible to apply water-based paint over lime and whether the whitewash will begin to peel off over time.
Some claim that the surfaces of rooms painted in this way have retained their original appearance for many years, while others warn against such experiments. Since there is no clear answer, we will try to summarize the pros and cons and find out the best way to apply water-based emulsion to lime without harming the walls and, of course, your wallet.
Is it possible to paint a whitewashed surface with water-based paint?
Surely, when renovating an apartment or any other room, many people wonder whether it is possible to paint a whitewashed surface with water-based paint. Recently, lime finishing is becoming less and less common, because the fashion for this type of whitewash has long passed. In addition, the process of removing it is accompanied by a lot of dirt and debris. Therefore, there is often a desire not to remove the old coating from the walls, but to immediately paint it with water-based emulsion. We don’t argue that this option is possible, but only if:
- The surface of the ceiling or walls is not covered with defects in the form of pits, since the paint will only help to emphasize them;
- There is no fungus or mold on the old coating, because soon after painting these “guests” will make themselves felt again, and then it will not only be necessary to wash off the whitewashed walls, but also treat them with a special antiseptic solution;
- Traces of rust or water stains are visible on the whitewash, since the painting will not be perfect, and in those places covered with lime the color will again become darker (those who apply three or more layers are trying in vain);
- Lime, applied in a very thin layer, lies perfectly on the wall, while the painting over the entire surface is even and has no cracks or bumps;
- It holds tightly and is not prone to sagging or falling off, so painting will not be in vain.
Otherwise, if you pass water-based paint at least once over a whitewash that has the above-mentioned errors, it will simply get wet, become sticky, and during painting some particles of the wall will begin to attach to the roller, which will not only spoil the aesthetic appearance of the finish, but also your mood.
do not forget to prime the ceiling with a deep penetration primer
In order to avoid this, it is necessary to prepare the surface for repair work. First you need to use a spatula or scraper to remove all those places of whitewash that can be removed without any effort. Next, you should loosen the lime coating by soaking it with warm water, and then easily scrape off all the remaining fragments.
The next step in this process should be to completely clean the walls (ceiling). This can be done using a wrung out damp towel or a vacuum cleaner. And finally, the surface must be covered with a layer of primer, because then the water-based emulsion adheres more firmly to the whitewash. Only after doing all of the above is a positive result of the repair possible. Now apply water-based paints and don’t be afraid that soon all this will need to be redone.
Renovation starts from the ceiling
The first thing we start any renovation with is finishing the ceiling. It is no coincidence that one starts with this area; this allows one to subsequently avoid contamination of the fresh floor covering and calmly carry out painting without fear of staining or ruining something. However, at this stage many people have a choice between lime and staining, since each of these finishing options has its pros and cons.
Many, when carrying out repair work with their own hands, prefer to update the whitewashed ceiling with lime, because they do not know that it can be painted. In fact, decorating with paint is not at all difficult if you have a perfectly flat surface at your disposal, without scratches, depressions or chips.
How to properly apply water-based emulsion to lime
You can use any water-based paint for whitewashing, however, be sure to pay attention to where you will use it. For a bathroom or kitchen, paint with a waterproof composition is best, and for other rooms all types.
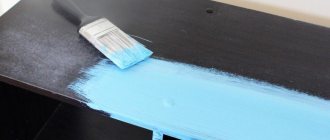
Before starting work, the water-based emulsion is thoroughly mixed and, if necessary, water is added. To begin with, using a brush, you should apply water-based paint to the corners of the room, as well as other areas that cannot be reached with a roller. After this, you should paint the remaining areas, carefully distributing the paint to avoid the formation of drips. To satisfy you with the result, you need to apply at least two layers of water-based emulsion. However, the first layer must be completely dry before recoating.
As recommended by professionals, the best option is matte water-based paint, since it can easily mask all surface imperfections, and at the same time always looks impeccable in any color.
Useful tips
Without the proper experience and specialized education of a plasterer-painter, it is rarely possible to carry out the first painting efficiently. But a number of tips will help:
- If there are small defects on the surface, then it is better to use a matte water-based emulsion. Glossy painting will only emphasize unevenness and roughness.
- Wear protective equipment: glasses and a respirator.
- Select the composition of the water-based emulsion, taking into account the purpose of the surface to be painted:
- acrylic water-based paint is not afraid of either ultraviolet radiation or high humidity, a universal option for building facades and interior spaces;
- silicone water emulsion is an excellent option for the bathroom and kitchen, it has high vapor permeability;
- a cheap but not durable paint based on lime and cement, but is rarely used due to unreliability.
Is it even possible?
Of course, no one can forbid you to paint your own ceiling or walls however you like, but what will be the result? Let's consider several scenarios in order to decide when you should absolutely not paint a whitewashed ceiling with water-based emulsion, and when you can still make an exception.
Option #1
There is a smooth and beautiful, but thick layer of lime or chalk on the ceiling. The hand does not rise to wash away, and the water is on the meter. Decided to paint it. Water-based paint applied to whitewash will soak it, and, since the coating is very thick, it will begin to:
- exfoliate,
- crumble,
- swell and fall in large pieces.
The ceiling will look miserable, and you will have to remove two layers of material, wasting time and money.
Conclusion: densely applied whitewash must be removed in order for the new coating to be of high quality and presentable in appearance; and if the whitewashed ceiling is clean, smooth and looks fresh, then maybe you shouldn’t touch it yet?
Option No. 2
The old coating was cracked in places, crumbled, and in some places swelled with bubbles. It was decided to clean the problem areas with a spatula, rub them with sandpaper and apply water-based paint over the remaining whitewash. Eventually:
- the ceiling will look like an abandoned battlefield: irregularities will immediately catch your eye;
- Surely, under the weight of fresh paint, the old, barely adhering layer of whitewash will begin to leave the surface.
- You will not like the result, and everything will have to be redone, and thoroughly.
Conclusion: if the old coating begins to deteriorate and crumble, then repainting it will not save it; You can paint with water-based paint only after the unusable layer has been completely removed.
Option No. 3
The ceiling is smooth, the painting material holds firmly, is not applied very thickly, but there are stains and stains from water on the surface (including traces of rust), sooty areas or signs of mold. You decide to simply paint with water-based paint to make the ceiling look clean. More likely:
- spots will appear even through two layers of paint, that is, the color in these areas will still be different from the rest, so the effect of “purity” will not work;
- the mold will “grow” and feel great, gradually developing new territories on the ceiling (and not only!);
- You may want to paint it again, but applying water-based paint on lime more than twice is a real provocation; the coating will crumble.
Conclusion: whitewash with traces of emerging life and dirt must be decisively removed!
Option No. 4
The ceiling was whitewashed only once, so there is little chalk on the surface; The coating is clean, smooth and does not crumble anywhere. Try this experiment: apply a little primer to a small area and let it dry. Now lightly scratch this area. Doesn't it fall out? This means you can paint with water-based emulsion!
Do I need a primer?
If you want to get a strong and durable coating, you should not skip this step. Moreover, the primer is inexpensive. Its main purpose is to strengthen the base and improve the adhesion of paint to the wall. After treatment with a similar composition, a loose wall turns into a monolithic and durable coating.
The primer is able to fill the smallest pores, and the surface after its application looks smoother. The fact is that such compositions form a thin, durable film that prevents moisture from being absorbed from the paint. As a result, it lies flatter. Therefore, before applying water-based paint to lime, be sure to prime the surface.
Since it is sold in concentrated form, dilute it with water according to the instructions on the package. If the composition is too thick, streaks may form on the walls. It is better to add a little more liquid and treat the surface twice.
Dyeing process
Any surface needs preparation before finishing; in this case, you need to do the following:
- clean the ceiling from accumulated dust; This can be done using a vacuum cleaner or a well-wrung out damp cloth;
- put a layer of primer on a dry surface; it is possible to use a water-based emulsion diluted with water at least five times as a priming composition, but it is better to purchase a special deep penetration composition; let dry;
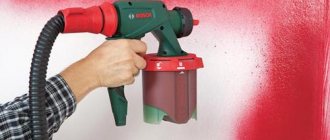
Now it's time to start painting. Tools to choose from: brushes and paint roller, spray gun.
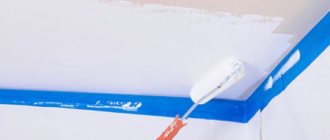
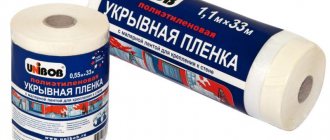
Masking tape will be required in any case. Paper tape should be used to cover the perimeter of the walls just below the ceiling to protect them from paint.
Attention: before use, the water-based emulsion must be thoroughly mixed using a construction mixer or drill with an appropriate attachment.
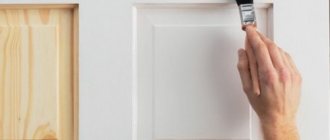
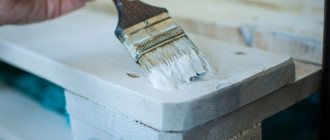
If the household does not have a paint sprayer, then use a brush to paint the corners and joints (along the glued tape). Paint is poured into a special tray and the coat of a roller (with short pile or foam rubber) is soaked with it; excess liquid is removed by rolling it along the grooved surface of the tray.
Stripping Tools
The choice of products and tools depends on the thickness of the whitewash layer and the degree of surface contamination:
- To remove a wide layer of limestone, use a sharp trowel. Moisten the wall or ceiling with water from a spray bottle in advance. Then use a spatula to scrape off the whitewash. To work, put on old clothes, tie up your hair and take a respirator, because lime gets dirty when wet.
- With a medium thickness of whitewash, use a roller with wet, tenacious bristles.
- To remove a thin layer of lime coating, purchase a grinding machine. With its help, you can clean the surface much faster.
Important! Protect your respiratory tract in advance with a respirator or gauze bandage, because the process is dusty. Lime particles enter the nasopharynx and larynx. This may cause allergies or respiratory problems. In particularly severe cases, pollution can even damage the lungs and cause pneumonia.
What difficulties might arise?
The question of whether it is possible to paint a ceiling over old whitewash with water-based paint is difficult to answer unequivocally. When making a positive decision, one cannot be absolutely sure of the success of this enterprise. Here are some arguments against:
- There is no guarantee that the seemingly strong old layer will not weaken in some places; The risk of getting a short-lived result still remains.
- Whitewash tends to get wet very quickly, becoming sticky; You may have to deal with such an unpleasant phenomenon as its smearing and small fragments sticking to the roller or brush.
- On a whitewashed ceiling it is difficult to see small irregularities or cracks under a layer of lime, but they will certainly make themselves felt after painting (the paint will highlight them).
Note: it is better to take a water-based emulsion with a matte effect; This coating smooths out and masks surface imperfections.
We all have to do cosmetic repairs to our home from time to time. And despite the abundance of finishing materials on the shelves of hardware stores, ordinary whitewashing of walls and ceilings is still very popular. Although this coating is short-lived, you can resort to it at least every year.
Preparing the ceiling for painting
To achieve the best quality and long service life, it is strongly recommended that before painting with any type of paint, remove as much of the whitened layer as possible and carry out work to eliminate minor irregularities, depressions or scratches. This process is not as complicated as it might seem at first glance.
The ceiling, like any other surface, must be prepared before painting.
For high-quality surface cleaning, you can use two main methods:
- wet processing;
- dry processing.
Dry ceiling cleaning
When dry cleaning, the following tools are often used:
- grinder with grinding disc;
- electric drill with brush attachment;
- Grinder;
- sandpaper.
The dry cleaning process is carried out quite quickly, however, it has several significant drawbacks, due to which it is used extremely rarely.
Dry cleaning is fast, but problematic
- The main disadvantage is the large amount of dust. If work is carried out in only one room, then the room must be carefully insulated while ensuring good ventilation.
- This method is harmful to health; it is necessary to use personal protective equipment in the form of a respirator and goggles.
Video on how to remove whitewash from the ceiling:
Wet cleaning of the ceiling
With wet processing there is much less dust, and the method itself is much safer, however, it takes more time.
To work you will need:
- respirator;
- a small sharpened spatula;
- metal brush;
- roller with medium length pile;
- bucket with water;
- spray.
Before painting over whitewash, its base layer is removed as much as possible by wetting the surface of the ceiling using a conventional roller or spray nozzle. You need to wet a small area as large as you can handle before it dries completely. After applying the washing liquid, you need to wait a little more than half an hour and begin removing the previous layer with a spatula.
For maximum effectiveness, you can add a few tablespoons of liquid soap and 5-6 tablespoons of regular soda, which will significantly speed up the decomposition of the lime and make the removal process easier. Try to apply the solution in a generous layer, as lime absorbs it strongly, and the more it absorbs, the more effective the surface cleaning will be.
Not all areas of the surface can be treated immediately. In such cases, you do not need to dwell on them, but continue working further; you need to return to these areas after processing the entire surface and remove them using sandpaper or a metal brush. Before painting over whitewash, try not to use very sharp objects such as a chisel or chisel when removing its base layer, which can leave scratches on the surface. This is especially important if there is a leveling layer of finishing putty under the lime.
Advantages and disadvantages of whitewashing walls
Even a novice master can whitewash ceilings and walls with his own hands. Requirements for materials and tools are minimal. Let's try to evaluate the obvious advantages of this process:
- Cheapness. If it’s time to do repairs, but you have limited funds, whitewashing is the best solution.
- Simplicity. Even an untrained person can easily cope with the work.
- Accuracy. Although whitewashed walls are clearly inferior to modern decorative pasting - the same Venetian plaster, with the right approach it is possible to obtain an original matte surface. In addition, you can add dye to the whitewash, which will clearly benefit the design of the room.
- Environmental friendliness. The applied finish easily allows moisture to pass through and allows the walls to “breathe,” which cannot be said about tightly glued wallpaper or tiles.
- Active protection. Lime whitewash is not susceptible to fungus or mold because it is able to resist bacteria.
As for the disadvantages, the following should be highlighted:
- fragility - after a couple of years it is advisable to repeat the repair;
- uncomplicated appearance;
- There will be a lot of cleanup to do upon completion.
