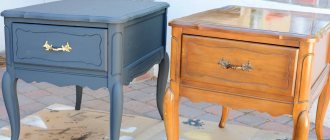
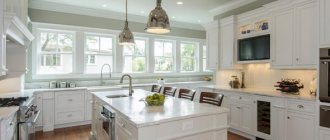
It seems absurd why paint chipboard and furniture plastic. But, nevertheless, the customer’s demands and legibility have grown significantly and sometimes, in order to solve some problem in the manufacture of furniture or interior items, it becomes necessary to paint chipboard or facades lined with plastic or film.
When does it become necessary to paint chipboard and films?
Chipboard is painted when they want the front part of the furniture body to be the same color as the painted facades.
When they can’t find chipboard of the right color. Then they do this - buy white chipboard and paint it in the desired color. Costs, both material and time, are lower than when painting MDF.
When they want products coated with film or plastic to have a more advantageous decorative appearance after applying varnish. This, in particular, applies to the creation of a decorative patina finish for film facades.
When you need to paint MDF facades with complex milling. In this case, MDF facades are wrapped in white film in a membrane vacuum press and then finished with enamels.
The types of laminate painting also include the option of painting MDF facades, when the manufacturer deliberately buys MDF laminated on both sides and actually finishes only the edge of the facades according to the complete technological scheme.
What do all these cases have in common? That's right, the need to create the necessary adhesion, that is, the adhesion of paints and varnishes to chipboard, film, and plastic. Otherwise, the beauty will be short-lived - the varnishes and paints will peel off and you will have to redo everything.
What paint can you paint laminated chipboard furniture with your own hands?
Inexpensive shelving and cabinets made of laminated chipboard and MDF were conceived as items that can be easily replaced with analogues of a different size, shape and color. But now home craftsmen can easily repaint such furniture - and share their experience on repair forums. We have collected the most common recommendations for updating color, carefully checked them, and are now ready to tell you: paint boldly, you will succeed!
All dirt must be washed off the surface of laminated furniture and degreased.
Use grease-dissolving detergents, rinse and wipe the laminate flooring thoroughly, and dry it with a cloth. Many home craftsmen recommend disassembling furniture. But here it all depends on the complexity of painting - if there are a lot of drawers and trim in a rack or cabinet, then, of course, it’s better to take it apart. If the shape of the furniture is very simple, and you want to paint, for example, only the facades, you can leave the cabinet “as is.”
2. Create a rough surface
The coating on modern laminated chipboard and MDF is made of PVC, and therefore, like any plastic, it is poorly wetted even with water, not to mention paint. For better adhesion (adhesion of the paint layer to the laminate layer), you need to treat the surface with the finest sandpaper (“zero”). It is best to work in a respirator - dust from the laminate layer is very harmful.
3. Primer is the main character
To ensure that the paint lays evenly, without rolling, and does not bubble in the near future, be sure to prime the surface of the furniture. What paint can be used to paint wooden furniture? Look for a primer that sticks to everything - even glass and tiles: almost all manufacturers of modern paints and varnishes already produce such primers (usually they are polyurethane-based).
The cost of such a primer is quite high, but you should not skimp on it - its quality may be even more important than the quality of the paint.
Motorists share a secret: you can use a primer for bumpers from a can. What paints should I use to paint IKEA furniture A respirator wouldn't hurt here either. In any case, the primer layer must be dried.
And it’s good if you allocate at least 12 hours for this.
Important: at this stage of the work, carefully seal all un-removed fittings with masking tape!
4. Seal cracks
The item is optional, but many of those who have successfully repainted chipboard furniture regret that they did not use putty before painting. There are two recommended ways to fill dents and scratches: either using latex putty or using epoxy-based compounds (there are even tips for using gelcoat).
In any case, after puttying, it is necessary to prime and dry the surfaces again.
5. Paint: which one to choose and how to apply it
Alkyd enamels and polyurethane paints are suitable for repainting over PVC film - it is best to buy a special paint and varnish material marked “for furniture” so as not to disturb the overall ecology of the apartment. Epoxy enamels usually give good results, but take too long to dry and retain an odor. There are many reports about home repainting of MDF and laminated chipboard with acrylic latex compounds - provided that a special primer is used (sometimes even in two layers).
For painting work, craftsmen recommend a velor rather than a small foam roller - it will paint the surface evenly, neatly, without unnecessary air bubbles. If you decide to paint your shelves or fronts in two layers, let the first layer dry completely.
Treat corners and hard-to-reach nooks and crannies with a brush with a beveled edge.
A professional approach is painting using a spray gun with paint consumption from 60 to 200 grams per square meter. The nozzle diameter and pressure will have to be calculated independently, taking into account the type of paint.
6. Varnish finish
If you have repainted the fronts of a wardrobe or kitchen cabinet - that is, furniture parts that are subject to a lot of wear and tear - it makes sense to coat the painted surface with a water-based varnish. It will protect the paint from external influences, scratches and abrasion. True, there is a danger that the varnish will turn yellow over the years - but you already know how to repaint your furniture again!
Many people ask the question “ How to paint laminated furniture?” ” and is it even possible to do this? After all, it often happens that you don’t want to part with comfortable cabinets and shelves, even though they have lost their appearance and do not fit into the interior after renovation.
Interior items often lose their appearance over time. Do-it-yourself decorative painting of walls with water-based paint? What to do if they are still strong and you don’t want to throw them in the trash? There is a good solution - to paint the outdated model with your own hands. Work on updating the facade can be carried out at home.
You can choose to cover it with paint or varnish, and also decorate the sample using scrap materials.
Modern interior items very quickly go out of fashion or lose their attractiveness, but purchasing new ones is not always possible. This raises the question: how to repaint chipboard furniture with your own hands so that the product acquires an attractive appearance? This is not always easy to do, because the result is influenced not only by the correct choice of materials and technology, but also by the accuracy of the process.
When planning to update the appearance of a room, owners may doubt whether it is possible to paint chipboard furniture. The uncertainty is understandable, but unjustified. You can make your products more modern with your own hands, you just need to repaint them with diligence and skill.
Sometimes it’s not necessary to throw out your old closet. If the owner has taste, then the item can be given a new life. And what satisfaction comes from furniture restored with your own hands! For it to truly become a source of pride, you should carefully study how to paint chipboard furniture at home. This knowledge will help you inexpensively refresh the appearance of a table, bedside table, living room wall, bed, chest of drawers or stool.
The tips in this article are universal for any objects made of particleboard.
Painting chipboard. Tools, materials and technology
Chipboards are used for interior decoration and furniture making. The composite material is produced using the technology of pressing shavings of deciduous and coniferous trees with the addition of synthetic resin. At the end of the technological cycle, thick sheets with a loose structure and a rough surface are obtained. To prevent moisture from penetrating into the pores and destroying the canvas, it is laminated or covered with melamine film at the furniture production plant. For finishing, polished slabs are sold without additional protection, requiring painting.
Features of painting chipboard at home
Emulsions and varnishes increase the material's resistance to mechanical damage. At the same time, they enhance the moisture-protective and performance properties, prevent deformation and warping of the canvas. Before starting the process, prepare the tools. To work you will need:
- Solvent for degreasing (white alcohol or degreasing compound).
- Cotton rags.
- Covering film.
- Sandpaper of different grits.
- Roller or spray gun, for manual painting - brushes of different thicknesses.
- Putty and primer.
- Regular or spray paint, acrylic varnish.
- Putty knife.
Modern emulsions and varnishes are non-toxic, but do not neglect a respirator and gloves, and work in a well-ventilated area.
How to prepare chipboard walls and furniture for painting
Due to their porosity, the sheets quickly absorb the emulsion, so the surfaces must be prepared in advance before applying the decorative layer. The fittings are removed from the facades; when decorating the walls and floors, the adjacent areas are covered with film or paper. The process consists of 4 stages:
- eliminating minor defects;
- cleansing from dirt;
- surface leveling;
- applying the final decorative coating.
If the task is to refresh old furniture or floors, the remaining swollen paint is removed with a grinding machine or manually. When chemically washing, surfaces are treated with special solutions. Then use a construction hairdryer to soften the cracked layer and remove it with a scraper.
A hair dryer is one of the most effective tools for removing paint from walls, wood and other surfaces.
If the coating does not peel off, but has only lost its aesthetics, it is cleaned with low-abrasive sandpaper to make it smooth. The next step involves removing dirt with warm water and detergent with a napkin and drying thoroughly.
Chipboard putty
If there are chips and deep cracks at home, take shavings, mix them with glue and repair the unevenness. Then use corrective putty to level the surface. Construction stores sell ready-made wood putties based on:
Many people make their own plastic paste by mixing chalk powder with acrylic varnish diluted in water. Then, using a roller or brush, spread a thin layer over the facade, floor or wall. After 2-8 hours, the surface layer is cleaned with fine abrasive paper.
Chipboard primer
To prevent paint absorption, the slabs are coated with a special impregnation. Primer applied in one layer:
- creates a waterproof film;
- protects the material from the harmful effects of moisture;
- the appearance of mold spores;
- reduces paint consumption.
For old chipboard furniture and previously painted surfaces, an oil primer is more suitable. To create a base for painting, the sheets are treated with acrylic, alkyd, epoxy or polyurethane composition. Unlike analogues, which are designed for repeated processing, alkyd is applied in one layer. Easy to use aerosol acrylic primer. After drying, the canvas is degreased with white alcohol or acetone, and decoration begins.
More convenient, but at the same time much more expensive, in terms of volume, is an aerosol primer (500 ml, about 150 rubles). Justified only for small volumes of work.
Features of painting furniture made of chipboard
Working with laminated chipboard has its own peculiarities. Factory-treated facades do not require additional decoration, however, if used for a long time, they require restoration. Paint on a polymerized surface with a membrane-vacuum film does not always lie smoothly. First, it is sanded, then a composition with colored pigment is distributed over the panels.
How to paint chipboard
The quality of the decorative coating determines the type of enamel. Today, acrylic, latex, and alkyd compositions, presented in a wide color palette, are in demand. Imitations of metallic, mother-of-pearl, and precious metals allow you to uniquely decorate interiors in any style.
Latex ones differ in color saturation. However, when applied in multiple layers to chipboards, they may peel off spontaneously. Moreover, they do not protect against the appearance of pathogenic microorganisms, which is why they are not suitable for use in rooms with high humidity.
Alkyd enamels are free from this drawback. Designed for covering furniture in the kitchen and bath, application to floors and wall panels. However, due to the toxic solvent in the formula, their use is not recommended.
Water-based acrylic paints are environmentally friendly, dry quickly, create a dense waterproof and vapor-proof layer, and do not fade under the sun. The composition is prepared using adapted technology in 2 stages:
- fine powder is mixed with water in the proportion specified by the manufacturer;
- the mass is allowed to swell;
- mix until homogeneous.
Then pour into a spray gun or into a tray for application with a roller.
How to paint chipboard
A tool with a velor or foam nozzle is suitable for creating a smooth surface, and one with a long pile is suitable for creating a textured pattern. The ends and hard-to-reach places are treated with a thin brush. The composition with pigment is applied in one direction with quick movements without additional coverage of stains that appear after absorption. The next layer is applied a day later with a more viscous composition. After drying, apply the finishing coat.
Having a spray gun does not guarantee quality paint. For a good result you need experience working with it. You can get by with cheap and familiar tools in the form of a roller and paint brushes.
How to work with aerosol paints
Acrylic composition in a spray can is suitable for home painting. It is shaken vigorously for 30 seconds, then sprayed from a distance of 25 cm. To prevent smudges, the cabinet fronts are placed on the floor, the walls are painted from top to bottom. To ensure even application and obtain a sealing layer, the process is repeated 2-3 times, waiting for the previous one to harden (30 minutes). Attention is focused on processing the ends and joints. For additional protection against abrasion and damage, and to give a glossy or matte shine, varnish is applied. Experts recommend using a foam sponge and applying the product using pressing movements.
Specifics of furniture varnish
Furniture varnish includes substances that, after drying, become a transparent layer. The surface coated with varnish can become either matte or glossy, through which the wood, with all its features, will shine through.
Furniture coated with varnish is always relevant. It looks luxurious and will fit into any style.
Varnish coating has a number of advantages:
- Surfaces become shiny or matte.
- The varnish creates a protective layer against dampness and dirt.
- Externally, the furniture looks more aesthetically pleasing.
- The service life of the product increases.
- The coating prevents cracks and minor scratches.
- Some varnishes are resistant to temperature changes and ultraviolet rays.
- On a varnish surface, small defects are less noticeable.
- It is easier to get a splinter or injury from untreated furniture.
The following precautions must be observed during the varnishing process:
- Work must be carried out in a respirator or using other methods of respiratory protection.
- Work must be carried out with gloves.
- There should be no open sources of fire near the work being carried out.
- When varnishing old furniture, the previous layer must be removed; noticeable cracks should preferably be treated with putty.
- After preparatory work, the surface must be treated with a primer.
The surface is varnished several times; before applying the next layer, you need to wait for the previous one to dry.
Pre-treatment of surfaces
Before painting, laminated surfaces must be prepared so that the paint lays evenly and adheres firmly.
You will need:
- dishwashing liquid;
- sponge;
- roller, brush;
- primer tray;
- rubber spatula;
- putty;
- a set of sandpaper;
- Sander;
- rags;
- gloves, protective mask and goggles.
The final result will depend on how well the surfaces are prepared.
Advice! If the product consists of many parts (a table with drawers, for example), then it is recommended to disassemble it before painting. Furniture of simple shapes - a wardrobe - can not be disassembled if you only need to refresh the facade by painting it white.
Sanding
The next step is to sand the surfaces. After sanding, the coating will acquire a rough structure, and it will be easier to paint and the paint will adhere better. Start with coarse-grained sandpaper and finish with fine-grained sandpaper. You can get the job done faster by using a grinder.
If you use a sander, it is important not to overdo it and sand evenly over the entire surface, otherwise you may end up with a wavy surface with different sanding depths.
Important! During work, the respiratory tract must be protected with a protective mask: the substances contained in laminated chipboard can be harmful.
Degreasing
All surfaces that are planned to be painted are thoroughly washed, removing dust and dirt. Then degrease using a sponge with dishwashing detergent applied to it, rinse off and wipe the treated surfaces with a clean, dry cloth or napkin.
Leveling surfaces
If the furniture has chips, cracks or other imperfections, they should be repaired at this stage before painting. It is best to fill all the recesses with latex-based putty or special products with epoxy resin. When the mass hardens, the surface is leveled with sandpaper.
After this, the product is primed again and dried thoroughly.
Padding
It is much easier to paint surfaces treated with a primer: the paint goes on smoothly and no air bubbles form.
It is advisable to purchase a primer that is suitable for smooth surfaces (tiles, glass). You can also use bumper priming compounds - they come in cans, making application more convenient and quicker. While working, you must wear a protective mask.
After applying the primer layer, you need to let it dry. This process can take about 12 hours; you can find out more precisely by studying the label of a particular product.
Paint selection
Furniture with a laminated facade is best painted with water-based acrylic paint. It is suitable for painting products white, and to add color to the base you can add a color of the desired shade. Also, if necessary, the paint can be diluted with water to achieve a lighter tone.
Acrylic paint can be used indoors: it does not have a pungent odor, does not emit harmful compounds, is durable and easy to clean. To paint large surfaces, you can use acrylic paint in cans.
Thixotropic paint is also suitable for painting furniture - it has a special consistency, thanks to which it applies smoothly, without running down or forming smudges. Painted surfaces will resemble plastic ones.
You can paint laminated surfaces with polyurethane and latex paints, but when choosing, it is important to pay attention to the label: it should indicate that the product can be used for indoor furniture. They are also available in a basic white color; color is used to obtain the desired shade.
How to upgrade MDF wall panels?
You can paint MDF panels manually or with a special pneumatic gun, but this will require a compressor unit and a moisture-water separator. The composition is applied with smooth movements in two layers: the first - across the main direction, the second - along the entire length of the part.
Interesting materials:
What to take with you to Masa? What are the benefits of running on a treadmill? What does a cardio machine provide? What benefits does creatine provide during training? What does flaxseed provide? What does the bar give us? What does an EA Access subscription provide? What does a prosecutor's audit provide? What are the benefits of having a child in Canada? What does a stepper do?
Coloring
To paint old furniture, you should prepare:
- paint container;
- roller, brush;
- paint;
- masking tape;
- gloves, mask.
Hardware protection
Before starting work, it is worth removing all fittings from the furniture. If this is not possible, all elements are carefully sealed with masking tape to protect them from accidental paint.
Roller and brush painting
In order to paint laminated surfaces, it is best to use a velor roller rather than a foam roller - it applies the paint evenly, preventing the formation of air bubbles. Foam rubber, due to its porous structure, can leave noticeable marks on the surface.
For hard-to-reach places and corners, use a narrow brush with a beveled edge. The tool must be of high quality, with tightly secured lint. If you paint with an old brush, individual hairs may fall out, remaining in the applied layer of paint.
If you plan to paint chipboard furniture white or light colors, it is advisable to apply two layers of paint so that the coating is dense. It is necessary to take a break between applying the first and second layers to allow the paint to dry completely.
Using a spray gun
An easier and faster way is to paint furniture using a spray gun. In this case, 60–200 g of paint will be spent on each m², depending on its consistency, layer thickness and other factors.
Protection of joints and edges
Any liquid always seeks and finds the lowest place on the surface. The joints are recesses and are therefore vulnerable to water penetration. There are a considerable number of joints in cabinet furniture, where the main structural material is chipboard.
Due to high humidity and frequent contact with liquids, kitchen furniture is especially vulnerable. The sink, countertop, and furniture next to the stove are the most frequently moistened pieces of furniture in the house. An example is the part of the countertop that is in contact with the mixer. Sooner or later the faucet leaks, which means that the unprotected chipboard will inevitably begin to get wet and collapse.
To protect the joints, we first clean these places and dry them with a hairdryer. Then we apply PVA glue to the joints, and when it dries, we treat the protected surface with silicone or, alternatively, construction sealant.
If there is no tray in the cupboard, then sooner or later the liquid draining from the wet dishes will destroy the chipboard. Therefore, the material must be degreased and then treated with a sealant.
We seal the seams with sanitary silicone in the color of the furniture. This will prevent mold from growing on the furniture.
In those places on the edges of the tabletop where there is no lamination, we install end or connecting strips. These elements can be made of metal or plastic. The strips are not ideal protection, so the edges still need to be pre-treated with sealant. Another common method of protecting chipboard is applying PVA glue or furniture varnish to the edges.
Finish coating
Laminated chipboard has a smooth surface, but after sanding and applying paint it becomes matte. You can restore the shine of furniture and additionally protect painted surfaces by covering them with water-based varnish.
After the varnish has dried, the surface can be polished with a mildly abrasive auto polish, because it is almost impossible to apply the varnish with a brush or roller in an even layer and there will be small or noticeable waves on the surface; after polishing, the surface will be perfectly smooth and glossy.
Advice! It is recommended to purchase products for pre-treatment, coloring and finishing from the same company: they can definitely be used together, and the compositions of products from different manufacturers may be incompatible with each other.
Painting furniture yourself is quite simple: if you follow these recommendations, the new coating will be perfectly smooth, and the result will last for many years.
Is it possible to paint laminated chipboard without pre-matting?
Matting a laminated chipboard surface is a complex process that takes a lot of time if you don’t have a sanding machine. But it can be avoided if you use chalk paint: a mixture of chalk, clay, dyes and a binder. This composition fits well on any smooth surface.
Features of Chalk Paint:
- The natural composition is harmless to health.
- Water is used for dilution.
- The chalk mass is odorless.
- Creates a matte finish with an antique effect.
- Painted surfaces do not fade in the sun.
- Drying time for 1 layer is 8 hours.
- Drying time for 2 layers is 24 hours.
- Compared to acrylic, chalk paint is about twice as expensive.
If milk casein is used as a binder, the paint is called milk or casein paint. It has the same properties, but its decorative qualities resemble acrylic coating. Its color is rich and its surface is semi-matte. This is the best paint for laminated chipboard if you are not interested in creating an antique effect.
