How to cut MDF panels?
The length of the panels is more than 2 meters, therefore, especially if you do not have your own transport, or it is awkward to transport, they are cut right in the store , but what can you do at home, if cutting is necessary?
For cutting it is recommended to use the following equipment :
- A hacksaw for wood – it is not recommended to take it with a very large tooth, otherwise the edge will turn out to be loose, and the teeth can catch and pull the decorative film along with them;
- Alloy hacksaw - cuts literally and carefully, but slowly, so it can be used for isolated cases when it is necessary to adjust something;
- A grinder with a cutting wheel cuts quickly and literally, but a lot of dust appears, so it is suitable for working outdoors, or during serious repairs;
- A jigsaw is suitable for indoor work, as it is possible to connect a vacuum cleaner to it.
In isolated cases, can be used , provided that the panel thickness is not more than 3 mm.
The blade is pressed forcefully onto the material, after which a sharp cut is made and the fragment is broken off with your hands, while using a knife to cut off the film from the back side; alloy scissors .
Don't confuse ceiling panels with wall panels!
Building materials stores offer a very wide selection of PVC panels. They are of different lengths and widths, they come in varnish, glossy, matte, wood or marble. It's up to your taste; the main thing is not to confuse them with wall ones.
The modern market offers many varieties of ceiling panels. All that remains is to choose exactly what is suitable for your interior.
The difference is in weight. Plastic wall panels are heavier and stiffer. Ceiling ones are much lighter, which simplifies the work. Their fragility necessitates careful handling: a dent can be left even by hand, not with a tool.
How to connect MDF panels?
Installing MDF may seem complicated only at first glance; in fact, the entire system is assembled similarly to a children's construction set , and even someone who has never picked up a tool in his life can completely change the situation.
Fastening panels may resemble the same process with PVC, but it also has its own characteristics . The connection between each other is carried out using a tongue and groove, each of the panels has one side pointed and the other side is forked, thus, by inserting the point into the groove, a prefabricated system is obtained.
For fastening to the wall, it is imperative to refine the lathing , unlike PVC, MDF is sensitive to moisture released from concrete, and the air gap will ensure air circulation.
The sheathing must be made of wood planks , but panels can now be attached to them using glue. Or mechanical fasteners.
It should be borne in mind that by gluing the panels, you will lose the ability to quickly disassemble , and if it is torn off, the decorative film will also come off, so only one side of such a panel can be reused.
For mechanical fastening, nails and special fasteners are used - clamps, as necessary; such cladding can be disassembled quite quickly.
About the product
MDF panel Wand der Welt Status Latte is a vertical 3D column, due to which the height of the walls visually increases. It is characterized by high wear resistance. The panel height is 2.7 meters from floor to ceiling. Wand der Welt MDF panels reliably protect walls from dust and dirt, are easy to clean and quickly installed. Using Wand der Welt wall panels will reduce the time it takes to decorate a corridor, hallway, balcony, kitchen or garage. Installation of a wall of 15 m2 - 2 hours of work. The panels are durable and easily attached to each other using a tongue-and-groove system using nails or staples, and a small under-panel space will perfectly hide wires or additional insulation. To decorate a wall with MDF panels, no preliminary preparation of the wall is required at all.
The tongue-and-groove fastening is done using locks: at the ends of the panels on both sides there is a tongue (protrusion) and a groove (recess). Then the tenon and groove are joined and a flat and smooth surface is obtained. The advantage of the method is that no preparatory work is required in the form of leveling the surface of the walls. The slabs are attached to the sheathing (wooden planks) using self-tapping screws or self-tapping screws. Wall panels are attached to the slats with staples or nails.
Wand der Welt MDF wall panels are made from finely divided wood shavings, pressed under pressure at high temperatures. It is when exposed to high temperatures that lignin is released from wood - a natural polymer that is a binder. The absence of chemical adhesives allows you to obtain an environmentally friendly product.
To treat the surface of the Wand der Welt Status Latte MDF panel, a film based on environmentally friendly cellulose material was used. Also, the surface of the panel is treated with Toppan coating, which will prevent the panel from peeling, drying out and cracking. The coating fully conveys the texture of wood and looks natural, in addition, it is resistant to light chemicals. The wear-resistant decor can withstand pressure of 24.5 kPa. Additional sound insulation is 6 dB.
Advantages of MDF panel Wand der Welt Status Latte:
- Versatility - suitable for finishing the ceiling and walls of any room, both residential and industrial; the panels have an optimal length, which allows finishing of full-sized rooms (up to 2.7 m).
- The unique width of the panel (301 mm) and the joining method allow you to create a decor that is as close as possible to a homogeneous array.
- Simplicity of installation - wall panels are easily joined together and no preliminary preparation of the surfaces on which installation is required is required.
- Labor savings – the ability to finish a larger area with fewer panels, saving up to 50% of time.
- Ease of use - wall panels are more resistant to environmental influences and do not require additional maintenance or updating.
- Comfort - high heat and sound insulation properties (6 dB) - Wand der Welt panels initially have these properties, but during installation they can be enhanced using special materials.
- Ease of transportation - the packaging is designed for loading and unloading by one person.
- Safety - the panels are made from environmentally friendly materials.
- Convenience - the panels do not require special care.
- Relatively low cost - finishing will cost much less than tiles or high-quality wallpaper.
Recommendations for installing MDF panels Wand der Welt Status Latte
For installation you will need
- Wall panel;
- universal angle;
- decorative casing (if necessary);
- mounting bracket and nails;
- tool.
Preparation
- Before starting work, the following conditions must be met: walls and ceilings must be dry, the room temperature must be close to room temperature. Before installing the panel, it must be left in the room for 48 hours to adapt to the ambient temperature and humidity. A general ventilation system must be used in the room.
- Installation of the panels begins with creating a frame from wooden blocks with a cross-section of 20x40mm. The direction of the supporting bars is perpendicular to the direction of the panels. The distance between the bars should not exceed 45 cm. The exact distance between the bars is determined based on the installation method and design ideas.
Installation of MDF panel Wand der Welt Status Latte
The type of panel connection is “tongue and groove”, reveal “0”.
1. Installation of panels must begin from the corner of the room.
2. Nail the first panel from the tenon side to the corner bars at a distance that allows you to hide the nail with a decorative corner.
3. From the side of the groove, nail the panel or shoot it with brackets.
4. Insert the tenon of the second panel into the groove of the first panel until it stops.
5. From the groove side, nail the second panel to the bars and so on.
6. If the width of the panel at the opposite end of the wall or door turns out to be excessive, cut it to length from the side of the groove and secure it to the bars with nails.
7. Hide the nails with a decorative corner or door trim.
Finishing
- Decorate all corner joints with a universal corner, gluing it to the panels.
- Hide the lower edge of the panels with a plinth, and the upper edge with a universal corner.
How to bend an MDF panel?
It’s not always necessary to cover only a straight surface; if you have imagination, you can make decorative elements of a semi-oval or round profile in a room, significantly diversifying its style, but what about MDF panels that have only a rectangular profile?
As it turned out, bending of this finishing material is entirely possible , but only if the thinnest panels are used, with a width of no more than 3 mm and only for painting.
For bending a template is useful ; you can create it with your own hands; any material that can transfer to the panels a circle radius equal to that of the surface to be coated will be suitable for this purpose.
Because MDF has a structure with its own density located between the board and the cardboard, it is useful to soften it . This can be created using alcohol glue, aqua-based mixtures such as PVA, which are not needed here, as they may cause the product to swell.
A layer of glue is applied to each panel using a notched trowel, after which it is stacked, when the stack is assembled, it is tied at the ends, laid on the template, after which the ends are pulled with force and fixed.
- Information on how wall panels are attached.
- What are MDF panels - the information you need is here https://postroyka.org/chto-takoe-mdf-paneli/
- How to sheathe MDF panels - see the full instructions here.
Drying lasts two days , then the panels are separated, sanded and painted.
You will also find a useful video on how to install MDF panels
Options for joining planks
Option #1
Connection of plastic and MDF panels:
- H-shaped PVC profile. Most often, joining along the length of plastic and MDF linings is done using H-shaped PVC profiles, as in the photo below. In this version, the planks are simply inserted into the profile on both sides. The downside is that such a profile is visible, and in the case of MDF it also differs in texture.
The H-shaped profile is considered universal, but it is visible
- Thin straight and corner strips. Manufacturers of MDF panels produce thin strips that are glued to the connection line; these strips can be straight or angular.
- T-shaped moldings . They are inserted into the gap between the panels.
T-shaped moldings for hiding the joints between MDF panels are very easy to use
Option No. 2
A decorative overlay at the joint is considered the simplest way to connect wooden cladding along the length. You simply fit 2 rows of planks and nail a piece of wood on top. The configuration and dimensions of the slats can be any, and most importantly, there is no need to adjust the slats too precisely; the slats will cover the entire defect.
To decorate the joint on the Blockhouse lining, a planed board with chamfers is usually used
Craftsmen use wooden T-shaped slats, they are also called mushrooms. There the rail is inserted into the gap, which must be precisely adjusted to the size of the fungus. Plus, this joint must be on the supporting lath of the sheathing.
The gap between the slats should correspond to the thickness of the fungus stem
Option #3
Installation in a running manner. This option is the most difficult to install with your own hands.
It is being built in several stages:
- No one is going to hide the joints; on the contrary, they are highlighted , so they must be perfectly even. To do this, the ends are cleaned and ground at 90º before installation.
- To ensure that there is no gap at all when joining, lay the planks on top of each other and use a miter saw to cut off the edges of both at once.
- A grinder or electric planer is used to chamfer the outer part of the cut ; the bevel should be the same as the side bevels on the plank itself.
- The planks are connected end-to-end and the cut no longer spoils the view, but is part of the interior.
When installed staggered, symmetrical seams look better
You can do it simpler - when you reach the end of the row, you cut off the excess plank and start the next row with this trimming. But here it will not be possible to build a perfectly symmetrical picture of the joining seams.
What mistakes are often made when joining MDF panels along the length
Upgrading the interior with the help of MDF is an opportunity to properly use the space, making it the most attractive and comfortable, but during installation, certain technical difficulties usually arise that cannot be abandoned without a detailed consideration. With its help, the walls in the interior are decorated, so it is filled with comfort and coziness; environmental cleanliness is also considered a fundamental advantage, so the safety of the room is not compromised.
Slope finishing
Finishing slopes with MDF panels is done in the same way, but two options are possible: pieces of MDF panels along and across the slope. If the slope is narrow, less than 1.8 times the width of the MDF panel, then it definitely needs to be sheathed across. With wide slopes, the choice of cladding method is a matter of taste. Slopes sheathed across alternately with pieces of dark and light colors look good. In general, it is at the discretion of the master and his family.
Corners and crevices
There are no difficulties here: there are many corners and baseboards for MDF of different profiles, sizes and tones on sale. Installation comes down to cutting to size, rounding the corners, sanding the cuts with sandpaper and gluing with liquid nails or any wood glue.
What is MDF?
MDF is a wood material made from sawdust, which has been specially treated with disinfectants and assembled into real boards using various adhesives. Compressed production design is a fundamental advantage, which ensures strength, mechanical resistance and reliability.
Manufacturers are constantly improving the production technology of MDF panels, but one thing is common - the introduction of only environmentally friendly and non-hazardous raw materials. Typically, these are sawdust from precious wood species that have been sorted and processed to avoid compromising the final properties.
There are several model options depending on the installation method - with joint locks and tongue-and-groove systems, so you select what meets your requirements and preferences. But the option with docking locks has a higher cost, which creates corresponding financial inconveniences.
Fundamentally! Despite the higher cost, it is better to give preference to models with special docking locks.
Surface preparation
One of the main advantages of MDF panels is that there is no need to completely level the surface to which you are going to attach them. In this case, it does not matter at all whether the wall was pre-painted or not, and what material it is made of (brick, concrete, blocks, wood). It is enough to simply coat the plastered or wooden surface (2 times) with a primer (or a special composition for protecting wood), and then either immediately attach the lathing for mounting MDF panels, or first attach a layer of thin thermal insulation to the wall (using “liquid nails” glue) (such as folgoizol).
The main mistakes when joining panels
Usually, non-compliance with technological features and rules becomes a prerequisite for the occurrence of areas of delamination and deformation of the material, which causes certain operational inconveniences.
Experts identify the following main mistakes when joining MDF panels in height:
- An incorrectly chosen installation method, which not only creates difficulties during installation, but also inconveniences the next time the finished space is used.
- There is no step between the panels, due to which incorrect joining in the next one becomes a prerequisite for deformation of the coating. The fact is that under the influence of temperature or high humidity, not only the comfort of the room is disrupted, but also the shape of the material.
- Incorrectly selected panels, depending on the height, are the main reason for inaccurate joining on the wall, which causes not only visual, but also convenient inconvenience.
The correctly chosen method of installing MDF panels is a guarantee of the attractiveness and convenience of the room, so you should not neglect even small details when arranging the walls. It is also important to familiarize yourself with the intricacies of the installation method in order to avoid inconveniences in the following.
Finishing MDF is an easy way to transform a room at minimal cost
Today we will look at such a material for interior decoration as MDF panels. This type of product is excellent for carrying out budget repairs, and an additional advantage of this solution is that the installation work can be done without any problems with your own hands. I will describe the whole process in as much detail as possible, and you just need to use all the recommendations from this review.
Using MDF wall panels, you can transform a room in one day
Wall cladding with MDF panels
Naturally, every job must be done by a specialist, but a person, with a little preparation, can cope with any kind of work.
Wall cladding with MDF panels
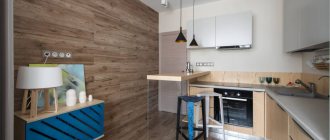
For some reason, it is believed that decorating walls with MDF panels is a solution only for an office or a store. That finishing with MDF panels is a sour, monochromatic canvas... This is not entirely true, or rather, completely wrong. There are rooms in the house and apartment where the panels will look very harmonious and beautiful. The entrance hall and hall, the kitchen are rooms completely suitable for panels. Covering the walls with panels is quite simple, does not take much time and is completely within the capabilities of any person. I'll tell you about some secrets...
MDF panels are a board material made from dried wood fibers, treated with synthetic binding substances and formed into a carpet, followed by hot pressing (density 700...870 kg/m3) and sanding.
MDF appeared as a future development of the dry method of fiberboard production, taking into account technologies that were being improved in the manufacture of fiberboard. The abbreviation MDF is a carbon copy of the British MDF - Medium Density Fiberboard. In medium-density fiberboard, the developed surface area of wood fibers and a short pressing cycle are perfectly combined with strength due to the role of binders in interfiber assistance.
The panels are connected to each other using the tongue-and-groove principle and are attached to the base either with clamps on nails or staples, or directly with staples from a construction stapler. To cover the walls with panels, you must first install a base of wood slats with a cross-section of 15X30 mm - this cross-section provides sufficient strength and does not significantly reduce the area of the room. The slats are attached to the wall horizontally and aligned plumb. Panel manufacturers recommend assembling the base with a pitch of 500 mm on the walls and 400 mm on the ceiling. From my own experience I can say that it is better to assemble the base with the following step - 1 rail - 40 mm from the floor, then after 500 mm the 2nd, after 300 the 3rd, after 300 the 4th and then after 600 mm the remaining three pieces. A total of seven slats per panel height. The most deformable space of the wall is at the level of a person’s hips; in this place there will be a reinforced base. The base must be smoothed vertically - only in this case the panels will look great. The development of smoothing the frame is different for every craftsman - but, usually, this involves screwing the slats to the wall using screws or dowel-nails with smoothing by placing all sorts of spacers of different thicknesses under the slats - fiberboard, wood chips, etc. We use a different method that allows us to level the base with an accuracy of 0.5 mm. To do this, it is necessary to cut galvanized strips measuring approximately 30X120 mm and screw them to the rail with 16 mm screws with a press washer with a pitch of approximately 600 mm. Next, we apply the strip with the tins to the wall and attach the upper ends of the strips to the wall with screws or dowel nails. Now, bending the tins away from the wall in the shape of a V, we move the rail to the required distance, aligning it along the wall along the cord, and vertically along the plumb line. After finishing smoothing, you can attach the lower ends of the strips.
What do you use to cover it with?
This kind of cladding is now made from 3 materials:
- Plastic.
- MDF.
- Tree.
Plastic and MDF cladding are often of the same type, but with wood it is a little more complicated; in addition to wood species, the lining is also divided into classes and types.
Plastic lining
The width of the planks varies from 100 to 380 mm, and the length from 2000 to 6000 mm. The thickness varies around 10 mm.
PVC lining is most often used; it has a wide range of models and a reasonable price, but there is one serious drawback: polyvinyl chloride fades in the sun. Acrylic panels are more expensive, but they do not fade, plus the colors are brighter and the material itself is stronger.
MDF planks
MDF planks are used only for interior decoration, but unlike plastic, they cannot be installed in wet rooms.
Modern MDF lining differs from laminate flooring in its density, but otherwise these materials are similar.
Wooden lining
This cladding is regulated by two standards:
- Domestic GOST 8242-88.
- European DIN 68-126/86.
As for wood species, linden, spruce and pine are considered popular. Elite finishes include oak, larch and Karelian birch.
The name eurolining does not guarantee that the material was made abroad. It’s just that the planks are made according to the DIN standard, and they could have been made at the nearest sawmill, which has the appropriate equipment.
- Dimensions according to domestic GOST . In stores, the length of wooden lining ranges from 1500 - 3000 mm, the minimum width is 76 mm, the maximum is 200 mm. The thickness depends on the configuration, so thin strips such as Standard, Shtil, etc. have a thickness of 12 - 16 mm, and semicircular lining (Blockhouse) reaches 40 mm.
- Dimensions according to DIN standard. The most common length of eurolining is 2.7 m, width 80 - 120 mm, and thickness 12.5 - 19 mm.
In theory, both of the above standards allow for the production of planks up to 6 m long, but due to difficulties with transportation, such material is usually made to order.
The configuration of the planks is also very different, both in price and in appearance:
- Standard, Shtil and Softline are considered the most popular and affordable.
- Eurolining is the same Standard, only with different sizes.
- Semicircular lining or Blockhouse is more expensive, now this model is very popular.
- Landhouse and American models are considered specific in the domestic market. Their price is average, but their popularity is lower than that of traditional lining or Blockhouse.
Contours of different types of lining in section and appearance in the photo
Methods for installing MDF panels on the ceiling
Bulges from poor finishing or imperfections in the laying of floor slabs can only be removed by installing MDF panels on the ceiling. Applying plaster and putty can be problematic or unrealistic because it requires skill. Time, material and labor costs should also be taken into account.
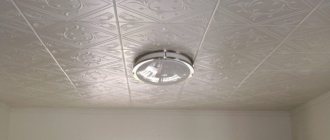
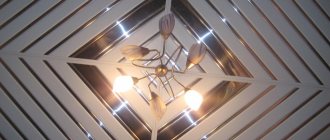
MDF panels, painstakingly matched to the overall design in terms of texture and color palette, simply solve the problem of smoothing the ceiling surface. Ceiling panels are installed on a base made of metal profiles or wood sheathing, which is the smoothing structure.
Fastening panels to the wall
If the walls are smooth and the room is dry, you can do without lathing and mount the panels directly on the walls.
If the walls are uneven and/or there is high humidity in the room, you need to mount the panels on the sheathing.
Sheathing options:
- wooden blocks;
- PVC strips;
- metal carcass.
| Screw mounting | Bracket mounting |
| Gluing |
Structure and composition of MDF panels
In terms of its physical structure, MDF is a wood fiber of small dispersion, treated with polymer resins and compressed under high pressure. After surface preparation, MDF boards purchased by high-temperature pressing are covered with a decorative layer of various textures and colors.
The edges of the panels are made in the form of a lock, so the joints are virtually invisible. Some brands of MDF elements are equipped with such fasteners not only on the long side, but also on the short side. This is done for the purpose of effectively joining the panels if their usual length is insufficient to cover extended areas.
The vast majority of manufacturers use paraffin and lignin compounds as binders. Sanitary and hygienic characteristics for the release of harmful and toxic substances are confirmed by certificates and are within the limits of the standards regulated by SanPiN 2.1.2.1002-00.
Finishing nuances: processing joints and corners
A universal corner is used for finishing corners. It consists of two plates made of chipboard and connected on the front side with a film.
- The corner is cut to the required length. Docking, if the top edge is being decorated, is done at an angle of 45 degrees.
- It is recommended to apply glue to the glue in two stages: light pressing so that the composition is distributed both over the cladding and on the surface of the corner, and then firmly with pressure.
- Remains of glue, if they do appear, are cut off with a painting knife after complete hardening. They are difficult to remove with cleaning agent or solvent.
Joints are finished in exactly the same way, if such a need arises. However, in this case it is necessary to carefully select the element by color.
Finishing MDF with boards is not a job of a high level of complexity and requires not so much experience as careful execution.
From an aesthetic point of view, it is not recommended to decorate both the ceiling and the walls of the room with slabs at the same time. Styles that involve such a solution are not implemented in city apartments. But for a balcony or loggia this is a completely acceptable option.
Pros and cons
The indisputable advantages of MDF include:
- a huge number of textures and colors;
- the strength endowed with wood fiber material;
- resistance to pathogenic causes: insects, fungi and mold;
- simultaneous creation of form-building and decorative surfaces;
- excellent insulating characteristics for noise and heat;
- low cost compared to other materials.
MDF ceiling panels are available in different sizes, which allows you to use them when developing the most unique interiors. Since the parts are fastened to a previously installed base, the ceiling made of MDF panels can be made in several levels.
The ability to significantly bend allows you to form unusual decorative and building elements.
MDF is a material that can be processed even with non-professional equipment. Ability to use a hammer, a hacksaw and a hammer drill, and the ability to install lightweight structures will be enough for a ceiling made of MDF panels to come out perfectly. Methods for connecting individual parts, integrating decorative and final parts into the finished surface, installing and fastening ceiling lighting devices are intuitive and accessible even to an inexperienced craftsman.
Required tools and materials
The dimensions of MDF boards allow you to calculate consumption with minimal losses. The thickness of the slabs is from 3 to 60 mm, depending on the purpose of the material. Along with ordinary MDF, there are laminated or veneered surfaces, the use of which can be used to advantage in the interior. Glossy or matte, panels for painting - almost any type of this material can be used for cladding the interior space.
What you need for work:
- Drill - hammer drill.
- Screwdriver.
- Building level.
- Wooden beams for sheathing.
- Profile for installation of drywall.
- Kleimers.
- Suspensions.
- Corrugation for laying electrical wires.
- Decorative slats and corners.
Do-it-yourself installation of MDF panels on the wall is carried out using a pre-assembled sheathing or adhesive. Panels of only small thickness can be glued; preliminary leveling of the concrete walls will be required (defects will affect the quality of fastening). Almost all types of MDF boards can be attached to the sheathing; the cladding will support the weight of shelves and furnishings installed after installation.
Installation of panels
The MDF ceiling is finished using 2 methods:
- Specific application of parts to floor slabs with the introduction of adhesive compounds.
- Fastening panels to a previously installed frame structure.
Option 1 is applicable if the ceiling surface is perfectly leveled and only final finishing is required. It’s clear how to strengthen MDF specifically to ceiling tiles. The material is secured to the previously prepared, primed and dried surface of the ceiling with watery nails or any other compound that can provide reliable fixation.
Before installation of the panels begins, it is planned to place ceiling lighting devices. Electronic cables are laid in advance.
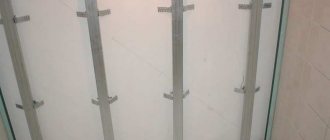
The 2nd method is the most common, but the most labor-intensive. The development consists of installing parts on a base assembled from a zinc-coated iron profile or from timber of a suitable cross-section. The wood base can become deformed under the influence of humidity and temperature, losing its original appearance. That's why the iron profile is better.
The frame is assembled using a technology similar to the installation of a drywall base. The difference is that the ceiling MDF has a width not exceeding 325 mm, so for fastening it does not require the creation of a checkered structure. The panels are laid perpendicular to the guides.
The PNP ceiling profile is fixed to the walls marked using a hydraulic or laser level. If the coating serves only to mask flaws, the distance from the top plate is chosen to be small. When developing multi-level structures or installing integrated lighting fixtures, the installation distance is adjusted to the required value.
PP ceiling profiles are fixed at the edges in the guides.
For additional fixation, so that there is no sagging of the canvas, straight hangers are used.
The installation density is determined based on the heaviness of the selected panels. Typically the distance is between 600 and 1000 mm. The average gap between ceiling profiles is taken to be 500 mm, less for lightweight types of panels.
More about the benefits of plastic panels
The finishing material is strong, durable, plastic, has good sound insulation, is moisture resistant, does not fade in the sun, and is easy to clean. Oddly enough, thanks to special additives, it is environmentally friendly, resistant to high temperatures, does not burn and does not emit unpleasant odors. Therefore, you can replace the usual electrical wiring with circuits that allow you to install LEDs, halogen, and spotlights.
Finishing the ceiling with plastic panels makes it possible not to pay attention to the unevenness of the ceiling surface. If pipes or wiring are visible, the panels will reliably disguise them. True, they will eat up to one and a half centimeters of the height of the room.
Final operations
Upon completion of the frame assembly, electronic cables are connected to the lamp installation locations. When choosing a wire, you should pay attention to the fire properties. MDF is a flammable material, therefore the wiring hidden under it must, in addition to having a sufficient cross-section, have proper insulation. Cables that have the NG index in their own marking, indicating increased non-flammability, are better suited.
How to strengthen MDF to iron profiles: the panels are fixed using specially designed parts - clamps. They are secured to a wooden frame with nails, and installed on a metal profile with screws. To prevent corrosion, choose zinc-coated fasteners.
The advantage of fastening with clamps over gluing is that the panels have free movement, which compensates for changes in size due to the action of water and heat. Another advantage is the ability to dismantle and re-install panels without damage.
The introduction of MDF materials for interior decoration not only creates a cozy and beautiful environment, but also reduces expenses for repairs.
Installation technologies
Important:
If the room for finishing MDF has been damp at least once, if traces of wetness, swelling or peeling of the plaster are noticeable, if the plaster is lumpy, uneven or its layer is more than 12 mm, then before finishing the MDF the plaster must be removed to the main wall. In any case, it is advisable to remove the plaster - this will reduce the cost of fastening and allow you to identify hidden defects in the walls. Of course, the baseboards also need to be removed.
Two technologies for installing MDF wall panels are used:
- On a wooden crate;
- On a frame made of special galvanized profiles.
Wooden sheathing is easier to make; it requires less hardware for fastening, but wooden slats, or even slabs, are more expensive than a metal frame. In addition, wooden sheathing requires preliminary impregnation against fungus, rot and mold. It is definitely not recommended to use wooden sheathing in damp rooms and brick houses: moisture and fungal spores can penetrate from the outside simply through the pores of the brick, and the cavities between the cladding and the wall are an ideal environment for the development of pests.
For a metal frame you will need UD (guides) and CD profiles. Both of them are U-shaped and differ only in their cross-sectional configuration. Sellers often offer mounting end switches (“ears”) and connectors for the CD profile. Their use makes sense when performing a large volume of work in a limited time. If you are decorating one or two rooms yourself, you can do without them. How will be described below.
Read more about lathing and its methods here.
How to properly make lathing for PVC panels from wooden slats?
For the internal wooden frame, slats with a cross-section of 20x20 mm are selected, this is the minimum. It is important that the slats are straight and even, without knots or cracks. It is quite difficult to remove a broken element from the frame and replace it with a new rail. The guide battens will be perpendicular to the installed panels, the step between the slats will be no more than 50 cm.
The first step is to assess whether the tree needs antiseptic treatment. As a rule, such treatment is required for plumbing rooms and kitchens, due to the high humidity of such rooms. Even before installation work begins, stacks of slats are untied, each is treated with an antiseptic composition using a brush or spray. It is advisable to carry out this treatment outdoors the day before installation - then the wood will dry out thoroughly and you will not have to inhale unpleasant fumes.
The impregnated slats are first placed around the perimeter of the ceiling or wall. The rectangle formed by four slats is the basis of the entire frame . When installing perimeter slats, you must use a level and plumb line and measure the “frame structure” several times before fastening. The perimeter will probably not fit tightly against the wall, so additional bars are placed between the slats and the walls (ceiling). Fastening is carried out with self-tapping screws into pre-drilled holes, fastening spacing is no more than 40 cm.
When a wooden perimeter has been created on all walls, additional guides are mounted to it in increments of 35-45 cm. There is also a trick here - every 50 cm, these long slats must be additionally attached to the walls or ceiling, otherwise the entire structure will sag. Use a heavy metal ruler to check the straightness of the guide rails by running it between the side perimeter posts.
The finished frame must be strong - even if not at the level of the sheathing for the lining, but without play or any irregularities. After filling the slats with plastic fittings (ends, corners, turns, etc.), you can once again evaluate the strength of the frame - and, if necessary, strengthen it with additional slats and screws. Then the PVC panels will slide freely onto the installation site, and assembling the plastic lining of the room itself will take a few hours at most.
How to make openings for windows and doors
To attach the plastic panel from the window to the corner, it is better to mount a horizontal profile. If the gap between the window sill and the wall is too small, then ordinary planks are used instead of a profile. They are glued to the wall using liquid nails. As the glue cools, additionally:
- foam the joints;
- When the material has set, the boards are attached to the wall using dowels.
The rail is installed vertically to the window in the same way.
To better fit the window, the panel is placed as follows. The part where the fasteners are screwed is cut off. This creates a beautiful factory edge. This edge is used to attach the panel to the window. That is, then there will be no need to design the joint, it will look complete. The other sides of the panels adjacent to the window can be trimmed:
- with cross-cutting with broach;
- on a regular tile cutter.
Door slopes are made in the same way.
