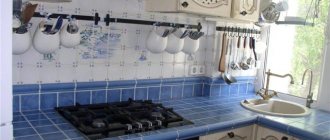
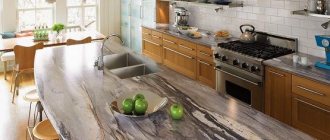
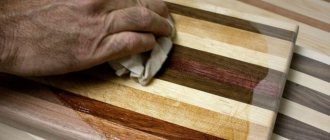
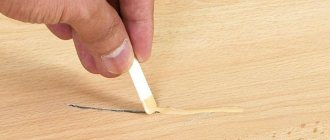
The kitchen is one of the places in the house where furniture is constantly in contact with water. As a result, the material wears out, and over time, swelling, cracks and chips may appear on it. Read on to learn how to protect your countertop from swelling.
When choosing a kitchen set, many first of all think about the facade, color, drawers, and the question of what kind of countertop should be fades into the background.
How to protect countertop joints from moisture?
In this article we will tell you about methods of protecting laminated chipboard countertops.
Countertops covered with plastic have a number of advantages:
• affordable cost; • variety of colors and textures; • color stability to ultraviolet radiation; • relative resistance to mechanical damage, thermal influences, food acids; • the laminated coating has no pores, therefore it is resistant to moisture and hygienic.
There are also disadvantages (but we will tell you how to deal with them): • the chipboard can absorb moisture and swell if there are parts left uncovered by the edge or the lamination has been damaged; • alkalis and concentrated acids can damage the lamination; cutting products directly on the countertop is also not recommended - scratches will remain, worsening its appearance and performance characteristics. • the board contains formaldehyde, a compound harmful to health. But in modern high-quality chipboards, its content and emission are minimal, and sealing all open cuts prevents its release;
How to make a seamless wide tabletop with plastic coating with your own hands
During the holidays, mothers and grandmothers have to spend all day in the kitchen. Things go faster if everything is at hand. And everything is at hand when the cutting table, stove and sink are conveniently located and united by a wide, solid tabletop.
Today we have heard a lot about “kitchen islands” covered with marble or granite slabs. At furniture exhibitions and at friends’ houses, we touched countertops made of artificial cast stone and saw mosaic cladding. Everyone knows laminated chipboard countertops with their undeniable advantages. But there is a more interesting idea. A solid tabletop can be constructed from non-laminated chipboard or MDF and covered with sheet decorative plastic. It's not as difficult as it seems. It's worth trying to get the perfect exclusive.
Protection measures:
Silicone sealant
To prevent swelling of the tabletop and increase its service life, it is recommended to treat all undercuts and all kinds of joints with a special silicone sealant. It can act as an independent method of water protection, or in combination with other components.
When drying, silicone sealant forms a protective film that prevents moisture penetration. Most often, a thick layer of sealant is applied to the joint between the countertop and the wall, cutouts for the sink and hob purchased in our store.
Source
The advantages of such a homemade countertop
The proposed technology has two advantages. Firstly, you can create an absolutely seamless front surface even with an angular location of the working area - this effect cannot be achieved with laminated chipboard. Secondly, the decorative range of sheet plastics is generally disproportionately wider than that of ready-made laminated countertops. In addition to plain items and traditional decor imitating wood or natural stone of various species, unexpected geometric patterns, animal prints and textile motifs are offered. Install the countertop yourself and feel a pleasant sense of pride in your work!
TOOLS FOR HOME AND GARDEN, HANDCRAFTS, ETC. PRICES VERY LOW
When processing the countertop and the upper edge of the apron, the router guide will move along the laminate, and it is very important that the tool does not stop. When it stops, the cutter will go deeper into the laminate. To avoid damage, you can lubricate the edge of the surface with petroleum jelly.
What sealant to use for the bathroom, kitchen and other surfaces: a detailed guide
Moisture is destructive to most building materials and furniture. To protect them, special means are used. They prevent water from reaching moisture-sensitive surfaces. Their range is very wide. Let's figure out which sealant is best to use in the bathroom, kitchen and other rooms.
How to cut with a circular saw
The tool can make long cuts, but during operation more chips are formed (compared to cutting with a jigsaw). You will need a saw blade with fine teeth.
You should work with electrical appliances carefully.
As a rule, the side where the teeth cut remains clean, but chips appear on the opposite side.
You should start cutting from the front edge (facade) to avoid chipping on this part.
It is more convenient to work with a saw fixed on the table. This way you are not busy with the tool and you can use the guide. This will increase the cutting accuracy and allow you to make several parts.
Use tools correctly.
Chips that form after cutting can be processed with a file and sandpaper.
Types of sealing agents
The sealant is used for sealing cracks, crevices and voids, sealing connections and utilities, installing plumbing, flooring, and other similar operations. The quality of the work performed depends on the correct choice of the drug. They differ in purpose, method of use, and chemical composition. Let's list the main types of mastics.
Acrylic
A mixture of acrylate polymers. A budget-friendly and reliable option for indoor use. After hardening, painting with acrylic dyes or applying varnish is possible. Available in tubes of 350-500 ml. After installation, the film forms within 15-17 minutes. Complete hardening occurs within a day.
Advantages
Flaws
There are moisture-resistant and non-moisture-resistant acrylic mixtures. The latter cannot be used in damp areas or in direct contact with liquid. Moisture-resistant pastes are inferior in characteristics to analogues with other compositions. Therefore, for rooms where humidity is always high, other mastics are chosen.
Silicone
The basis of the mixture is silicone rubber, which is an organosilicon polymer. In addition to it, the composition contains fillers that improve adhesion to various substrates, fungicides, extenders, and dyes. There are two- and one-component products.
Types of single-component products
Advantages of silicone mastics
Flaws
Polyurethane
It is made on the basis of polyurethane, a synthetic polymer with high elasticity.
pros
Minuses
Hybrid
This is the so-called MS or SMP mixture. Their basis is polyurethane, into the structure of which a silanol group is introduced. This significantly changes its properties. The result is a kind of hybrid of silicone and polyurethane, which has the advantages of both materials.
Advantages
Flaws
We have not listed all types of sealants. There are also ticol, rubber, bitumen, butyl rubber and others. They are used for outdoor and special works. They are practically not used in everyday life.
Table of characteristics of compositions for processing wooden countertops
| Name | pros | Minuses |
| Oil |
|
|
| Oil-wax (for interior and exterior work, transparent and colored) |
|
|
| Paint (enamel) |
|
|
| Varnish |
|
|
| Azure (composition with the properties of varnish and impregnation at the same time) |
|
|
For wood with a pronounced structure, a transparent coating is suitable
Which sealant is better to choose for the bathroom and shower?
In order not to make a mistake, you need to choose the material “for the task.” And understand that different mastics are used for different purposes, even if you have to work in the same room. According to professionals, the best option for sealing the joints of a shower tray or bathtub with a wall is MS paste. You can choose polyurethane or silicone mastic, but only those that contain antibacterial additives. The packaging will be marked “sanitary”. They are also good for aquariums.
To treat cuts and edges of furniture or countertops, preparations with silicone are used. Even inexpensive acidic ones will do. They will protect the wood well from excess moisture. For gluing decorative elements or mirrors, neutral silicone compounds are chosen. It is best to glue the fallen off cladding using MS solution or polyurethane. They are elastic, fix the tiles well, and hold them securely.
A difficult task is processing seams in the bathroom of a wooden house. If the walls are covered with moisture-resistant plasterboard, and this is most often done, the joints must be sealed. Considering that the wood “plays”, a sufficiently elastic material is needed to fill the gaps. A product based on MS polymers or silicone is suitable. The latter is much cheaper.
The treatment of plumbing connections is carried out with a preparation of suitable composition. This should be determined by the material from which the communications are made. So, for metal-plastic or plastic, any silicone mastic, including acidic ones, is suitable. For cast iron or steel, neutral mixtures, polyurethane and with MS polymers are best. The last two work well as glue. They are used, for example, to strengthen the fastening when installing toilets.
Source
Can I cut with a jigsaw?
The tool is suitable for making small cuts. You will need a tool for working with metal, with fine teeth. The cut is made along the front side: this way there will be fewer chips on it, and there will be small irregularities on the back side.
When working with a jigsaw, the cut is made from the reverse side due to the direction of the teeth on the file.
When working, the tool is not set to maximum speed, but slightly above average. The tool must be moved with smooth movements, with light pressure.
Important! The method is not suitable for cutting long materials, since it is difficult to maintain an even cut line.
Dull saws need to be replaced.
Features of protecting kitchen furniture from water
There are always risk areas in kitchen furniture that need to be monitored especially carefully. This is a cabinet with a dryer, a sink and a cabinet with a washing machine. They are often the reason for repairs or replacement of the headset. When purchasing, it is better to give preference to moisture-resistant material. However, the manufacturer only provides a guarantee for a solid tabletop. First of all, the correct selection and installation of furniture is important.
Correct installation of sink and faucet
When purchasing a sink, you should pay attention to the feature of the locking connection. The locks should snap onto the tabs and not just click. When installing, it is advisable to use silicone sealant. When drying, it forms a protective film that protects against moisture. A thick layer of sealant is usually applied to the joint between the countertop and the wall and the cutout under the sink. The sealant is easy to check for quality. To do this, leave the drop at room temperature for three hours. If it has frozen and does not leave marks on your hands, then the product can be safely used at work.
Note! Experts do not recommend embedding the faucet directly into the countertop, as the faucet will sooner or later begin to leak. This will cause the surface to swell. An exception is made for drinking filters.
Drying installation
When choosing a dryer, you should pay attention to whether the set includes a tray. If it is not provided, then water draining from the dishes will fall to the bottom of the cabinet, which will subsequently lead to swelling of the surface. Good ventilation of the dryer is also necessary. To do this, make a small hole in the cabinet, which is designed in the form of a socket for the wire.
Kitchen plinth protection
When choosing a kitchen plinth, it is better to give preference to plastic. The panel will close the gap between the cabinet and the floor. The design is equipped with grooves for fastening to supports and a seal that protects against the ingress of water and dirt. The advantages of the plinth are as follows:
Protecting the edges of the tabletop
It is better to cover the edges with special strips, the choice of which depends on the installation method. The end is pre-treated with silicone. One of the popular techniques is to apply several layers of paraffin, PVA glue or varnish to the sections. Some people use self-adhesive tape or wide tape.
Processing joints and edges
Water always looks for the lowest place, the depression. And what, if not a recess, are joints on horizontal planes? There are especially many such joints in cabinet furniture, which is made from chipboard. Kitchen furniture in general is like on the front line: there is plenty of water and enough evaporation. The most susceptible to moisture are the sink, cabinet with dryer, countertop, and furniture near and above the stove.
The taps all start to leak at some point. So, the most potentially dangerous place in the sink is where the faucet crashes into the countertop. This is the point of contact between metal and wood. It is possible not only for the faucet to leak, but also for water to condense at the contact point. Therefore, this place is cleaned and dried with a hairdryer. Next, a layer of PVA glue is applied, after which it dries - silicone. You can use construction sealant, this is also a silicone mass; it even seals window frames against leaks.
The edge not only protects the chipboard from moisture, but also reduces emissions of harmful substances
In the dish cabinet, you should check the presence or absence of a tray: if it is not there, the liquid, flowing to the bottom of the cabinet, will ruin it. For all kitchen furniture where it is possible to get wet, you need to make it a rule: degrease this area and then do not skimp on the sealant.
To seal the seams, it is better to use sanitary silicone of a suitable shade: dark mold spots will not appear on the surface.
Non-laminated edges of the tabletop are covered with connecting or end strips. They come in metal or plastic. The protection is not so great, so the end of the tabletop should first be treated with silicone. Another method of protection is to apply furniture varnish or PVA glue to the cut area. Self-adhesive films or tape offered by the construction market cannot be called reliable protection.
How to coat and treat chipboard from moisture
Due to its low cost and good performance properties, chipboard has become a very popular material. The main enemy of these plates is water. After all, sawdust increases in volume when wet and the base wrinkles. Next, we’ll look at how to increase the moisture resistance of the material.
The first step towards moisture resistance
Even at the production stage, the process of resinizing the chips is carried out. Thanks to this, the fibers are saturated with resins and glued together. Formaldehyde resin itself is already a hydrophobic component of the product. A stronger substance is urea-melamine resin. The moisture resistance of chipboard is increased by the introduction of paraffin or its concentrate into the chips.
Surface treatment of plates
It will not be superfluous to process the front and back sides of the slab. One of the effective techniques is lamination. A melamine film is laid on the treated board under high temperature and pressure. As a result, the film forms a single block with the plate. At home, chipboard is painted in several layers, following the following steps:
Important! Each subsequent layer of paint is applied to the completely dry previous one.
Processing joints and edges
Before processing, the joint should be cleaned and dried with a hairdryer. Next, a logical question arises: what is the best way to treat the edges of a chipboard tabletop so that they do not swell. PVA glue or sealant will come to the rescue. In places where there is no lamination, end and connecting strips made of metal and plastic are fixed.
Sealing chipboard joints on the floor
Floor slabs are regularly subjected to great physical stress and tend to move relative to each other. Therefore, putty does not help in this case. The seams are treated with a mixture of epoxy and crushed sawdust. The composition hardens instantly, so it is better to make a small batch. You can make a mixture of hot glue and sawdust. The glue penetrates deep into the porous structure and the joint stops moving. This is one of the budget and reliable methods. True, the glue takes a long time to dry and it’s better not to walk on the floor for a couple of days.
How to treat a wooden tabletop
- It is safer and more reliable to cover a solid wood tabletop with bio-impregnation - a mixture of vegetable oils and beeswax. The high-quality impregnation composition can withstand high humidity, temperature and mechanical stress, as well as ordinary, not too aggressive detergents.
- You can choose pure oil, without adding wax, but the coating will have to be renewed frequently and grease stains will leave marks on it. If you need a glossy surface for a wooden tabletop, it is better to use glaze.
- Varnish and paint are suitable for garden furniture, but not for kitchens.
- Film is a saving option for a table made of wood-based materials, but sticking it on a tabletop made of natural wood is a crime.
On a note! Oil and wax are produced for different types of wood. This needs to be taken into account when purchasing.
Oil and wax mixture
Sometimes this coating is called wax, without mentioning oil. In addition to environmental friendliness and moisture-proof properties, the plastic mixture has other advantages:
- the consistency resembles a viscous varnish;
- easily distributed over the surface;
- does not create a glossy film;
- resists fire well.
Most often, refractory carnauba or light beeswax is used for countertops. The first gives the tree reliable protection, but is difficult to apply. The second one is easy to rub and gives the wood a soft shine, but the protection against damage is not so reliable; at high temperatures the wax begins to melt.
Coating can be applied with a brush or lint-free cloth
Waxes are:
- colorless, they make the tabletop a little whitish;
- compositions of natural color give a slight effect of wet wood;
- decorative ones are suitable for dark wood or to darken a countertop.
The coating is safe and decorative, but it is not very easy to apply. First you need to prepare the surface of the wooden countertop:
- remove the old coating, if any;
- sand the wood with sandpaper, starting with coarse grain and ending with fine grain number 240, 320.
The wax-oil layer dries for several days, then it is sanded and the coating is applied again. The work is repeated 3-4 times. If you finish with hard wax and rub it well, the surface will receive a noble, muted shine.
On a note! Liquid coating is great for new wood or countertops with minor scratches. Severe damage or cracks should first be filled with hard wax, and then the entire countertop should be covered with impregnation.
Oils for coating wooden countertops
Pure vegetable oil is the safest way to treat a wooden countertop:
- tung protects against mold, rot, insects, penetrates deeply into the wood;
- tar - a natural antiseptic;
- linen is suitable for all types of work, penetrates deeply into wood, and repels moisture well;
- teak – universal protection for any wooden surfaces.
Natural oils protect wood from damage, parasites and natural influences; there are vegetable, mineral and combined ones. To enhance the properties, solid particles in the form of crumbs or solvents can be added.
Azure – double protection for wood
There are several types of azure:
- oil;
- water soluble;
- with an aggressive solvent.
Based on the thickness of the layer, they are distinguished:
- Thin-layer glaze - has a liquid consistency, does not form a film, and is suitable for furniture prone to deformation.
- Thick-layer - the hard composition hardens into a film, suitable for interior decoration.
- Medium layer - an intermediate coating option. Azure is well absorbed into wood and forms a thin, breathable film.
Water-soluble compounds are safe for health. They can be used in a children's room and other living spaces, in a bathhouse or sauna.
Attention! Azures with aggressive components can cause allergies. They can only be used outdoors.
The glaze gives the tabletop a slight shine
Plastic countertop repair
To remove cracks and chips, you can use a special fastening glue for plastic, which is applied with a gun. If the surface is not badly damaged, regular superglue will do. To cover the flaws, the plastic is ground to a powdery mass and mixed with glue. The resulting mass is used to fill the chips.
Additional Information! For large tables it is worth buying Titan glue.
Tips for making countertops
It is possible to cut the end cladding with metal scissors, but it is difficult. It will be perfectly smooth only with a certain skill. You can use ready-made end tape, or get a special tool. The laminate cutting machine comes with a guide for making strips with a width of 1.25 to 11 cm. A milling cutter will also help.
It is convenient to cut out the cladding of the table top from HPL sheets with a circular saw. Place a board under the sheet to prevent the saw from touching the floor. Place masking tape on the bottom surface of the saw base to prevent scratching the laminate.
HPL adhesive is very toxic, be sure to use a respirator, keep the window open and turn on a fan. The glue is applied to both surfaces to be joined (clean them thoroughly first). Apply glue along the perimeter with a brush, and then spread it over the rest of the area using a piece of laminate.
Laminate adhesive sets instantly; Once two coated surfaces touch, they cannot be separated. But it is difficult to lay a large flexible sheet accurately and accurately. Cut the remaining laminate into strips and use them as dividers so you can slide the laminate sheet along them.
If you are replacing the tabletop on factory-assembled tables (stands), the chipboard base will need to be raised. Use slats as linings or cut 1.9 cm thick chipboard blocks. Then the top drawers will not touch the countertop. Instead of pads, install a board at the junction of two tables.
Cut the hole for the sink after installing the chipboard base. But before you lay down the plastic cladding!
Before installing the chipboard base, cut a groove 0.6 centimeters deep in the apron, which will allow you to move the sheet along the tabletop.
TOOLS FOR CRAFTSMAN AND CRAFTSMAN, AND HOUSEHOLD GOODS VERY CHEAP. FREE SHIPPING. RECOMMENDED – 100% CHECKED WITH REVIEWS.
Below are other entries on the topic “How to do it yourself for a homeowner!”
Subscribe to updates in our groups and share.
Let's be friends!
3 reviews
From time to time you have to cut laminated chipboard. To ensure that the cut comes out smooth and without chips, I use the following techniques. The grinder is a universal tool; it can cut almost anything. To get a beautiful edge, without cracks or chips, when cutting, I turn the laminate board with the front surface up. I use discs for metal, concrete or ceramic tiles. The disadvantage of using an angle grinder is the large amount of dust that is released during cutting and the smell of burnt wood, so it is better to work on a balcony or outside. Hacksaw. I don’t use the usual one for wood - its teeth are large and “bite” into the slab, rather than cutting it, leaving decent chips along the edge. I use a hacksaw for metal - it has finer teeth. I use these techniques for small volumes of work, but if there is a lot of cutting, it is better to order cutting from a specialized company.
How to care for furniture made of chipboard and mdf so that it lasts a long time?
First of all, you need to take care of the correct arrangement of furniture in the room. You should not place it near heating devices and use it in rooms with temperatures below 2 “C. The relative humidity in the room should be maintained between 45 and 70%. Do not place hot objects on the surfaces of parts and allow prolonged exposure to sunlight. The durability of furniture depends on the quality of the initial assembly, which must be done by a professional. To remove various contaminants from the surface, use special compositions for cleaning furniture. During operation, it is worth periodically checking the reliability of all connections and the condition of moving parts (doors, drawers, etc.), and if necessary, perform broaching. Do not overload the shelves inside cabinets and cabinets, especially if the former are made of glass.”
Helpful tips for preventing swelling
Be sure to take advantage of the kitchen assembly service. Otherwise, the company will withdraw its warranty obligations. It is necessary to take care of the installation of the hood. It will not only get rid of unpleasant odors, but will also protect furniture from condensation, steam and grease drops. Remove moisture from the surface in a timely manner and do not leave it wet overnight. Otherwise, the material will begin to swell. The base can be rubbed with stearin and then heated with warm air. After cooling, repeat the procedure several times. You can make a coating from a mixture of bitumen varnish and drying oil in a ratio of 1:5.
Sometimes repairing an old countertop is more expensive than buying a new one. To extend the life of furniture, it is important not only to install it correctly, but also to properly care for it in the future.
Do-it-yourself tabletop - work progress in the photo
1. Having cut out the necessary parts from chipboard (apron, tabletop, lining) to size, fasten them together. The master did this using a construction stapler, with 0.6 cm staples 3 cm long at a distance of 12.5 cm from each other - no glue is required in this case.
2. The standard hole for the sink is 54 x 82 cm. But perhaps you have a different one? Before grabbing the tool, measure its dimensions and draw an outline with a pencil.
3. The surfaces of the chipboard base parts may be at slightly different heights, but the joint must be perfect. Apply a few pencil strokes to the joint and sand it until the pencil marks disappear.
Questions and answers
Question: What to do if the countertop is swollen?
Answer: It would be correct to replace it, completely or partially. If the swelling is small, you can try to resort to restoration: straighten the canvas by squeezing it with a clamp through plywood or another gasket, pick out the swollen sawdust, dry everything thoroughly and fill the excavated cavity with epoxy resin.
Question: Which countertop is the best to maintain?
Answer: Different countertops have their own care requirements. Caring for artificial stone and laminated countertops is approximately the same. Natural wood and stone are more demanding. Mirror stainless steel will also require a lot of attention - it will leave noticeable handprints and water stains.
The durability of a countertop depends on many factors. First of all, this is the quality of the material and the correct assembly of the set (installation of the sink, installation of the dishwasher). The next point is proper care. It is important to understand the characteristics of the material and not to use dubious means. The best choice is special chemistry and impregnations. Don't forget about cutting boards and hot pads. Then the countertop will serve faithfully for many years!
How is the work going?
First of all, you need to prepare the place of work. It should be well ventilated, the furniture nearby should be covered with a cloth so that dust does not fall on it when cutting. It is also necessary to protect your hands, eyes and respiratory organs: use a respirator, mask or goggles, closed clothing.
Source nikastroy.ru
Having decided what to cut the decorative stone with and having prepared, you can get down to business. The cutting process consists of several steps:
- First, you need to place the artificial stone on a solid and level surface from which it will not move, and secure it. It is important that the cut part falls on the floor or the master’s foot and does not break off on its own, leaving the edge uneven.
- Then apply the markings with a pencil or using construction tape.
- Next, using a grinder with a diamond blade, saw through the tabletop. If its thickness is greater than the diameter of the saw blade, make a cut, then carefully break off a part along this cut. When using a hacksaw, you usually cut right through.
- At the end, the cut is ground and cleaned if necessary.
To drill stone, use a drill, screwdriver or hammer drill. The latter is especially effective in operation. If desired, you can cut the stone using these tools: just make holes along the cut line and break the blade. However, experienced craftsmen do not recommend doing this, since the cut turns out uneven, with notches.
Source stonecraft24.ru
