Time-tested quality
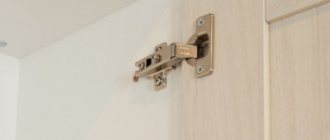
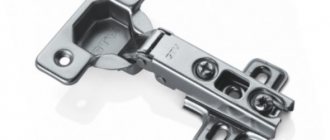
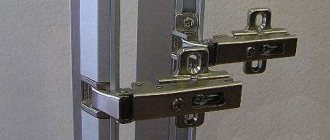
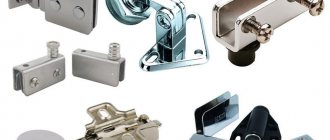
Furniture hinges from Blum are designed to connect the door to the cabinet body. The huge assortment that can be found in the store allows you to choose absolutely any opening angle. And if you want everything to work silently and smoothly, then you should additionally consider closers.
In their production, only high-quality materials are used, which ensure a long service life. The manufacturer guarantees over 200,000 openings/closings, which is approximately 20 years of operation. For installation and adjustment you do not need to have special tools or knowledge. Even a beginner can handle it.
Analogues of Blum fittings
Quite often, kitchen furniture manufacturers are faced with the problem of choosing fittings. Blum is considered the best manufacturer on the market. It is widely known, not only among manufacturers, but also among customers, and is famous for its quality, but the cost of the products is quite high. Let’s take a closer look at the cases in which you can save on fittings and turn to bloom analogues.
Why Blum is the best fittings
Blum is an Austrian company with more than half a century of history. Despite the extensive accumulated experience, the company is constantly moving forward and developing. She owns the latest developments in improving the ergonomics of the modern kitchen space. It creates trends, and other manufacturers have to follow the example and release something similar.
The main advantage of blum fittings over analogues is their high quality and wide range of products. While it is still possible to achieve a high level of production in highly specialized production, developing a diverse product range is much more difficult. That is why it is much more convenient to equip kitchens with blum products; you can purchase all the necessary mechanisms from one supplier and not worry about quality. Yes, this approach will help save time, but the cost of the kitchen increases.
Blum Alternatives
When starting to choose an alternative, we first classify the main systems used in kitchen sets:
- lifting mechanisms;
- extension mechanisms;
- loops;
- guides;
- storage devices - baskets, trays, partitions, holders and rails.
While you can save money on simple retractable systems and hinges by using high-quality Chinese analogues of blum, lifting or silent mechanisms of comparable quality and design are difficult to find even from European manufacturers.
Let's look at blum's main competitors on our market.
Hettich – Germany
Hettich has been on the furniture fittings market since the mid-20th century. The manufacturer has several of its own engineering solutions that are iconic in the furniture industry, such as drawers with double sides and a vibration-suppressing pull-out mechanism. The company's products are of high quality, but less known and advertised in Russia.
How to choose
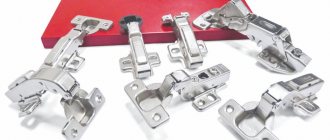
When you come to the store, it can sometimes be difficult to make a choice. The main problem for many people is the way the loop is applied. If you are not particularly versed in them, then it is worth getting acquainted with the main classification:
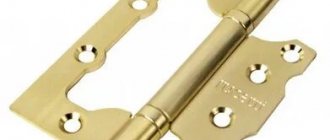
- invoice;
- semi-invoice;
- loose-leaf.
When everything has become more or less clear with the view, it’s worth deciding which line of Blum hinges to choose.
How to fix a broken door closer
Small hinge, overhead or mortise mechanisms usually cannot be repaired when broken . They are dismantled and replaced with new devices.
To extend the life of your mechanisms, do the following::
- protect against corrosion if the product is steel (remove rust, treat with an anti-corrosion agent, for example, WD-40);
- If squeaking occurs, lubricate with machine oil or silicone grease;
- check and tighten fasteners.
Lifting mechanisms are more complex and have more parts in their structure . Lifts can be disassembled into spare parts and replacement parts can be selected for them.
Repair is available in the following cases:
- Oil leak. Locate the leak. If it's a small crack, fill it with caulk. Add leaked oil through the holes for the adjusting bolts. Synthetic motor oil or shock absorber fluid will do.
- Try to repair detected cracks and breaks by welding. Level the weld seam to the surface by grinding it.
- If the closer rod is bent, straighten it with a hammer. Try to use moderate force to avoid damaging the part.
The lineup
Today, several varieties are found in construction stores.
Modul Series
This is the most standard model. Does not differ in any special characteristics. They have no advantages, but the following disadvantages are present:
- no built-in closer;
- it is impossible to separately install the automatic finishing mechanism;
- for installation you need to have special tools;
- To open cabinets with such hinges, handles must be present.
The price range for door hardware of this type is not high.
Clip/Clip-Top Series
Convenient to adjust and install. The model has the following positive aspects:
- equipped with an additional door closer;
- It is possible to install without tools.
Along with the advantages, there are disadvantages:
- there is no built-in closer (the complication is that you need to choose it correctly and install it yourself);
- the door on which such a hinge is installed cannot be opened without a handle.
Clip Top Blumotion Series
If everyone in your family likes to slam doors, then this model is worth considering. There are several positive aspects:
- the device has a built-in closer;
- Easy and quick installation without tools.
But such a mechanism is not suitable for using furniture without handles.
A wide range of subspecies of this series can be distinguished:
- for glass, profile and folding doors;
- standard with different shoulder curves;
- for false panels;
- for aluminum frames;
- structures with an angle from -50 to +50 degrees;
- models with a large opening angle;
- mini loops;
Tip-on series
If you value the highest comfort when using furniture, then you can consider this series. They will open silently and easily. Among the advantages are:
- easy installation without tools;
- several color options;
- can be used for doors without handles (they open with a light touch).
There is one minus - there is no built-in door closer and the ability to insert it. But in reality this turns out to be an insignificant drawback, which is easily compensated for by everything else.
Selection and installation of closers - so that kitchen cabinets close quietly
Closers for kitchen cabinets are a whole family of modern furniture fittings. Such mechanisms ensure smooth closing of facades without noise or unnecessary effort on the part of humans. Naturally, their use makes the use of kitchen furniture more comfortable and increases its service life. This is especially true for doors with glazing, for which sharp impacts are strictly contraindicated.
The classification of closers distinguishes them by the type of working fluid (oil or compressed gas), as well as the scope of application. Naturally, different mechanisms are needed for hinged, folding facades and drawers.
Oil closers with spring mechanism
No, we are not talking about Soviet tight springs that slammed the doors shut with all their might. Modern kitchen closers are a spiral in a sealed sleeve filled with viscous oil or liquid silicone. Special valves on the mechanism body allow you to adjust the resistance of the medium to the movement of the spring, which in turn affects the speed and force of closing the door. These models are quite reliable, but they are not cheap.
Oil closers are designed in such a way that even if they fail, the working medium cannot leak out of them. This type of mechanism is used for both kitchen fronts and drawers. The latter usually come already built into the system of guides along which the box slides, and are completed with a supporting bar - a trigger.
Installation and adjustment
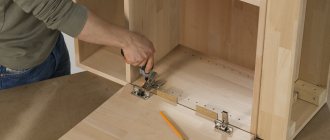
You can even install it yourself using step-by-step instructions:
- Prepare the doors with the holes and hinges already made.
- Insert the fittings into the recess so that they fit snugly. Lower the latch.
- Screw the inside (back) part of the hinge.
- We insert the door into the cabinet and secure it with a special latch.
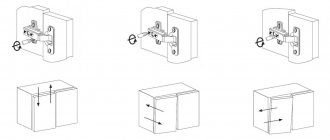
- If there is a need to adjust the height, width and pressure, then there are three bolts for this. To work you will need a Phillips screwdriver.
With these simple movements you can install furniture hinges.
The video instructions describe in detail how to install and mark furniture hinges.
ADJUSTING POWER MECHANISMS
After installing the lifting mechanism, it is necessary to adjust the power so that the open facade is in balance in any position. Those. did not fall under its own weight and did not “fly up all the way” without additional effort. When opened, the facade should remain directly in the place where you released it.
Power adjustment is carried out by a special screw on the power mechanism. To increase power (if the facade closes under its own weight), the screw rotates clockwise, to decrease it, counterclockwise. It is recommended to adjust the power of the power mechanism using a screwdriver. The position of the screw depends on the type of lifting mechanism.
AVENTOS HF
AVENTOS HS
AVENTOS HL
AVENTOS HK
AVENTOS HK-S
AVENTOS HK-XS
How to install a door closer yourself
Installation of complex, expensive shock absorption systems such as electric lifts should be done by professionals. Any home craftsman can handle the installation of simpler and more common structures.
The easiest way is to attach special loop closers to furniture hinges .
The arm or bowl of the hinge must have special grooves , the closer is placed on top and snaps into place.
If the hinges are not suitable for fastening shock-absorbing devices , use cabinet or mortise closers.
Installation of a cabinet closer
The cabinet closer is installed in close proximity to the furniture hinge . Placement in the middle, between the loops, is allowed.
How to install:
- For convenience, remove wall cabinets from the wall. Place the piece of furniture on the floor or table.
- Mark where the device will be fixed, put dots in the places of the proposed holes.
- Drill holes for the mounting bolts. For self-tapping screws, puncture the surface with an awl.
- Screw the base of the closer with self-tapping screws or bolts.
- Check if there is any interference when opening and closing the doors.
- Hang the cabinet in place.
Surface-mounted body closers can be equipped with a limiter . It is applied to the edge of the part and the device is immediately secured with self-tapping screws without preliminary marking.
Mortise devices
Mortise closers are mounted at the end of the side part of the cabinet opposite the door . For wall cabinets, choose the top or middle part of the part, for floor cabinets - the bottom. Installation proceeds as follows :
- Mark the installation point of the closer at the end of the part. Make a small hole with an awl.
- Using a drill corresponding to the length and thickness of the closer rod, drill a hole to the appropriate depth.
- Insert the mechanism into the hole.
It is better not to use glue or sealant for fixation . They will create difficulties during dismantling in case of breakdown. The closer will not move or fall out without additional means of fastening.
Gas lift installation
Operating procedure:
- Mark with a pencil the installation locations for equipment fastenings.
- Pre-drill holes for mounting bolts. If you use self-tapping screws, you don't need to do this.
- Having attached the fasteners to the intended places, secure them with screws or bolts.
- Insert the closer mechanism into the fastening holes and click into place.
Adding furniture hinges: step-by-step photo instructions
Today I will discuss in detail such a frequently encountered issue as the addition of cup furniture hinges (“frog hinges,” as they are sometimes called). Let's analyze this process using the example of installing a facade on a kitchen box under a sink. This box uses inexpensive, quick-installation hinges with integrated closers.
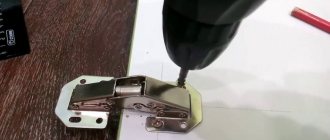
First we attach the mounting strips. To do this, the loop is disassembled. We mark and set aside the following dimensions from the bottom of the box: 100 mm (center of the lower hinge) and 600 mm (center of the upper hinge). We put pencil marks at these levels.
From them we set aside a perpendicular of 37 mm from which 16 mm in each direction (16+16=32). It is advisable to drill these points with a thin 1 mm drill. I apologize for the quality of the photo. I first screwed the bar, and only then remembered the need to take a photo, which is why the holes have such an unsightly appearance.
Using a pair of self-tapping screws, we attach the mounting strip to the box post. It is advisable not to tighten the screws, as adjustment will be required later.
Now we move on to a more important moment - adding facades.
On the back side of the facade (be sure to decide before marking where bottom is top, and right to left, so that it doesn’t hurt later) we also set aside the above-mentioned 100 and 600 mm from the bottom corner.
I do not remove the protective film from the facade, so as not to damage it later during transportation - do not pay attention to it.
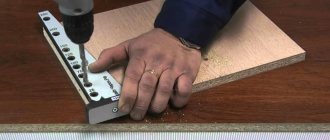
We mark the hole for the cup 21.5-22 mm from the edge. And the holes for fastening the hinge are 24 mm on both sides from the perpendicular and 27 mm from the edge (I forgot to note this size in the photo). We prick these points with an awl.
I will dwell on the tool for drilling such holes in a little more detail. It is called a Forstner drill (or cutter). We need a diameter of 35 mm. Pay attention to the central tenon, which ensures that the drill is centered relative to the axis. It can be long (matte drill from Globus) and short (yellow Anchor).
- In the first case, it holds better on the workpiece, that is, the risk of the cutter moving during initial drilling is lower, but the risk of pushing through the front side with this tenon is higher.
- In the second case, tilting during initial drilling (this is true for people who will drill with a simple drill) can lead to the drill breaking off and scratches on the inner surface of the facade, but the risk of pushing through is less.
Personally, I would advise you to look for the second option and ALWAYS practice on unnecessary parts.
Now the drilling process itself. Option one is drilling using a drilling machine (I must say that this is the ideal option). We set the guide, set the center of the workpiece under the center of the drill, and try it on.
Then we drill to a depth that is limited by the stop-limiter. The risk of damage to the facade tends to zero. And the output is these neat holes of the same depth. Moreover, with a minimum amount of dust (pay attention to the vacuum cleaner pipe behind the drill).
Now let's look at a more common (household) drilling option - using a simple drill. This requires great care, but, in general, there is nothing complicated either. During initial drilling, the drill should be held strictly vertically, controlling this process along the circle, which is cut by the scoring knives of the cutter.
As soon as the cutter has penetrated 2-3 mm into the material, it will no longer move to the side, and you can relax a little, but it is advisable to still maintain the angle. As a rule, you need to stop when the cutter goes into the material at the level of its upper platform, but still practice on scraps first. You can drill in several stages, checking the depth with the hinge cup until you reach the desired depth.
The result should be a hole like this for the hinge cup and another couple of 1 mm holes for the mounting screws.
Insert the loops into the holes. To align them with the edge of the facade, we use a long straight object (I have a piece of chipboard, or a second similar façade or a ruler), which supports the hinges in front.
This trick allows you to accurately position the hinge strictly perpendicular to the edge of the facade (this can be clearly seen from the position of the mounting holes that we marked earlier).
We fasten the hinges with a couple more screws.
Now comes the stage of hanging the hinges on the mounting strips.
Here I suffered trying to hold the façade with one hand and also photograph the process)).
We apply the facade to the installation site (you can put something underneath it or hold it with your foot, as I did) and place the loop on the bar in front and snap the lock into place. If you have simple cheap hinges, then they are also wound from the front, but the hinge body is wound under the screw that is on the bar. By tightening the latter, fixation is made.
The same manipulations are repeated with the remaining loops. In principle, the facade is already fixed.
All that remains is to position it on the sides of the box, that is, to make adjustments. Cup hinges are adjustable in all three planes.
By loosening the screws securing the mounting plate to the box post, we are able to move the façade up/down by 1-2 mm. Then we tighten the screws back.
By tightening and unscrewing the adjusting screw located in the front part of the hinge, we move the facade left and right. In this way, you can tilt the facade in one direction or another (by changing the position of only one hinge or twisting them in different directions).
Finally, by loosening and tightening the rear screw, we move the front back and forth.
As a result, we should end up with something similar. Photo of the final with the facade open.
And with it closed. It can be seen that the edge of the door is parallel to the edge of the frame (that is, the adjustment was carried out correctly).
And finally, let’s figure out how many loops need to be hung on the facade. After all, it is clear that for large doors a pair of hinges will simply not be enough. The quantity depends on the size and weight of the facades. For clarity, I will give this diagram.
Please note that weight can vary greatly depending on the materials used.
Various lifting mechanisms from Blum.
- Folding lift AVENTOS HF : the facade folds and rises to the top.
- AVENTOS HS folding lift : the one-piece front is folded over the body.
- Vertical lift AVENTOS HL : a solid facade rises upward parallel to the body.
- Rotary lift AVENTOS HK : the solid façade rotates upward.
- Small rotary lift AVENTOS HK- S: the solid front turns upward.
Complete information on AVENTOS.
AVENTOS HF: complete information, installation instructions.
AVENTOS HS: complete information, installation instructions.
AVENTOS HL: complete information, installation instructions.
AVENTOS HK: complete information, installation instructions.
AVENTOS HK-S: complete information, installation instructions.
