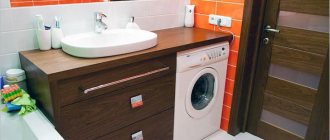
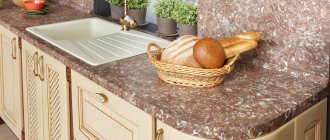
Production technologies are constantly being improved - new inexpensive polymers and durable composites are being created, but it is still impossible to do without natural materials. Wood is one of the most popular and important materials in construction. And if you want a wooden table to decorate your kitchen, it’s time to start developing a project.
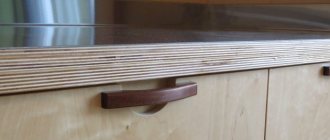
For an impressive and durable product, it is not necessary to use elite and expensive types of wood. With the help of imagination and careful elaboration of the plan, you can make a tabletop from boards, scraps, saw cuts and timber. Modern designers have learned to turn disadvantages into advantages: this wonderful experience is definitely worth taking advantage of.
How wood is glued - technology and subtleties
Making furniture with your own hands is becoming increasingly popular both due to the high cost of finished products and due to the large number of raw materials that have become freely available. At home, with a minimum set of appropriate tools, it is possible to assemble viable furniture that will serve well and delight you with its appearance. One of the most popular methods of joining wood is gluing, which allows you to obtain durable, monolithic parts. Bonding can be used as an independent fastener or as a backup when using external elements such as dowels, dowels or screws.
Briefly about gluing wood countertops
Making furniture at home is a difficult and responsible task. And yet, many decide to install a wooden countertop for the kitchen with their own hands.
Handmade tables have many advantages:
- Budget savings. The materials will cost much less than the finished product. Plus, you can use home supplies from past projects.
- Individual design. It is difficult to choose the finished product ideally for the interior and size of the kitchen. Self-installation provides all the possibilities for this.
- Uniqueness. Handmade furniture is always one-of-a-kind.
- Confidence. The quality of the product from start to finish is under your personal control.
- Pleasure. What is made with your own hands always decorates the house and pleases the family with special comfort.
Several disadvantages of self-installation:
- Time and effort. You immediately need to take into account the considerable labor costs and find free time to work.
- Tools. Without a set of specialized modern tools, construction work will become significantly more complicated. Buying tools is a necessity.
- Safety precautions. Some types of work are harmful to health - it is recommended to carefully follow safety regulations.
Table size
The size of a hand-made table depends on the area of the room and the purpose of the product. But, as a rule, its standard height is 70 cm.
For a family of 4 people, making a tabletop measuring 1m by 1m will be quite sufficient. The ideal table size would be 120 cm by 80-90 cm - such a table will accommodate not only the owners, but also the guests.
Solid wood table top
Material selection and tools
The selection of materials will be small, but, nevertheless, it is better to do this in advance so as not to be interrupted from the work process:
- in this case, to make the tabletop we will use a pine board 100x2500x30 mm. Even though there are 9 of them in the top photo, only 8 will be used for the final result;
- strips for temporary fastening of any thickness (3 pieces) and self-tapping screws;
- wood glue or PVA;
- nitrovarnish for impregnating wood (colorless of any brand);
- parquet varnish for finishing the surface (in this case “Alpina” varnish will be used).
From the tool we will need:
- tape clamps (they can be replaced with strong rope);
- electric or cordless drill (you can even use a screwdriver);
- disc or belt sander;
- brush for applying glue;
- brush for applying varnish.
Rough work - making furniture panels
Apply glue to the ends of the boards
To create a furniture panel we will need:
- determine the future width of the tabletop relative to the width of the boards that are available;
- choose the best of them (without fungal infections and rot, wane and cracks);
- lay them out on the surface, selecting the front side according to the quality of the material;
- there will be large gaps at the joints, but don’t be upset about this - all the unevenness will be leveled out when you tighten the shield with clamps.
When you have laid out the boards and are sure that they are completely suitable for you, place them on edge (as in the top photo) and generously spread glue. In this case - PVA glue. Don't worry if the glue starts to bleed - it won't matter as you will still have to sand the surface.
Despite the fact that drips are acceptable, it is undesirable for the PVA to be too sparse, since it will practically not linger on the surface.
Layout of boards for the shield
The boards are smeared with glue on one side only, and as soon as we do this, we immediately place them flat, forming the future tabletop. If during installation you notice that it is better to unfold or turn over any of the boards, do this, just make sure that all joints are coated with glue. Also now you can still add or subtract the number of boards on the shield, that is, while it has not yet been pulled together.
The shield is tightened with tape clamps
After approximately shaping the tabletop (moving the boards and trimming the ends), stepping back half a meter from each edge, we put band clamps on the backboard. This is a very powerful tightening agent that can leave a dent on the board, and to prevent this from happening, a board is placed on each side, laid on edge - they are clearly visible in the photograph.
Then the structure is gradually tightened - the tape clamps have special handles that rotate the worm gear, tightening or loosening the tape.
When screeding, the boards should be aligned relative to each other.
Since we are using a non-profiled board, it is quite natural that the plane of the shield, when tightened, will have differences, that is, one board will turn out higher than the other, especially at the edges. Therefore, as you tighten the clamps, you need to align them by pressing your hand on the tubercle. But if that doesn’t work, then you can knock out the protrusion with a mallet or a plumber’s hammer, only through some kind of lath or board, so as not to damage the surface.
Additional homemade clamp
But for such a long board, two clamps are usually not enough - of course, it largely depends on the board, however, most often this is the case. Therefore, the missing clamps can be replaced with a sling or a nylon or mylar cord. Everything is very simple here - a loose loop is made around the tabletop, tied at the top, twisted in a figure eight and a stick is inserted into the top hole, which serves as a collar for the tie - this is shown in the photo above.
For PVA, it is advisable to keep it at room temperature for a day for complete drying. But if necessary, the clamps can be removed after 5-6 hours.
Final stage
If you think that the glue has already dried, you can free the shield from the clamps for further processing.
Temporary fastening of the shield from the back side
But if less than a day has passed, then it’s better to play it safe and screw three planks on the back side of the tabletop, securing each board. But screwing screws into the edges of the plank is risky, as it will split, so you need to drill holes there first. Make sure the length of the screws is correct so that they do not come out on the front side.
No matter how you level the boards, the surface will still remain rough, and in some places there will even be mismatched edges. Therefore, the glued shield should be sanded using a disk or belt machine. The edges around the perimeter are also subject to grinding and rounding.
The ends will also be uneven, therefore, using a construction square (you can even use a school triangle), draw lines along the edges on both sides. Then the excess is cut off with a hand-held circular saw and sanded.
Surface coating with nitro varnish
It is best to use nitro varnish as the first layer - it is cheaper, and wood absorbs this composition into the pores very well, therefore, much less paintwork and varnish will be spent on the second layer.
Sanding after varnishing
In addition, after the varnish dries, and this will happen in 40-60 minutes, the wood fibers will rise and you need to sand the surface again, but this time by hand. After this, cover the tabletop with parquet varnish 2-3 more times, only here the drying of the layer lasts for 4-4.5 hours.
After each layer of parquet varnish, check the surface for roughness and, if necessary, repeat the manual sanding cycle.
Which material to choose?
When making countertops yourself, the following materials are most often used:
p, blockquote 16,0,0,0,0 —>
- whole board . The option is the most durable and reliable, but at the same time the most expensive. When choosing a solid board, you need to pay special attention to the degree of drying. Under-dried material may lead to deterioration over time;
- prefabricated array. In this case, a stacked tabletop made of timber, boards, or ready-made furniture panels is used. With this approach, the cost of the product will be slightly lower, there is less chance that it will fail, but there is a chance that over time, cracks will form at the joints due to shrinkage;
- wood products . This option is one of the most affordable, but the least practical and durable. Although, with proper processing and careful handling, even such a tabletop can last ten years without any problems. This includes all types of wood materials:
- plywood;
- MDF;
- HDF;
- Chipboard and laminated chipboard;
- OSB (oriented strand board);
- CSP (cement particle board);
- GSP (gypsum particle board).
Deciding on design and construction
When choosing a design, you must first focus on your own skills and capabilities. It is better to make a high-quality tabletop of a simple configuration than to take on a complex project for which you do not have enough time and skills.
p, blockquote 21,0,0,0,0 —>
In addition, there are several other factors to consider:
p, blockquote 22,0,0,0,0 —>
- kitchen style;
- size and weight of the finished product;
- material chosen for the base;
- availability of necessary tools for processing;
- complexity of the configuration (whether it will have mortise elements, curvilinearities, etc.).
It is better for novice carpenters to choose simple models with a minimum of mortise parts.
p, blockquote 23,0,0,0,0 —>
p, blockquote 24,0,0,0,0 —>
It is very convenient to make a tabletop from parquet or floorboards; they already have the necessary groove for reliable adhesion of the individual dies.
Wood selection
Often, the manufacture of furniture involves prefabricated wooden tabletops and made from millwork. Solid wood tabletops are very beautiful, strong and durable, and therefore quite expensive, which is why they are used for assembling premium furniture. However, for work at home and without special skills, solid pieces of wood are not suitable, since they are very difficult to process.
Regardless of the type of construction you plan to do, you must first choose the right wood. The table should be durable and resistant to mechanical stress, especially when it comes to kitchen furniture. If you want the countertop to serve you for many years, preference should be given to hardwoods: oak, cherry, cherry, teak or walnut. These are the most suitable trees for creating tables. There are also harder species, but they take a long time and are difficult to process, and the cost of some exceeds the price of ready-made factory furniture. In addition, wood that is too hard can dry out or swell due to changes in temperature and humidity. The types of trees listed earlier not only have sufficient strength, but are also able to effectively withstand various external influences.
Tools and materials
Depending on how you will make the tabletop, you will need different tools. So, if you are making a tabletop from a wood panel, you will have to acquire a jointer - a long plane, which is used to finish (smooth) the surface. The panel method allows you to make strong and durable furniture of large sizes.
The best option for a self-taught craftsman is a jointing machine. You can rent it, or if you do not have the skills to work with such equipment, ask a specialist to process the workpiece in a workshop.
So, what do you need to make a wooden tabletop:
- automatic or manual cutter (if you plan to make a table for your garden that will stand outdoors);
- jointer;
- hacksaw, hammer drill;
- set of drills;
- hammer;
- fasteners (nails, screws);
- pliers;
- sandpaper of different grits (from No. 3 to No. 0);
- thicknesser;
- clamps;
- wood (boards);
- wood glue;
- stain (if you will be tinting the wood);
- antiseptic impregnation (to protect the tree from pests);
- varnish or paint;
- flat brush.
Helpful tip: Choose boards of the same thickness if you want a durable tabletop. Before assembly, all wooden elements must be dried, otherwise the tabletop will deform over time.
Before starting work, select the type of connection of the elements of the future countertop. In some cases, you may need additional wood slats and fasteners.
Tools
To make a wooden tabletop, a novice user will need the following tools :
electric or manual plane;- electric jigsaw or wood saw;
- drill;
- Bulgarian;
- thicknesser;
- tape measure and square;
- sandpaper.
In addition, for subsequent assembly and finishing of the product, the craftsman may need stain, various antiseptics against pests, wood glue, paint or varnish and, of course, an application tool such as a paint brush.
How to do it?
The countertop manufacturing technology varies depending on the source material used in the work. If a board or straight plank is used, the sequence of work will be as follows:
The required number of boards must be cut according to the specified length.- Process the surface of the cut material using a plane.
- Cut grooves in the side ends using a jigsaw.
- Cut slats from the same material as the future tabletop. In this case, the thickness of one rail is similar to the width of the groove.
- Insert the made slats into the groove on one side and glue them with wood glue.
- Connect all the prepared boards in such a way that each batten fits into the free groove of the adjacent board. Fill the joints with the same wood glue.
- Compress the boards connected to each other by installing clamps or other devices that compress the already assembled canvas.
How to make from furniture board?
When a furniture panel is used in the manufacture of a tabletop, the work is performed as follows:
- The furniture panel is given the required dimensions.
- The inner side of the furniture panel is reinforced with wooden blocks or slats - thus ensuring maximum structural strength.
- If it is necessary to install the legs, the mounting elements are installed, as well as the installation of the necessary fasteners.
Plastic covering
Regardless of the countertop manufacturing technology used, as well as the type of wood material used, its surface can be coated with plastic - this will significantly improve the performance characteristics of the surface.
At the same time, plastic can be used not only in the manufacture of a table, but also if its working surface is damaged during operation.
Today, there are a huge number of different types of plastic, which differ both in size and in their performance characteristics, as well as in appearance. In order to decorate the surface with this material, the plastic must be cut according to the size of the table and glued using liquid nails or special glue for mastic.
Cover
If wooden boards were used during assembly, then during the manufacturing process of the whole canvas, in order to hide their ends, a special covering is made, which acts as a protective edge.
It is made from wooden blocks and installed around the entire perimeter of the tabletop.
The lining is attached to the canvas in accordance with the “edge-groove” principle. In this case, finishing of the lining (grinding, polishing, painting) is carried out simultaneously with fastening.
If a furniture panel is used to make the tabletop, the same principle of edge finishing is used.
How to glue wooden boards into a board
To properly glue furniture panels , you should first acquire special equipment:
- Planing machine;
- Circular Saw;
- Hammer;
- Thicknesser for drawing marking lines;
- Long ruler, tape measure and pencil;
- Clamps or homemade tools for tightening boards;
- Surface and belt sanders for stripping wood. Instead, you can use sandpaper, screwing the wood onto the block, but cleaning will take more time;
- Electric planer;
- Wooden boards.
- Glue.
What is the secret of popularity
For centuries, our ancestors used wood for construction and home improvement.
Such furniture was, is and will remain at the peak of popularity and there are many reasons for this, here are just a few of them:
- It is difficult to find a more environmentally friendly material. Wood itself has natural warmth. Plus, with proper processing, such a table top made of wood will have a very beneficial effect on the aura and health of the household.
- From a design point of view, this material fits perfectly into almost any interior. The array lends itself easily to decoration and adapts well to different, sometimes diametrically opposed, styles.
- Such furniture can have different shapes; in addition to classic rectangular and square tables, you can order or cut a plane of any configuration with your own hands.
- If you properly treat such an array, it will not be afraid of biological pests, moisture and direct sunlight. As a result, the table will feel good both in the house and on the veranda or in the open gazebo.
- A tabletop made of natural wood is many times more elastic than natural or artificial stone. Where the stone cracks or begins to crumble, only a small dent will remain on the board, which can then be filled with putty.
- And finally, making wooden countertops with your own hands is quite accessible to a person with basic carpentry skills.
End caps for the table top.
Any, even the most perfect and beautiful material has its drawbacks. A tabletop made of natural wood is no exception.
Fortunately there are not many of them:
- The durability of the material directly depends on what you use to cover the wooden countertop. Synthetic varnishes have high protective properties, but at the same time they neutralize the environmental component of the material. Natural oils are good, but wood with this treatment quickly darkens in the sun. Plus, any coverage needs to be updated at certain intervals, which means additional costs.
- Compared to glass or stone, a wooden table is quite easy to scratch or dent. Although in fairness it should be noted that repairing such a defect will not be difficult.
Tabletop fastening diagram.
- A high-quality, natural product has always been expensive, especially if it is a tabletop made of a single piece of wood, which is very problematic to make on your own in a home workshop.
Types of glue
In addition to the rules for choosing glue, you need to pay attention to the type of product. This will allow you to do a high-quality job of fastening items. There are several types of furniture glue. PVA, or polyvinyl acetate, which is divided into 2 types: for home and repair of garden furniture. The second type is moisture resistant, but, since it is yellow in color, it can leave marks.
Latex is perfect for repairing products made from different materials, for which strength and safety are important. It has better penetrating ability, which is why it is chosen for the restoration of mechanically stressed furniture. There are no toxic substances in the composition.
For furniture it is intended for fastening plastic parts. You must work with the product carefully, since gluing occurs immediately. But since rubber is present in the composition, the glue does not harden.
To restore oily wood, you need the right furniture adhesive. Which one is better to use? Suitable for this The product is moisture resistant, therefore ideal for garden structures. After work, an invisible seam remains.
Polyurethane adhesive-sealant is used in fastening products with gaps. The product can be used to restore any furniture. The exposure duration is 1 minute. After this, the product should stand motionless for two days.
There is a two-component one used for different materials. The composition is useful for filling gaps, and the strength remains high quality. After the procedure, you can apply any film coatings and paint.
Pros of wooden countertops
- Hygienic: Wooden countertops are natural and hygienic because they have natural protection against bacteria.
- Easy Repair: Unlike other materials, if wood countertops are ever damaged, simply sand away any unwanted marks or dents to smooth out the surface.
- Adaptability: The rustic look of the wood allows wood surfaces to blend in with any kitchen style.
- Price: Since the wood countertop will be manufactured exclusively by you, you will only pay for the materials. Depending on the size, design and type of countertop, it can cost 2 to 7 thousand rubles.
- Moisture Control: Wood countertops are porous and naturally susceptible to water damage, but if they lose too much moisture, they dry out quickly. Therefore, it is important to have a quality finish to preserve the natural moisture content of the wood.
Drawing
When choosing dimensions for a future countertop, you first need to focus on the dimensions of the kitchen space itself. At the future table it should be comfortable to both stand and sit, as well as use the furniture installed above its surface. In this regard, the most optimal parameters are considered to be:
- length ranging from 850 to 900 mm;
- width ranging from 600 to 800 mm.
Accordingly, the length of the table will depend on the initial parameters described above, which may vary depending on the height of the user and the dimensions of the room.
In addition, it is important to decide on the shape - it can be round, oval or rectangular.
Manufacturing of carpentry panels
We select dry boards of the same thickness
Making a carpentry panel is the arrangement of pre-prepared elements. The main parts of the carpentry panel are wooden boards. But first they need to be specially processed.
Cut the boards to the required size
We process the surfaces of all boards using a plane and jointer
Use a plane to level the surface of the board material. Using sandpaper, carefully sand the surface. After grinding, the prepared material must be treated with an antiseptic.
Sand with sandpaper or a sander
Construction stores have a huge selection of them, but please note that you need a solution for interior work. The antiseptic will protect the wood from excess moisture, which is available in abundance in the kitchen, and will prevent the appearance of mold and insects.
European funds
Adhesives from foreign companies also deserve attention, since most of them are frost-resistant. Even if the structure is located in the air, you can work without problems. The composition is completely ready for use, and therefore there is no need to properly mix the components.
Such mixtures are moisture resistant, otherwise the moisture falling on the wood would not be able to dry properly. Mold and an unpleasant odor gradually appear. European products are environmentally friendly, although they are not completely harmless. After drying, the parts are fastened securely.
