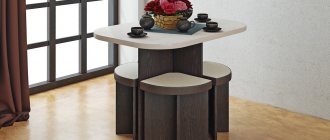
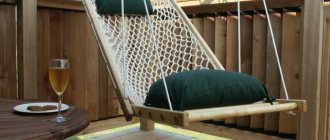
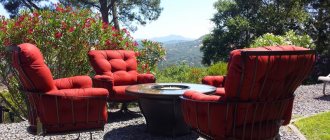
Garden furniture in our dachas is often made from scrap materials. We invite you to get acquainted with the options on how to make garden furniture yourself. Some of them are very simple and will require a minimum of expense and labor from you.
For example, this table requires a couple of bricks and a couple of boards. This may not be the most reliable or beautiful option, but we offer to get acquainted with projects of different levels of cost and skill.
DIY garden furniture. Summer kitchen made from pallets.
If you are planning a summer kitchen in your country house, then garden furniture for it can be made from wooden pallets.
This set includes a work table, a shelf for storing utensils and a small work table that can be conveniently placed near the grill.
Stages of building a shelf from wooden pallets.
How to make a desktop from wooden pallets.
Let's make a small table. Depending on the height of the legs, it can also be used as a chair.
Materials and tools
What can garden furniture be made from? It is recommended to first draw a sketch of the future model. In this way, it is possible to have a clear idea of the finished result and make timely adjustments to the product design. For this you can use:
- Wood;
- Plastic;
- Metal rods;
- Various details from previous furniture.
How to choose material for making garden furniture? Wooden products occupy a leading position in landscape design. Wood is distinguished by its strength and high performance qualities. Before purchasing a consumable, you need to consider its structure and appearance. The fibers should fit tightly together, and there should be no traces of harmful insects on their surface.
Damaged boards are considered unsuitable for further use. Their base structure is already damaged. If there are traces of rot and mold in the cavity, then it is best to refuse to purchase such raw materials.
Absolutely anyone can work with wood. This material is easily repairable and can be used for various types of decorative finishing. For work, use a hacksaw, a screwdriver, a hammer and ordinary nails.
A significant disadvantage of such raw materials is its inability to withstand high humidity. That is why, at the end of the work, it is recommended to use paint and varnish compositions that will create a protective shell on the surface. This coating can last for three years. It is not recommended to install the finished product in direct sunlight. After some time, numerous cracks may appear on the plane.
For work you can use:
- Wooden pallets. These structures remain after purchasing the building material. You can make comfortable sofas, spacious tables and armchairs from them;
- Car tires. These elements are used to create a base or used to construct a seat. Old tires are ideal for creating a garden swing. The soft base will not cause discomfort while riding;
- Metal and plastic pipes can be used as a frame or for standard connecting elements;
- Reinforcement and steel profiles are chosen to create complex structures. To work, you will need a welding machine and skills to work with this equipment. In this way, it is possible to create durable structures that are not afraid of climate disasters. The soft base is made of wide pillows with soft filling inside. Most often, a frame for a table is made from reinforcement. The upper part is made of tempered glass or wood.
The list of consumables is quite diverse. To create successful furniture crafts for the garden, it is recommended to follow the instructions of specialists. Thanks to them, it is possible to correctly calculate the load on finished products, as well as avoid common mistakes during surface treatment.
Transformable garden bench.
If you only need a table in the garden when guests are visiting, then you can make a transformable bench that, if necessary, turns into a table.
At first glance, this is an ordinary bench.
The bench consists of two halves - upper and lower, which are connected to each other on hinges.
First we make the top part of the bench. Its back will also be the legs of the table.
Then we make the bottom part. We fasten them together.
Hanger in the hallway
One of the simplest products that you can make yourself, even for a novice craftsman, is a clothes hanger.
Step 1. A design drawing is prepared. This stage is extremely important for calculating the necessary materials and correct manufacturing of the structure.
Hanger drawing
Step 2. Prepare the components: boards (4 main and 2 crossbars), hooks for clothes and bags (four large and 2 small), self-tapping screws for attaching the structure and hooks. The boards can be solid or glued together from lamellas.
Boards and hooks for clothes
Step 3. You will need tools: saw, jigsaw, blowtorch, grinder (you can get by with sandpaper), screwdriver. In addition, you need to prepare PVA glue, varnish and a brush for applying it (or spray).
The edges need to be rounded with a jigsaw
Step 4. The planks are cut to size. For greater aesthetics, it is recommended to round the edges with a jigsaw.
Step 5. The wood is burned black using a blowtorch. This technology can significantly increase the durability of wood and resistance to adverse influences (climate, fire, insects). In addition to improving the functional characteristics of wood, firing helps make it more expressive, as the structure of the wood is more clearly revealed.
Burning wood with a blowtorch
Important! Firing can begin when the fire turns purple (firing with a yellow flame will produce soot). When exposed, the fire should be directed perpendicular to the bar. When working with an open flame, it is necessary to pay attention to fire safety.
Gasoline blowtorch
The sides of the planks do not need to be burned, in which case the design will be more attractive.
Step 6. The burned boards are treated with sandpaper or sanded.
Sanding burnt boards
Step 7. All structural elements are ready for assembly.
All elements are ready for assembly
Step 8. The boards are fixed with self-tapping screws. The joints are treated with glue for greater strength.
The boards are assembled into a single structure
Step 9. Varnish is applied. To do this, use a sprayer or a regular brush. It is recommended to apply several layers with the obligatory drying of each previous one.
Applying varnish
Step 10. The finished hanger is attached to the wall. Hooks for clothes are fixed.
Finished hanger on the wall
Step 11. Small hooks are attached to the bottom of the two slats, on which you can hang keys or bags.
Small hooks at the bottom for keys and bags
The presented hanger option is one of the simplest. You can complement the design with a shelf for hats.
The result of the efforts spent is obvious. The result is a comfortable piece of furniture that perfectly matches the style and color of the hallway design.
Simple hanger in the hallway
How to make a wooden table.
For fans of more traditional options, we offer a wooden table project.
This table will look good both in the garden and in the house or gazebo.
First, we assemble the two side supports of the table, as shown in the diagram.
Then we make a tabletop from the boards. To prevent the boards from warping over time, we decorate the side edges of the tabletop with perpendicular wooden planks. We make the bottom shelf and fasten the tabletop with the side supports.
From wooden boards you can make a bar counter with chairs for your dacha.
For structural rigidity, the frame is reinforced with metal pipes.
Special design programs
These programs greatly simplify the design process. They help to make the correct sizing calculations and more. Using programs you can:
- Create a sketch of a certain thing;
- Create a design project, for example, a kitchen set;
- Narrow down the selection of materials to a specific category;
- Select options for decor, finishing, fittings;
- Build a 3D model of the future structure;
- Optimal placement of parts on the sheet - precise cutting of sheet material;
- Manage the material cutting process.
Using computer programs, you can create the correct sketch and accurate drawing of future furniture
In short, you can computerize the entire process, thereby ensuring that mistakes are avoided, and everything that is difficult to do with your own hands can be done on a computer.
Garden furniture for the children's playground.
To make summer more fun for your kids, make a garden house for your children.
This house can be placed in the garden or even used as a bed for your baby.
If the house is planned to be used as a bed, then its width should correspond to the width of the mattress.
Photo gallery of ready-made options
Below are solid pine cabinets in various shapes, finishes, and styles.
A cabinet made of natural pine will be a great addition to many interior styles, and a homemade design will also save money, which you can spend on decorating your home.
Garden furniture from old furniture.
If you are changing the facades in the kitchen, then the old cabinet doors can still serve you in the country. Such a table can be useful both in a summer kitchen and in a barn or on a veranda. It can also be used for storing vegetables.
Two doors will become the basis for a table cabinet, which can then be tied together with a tabletop in the form of a regular board.
The back walls of the cabinets are reinforced with cross-shaped fastenings made of boards.
Often old furniture can be reclassified as garden furniture without much expense. For example, like this old wardrobe.
You can quickly make a beautiful garden bench from old chairs.
We tie the frame of the chairs with wooden slats and cover the seat. That's all.
Furniture fasteners
Furniture fasteners are hardware (metal products) that are used to connect parts. Most often, connections are made at right angles.
Dowels
Furniture corner
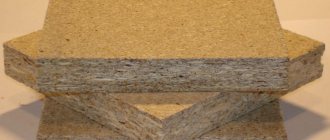
Euroscrew (confirmed) – furniture screw. This is the main fastener for parts in modern furniture. Furniture makers almost never use ordinary self-tapping screws. Confirmats have a larger thread, so they stay inside the chipboard much better. Confirmat
The holes for them can be drilled directly on site. To do this, use a special drill that makes a hole with different diameters for the thread, neck and head of the Euroscrew. The most commonly used confirmats are 7*50 mm
When drilling, special attention should be paid to the perpendicularity of the drilling so as not to spoil the coating of the part with a through hole
Drill for euroscrew
Furniture screws are tightened with a hex key or a screwdriver attachment. The caps for a Phillips screwdriver cannot be tightened tightly until the end.
The main disadvantage of this type of fastening is that screwed-in caps remain visible. To hide them, use plastic plugs matching the color of the chipboard.
Eccentric ties are a modern and correct method of fastening. It leaves a hole only on the inside of the product, but requires very precise drilling. Eccentric coupler
To obtain the required holes, use a Forstner drill. There's not much point in going to the trouble of using them to assemble items that will be hidden, but they work well for attaching drawer doors.
Forstner drill
Article on the topic: DIY kitchen assembly.
Garden furniture original designs.
For those with larger scales, you can make such a covered bench near the barbecue.
This is something between a gazebo and a bench.
If there is not enough space at the table for a large company, make an additional shelf at the end of the table.
It is attached to the bench.
And it makes it possible to hang additional containers on hooks.
Have a party coming up and urgently need a garden shed? Let's do it quickly and simply.
We assemble the frame from PVC pipes as shown in the figure. We concrete the supports in buckets. We pull up the awning. And the canopy is ready.
Which slats are best to choose?
When choosing slats, the following criteria are used:
- Exposure to moisture. In conditions of high humidity, pine and beech slats require impregnation with special compounds. It is enough to subject the oak elements to surface treatment.
- Environmental friendliness. All wooden slats are safe for humans. The exception is veneered MDF, which can emit harmful substances, which limits its use in residential premises, especially in bedrooms and children's rooms.
In terms of strength characteristics, preference is given to oak and some rare wood species.
- Appearance. Any decor made from slats on the wall is natural and attractive. However, exotic wood species stand out especially for their beauty of structure and color shades.
In the price segment, inexpensive, budget options and luxury materials are distinguished. The first category includes pine and beech. Oak is somewhat more expensive. You will have to pay a significant amount for the chic look of valuable wood.
Buffels can be created from flat or three-dimensional elements. Sizes also vary. The cross-section of the slats can vary from 10x10 mm to 20x50 mm (veneered slats - up to 50x50 mm). The length ranges from 1 to 3 m.
