A DIY blanket made from old jeans is a way not only to give new life to unnecessary things, but also to decorate any room with a stylish and original product. Many needlewomen prefer to use old things to make various products, and denim fabric can be used to make a blanket that will last for many years. Today we will look at the types of techniques and ways to create such unusual things.
DIY blanket made from old jeans
Required Tools
To create a product from worn jeans, you need to arm yourself with the materials and tools necessary for this work.
- Unnecessary jeans, preferably several pairs. First of all, you need to prepare the raw materials: carefully select pieces of fabric suitable for sewing; areas with yellowness or discoloration should not be used for work.
- Choose fabric for lining. The lower part of the bedspread should be durable, soft, and warm. For this purpose, it is advisable to choose fabric made from natural fibers; it is best to use wool, satin, and linen. To save money, you can use padding polyester or batting instead of wool. Then, as a lining material, you can take any thin cotton fabric of a suitable color or plain color.
- Select fabric to trim the border around the entire perimeter of the bedspread.
- Threads and sewing needles should be thick and strong. Sewing denim is not easy because of its thickness. It is better to take threads in color to match the main fabric or contrasting ones in order to visually highlight the stitched parts and elements.
- Thick cardboard for making a stencil pattern, a measuring tape, a pencil, a thin piece of dried soap or chalk for marking parts on pieces of fabric.
- Tailor's needles for chopping off parts before stitching, sharp tailor's scissors, a special knife for ripping seams, or small scissors for manicure.
- Sewing machine. Special foot for sewing thick, coarse fabric.
Sewing instructions
Making a denim blanket from old fabric is considered a very painstaking job. To ensure that the final result does not disappoint, you must adhere to a certain sequence of actions.
Cutting patchwork blanks
A blanket made from denim scraps can be quickly sewn if you use a prepared stencil measuring 17x17. It will allow you to cut pieces of fabric more evenly.
It is best to cut using pre-prepared patterns
To do this you need to do the following:
- Attach the stencil to the fabric material.
- Using a pen, chalk or laundry soap, trace a pattern on the material.
- Cut the flap along the intended contour using sharp scissors.
When applying the pattern to denim, you must pay attention to the fact that the first side of the figure corresponds to the movement of the longitudinal thread, and the second - to the transverse thread. If this action is not performed, the blanket may tear after washing.
It is recommended to mark areas for stitching.
You will need to do the following manipulations:
- Apply a corner stencil to the corner of each flap from the front area.
- Insert a square blank with smaller parameters into the corner stencil.
- Remove the corner, outline the geometric figure on a light-colored fabric with a pencil, and on a dark-colored fabric with soap.
Assembling the bedspread
Due to the fact that it is very difficult to immediately distribute the shade of a large number of old denim products, it is recommended to place the image of the future bedspread on the floor surface. It is advisable to number all the squares so that during subsequent manipulations you do not make a mistake in their order.
Considering the number of squares of all shades, you can simulate the pattern of the blanket on the computer. Then it can be laid out according to a given pattern.
Stitching parts
Upon completion of assembling the bedspread, you can proceed to the stage of stitching the parts.
To do this you need to do the following:
- To obtain patchwork stripes, initially design the first row, then all the rest.
- When focusing on the outline of the element, fold, baste with thread and stitch.
- Thoroughly steam the prepared parts and straighten the ends of the squares in different directions.
- Stitch adjacent strips together.
Finishing of the finished canvas
To finish the resulting fabric, it is recommended to adhere to the following sewing instructions:
- Using a sewing machine, run a zigzag or even stitch along the lines of stitching the flaps.
- Stepping back 1 cm from the edge, run the sewing machine along each side of the sewn fabric.
- Regarding the side, remove the lobe threads and leave the transverse ones, or vice versa, spreading the ends of the squares that protrude.
- Decorate the entire perimeter of the bedspread with fringe.
Technicians
Today there are a huge number of ways to create patchwork quilts and more:
From the stripes
Perhaps the most common and simple option is the technique of stitching long strips of equal width. This blanket will resemble a cobblestone fence, especially if you choose the color.
Well
One of the ancient techniques for creating a unique pattern is the American square or well. This style of tailoring was very popular two centuries ago in America and, accordingly, in Europe. The basis of this ornament is a square, which is sewn together from stripes that gradually increase in length. This creates the illusion of a log well when viewed from top to bottom.
There are several options for creating such a drawing.
At its base and beginning there is a square, which is sheathed on each side with a strip of fabric, and each subsequent “log” is sewn overlapping each other in a circle. The stripes can increase in width or remain the same, the main thing is to change the shades of the tiers to create the effect of a three-dimensional well. You can also make a dark middle and sew lighter patches closer to the edge.
From squares
One of the oldest and simplest ways to create a quilt is to sew squares together. They can be large, medium in size, or reach up to 1-4 cm in area. The main visibility of the pattern is created by the color and sequence of stitching of the flaps. The ornament can have 2 colors and resemble a chessboard, but the option with a wide variety of color palette looks more interesting. Some artists can create portraits from rectangular cuts, reminiscent of a pixel photograph.
Any geometric figure, for example a triangle, can be taken as the basis for the stitched pattern. It is very easy to work with, since you can make a rectangle, the same square, and even a circle or rhombus from it.
The most common ornaments made from this figure are “mill”, “star”, “flower”.
Watercolor
Watercolor technique is very creative. The product can be made from scraps of different shapes (squares, rectangles, etc.), but the most important thing is the color. The cuts are selected in such a way that the tones are approximately in the same color range. In its stitched, finished form, this canvas resembles a canvas on which it was painted with watercolor paint. Such blankets look very soft and airy.
From hexagons
The “honeycomb” technique is very close to nature. To do this, hexagons are cut out and sewn together, and most often, the entire blanket is made of beige or light rags, and only some hexagons are made of honey or yellow color, so as not to look too tacky. You can sew small bees on top to make the product more atmospheric. But such a figure is not always used to imitate a honeycomb; very often the hexagons can be multi-colored and lay out a whole, bright product.
"Lyapochika"
One of the most beautiful and voluminous patchwork techniques is called “Lyapochika”. If you have accumulated a very impressive amount of old and unnecessary knitted T-shirts or T-shirts, then you can make an amazing patchwork quilt out of them. First you need to buy the fabric on which everything will be sewn. Then the items are cut into pieces (preferably rectangular) and, without finishing the edges, they are sewn layer by layer onto the base.
If you sort the cut pieces of fabric by color, you can lay out a design or pattern. Most often they make flowers or imitation sheep wool or fish scales.
All other techniques for creating ornaments are based on the above. Weaving and stitching the flaps alternate, resulting in a colorful and original design.
An interesting solution would be to make a plaid or blanket crocheted in a patchwork style. Thus, you can knit a very beautiful pattern using many colors. Typically, threads made of wool, acrylic, or a mixture of both are used. But the most interesting thing is that you can use thinly sliced and fastened fabric scraps as a thread. For this type of knitting you will have to use a larger hook.
Blanket made of stripes with a 3D pattern
There is another way to make a blanket from pieces of fabric, which produces an equally attractive and comfortable product. It is worth noting that for some beginners this method may seem more complicated.
The finished blanket will have such an unusual pattern
Step-by-step instruction
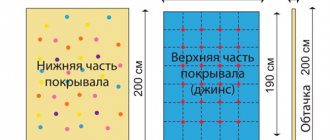
Step 1. It is necessary to prepare the material that will be used as a substrate. An unnecessary cotton sheet is best suited for this (the main thing is that it is intact). The cut dimensions must match the blanket. A few centimeters should be left to allow for seam allowance.
Preparing the material for the base of the blanket
Step 2. Next we need to take the denim and cut it into strips about 45-50 millimeters wide. If desired, you can make such blanks narrower or wider - it depends on what kind of blanket you plan to get in the final result.
Cutting denim strips
Step 3. Next we have to make a hem of about 1 centimeter on each side of such a strip. After that, you need to go over the hems with an iron to fix them in this position. In this case, we used three shades of fabric (we sew from darker to lighter).
We form hems on both sides of each strip
Step 4. We attach the strips of the main color to the backing using special sewing needles. The image shows seven such fragments, but if desired, you can make more of them (then the blanket will be, accordingly, wider).
We fix the strips on the substrate - it is important to check that they are positioned evenly
Step 5. Next, take a strip of a different color and pass it under the first strip at an angle (as shown in the photo).
We use a strip of the second color
Step 6. We continue to lay the same strip under the main ones. You must follow the same pattern as in the image.
We lay the strip further
Step 7. We pass another strip under the first two at the same angle (as in the image).
Passes a strip of a different color under two base strips
Do the same with the entire blanket.
As a result of the work done, this should be the basis for the formation of the subsequent drawing
Step 8. Then you should take a strip of a different color and pass it, starting from the right edge. The result should be a kind of rhombus - this allows you to connect the squares from the previous material with each other.
Pass a line of a different color at an angle
The result should be a blanket like this (after the first strip)
Step 9. The same steps must be done with another strip of this material.
Gradually, an unusual three-dimensional pattern is formed on the surface.
Step 10. After all the strips are connected, you need to fold the base and stitch it. In this way we made an unusual blanket from old jeans.
Fold the base and stitch it
Video - The idea of creating a denim rug
Features, pros and cons
Patchwork style pillows or more simply “patchwork” pillows are decorative accessories made from scraps of different shapes and sizes, scraps of different fabrics. This is painstaking work to create a product with a specific pattern of varying degrees of complexity. The technique is ancient, its appearance was associated with a shortage of textiles, so every piece of work had value.
Over time, the chaotic selection of scraps was replaced by the correct layout, taking into account the color scheme and a specific theme
Today, special attention is paid to needlework, so in stores you can purchase not only ready-made sets in the same style, but also “correct” blanks, be it individual square elements or ready-made sets with cut fragments
Pillows made from patches have many advantages:
- can dictate a design idea or support a specific piece of furniture;
- are self-sufficient accents or are included in a set with a bedspread, rug, blanket, or covers for upholstered furniture;
- are made on a sewing machine, therefore they are tear-resistant and durable;
- can be located anywhere in the room, decorating the surface of furniture (sofa, armchairs, chairs, stools) or window sills;
- have a wide range of sizes and variations in shape;
- are distinguished by a variety of carved fragments and a rich selection of color palettes;
- look professional and bright, obeying the rules for selecting the texture of the material;
- made from textiles of natural and synthetic origin;
- are divided into several drawing techniques, assembled according to a pre-prepared scheme;
- are made in the form of full-fledged pillows or as decorative pillowcases to fit the size of existing pillowcases, taking into account ease of care (they can have a zipper or buttons with loops);
- can combine different handicraft techniques (for example, classics and Japanese “patchwork” kinusaiga, iris folding, etc.);
- are a favorite topic of needlework for experienced craftswomen and inspire the creativity of beginners;
- recognized as an excellent gift for yourself or loved ones for a celebration;
- easy to care for, machine washable at 40 degrees, easy to spin and dry naturally;
- depending on the pattern and color scheme, they can create a visual illusion of increasing the space of the room;
- create a feeling of home comfort by maintaining a comfortable atmosphere or zoning a certain part of the room.
Patchwork pillows can be functional household items (for example, transformable models in the form of covers for bedding, pajamas). According to the production method, they can be single-sided with a pattern on one side, double-sided, decorated with the same or different patterns on both sides.
With a lot of advantages, patchwork sofa cushions have several nuances:
- require a large amount of free time to produce a high-quality product;
- look professional only with patience, precision and accuracy (errors in the assembly of each element are unacceptable);
- they look beautiful with a pattern, but without it they create a feeling of variegated and overloaded design;
- due to creation from separate fragments, they require a mandatory gasket covering the surface of the connected parts from the wrong side;
- “marketable” look made from new materials purchased specifically for needlework.
The cost of such things usually cannot be called budget. As a rule, professional craftswomen have their own tariff, which is based on an hourly rate, so buying a set of several pillows and, say, a blanket can be expensive. However, in most cases this is not an obstacle to purchasing, since there are many connoisseurs of such art, and they are ready to do anything to decorate their interior with exclusive new items.
Recommendations from experienced professionals
Beginners will always find some recommendations from experienced craftswomen useful:
- It is advisable to carefully tear off the back pockets of all pairs of old jeans, because they can also be useful for decorating the finished product;
- It is not necessary to wash and iron the entire old jeans; you can first cut out fragments from them and carry out these manipulations with them;
- Don’t be afraid to combine denim of different shades in one blanket;
- you need to purchase only strong, thick needles for sewing denim;
- Jeans that are too old can fall apart during work, so it is advisable to sew them together in large fragments.
Pockets should be carefully opened
How to make patchwork pillows with your own hands
Having decided to make such a decorative element with your own hands, you should determine which technique is best suited for creating a pillow. There is a master class that helps beginners learn how to create different models.
First, you need to choose your own scheme; with its help, no matter what technique you choose, you will be able to correctly complete the job you started. Moreover, the shreds can differ in size and color, and can also be made from different types of fabric.
Even a beginner can master patchwork, because in this matter what is more important is not sleight of hand, but a creative mindset
Therefore, if you decide to decorate sofa cushions with your own hands, you can use fabric scraps in any way you like, thereby creating your own unique patchwork style. After all, there is no clearly established type of pillow, and before you start sewing, you should determine which shape (round, square or rectangular) and size will best suit the interior.
Thanks to the use of a special pattern, even a beginner can quickly sew a patchwork pillow, and this activity will become an interesting and favorite hobby.
Which jeans are best to use for a bedspread?
Old, worn jeans can be cut out and then sewn into a gorgeous bedspread. To design a product using the patchwork technique, you will need durable denim scraps.
Those places where the material has deteriorated, torn or frayed should not be used. A product made from durable denim pieces will last a long time.
When choosing jeans for a blanket or bedspread, you should take into account the following:
- Denim cuts are taken in an identical shade.
- When sewing patchwork, only whole denim scraps are used and are very durable.
- Pieces of material with patch pockets, holes or rivets are not suitable for sewing bedspreads.
- If scraps of material of different colors are combined, the best option is to select denim that is identical in thickness and structure. Individual parts of the canvas should not neutralize the overall impression of the product or stand out in any way.
The scraps should be similar in thickness and fabric structure.
They use unnecessary, “out of order” jeans, preferably if there are several pairs.
Important! You should carefully select pieces of material suitable for working on the bedspread; places with a changed color or yellowness should not be used in sewing.
How to sew a beautiful blanket from jeans with your own hands: design options
Strictly speaking, everything that is sewn from scraps is patchwork. However, if a bedspread consisting of simple denim squares can be called patchwork, then it is a stretch. More complex forms are closer to this technique; the comparison can be seen in the photo.
Jeans can be combined with each other in shades and textures. It also goes well with any other fabrics, except, perhaps, satin and organza. Other fabrics only benefit from being combined with jeans.
In addition to squares, other geometric shapes are also used - mainly rectangles. They are placed differently on the base, resulting in separate geometric shapes within shapes - zigzags, squares, and so on.
Another delightful option for needlewomen is a combination of rectangles, squares, triangles, circles - and the result is something incredibly chic!
Those who think that only basic material can be used are sorely mistaken. Plaids and bedspreads made from seams, pockets and belts are no less common than those made from squares. Of course, sewing seams together with a zigzag is painstaking and tedious work, but the results are worth it. It is technically difficult to sew pockets - thick material is difficult to handle with a simple sewing machine. In addition, the pockets themselves need to be sewn up, also using a machine. But such bedspreads look very original.
Of course, it all depends on the size of the bedspread you want to get as a result. But if we talk about a simple bedspread made of squares for a one-and-a-half bed, the approximate number of fragments is about two hundred. With a final square size of 10 by 10 cm, the optimal size is considered to be from 10 to 20 cm for a square, and from 15 to 25 cm for a circle.
Of course, it is impossible to indicate the exact number of denim items that will be used to sew a bedspread - first of all, because items of different sizes naturally result in a different number of fragments.
In addition to the denim scraps, you will also need a base fabric, otherwise, in addition to a stylish bedspread, you will get an inexhaustible source of thread in the house as a bonus. Another option is a double-sided blanket, but it will cost exactly twice as much to cover the jeans.
The master class on sewing a simple denim bedspread is quite monotonous and completely uncomplicated. You perform the main actions at the very beginning. So, to work you will need:
- A certain number of jeans
- Felt pen or fabric chalk
- Scissors, tailor's pins
- Sewing machine
- Fabric base
- Dense and thick cardboard
Operating procedure. First stage. Cut a square measuring 12 by 12 cm from thick cardboard. This is the main template. Next, you need to use this template to cut out the maximum possible number of squares from the jeans. It’s rare that you can gather material for a whole blanket at one time - if you sew from old things. In fabric stores, denim is sold in rolls - buy it - I don’t want it.
However, you need to determine how many squares will go on one row of the bedspread. Considering that after stitching, the size of the square will be 10 by 10 cm, measure the width and length required for the bedspread. If you decide to decorate an old blanket, even better, you have the required dimensions; you just need to divide the numbers by 10.
When all the squares are ready, lay them out on the floor and arrange them by color or texture. With a large amount of material you can get a real work of art.
When all the details are in the order that suits you, collect them in order and number them - this way the sequence of colors will not be lost.
Second phase. It is better to sew according to the width of the blanket. Fold the blanks in pairs with their right sides facing each other, and sew a line, retreating a centimeter from the edge.
Determine the number of squares in a row yourself; after stitching one strip, you can attach it to the base or the bed itself to determine the optimal length of the strip. After all the rows in width are ready, they can be sewn along the length. It is better to fasten the threads on each row at once - otherwise, later, tying all the knots, you can go crazy.
Third stage. Fold the finished blanket of squares with the base, back to back. Secure with pins. And then sew each row along with the base. You can sew braid or bias tape around the perimeter. Another option is to fold the edges of the denim side inward along with the folded edge of the base, but this method is inconvenient and the thickness of the edges will stand out.
The blanket is ready!
Uncover
You can sew a blanket from denim scraps using a variety of cutting patterns. The result will be a product of different parameters, design and shape. To quickly progress the work, you will need to prepare preparations in advance. Their number and type directly depend on the style of the bedspread.
You can cut in squares, hexagons, stripes
Bedspread cutting samples can be of the following options:
- square and fringed using patchwork technique, from 350 elements with parameters 15x15 cm;
- from 252 square fragments with parameters 12x12 cm;
- from square elements 12x12 cm and 120 strips 2.5x12, 2.5x14.5, 2x14.5, 2x16.5 cm.
- from areas with motifs, using 20x20 cm squares of 2 color shades.
You can come up with a model yourself or use ready-made ideas. This type of needlework refers to a creative handmade technique. Canvases with a mosaic layout of denim patches with fluffy fringe look impressive.
What are patchwork pillowcases
Today, the most common product among patchwork designs are patchwork pillows. And needlewomen give particular preference to sewing decorative pillowcases.
Before you start sewing, you should apply the finished patchwork design to the fabric. After this, the pillowcase pattern must be transferred to the canvas, folded right side inward. Be sure to leave allowances for fastening.
In order for the pillowcase to fit perfectly into the interior, it is important to choose the right style in which it should be made. It won't be a problem with so many great ideas out there and it won't take much time.
Before you start sewing a pillowcase in patchwork style, you need to apply the finished patchwork pattern to the fabric
By starting to create such pillowcases, even a beginner can quickly learn patchwork sewing and, over time, acquire good skills in the production of other patchwork products.
How to use the blanket
There are many options for using a product made in the patchwork style. For example, you can cover a sofa with it or use it as a blanket.
It should also be noted that a blanket made of denim fabric is suitable for those who like to keep cats and dogs in the house, since hair can be quickly and easily removed from a product made of such material. It is not so easy for pets to tear it with their teeth or damage it with their claws.
This blanket looks great as a blanket on a sofa or bed.
Stages of work
Selection of material
You can take new or used materials. The main thing is that they are clean and washed (even new fabric needs to be washed to shrink). If the fabric scraps are not new, it makes sense to starch them a little and iron them.
Experts recommend not to forget about the following selection rules.
- The easiest to work with are cotton fabrics: they hold their shape perfectly and are as convenient as possible in cutting and sewing. Finally, they are natural and relatively inexpensive. Napkins, potholders, lunch mats, tea warmers, various capes, pillows and blankets are beautifully made of cotton.
- Gabardine, tweed and even drape can also be used in patchwork mosaics. They are used to make panels, thick blankets and rugs.
- Silk scraps can also be used, but silk fragments wear out quickly. Therefore, silk can be used to model patchwork paintings, but it should not be used for pillows and blankets, which are used practically.
- Knitwear is rarely used for patchwork because it is difficult to sew from. But things made of leather (including artificial leather) are made regularly.
Fabrics can be combined, but this does not always work out successfully. On sale today you can find creativity kits that already come with pieces of fabric that fit perfectly together.
Scheme selection
The diagram is an instruction that will allow you not to get lost in the colored patches and do everything technologically correctly. Today you don’t have to draw diagrams yourself: just find an interesting option on the Internet, print it out and cut it into parts. More experienced craftsmen make the templates themselves because they can intuitively understand what a new model from scraps will look like.
Little tips:
- there is no need to throw away templates, even if it seems that you are unlikely to want to repeat a specific product or everything is already clear and your memory will not let you down;
- It’s convenient to use folders with files to store diagrams, since diagrams get wrinkled, lost, and confused in boxes;
- on the details of the diagram you can make notes regarding the choice of fabric: when the product is ready, it becomes clear whether the colors and materials are arranged appropriately;
- The templates are cut using scissors along the dotted lines: not all templates leave a seam allowance, this must be taken into account;
- You can independently draw up a diagram on whatman paper: indicate on the drawing an ornament or design, the required number of parts, possible colors of fabrics.
Sewing is a technological process. Only very talented people with an excellent eye and an enviable sense of composition can do without diagrams and patterns. Don’t overestimate your own capabilities: it’s better to tinker a little longer, but the result will be impeccable.
Determining how to connect the patches
The most actively used are 2 patchwork sewing techniques: American and block. In the first case, identical figures are basted to each other using paper templates. Then a seam allowance is made for the turn-up, and then the piece is basted again. Block tactics are more often used in modern master classes. Triangular or square elements are connected into blocks. Then they are sewn to the base, resulting in a beautiful three-dimensional pattern.
If we are talking about crazy patchwork, the seams are treated fundamentally differently: they must be decorated. This can be to disguise the seam with elegant braid, lace, ribbons, or beads. The artistic stitch (“curly”) is popular, as are unusual options that imitate bird tracks, a Christmas tree, falling snowflakes, etc. Buttons, beads, beads, and rhinestones can be woven and sewn into artistic stitches.
Denim home decorations
You can decorate the interior of your own home using homemade crafts. Their price is minimal, but the design is memorable and unique.
Rug
Most often, rugs are made in denim patchwork style. To create it you need a lot of denim and patience. But there are a huge number of options for implementing creative ideas when creating.
Picture frame
Decorating frames with denim material is another option to diversify the interior. It makes it easier than ever. Prepare strips of denim of different lengths. Twist them one by one and glue them to the frame. What the result will be depends only on your imagination.
You should not throw away denim items that have served their age. You can create a huge variety of useful and interesting things from them. Even toys can be made from denim. But more on that another time.
The best ideas in the interior
Of course, a patchwork quilt is one of the decorative elements in the room, so you should be careful when sewing it, choosing the optimal colors and materials. For small rooms, patchwork blankets made in light, light colors are suitable, so the sleeping area will not seem large, but, on the contrary, very compact
An excellent addition to the interior will be the same pillows and chair covers, if they are in the room. Often made from scraps of bean bag chairs, they look very interesting in the room, and also delight with their practicality and softness
For small rooms, patchwork blankets made in light, light colors are suitable, so the sleeping area will not seem large, but, on the contrary, very compact. An excellent addition to the interior will be the same pillows and chair covers, if they are in the room. Often made from scraps of bean bag chairs, they look very interesting in the room, and also delight with their practicality and softness.
If you decided to make a bedspread from scraps for the living room, then you need to proceed from the general atmosphere. For example, a room is decorated in Provence style and has enough free space, then you can create a voluminous bedspread in turquoise and pink tones, as well as make the same pillows that can be laid out on separate armchairs, creating a complete picture. The blanket can also be made using watercolor or checkerboard techniques.
As can be seen from the interior of this bright room, a knitted patchwork bedspread perfectly complements the space, and it does not distract unnecessary attention to itself at all, leaving the room very calm and harmonious.
Despite the large abundance of colors in the patchwork quilt, they blend very harmoniously with the overall decor. The room is conducive to complete relaxation and wonderful sleep.
This example shows that the sleeping area is overcrowded with bright and catchy colors, so it will be difficult to calm down and fall asleep here.
There's an incredible sense of style on display here. The blanket is sewn in such a way that it matches the entire furnishings in the room, and there are also curtains made in the same style. Despite the fact that there are a lot of patchwork items in the room, it does not seem pretentious. This is achieved due to the color and texture of the fabric itself.
To learn how to sew a “Random Color” quilt in 30 minutes, watch the following video
Features of denim
Like most fabrics, denim has 2 types of threads in its structure:
- Warp thread. They are responsible for how durable the fabric will be. It is painted white and is visible only on the reverse side.
- Weft thread. It is the basis of the fabric. Painted blue.
Denim gets its sky color thanks to indigo dye.
Denim items may shrink a lot after washing. For this reason, new products must be washed very carefully; do not wring them out.
Now you can find both familiar denim products and absolutely unimaginable ones: jeans, Panama hats, boots, jewelry and much more.
Crazy patchwork: the messiest patchwork ever
The patchwork technique allows you to create finished products from different pieces of fabric that amaze with their originality and beauty. Crazy patchwork is the most interesting variation of patchwork, which implies the absence of any order in the creation of the finished fabric. That is, the flaps used are of irregular shape, and they are all radically different from each other both in the type of fabric used and in texture. Only the same cut and tie are maintained.
Content:
Quilting (also known as quilting) is a technique for creating compositions from pieces. In sewing and knitting it is called patchwork. That is, by its nature this is the same patchwork stitching. There are about 150 different patchwork techniques, which differ from each other both in the shapes of the initial patches and in the patterns that are obtained in the end.
The crazy quilt technique can be used to sew completely different products, from pillowcases to sweaters, dresses or banal napkins.
The basis of crazy patchwork is:
- abstraction;
- lack of order;
- the use of any flaps that, in principle, can be sewn together;
- lack of a pattern of the correct shape.
An item made in the crazy patchwork style is always unpredictable, looks bright and original, and is complemented by fashionable accessories.
By the way, Kristin Charsinoff can rightfully be called the founder of crazy patchwork. She used this style to create unprecedented beauty of paintings that were stretched on ordinary canvas with a decorative wooden frame. But its main “trick” was the combination of different sewing styles - both Western and Eastern, and even Slavic.
Naturally, no patterns are created for crazy patchwork. Creation begins with a conventional sketch. But in most cases, you can do without it - the flaps are simply laid out on the surface and the selection method is used to decide how they will be sewn together.
Crazy patchwork technique: master class
No matter how strange and funny it may sound, the main ideology of crazy patchwork is that you need to do everything quickly and without hesitation. That is why sewing in this style is done quite quickly. Of course, some of the masters adhere to a certain pattern or order, but only they know about it.
Crazy also uses the so-called masking of seams. For this purpose, seams with:
- ribbons;
- decorative fittings;
- curly seams (duck feet, goat, chain, braid);
- braid;
- beads.
The main feature of the crazy patchwork technique is considered to be decorative seams for hand-assembling patches: goat, chain, duck feet
Combining seams is also allowed. This is where the very name of the crazy technique comes from - the absence of rules and the use of all kinds of materials in the product.
The size of the flaps does not matter at all. Both 100 by 100 centimeters and 10 by 10 centimeters will do, not to mention irregularly shaped flaps. Of course, in extremes, you also shouldn’t try too hard to adhere to the rules for creating a certain product (whether it’s just a bedspread, blanket, socks or even napkins). That is, it must maintain the shape specified by the technique and fulfill its decorative purpose.
Cutting fabrics in crazy patchwork
It is conventionally believed that in crazy patchwork you should still use fabrics of the same texture or density. The required geometric shapes (if you plan to create a cut from scratch) are determined by the sketch. Mostly oval turns or any transitions are not used.
To create a crazy patchwork we will need:
- the fabric itself (best linen, silk, their synthetic analogues);
- fittings for masking seams;
- threads (will be used for sewing);
- pins;
- scissors and tailor knife;
- sewing machine;
- iron (for smoothing the flaps before stitching).
Using ordinary tailoring tools and scraps of fabric, which every needlewoman always has on hand, you can create a real masterpiece of patchwork.
You should start with the simplest elements. And these are napkins that don’t even require preliminary diagrams.
Patchwork fabric for this can be assembled using plain paper. That is, pieces are placed on it, and the places planned for them are marked. A similar technique is used for knitting, only here a ready-made fabric from the same cardboard is used as a base. Even threads are sewn along it (you can use a check, but, as a rule, they just make straight vertical lines, which are secured with pins).
To become a master of crazy patchwork, you don’t need to take any master class. It is enough to be able to imagine and create unusual textile compositions. You just need to learn how to properly sew (or stitch) the flaps and complement it all with decorations from any beautiful materials.
Ornaments in crazy patchwork style
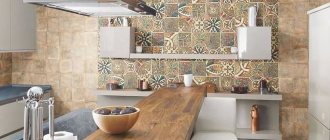
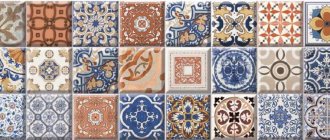
But ornaments in crazy patchwork appeared relatively recently. And they migrated to sewing from construction! Paving slabs are often laid in this style in Italy. It looks very attractive.
As for sewing, cotton fabric made from small scraps with even cuts is best suited for creating an ornament. Their connection is made using pins, after which the second (back) flap is pulled over the front flap and secured at the edges with pins. Along the joining line of the second flap, excess fabric is then cut off so that the first part of the canvas is absolutely flat relative to the surface (on which the flaps are laid out).
It is recommended to sew all parts of the fabric with a decorative seam, or to cover it with “duck’s feet”. In this case, it will definitely be impossible to make a mistake! The finished product with any combination of fabrics will turn out to be extremely attractive precisely thanks to the unique combination of several parts.
Samples of some patterns used in patchwork
Ready-made ornaments can be decorated:
- curly ribbons;
- braid;
- simply tied along the seams with beautiful ribbons, even if it is just polyethylene;
- the remnants of pieces of fabric cut from the second flaps.
Collecting crazy blocks for stitching
Despite the fact that no patterns are used in crazy patchwork, there is a whole category of craftsmen who stubbornly believe that assembling patches should be done using a certain technique. In principle, this is partly true. For example, combining small and large patches is not the best option, as is texture.
So, if anyone prefers to adhere to certain techniques, then we can only mention:
- correct combination of shades;
- lace can be combined with regular textiles;
- You should not use flaps of regular and irregular shape in one product;
- it is not necessary to take into account the density of the fabric;
- The stitching may also be different;
- The edges can be aligned at the time of stitching.
It is also possible to sew a patch on the base, although patchwork specialists most often ignore this rule, creating a canvas without any lining.
Kitchen panels using the crazy technique (video)
In most cases, the result is a multi-layered one-piece product with a single front side. An ordinary “sketch” is fastened with ordinary pins or hemmed with a rough seam. If the flaps are not folded into the correct shape in advance, then the excess edges are simply cut off.
Crazy patchwork (photo)
homeli.ru
