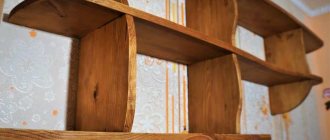
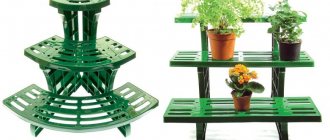
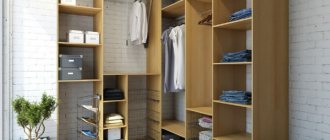
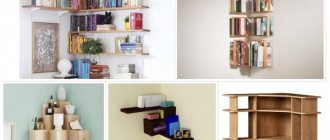
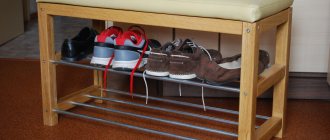
You can place a lot of things on such a rack
. A rack is an extremely useful thing in everyday life, and sometimes simply irreplaceable. This piece of furniture, which can be called the simplest, allows you to effectively use the space inside residential and utility rooms, and in some cases it is an excellent decor and even a zoning partition.
Today we will look at how shelving for a pantry is assembled - how to make a useful thing with your own hands that will make your owner happy.
Options and drawings of shelves for pantry
Before choosing any shelving option, it is important to know the dimensions of your pantry. Armed with a tape measure, you can easily measure all the necessary data and build on them in the further selection of the scheme.
Dimensions for each structure must be calculated individually, depending on the available space
Based on the individual dimensions of the pantry, it is important to understand the height and permissible width of the shelves, the distance between them, and the most comfortable depth of the entire product. Thus, making a rack will not be very difficult. Furniture manufacturing, like nothing else, is subject to the principle “Measure twice, cut once.”
The design can be either simple or intricate - it all depends on the imagination of the manufacturer
Leaving aside the classic shelving, you can allow yourself to go a little wild in the design of your storage space. By putting more effort into the drawing and measurements, you can make with your own hands not empty shelves in the pantry, but a work of carpentry art.
Shelving for the room
0
In the case of residential premises, the situation becomes a little more complicated. You already understand that a shelving unit for simple household needs, often in technical rooms, is usually easier and cheaper to make yourself than to go out and buy a ready-made one.
0
When making a shelving unit for your home, you should be guided not only by practicality, but also take into account its role in the design of the room.
0
Therefore, most furniture is made from wood, chipboard and MDF, because these materials will look very decent after processing.
0
The simplest rack is made in the same way as in the case described earlier. The difference will be in the appearance that is required of him.
0
For example, in order to hide self-tapping screws, you can use a larger drill to make a small recess in which the cap will hide. Later, you can close the screw with a plastic plug, as furniture manufacturers do.
0
A more brutal shelving unit can also fit into a modern interior. The DIY shelving layout won’t change much in this case, but you will need to use your imagination to select fasteners
0
What to consider when planning a storage system in the utility room
As we have already said, it is important to think about what exactly you want to keep in the closet and relate it to the area. If it is small, then it is better to equip spacious mezzanines, and put drawers or baskets below for items that you use less often than others. This option is not suitable for building materials.
When calculating the depth of the shelves, do not get carried away. Remember that you need to leave free space between them so that it is convenient for you to enter, take something, turn around, and take out large objects. It is advisable that the passage occupies at least 70 cm. In a room with a high ceiling and an upper tier directly below it, provide space for a stepladder or ladder.
Measure the longest containers that you plan to put away for storage, and make several compartments just for them.
A few more tips for arranging storage shelving in an apartment
- Straight shelves without intermediate supports are only suitable for small closets with a distance of no more than 2 m from wall to wall. Otherwise, the board will sag.
- The width of the ledges increases from top to bottom; the heaviest things need to be removed downwards. This is due to safety and convenience.
- Use the rule: the larger the load, the thicker the material (this applies to wood, plywood), the more fastenings and the smaller the gap between the support posts.
- The optimal mezzanine width for cans with blanks is 30 cm or more.
- It is preferable to fix light equipment against the wall; massive structures are stable due to their weight.
- Take care of separate lighting for the pantry, do it before starting other work.
- Before installing storage systems, the utility room must be prepared: thoroughly cleaned, if possible, level the walls, re-paste them, paint or tile them.
- If necessary, cover the walls with antiseptic impregnations to protect against mold.
- If the room will be open, paint its walls in bright colors that match the surrounding interior.
Taking into account all the tips and features of your room, draw a sketch of the future closet indicating the design parameters and start creating it.
Important points when designing utility shelves
You can also make shelving and shelves for your pantry yourself. To do this, there is no need to have specialized knowledge and skills. First of all, a sketch of the furniture set is created, which takes into account all the important parameters.
The pantry rack is a convenient storage for food, dishes, and homemade preserves.
The diagram must reflect:
- room size;
- shelf dimensions (height, width, material thickness);
- design features.
Each shelf of such a rack is used to the maximum and allows you to easily find the desired item, saving time on searching.
All these parameters affect the final appearance and correct installation. In order not to miss a single detail, we recommend that you familiarize yourself with the information on how shelves for the utility room are made by hand.
Choosing a place for a shelf
When thinking about how to make shelves in your pantry, it is important to decide on the location. The place where the shelves will be attached should be chosen taking into account many factors.
The wall on which it is planned to mount must be load-bearing.
This is the key to the strength and durability of the structure. A thin interior partition may not withstand the load and shelves filled with heavy objects will collapse.
In addition to boards, you can use particle boards, plywood and other suitable materials.
If the fastening is not carried out directly to the wall, then you can use your imagination in accordance with the desired shape of the location.
Consider the dimensions of the items you intend to store.
It is important to prepare the storage room itself, level and tidy up the walls in advance so that the shelves stand up straight and there is no need to adjust them to the topography of the wall.
It is worth taking care of lighting before the installation of the rack occurs.
Wooden rack: general drawing
To create a rack it is easier to use ordinary pine. The racks are made of square (50x50 mm) or rectangular (50x100 mm) timber, the side drawers and shelves are made of 75 mm thick inch. From a reliability standpoint, paired crossbars attached to both sides of the posts are the most unreliable and least fiddly assembly option.
As for the sizes, in this drawing we specifically decided not to be tied to specific numbers, since the project is maximally variable. You can easily determine the dimensions of the rack yourself in accordance with the size of the pantry, balcony or loggia. You can also change the configuration of the rack: select the required number of shelves, adjust their depth, etc.
Manufacturing of sidewalls
Four posts of the required length are cut out of pine timber 50x50 or 50x100 mm. Based on the number of shelves in the future rack, prepare the required number of drawers. For this, a 25x75 mm pine board is optimal. The length of the drawers is the depth of the future shelves.
When the sidewall parts are ready, proceed to assembly. This is perhaps the most critical stage of the entire work, since incorrectly assembled sidewalls will lead to distortion of the structure. When screwing the jumpers, it is important to ensure the strictness of the right angle; for this, it is constantly checked with a square. By screwing the first two pairs of sidewalls, the structure will acquire the necessary rigidity and will not be so demanding on measurements.
Since the sidewalls form the main load-bearing unit, for greater reliability it is better to mount them on a bond of wood glue + self-tapping screws. To prevent the slats from moving due to slippery glue, keep a couple of clamps on hand and use them to secure the sidewalls after gluing. To avoid cracking, when working with dry lumber, self-tapping screws are drilled along pre-drilled guide holes.
Assembling shelves
Having assembled the required number of sidewalls, you can proceed to attaching the shelves. For slats, it is better to use the same pine inch, 75 or 100 mm wide. The boards are fastened with self-tapping screws, as shown in the diagram.
The first few slats are screwed in a horizontal position, carefully checking the perpendicularity of the assembly with a square. When the structure acquires the necessary rigidity, the rack can be placed vertically and continue to be drilled in a more convenient position.
On the lower shelves, where it is more logical to store bulky items, it is advisable to mount the slats with an indentation. This will save lumber and reduce the weight of the rack. It is better to make the shelves on which small things will be stored “deaf” so that things do not fall through the gaps. Alternatively, all the slats can be screwed “one after another”, and then cover the shelf with thin plywood or hardboard.
Dry lumber can crack easily. Don’t be lazy to drill thin holes for self-tapping screws - this will allow you to avoid such troubles as in the photo.
Load calculation
Before production begins, the load from objects and things to be stored is calculated. This indicator depends on the following factors:
- The thickness of the wooden shelf is from 30 to 55 mm. The greater the load expected, the thicker the board should be;
- fastening method - wooden blocks of several cm, metal brackets. Plastic holders will not cope with the weight of the shelf;
- fastening points – the longer the built-in rack is, the more fastenings are used.
Special racks
0
We've talked quite a lot about wooden shelving, but there is a type of shelf where the use of metal is highly desirable, if not mandatory.
0
We are talking about ceiling racks. Their essence is to be mounted under the ceiling, which means they must be strong enough to withstand everything that will be stored on them.
0
Wood does not fit this description very well, which cannot be said about metal.
Preparation
Before installing storage systems, the pantry must be repaired: clean the space, carry out dry and wet cleaning, remove old wallpaper and flooring. If necessary, the walls of the storage room or attic are leveled and also put in order: painted or pasted over.
It is recommended to use a primer that contains antifungal impregnations.
Laminate, parquet or linoleum is laid on the floor. It is also worth equipping the pantry with ventilation and lighting, which will greatly facilitate the use of the room.
Tools for work
To understand what tool is needed for the job, you need to clarify what exactly needs to be done. If the material for the shelves is not prepared and needs to be trimmed and sharpened to the required dimensions, then it is imperative to have a jigsaw or a hacksaw for wood and a plane. They will help you make shelves of the right size. You will also need sandpaper to sand the edges of the cuts and give the shelves a finished look.
Tools needed for work.
You need a hammer drill to create holes in the wall for dowel-nails to attach brackets, and a screwdriver to connect parts to each other, if necessary.
This is enough to ensure that the pantry has good and reliable shelves on which you can store anything.
You will definitely need:
- Tape measure, for creating markings and measuring distances;
- Construction level so that the rack with shelves is level;
- Pencil or colored chalk for marking the wall. When you have prepared all the materials, you can begin the process of installing them in place.
Necessary materials
When deciding how to make shelves in a pantry, you need to decide on the material from which the structure will be made. There are several options.
- The budget option allows you to make shelves from the material included in the furniture. If you have an old wall or an unnecessary chest of drawers, then you can disassemble them and get a fairly durable and, at the same time, free canvas for making boards.
This will be enough to ensure that the pantry has good and reliable shelves on which you can store anything.
- The second option involves purchasing material for shelves in the pantry. The choice must correspond to the list of intended items for storage, their dimensions, and weight.
It is advisable to make a rack directly in the pantry, since if it is large, then it will be difficult for you to bring it inside.
If it is expected that the racks will be loaded with conservation, then a solid board about 30 mm wide will be the best choice.
Any boards will do - the main thing is that they are of sufficient length and can withstand the expected load.
In addition to wooden materials, you can choose others, the main thing is durability and the possibility of self-assembly. In addition to the shelves, you should stock up on the fasteners on which the shelves will be installed, and the consumables necessary for the work.
In order to make wooden shelving for a pantry, you will not need a lot of materials and serious tools.
Wooden rack
Professionally assembled furniture
You can choose anything as a material for your shelving. By the way, metal pantry shelving can withstand an impressive load.
However, neither metal, nor composite materials, nor concrete, nor plastic can be compared with wooden products, due to the ease of working with the material and its beauty. Let’s not forget to mention that the price of such a solution will be lower and the work will take less time.
Metal shelving for the pantry looks a bit rough
Materials
The structure of the rack is very simple. It consists of vertical racks, the number of which is determined based on possible loads, horizontal jumpers and, in fact, shelves.
Wooden beam
- For racks and lintels, timber with a cross section of 45*45 mm or slightly larger is perfect. This thickness will be quite enough to withstand a lot of slender rows of twists.
- You can also use slats for jumpers that are half as thick - if you have a circular saw, they can be cut from the same beams.
Planed boards 20*95 mm
- You can use any sheet material as shelves, be it plywood, chipboard or MDF and other analogues. But if you want the rack to look good at the same time, it is better to purchase edged boards, the thickness of which is 20 centimeters.
- Such a solution will be even stronger.
Polyvinyl acetate wood glue
- Any self-respecting carpenter tries not to use metal fasteners in his work, but connects everything with wood glue and wooden elements, but this approach requires some experience and more time. We offer you a middle solution.
- Self-tapping screws will be used, but only in combination with adhesive joints.
Dowels of different sizes
- The main connections will be made using dowels. They are purchased ready-made in stores.
- Well, and, naturally, the galvanized screws that we have already mentioned.
We will not list the working tools separately - you will see everything as we describe the work.
Profile shelves in the pantry
Making a rack using metal profiles is suitable for storage rooms, where the walls are easily subject to self-tapping screws.
Simple shelf design using metal profiles
There are several nuances in the execution of this version of the product. For ease of installation, it is fixed under the ceiling and near the floor; it requires fastening to the walls. If this can be done in a pantry room, then the rack will make the owner happy with its simplicity and conciseness. Step-by-step manufacturing instructions are below:
- Metal profiles three meters long will be placed on the wall as follows. A total of 8 supports for the shelves are required. If necessary, the dimensions of the diagram must be adjusted to the dimensions of the storage room.
- The dimensions shown in the diagram below can also be adjusted. At this stage, it is necessary to attach metal profiles to the wall, floor and ceiling of the storage room. The framework of the structure begins to emerge.
- The dimensions shown in the diagram below can also be adjusted. At this stage, it is necessary to attach metal profiles to the wall, floor and ceiling of the storage room. The framework of the structure begins to emerge.
- Install additional perpendicular profiles on vertically fixed workpieces. They must be parallel to the wall ones. Thus, at this stage of work, the home craftsman needs to have three supports on the wall, two vertical ones from floor to ceiling, one from the beginning of the shelves to the ceiling, as well as three horizontal supports. The 8 profiles stated at the beginning of the instructions are used up - the shelving frame is ready.
- The next stage is creating shelves from plywood. Three blanks with a width of 500 mm are cut from a piece of 3000 mm. The quantity and sizes are selected individually.
- The next stage is creating shelves from plywood. Three blanks with a width of 500 mm are cut from a piece of 3000 mm. The quantity and sizes are selected individually.
- The final stage is the installation of plywood shelves on a structure made of metal profiles. Here you need to secure the bases with self-tapping screws and the rack is completely ready.
Quick and easy production will not ruin the home craftsman, but will provide additional storage space for tools, cans and other household items.
Hanging shelves in the pantry
Wall shelves always look light and laconic. This option is perfect for lovers of high-tech style and minimalism. The whole secret of such products lies only in installing them on the wall. Read more about how to create this piece of furniture and install it correctly in step-by-step instructions:
- The first stage is making the shelves. In this design, they must be wide enough so that the mount fits securely to the product. Plywood must be cut into equal pieces - the dimensions in this case depend entirely on individual preferences.
- You should get one long and narrow blank - the front side of the shelf, two wide boards for the base itself, two small side ribs where objects will be located, as well as three bars - they will become jumpers.
- You should get one long and narrow blank - the front side of the shelf, two wide boards for the base itself, two small side ribs where objects will be located, as well as three bars - they will become jumpers. Important! The side edges of each workpiece are sharpened at 45 degrees for easy assembly of the parallelepiped shelf.
- Having provided additional convenience with masking tape, you need to fold the shelf around three bars already attached to the base. In this position, they must be glued and secured with weighty objects until they dry.
- The next step is to secure the side panels in place of the shelf ribs. This can also be done using glue. The blanks are cut from the same plywood with a 45-degree edge.
- The next step is to secure the side panels in place of the shelf ribs. This can also be done using glue. The blanks are cut from the same plywood with a 45-degree edge.
- For aesthetics, treat the joints with wood putty - they should become invisible. Sand the shelf. If desired, you can prime, paint and varnish.
- For fastening, you need to take metal bars or profiles. They must go inside the shelf cavity. Weld or fasten the workpieces as shown in the photo. Paint as desired. Place them on the wall.
- For fastening, you need to take metal bars or profiles. They must go inside the shelf cavity. Weld or fasten the workpieces as shown in the photo. Paint as desired. Place them on the wall.
- Place the shelf on the metal fastener.
This design of a wall rack will not take up much space and will be an excellent design solution. Moreover, the load capacity of the structure is several tens of kilograms.
Final decor of the rack
The finished structure must be painted. Of the various options, the simplest are coating with water-based acrylic paint or varnishing the product.
The advantage of acrylic paint is that it dries quickly and has virtually no odor. It can even be used indoors, although the room will still need to be ventilated. Varnishing is preferable if you want to preserve the structure or slightly tint the surface of the wood. Clear or tinted varnish to resemble oak, walnut, ash and other wood species should be applied two to three times. Each new layer is applied after the previous one has dried.
Before painting the rack, it is necessary to prime the surfaces to be painted, unless two-in-one paint is used. Priming the surface will ensure a good result and will ensure that the paint does not peel or crack over time. If you intend to paint with oil paints, it is recommended to do this in advance outside the living space. We bring all painted parts into the house for subsequent assembly only after complete drying.
So, once the shelving unit is assembled and painted, you can stand back and admire your work. However, your furniture will look more presentable when books, figurines, framed photographs and other household items for which it was made appear on the shelves.
Expert advice
Experts give a number of tips to avoid mistakes in manufacturing and installation. A rack for a pantry or dressing room can be made by hand no worse than in production, if the rules are followed:
- the purpose of the structure is determined. The diagram reflects all large items that require shelves with sufficient width and depth;
- treatment of all wooden elements with varnish and stain. On the Internet you can find many photos with examples of such work;
- optimal placement of the structure along three walls or in a U-shape;
- natural materials, solid wood are preferred. The manufacture of partitions allows the use of veneer, plywood, chipboard or MDF.
Types of shelf designs
The main classification of furniture is based on design features. In the store you can find three varieties - linear, U-shaped and corner racks. Proper arrangement of space depends on the dimensions of the pantry.
INTERESTING! Most often, when choosing a shelf, the guidelines are the features of the room. Shelving should fit into the room and create proper organization of the storage system.
At the same time, you can separate types of products according to the dimensions of the shelf and the rack itself. Various manufacturers provide their products to suit customer needs, for example, equipped with closed drawers and doors. They are performed similarly with display cabinets.
A distinctive feature of such furniture is its spaciousness with relatively compact forms.
Modern designs can also be equipped with compartments for jars, a glass facade, shelves with baskets, compartments with metal fasteners for bottles, and drawers for vegetables.
Such options are selected on a case-by-case basis to suit the needs of property owners.
Photo ideas for homemade shelving
Sources
- https://FurniLux.ru/dizajn/kak-sdelat-polki-v-kladovke.html
- https://berkem.ru/polki-i-stellazhi/kak-sdelat-polki-v-kladovke-svoimi-rukami/
- https://bezkovrov.com/prihozhaja/stellazhi-v-kladovku.html
- https://vdome.club/materialy/svoimi-rukami/kak-sdelat-stellazhi-v-kladovku-svoimi-rukami-iz-dereva-profilya.html
- https://www.ivd.ru/dizajn-i-dekor/sistemy-hranenia/kak-sdelat-polki-v-kladovke-svoimi-rukami-sovety-foto-i-poshagovyj-plan-35931
- https://ProPodval.ru/stroitelstvo/kladovka/kak-sdelat-stellazhi-v-kladovke-svoimi-rukami.html
- https://wexy.ru/obustrojstvo/dizajn/stellazhi-dlya-kladovki-305
- https://gidrukodeliya.ru/stellazh-svoimi-rukami

