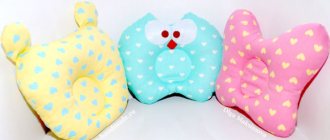
Homemade and handmade items have always been considered the most popular type of decoration. Such things bring unique character and individuality to the home.
Anyone who knows how to hold scissors, a needle and thread can make unique paintings from artificial fiber. There is virtually no need to spend money to implement such decorative decoration; everything you need can be found at home.
Technique, examples
Textile painting varies greatly in design and style. It can look like a mosaic painted on Chinese silk, a panel, a three-dimensional pattern. The technique of creating paintings originated in the Japanese Empire, and then in Great Britain and the United States and the Russian Federation.
All possible types of execution of smooth and convex reproductions from the manufactory:
- kinusaiga;
- osie;
- patchwork quilt;
- quilling;
- string art;
- from openwork weaving;
- from felt;
- damp cloth;
- from jeans;
- 3D version.
Always make a sketch on paper with a pencil, then select the type of execution that is especially interesting to you.
Fabric on fabric (basics of work)
Paintings on fabric began to come into fashion relatively recently. But, recently, panels are increasingly beginning to occupy a leading niche in the interior of the room. There are many admirers of such art. Some needlewomen try to make compositions with their own hands.
Related article: Homemade toy box: options made of cardboard, fabric and wood (4 MK)
You can often find versions of paintings that are obtained by painting on fabric enclosed in a frame. But such compositions cannot be called panels. It’s a completely different matter when a pattern is created on a fabric using another fabric. This is a real panel. The composition looks gorgeous if the fabric creates a voluminous effect.
Main rules
Full compliance of the panel with the style of the room is the main requirement. But there are no rules without exceptions. If the product is made in a different theme, but the color accents are respected and do not in any way disturb the overall impression, then you should not deny yourself the pleasure of placing the composition on the wall.
When working on creating a decorative panel, there should be:
- knowing of limits;
- compliance with the design of the room;
- full interaction of components with each other.
Techniques for creating fabric panels
You can perform the composition using different techniques:
- applications;
- kanzashi;
- patchwork;
- 3D modeling.
Base manufacturing options
When starting work for the first time, you should understand that you are unlikely to get a work of art the first time. To do this, you need to get at least a little bit skilled. Constant training, perseverance and following the advice of experienced masters will yield results.
It is better to make a panel for the first time from materials that you don’t mind spoiling. And the second and further, having acquired skills, you can aim at expensive workpieces.
There are several options for preparing the basis for creation:
- A base is prepared from very thick cardboard, fiberboard or plywood. A fabric is pulled over the front part of the workpiece, the edges of which are folded to the wrong side. To prevent the canvas from moving, its edges are fixed with glue. In this way, a base is obtained on which the applique elements begin to be attached.
- They take wooden slats and form a frame from them, then they cover it with fabric. To do this, cut out a rectangular fabric according to the dimensions of the frame, adding 2-3 cm so that you can wrap it on the wrong side. After the fabric is stretched, the edges are fixed to the frame using a stapler or small nails.
Article on the topic: Birdhouse made of plastic bottles: MK (+40 photos)
- Styrofoam is also perfect as a base. On such a blank, a drawing or diagram is drawn with a pencil, then scraps of fabric of different colors and textures are selected. Along the marked lines, the edges of the patches are deepened into the foam using a sharp tool.
After the base is ready, they begin to select the elements from which the drawing will be created. To do this, you can use both multi-colored textiles and any other accessories that are appropriate in the composition and combined with the main elements. The applique is complemented with all kinds of beads, buttons, rhinestones, etc.
Materials
The required set and raw materials for creativity differ slightly depending on the specific type of execution. Would need:
- frame;
- expanded polystyrene sheet;
- board, thick thick paper;
- straight and curly scissors;
- PVA glue, glue gun;
- wool;
- multi-colored fabrics;
- dye;
- needles, threads;
- stapler;
- iron;
- small cloves;
- textiles, wood;
- plastic decorations.
Procedure for creating an application
Regardless of the materials used, the process consists of the following steps:
- select a sketch;
- determine the size and shape of the application;
- selecting materials for work;
- we cut out the details;
- select the background, if this is not determined in advance;
- add details to the background;
- attach the details;
- If necessary, dry it.
How to sew or glue an applique
Possible options:
- hand stitches;
- machine stitch: select the desired type of stitch (most often it is a zigzag), pitch, stitch height and sew the stitch on a machine;
- use of stigis fabric: this is a special fabric for appliqué with a hot-melt adhesive layer. Stygis fabric does not require glue, threads or needles. Therefore, when children perform appliqué, there is simply no alternative for Stygis - it is convenient and safe. Especially if collective application is performed by children, because in this case the explanation of the process is greatly simplified. For stigis fabric, a general presentation for the lesson with step-by-step photos can be prepared. An example of a completed application - see photo;
- gluing on film: you will need cling film and two pieces of foil. On the ironing board we assemble a sandwich - foil (its dimensions should be several cm larger than the glued motif), the basis for applique faces. side up, cling film (we cut it along the contour of the motif with a margin of 5 mm), applique (this part of the sandwich can be pinned together with a pin to secure it), foil. Iron on low heat and leave until cool. This method is great for cotton fabrics. The finished item can be washed by hand without twisting.
Antique embroidery work
"Osie" originates in the Land of the Rising Sun in the 17th century. It has not lost its significance even today. The images were made from small pieces of thick paper, wrapped in scraps of worn Japanese kimono.
Subsequently, a special plastic paper based on mulberry silk threads was used. A distinctive feature of these images are children in traditional costumes, Japanese warriors, geishas, textured paintings with the theme of Japanese folklore.
Pieces of animal skins, leather, lace, and beads are often used as auxiliary decorations.
How to do:
- Cover the base with bright threads and the frame with dark threads.
- Cut out the components from paper and transfer the material.
- Glue them together as close to each other as possible.
- Let dry under pressure.
- Hang the artwork on several loops.
Modern directions
You can make your own fabric paintings using various techniques.
Patchwork, otherwise known as patchwork, has been known to many for a long time. However, along with the old styles and techniques of this type of needlework and original art, new modern trends have appeared that are very interesting and accessible for independent creativity.
The names of these directions are most often associated with methods of connecting flaps of fabric, applying it to the base or the shape of the pieces of material themselves.
Crazy
Despite its centuries-old history, this style is still popular today. It is characterized by: freedom in choosing colors and applying pieces of fabric and seams, as well as a complete absence of geometric canons.
Crazy patchwork
Crazy patchwork is mainly used to make blankets, pillows and rugs. The style is very simple to perform, even a novice master can handle it.
English
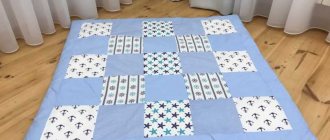
Another one of the most accessible styles to perform is English. It uses scraps of fabric of geometric shapes. Previously, these were only squares, which were placed strictly in a checkerboard pattern when stitching.
English patchwork
Today, triangles and diamonds are used in this direction, as well as various colors of these figures.
Quilt
This type of patchwork, as in the old days, involves a "quilt" style, where the top layer of the product is sewn together from pieces of fabric of different colors, shapes and sizes.
Quilt
The 2nd thick layer and the 3rd lining layer are subsequently quilted together with the top decorative layer.
Japanese
The Japanese patchwork style also has a centuries-old history. The technique is considered one of the most difficult and requires perseverance and a certain skill in work.
The execution requires a selection of fabrics and shapes, from which, by stitching, various figures of animals, people, plants and buildings are obtained. Today there are several trends in Japanese patchwork.
Japanese patchwork for beginners - belts
Japanese patchwork for beginners - yosegi
Japanese patchwork for beginners - applications
Japanese patchwork for beginners - sashiko
Japanese patchwork for beginners - yo-yo
"Kinusaiga" (patchwork without a needle)
Among them:
- "Belts";
- "Yosegi";
- "Sashiko";
- "Yo-yo";
- applications;
- “Kinusaiga” (patchwork without a needle).
A distinctive feature of Japanese patchwork is the use of only manual labor without the use of a sewing machine. Therefore, patchwork works from the Land of the Rising Sun always have a fairly high cost.
"Boro"
This technique is a variation of the Japanese style. All work is done manually. The scraps of fabric can be of different textures and colors.
Patchwork Borough
They are not simply stitched together at the edges. They are sewn on top of each other with overlapping stitches over the flaps. The result is an unusual and semi-volumetric picture.
"Watercolor"
This style of patchwork is very popular among needlewomen, and is considered one of the simplest and most beautiful.
Patchwork watercolor
In the process of stitching together scraps of different shades, while following the color combination scheme, beautiful paintings with a gradient are obtained.
"Bargello"
A very interesting direction, where when sewing scraps of different colors in a certain direction, you get a beautiful transition from color to color with the illusion of movement.
Patchwork Bargello
This is not a very simple technique, but the result is very beautiful.
"Pizza"
This is a fairly simple version of the patchwork technique, which does not require a pattern or strict geometry. Here, on a piece of fabric, scraps of the desired color are laid out in a chaotic manner along the contour of the selected pattern.
Patchwork pizza
Organza or tulle is applied on top. The work is ironed and secured with pins, after which it is attached by machine.
"Lyapochika"
This is an old trend in patchwork, the name of which translates as “piece of rag.” This technique produces excellent three-dimensional paintings.
Patchwork frog
In this case, scraps of fur, pieces of yarn or fabric are used to create them. They are sewn on top of some fabric base.
Traditional
In this technique, the remaining pieces of fabric are sewn in a circle to the central piece of fabric of the selected figure onto the base according to the selected pattern. There are several types in this direction.
Traditional patchwork - Russian square
Traditional patchwork - sunflower
Traditional patchwork - multi-colored spiral
Traditional patchwork - pineapple
Traditional patchwork - star
Among them:
- "Russian Square";
- "Sunflower";
- "Multi-colored spiral";
- "A pineapple";
- "Star".
All subtypes use scraps of fabric of different geometric shapes, which are sewn in a certain order.
"Chess"
This is a popular and not very difficult direction in patchwork sewing. Here, squares are used for stitching in the required quantity and color, which are determined in advance. They are stitched alternately into strips, which are subsequently combined into one fabric.
Patchwork checkerboard
When working, it is important to clearly maintain the joints of each figure. This technique is used to create blankets, bedspreads, decorative pillows and pillowcases, and also as frames for pictures from scraps.
"Corner"
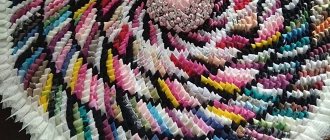
This direction of patchwork is reminiscent of Japanese origami paper art. In this case, squares of the same size are cut out of fabric of different colors. Each of them is folded several times into triangles.
The finished figures are placed one on top of the other, pre-fastened with pins, and then stitched. As a result, you can get a beautiful three-dimensional patterned panel, napkin or rug.
Patchwork corner
The easiest to follow, well-known and popular directions:
- squares;
- triangles;
- stripes;
- honeycomb
Their names indicate the shape of the flaps used in the work. Today, in addition to the method of sewing together pieces of fabric, patchwork appliqué is used.
Kinusaiga
One of the hallmarks of Japanese culture is that almost every activity develops into high creativity. Nationally, it turned out that the raw material for the performance was a worn-out kimono, which they were ashamed to throw away.
The uniqueness of the amazing “patchwork without a needle” is that you don’t have to sew the parts together. Silk fabric for sewing Japanese robes is quite durable.
Progress:
- First, draw a diagram of the arrangement of elements.
- Transfer the sketch through a carbon copy onto the foam.
- Using the cutter, make cuts along the contour of the pattern with a depth of two to three mm.
- Cut the fabric into pieces of appropriate shape.
- Insert the scraps into the workpiece with a thin object. For example, with a cosmetic file.
- Trim off any excess and place it in a frame.
How to care for fabric paintings
Like any other product, a fabric picture requires care. It is important to take into account that the materials from which the panel is made must be washed and ironed before starting work. It is better to place the finished work in a frame with glass - this way the product will not get dirty or collect dust. If the artistic design hangs on a wall without glass, you need to periodically brush off the dust with a soft brush.
Patchwork, quilling
Patchwork art arose back in the 10th century of the first millennium. It is possible to use both ordinary fabric scraps and parts of knitted fabrics connected by crochet and knitting needles. Patchwork technique of sewing in one layer.
Items made using the patchwork technique will perfectly decorate an interior in the Provence style or a country house. The filler will create a voluminous effect.
Quilling is voluminous, multi-layered, and includes a huge number of different hems, embroideries, patterns, and weaves. To give softness and volume, padding polyester is used, laid in the middle of each layer of patchwork mosaic.
Execution method:
- Draw a sketch. You can take a schematic diagram from the website.
- The initial level is a single-color fabric, the second is a filler for volume, the third is a rag pattern with decoration.
- Sew everything using an automatic stitch or manual stitch.
- Make the base color plain or diamonds.
- Sew on the image.
- Sewing in parallel lines, zigzag, circle, spiral or random.
- For auxiliary decoration, use guipure, openwork weaving, braid with fringe, floral fabric patterns, and silk bows.
Some tips
If you want the painting to fit organically into the interior, you need to select fabric to match the walls. Each style has characteristic features:
- Provence – small floral prints, soft pastel colors, always soft pink, beige, shades of green;
- country - checkered, woody shades, always a combination of light and dark brown, marsh.
Instead of a baguette for decoration use:
- foam ceiling plinths painted in the desired tone;
- cardboard strips;
- bamboo;
- slats.
When creating paintings, experiment with the shape; it does not have to be a square or a rectangle; the decor of a multifaceted and triangular shape looks original. The general mood of the picture depends on the style. Applications of any level of complexity will look organic if they do not stand out from the general concept of the room or kitchen. Paintings in any technique can become a unique piece of decor or a pleasant gift for friends and family if you follow this rule.
Old jeans
Comfortable fit. Denim material, which comes in a variety of shades, always remains in fashion. Thanks to the variety of colors and stitches, this textile can be used to create amazing life collages, similar to traditional patchwork embroidery.
Most of the paintings are made using the denim-on-denim technique. Most often, faded parts that have interesting tints are used.
Recognized themes are city and seascapes and abstraction. Denim words look best against a darkish or distinct background.
Execution instructions:
- For the main color, cut out one-to-one diamonds in different shades.
- Sew in alternating order or in the manner of spectral descent.
- Draw elegant details - leaves, animals, boats, stars, bouquets, etc.
- Transfer the blanks to the jeans. Cut them out, then glue or sew them on.
- Decorate with trim.
- Edging is important. Make it from denim, in the form of a braided braid.
- Attach around the edges of the image.
- Attach the finished product to the plywood using a glue gun.
Choosing a theme to create a panel
Before you start work, you should understand that the panel must be designed in a certain style. It should resonate with the decor of the room in which it will be located. Otherwise, the product may stand out from the general theme and amaze everyone present with its tastelessness.
Many ideas and stylistic solutions can be gleaned from various articles, which are accompanied by a large number of photos. All that remains is to choose the idea that you like best and that fits the existing interior.
Classic, country, Provence
The ideal theme for panels for rooms decorated in classic, country, and Provence styles are various still lifes or floral motifs. Compositions in the form of landscapes also look good. Try to avoid pretentiousness; it is better to give the appearance of the product maximum simplicity and cheerfulness. The composition should bring an atmosphere of relaxation to the interior and evoke only positive emotions.
Abstraction is also appropriate in the interior of the appropriate style. It can be noted that it is a universal option, as it suits, in principle, any style.
Modern
Modernism is distinguished by the presence of strict geometric lines. That is why panels in the Art Nouveau style should contain compositions with different clear patterns. The design of the product should also be moderate. The frames used to frame the panels are quite simple, almost invisible.
Scandinavian style
One of the rare themes in the Slavic expanses is the Scandinavian style. It implies brightness and practicality, and is distinguished by the presence of appropriate ornaments and motifs. Even a novice craftsman can create such a fabric panel for the wall using various available materials, such as beads, shells, and ribbons.
Also on the fabric panel there can be images of deer, Christmas trees, letters, lines, cages and other things.
Loft style
Design solutions in the loft style are very popular in the design of modern interiors. There are also certain requirements here. The subject matter is quite varied, but the panel should be done only in two or three colors.
Despite the strict and laconic lines, the loft-style panel attracts the eye and looks perfect in the interior.
Fabric wet
Delicate fabrics, especially when raw, are good for folds. To make the material look wet, but not shrink, it is saturated with PVA glue diluted with water. Crumpled paper is placed under it. This technique usually depicts: nature, animals, ancient buildings.
Manufacturing:
- Make a sketch of the future image.
- Place the material on a flat surface and completely cover it with a thick layer of glue.
- On the soaked side, place the fabric on the base of the picture, which should be smaller on each side than a piece of fabric.
- Part of your design is almost smooth, the rest is textured.
- Where the background is smooth, carefully level the surface with your hands.
- To make folds, squeeze them out by first placing paper soaked in glue underneath.
- Dry with a fan.
Do-it-yourself volumetric paintings
Let's consider what various three-dimensional paintings from fabric and other materials can be made with your own hands using different techniques.
Light box and paper lace
Let's prepare for work:
- cardboard or thick paper;
- frame for fastening sheets;
- LED strip;
- stationery knife;
- frame box;
- sketch of the painting.
And we begin work.
Master Class:
- We print out the sketch of the painting on a printer.
- For work we will need a wooden board, on which we will cut out the parts.
- Using a knife, carefully cut out the parts. If you only need one printed drawing to create a work, then attach it on both sides. You can make 2, 3 or 4 layers of the sketch, this will create volume and lace filigree. Each layer will give depth, and shaky shadows will bring the painting to life.
- We install lighting in the box. We attach the sketch on top.
- Close the frame box and connect the light.
It turned out to be a wonderful New Year's story.
Volumetric panel made of leather
In any home you can always find out-of-fashion leather goods: wallets, bags, belts, jackets or vests. This is a fertile material for creating charming little things: brooches, eyeglass cases, tablet cases and other trinkets.
And we will create a three-dimensional panel using pieces of fur, cords, ribbons and decorative details.
What we need:
- Genuine leather or leatherette. Select scraps of various colors or paint them with special paints for leather.
- Prepare PVA glue to create three-dimensional elements.
- Glue “Crystal” or “Moment” for connecting parts together. It should be transparent to avoid unsightly smudges and stains. You can also use a glue gun.
- Acrylic paints or dyes for fabric and leather.
- Thin wire for creating three-dimensional elements.
- Stationery knife or scissors.
- Cardboard for templates.
- Pencil.
- Bowl of water.
- Regular hairdryer.
- A tool for giving parts a curved shape, it can be a metal ball.
- Corrugation cutter.
Let's start a lesson on making leather flowers:
- For the base of the picture we take fiberboard, thin plywood or cardboard. We cover the sheet with fabric, felt or leather.
- For the flower we prepare curled petals and grooved leaves. First we draw the petal templates on cardboard. We trace them on the back of the skin and cut them out with small scissors.
- Steam the parts and soak them in a bowl of water.
- We warm up the metal ball, and from the wrong side we begin to press each petal in the center, from which it begins to gain volume and flounce along the edge.
- Using a cutter we “draw” the veins of the leaves, also from the inside out.
- Let the parts dry until the morning, or dry them with a hairdryer.
- We collect petal by petal into a beautiful flower.
- We first attach the leaves to the substrate, and then the flowers.
- Add floral wire for the stems.
- We paint the vegetation with paints.
- Add various decorative materials.
- We insert the work into the frame.
Volumetric decoupage
Another very interesting technique for creating panels. You can do it with your children.
To work you will need:
- A4 drawing paper;
- scissors
- office glue;
- glue "Titan";
- picture frame;
- computer mat.
Begin:
- Let's print the picture 5 times on drawing paper.
- We do not touch the first sheet; it will be the substrate on which the volumetric parts will be attached.
- Create perspective using several layers. First we cut out the parts that will be in the background.
- We create volume for each part: with the rings of scissors we make circular movements along the edges, push them through, and then work out the middle. The figure becomes convex and voluminous.
- We attach the elements to the base. We apply Titan glue to each part, and after 1-2 minutes we apply it to the base. Don't press too hard.
- Glue all the parts one by one. Let each layer dry for 5 minutes.
- We frame a three-dimensional painting with flowers.
Very beautiful and unusual!
Beaded masterpiece
Bright, shiny and easy to do work.
Let's prepare:
- photo frame;
- beads of different colors (depending on your design);
- toothpick;
- PVA glue;
- scissors;
- dark yarn.
Begin:
- Let's disassemble the frame.
- Mark the contours of the frame on the picture.
- The selected drawing is placed under glass. The outline is outlined with glue. Next, we lay a thread of dark yarn exactly on the line. We cut it into pieces for high-quality styling. Help yourself with a toothpick.
- Let the work dry.
- Apply glue to the cells step by step. We fill the leaves and petals with beads. For small fragments we use a toothpick.
- Leave the painting until completely dry.
- We install the picture vertically for a short time.
- We insert the panel into the frame.
Chic, shine, beauty!
Panels made of bulk materials
For creative work, you can use cereals, pasta, coffee, shells, in general, everything that is on your shelves.
Master Class:
- We clean the cereals from foreign impurities.
- If you need colored cereal, then do the following: put the material in a cup, add gouache or acrylic paint. Mix everything well and put it on paper. After drying, the cereal is ready for use.
- We take a photo frame and take it apart.
- Glue a sheet of paper onto the backing, maybe colored.
- We draw a sketch of the work.
- We place different types of cereals in different cups.
- Apply glue to the first area, and pour in one type of cereal.
- Spread large grains separately.
- Step by step we form a picture.
You can also make a panel from wooden parts with your own hands. You can select tree cuts, use branches of different thicknesses, beautiful curved gnarled branches. All this can be combined into a single ensemble. Glue, screw, hook onto each other, tie dry grass and flowers, connect with linen twine, glue on pine cones... Such scope for creativity. And how will such a piece of nature look in your home... A forest fairy tale, and that’s all...
Bas-reliefs
But the most spectacular works are the bas-reliefs. You can apply the composition to the wall in three ways: using a stencil, squeezing out the putty with a syringe and working with a spatula.
You shouldn’t immediately take on complex techniques for applying putty; start with simple paintings. Create simple compositions: tree branches, leaves, flowers.
Prepare putty, primer and paints.
It is very convenient to work with a palette knife; you can buy it at an artist supply store.
Let's get started:
- Leveling the wall.
- We prime the surface.
- Draw the outlines of the composition.
- We dilute the putty with water and apply the material to the wall.
- After 15 minutes, we correct the drawing, removing excess putty, and correct the contours.
- Walk over the surface with a damp brush; it smoothes out the contours.
- After drying, sand it with sandpaper.
- The work is treated with a primer.
- The most creative stage is applying paint.
- At the end of the work, we cover the picture with acrylic varnish.
Felt applique
Felt is used in sewing, shoe making as an abrasive, and its cleaning is used in crafts. A flattened or three-dimensional felt product is made quite simply and turns out bright and original.
The material density is from 1.3 to 5.1 mm, ideal for cutting shapes with a distinct outline. It is used in different ways. Wool for large jewelry, wool mixture for small jewelry. Thin acrylic, viscose, polyester - for appliques.
In fabric stores you can often purchase complete sets of colored felt in packaging, including up to a dozen scraps of various colors and densities.
What you need to create a fabric painting
In order to make a beautiful and original picture from a material such as fabric, you should prepare:
- material for creating the frame and subframe (foam, wood);
- scissors, it is best to purchase special ones for a tailor;
- self-tapping screws;
- small nails;
- hammer;
- slats;
- construction stapler with staples;
- textile.
Volume options
To make the image capacious, a number of techniques are used:
- filler: foam rubber, holofiber, various textile waste, cotton wool;
- crumpled sheets soaked in adhesive paste placed under the fabric;
- ribbons, textile balls, braid, flowers, made separately and attached to a single-color base;
- starched parts attached to stretched fabric;
- use of parts in the frame.
Leather panel
Panels are also made from leather, using it instead of fabric. This option is more expensive, since genuine leather is not the cheapest material. Leather itself is an excellent type of material for needlework. It is durable, high quality, plastic. Leather fabric can be taken from old bags and things that are either out of fashion or outdated. This is a great way to ensure that they bring at least some benefit. To make panels from leather you will need all the same materials as for fabric ones.
Leather panel with flowers
Important! When processing and cutting out shapes from leather, you can use a candle, the heat from which will give the leather the desired shape. In addition, the leather can be successfully dyed.
Leather panel with a picture of a tree
Yarn – String Art
The string art technique is an original painting technique using hundreds of pins nailed to a plate and wire pulled over them. You can use any yarn, as long as it is reliable.
You need to tighten it thoroughly, otherwise, over time, the threads will stretch and the craft will lose its attractive appearance. Carnations are stuffed at a distance of up to one and a half cm from each other.
The product turns out transparent, so a background of the opposite shade is desirable. Such decoration, embodied on oval plywood or a ring, can represent bright symbolism or a dream catcher.
Panel "Cats and Tails"
How to sew a block “tails”: inside there are squares, then triangles of different sizes. The square needs to be drawn out in detail and you will understand how it is stitched together.
Once again about the tails: first sew small squares, then triangles are sewn clockwise to them.
How to make an applique from fabric. Master Class!!!
(4 votes. 5.00 out of 5)
Lace
Nowadays, few people invest in openwork weaving, but such patterned material is very widely used as decoration. Ornate panels are created from purchased fragments or hand-crocheted.
To prevent dust from accumulating on the image, it is placed under a transparent or glass material.
Creating a real work of textile art for interior decoration is not difficult if you have just a few pieces of fabric, thread, needles, and scissors. Decorating with fabric is very popular now.
Such works are included in exhibitions, and new master classes on their production appear on the Internet every day. Some craftsmen even turn their “patchwork hobby” into a very profitable business, creating a series of highly artistic works to order.
Benefits and accessibility for self-expression
The advantages of this type of handicraft are obvious:
- Very beautiful.
- accessible to even beginning craftswomen;
- original;
- lasting;
- only;
- cheap, since the materials are available in every home;
- practical because it uses what is often thrown away;
In addition to the above, such creativity is an excellent option for self-expression and the realization of your fantasies, working together with children, as well as developing their creative imagination, perseverance and ability to work with fabric.
