How much does it cost to restore a wooden chair?
Depending on the damage, prices for chair restoration are divided into three categories.
Minor repairs to a chair – strengthening the frame if it is slightly loose. Re-gluing the chair, replacing the fabric, partially restoring the varnish. 3-5 thousand rubles.
Complete restoration of a chair - Disassembly, cleaning of the chair from dirt, darkened varnish, damaged glue, restoration of threads, parts connecting parts, extension of legs. Replacing the filling, upholstering with fabric or leather, decorating with carnations or braid. 10 – 15 thousand
Restoration of antique chairs. They are more expensive not because they are antique, but because they have more damage and the technology is more complex. Most often, antique chairs from the 19th century, stored for a long time in unfavorable conditions. In the country house, attic, disassembled on the mezzanine. The carving has been partially lost, the gilding has been worn off, and the varnish has worn down to the wood.
The table shows the optimal prices for the repair and restoration of chairs with the most common types of damage.
| Chair | Minor repairs | Complete restoration with re-gluing and varnish replacement | Restoration from a ruined state |
| Hard wooden chair | 3-5 t.r. | 10-15t.r. | from 15 t.r. |
| Soft chair or floor chair | 5-7 t.r. | 10-17t.r. | from 20 t.r. |
| Antique spring chair with sea grass and horsehair | 10-15 t.r. | 20-25t.r. | Dog. |
| Empire style, classicism, shellac polished | 30-35 t.r. |
What you will need
Tools
- coarse sandpaper;
- fine-grained sandpaper;
- different types of screwdrivers;
- stapler;
- mallet and hammer;
- scissors;
- brush;
- screwdriver;
- clamps.
Material
For materials to repair wooden chairs with your own hands, you will need the following items:
- upholstery fabric;
- foam;
- glue;
- screws;
- stapler cartridges;
- dye;
- varnish
For reupholstery
The choice of fabric for covering is quite large. Each option has its own advantages that determine the feasibility of use in certain conditions:
- Tapestry is the most common material in the manufacture of upholstered furniture with a rich texture and texture. Strong, durable, practical, does not fade in the sun, and is easy to wash. And besides, it is antistatic (dust does not accumulate on its surface). An excellent choice for chairs in the living room or bedroom.
- Chenille is another popular option, a beautiful and inexpensive jacquard fabric, the special type of weaving of which ensures its softness and volume. The most practical and durable are samples of mixed composition, containing natural threads and synthetics. A significant disadvantage of chenille - strong hygroscopicity - does not allow it to be used for the restoration of kitchen upholstered furniture. But on chairs for dressing tables, such textiles are irreplaceable - they are velvety and pleasant to the body.
- Jacquard is a fabric with convex patterns obtained by complex weaving of threads. She is not afraid of grease stains and moisture, and therefore do-it-yourself “jacquard” restoration of chairs is the best option for upholstered furniture in the kitchen.
- Flock, or artificial velvet, is not afraid of animal claws, durable, easy to clean and wash, and therefore suitable for any room, including as ottomans in the hallway.
- Velor is a spectacular material, pleasant to the touch, but very impractical due to rapid wear. Good for chairs that are rarely used.
- Genuine leather looks beautiful, is extremely easy to clean, but is very expensive.
Separately, it is worth mentioning the leatherette. Of the various substitutes, eco-leather is the most successful. This material is good for its consumer qualities, and in general is almost as good as natural leather, but will last about 8–10 years. Unlike ordinary fabrics, this upholstery has its own operating characteristics:
- Leatherette does not forgive mistakes - leaving holes from an unsuccessful stitch, some of its types stretch greatly in one direction, but not at all in the other, which should be taken into account when cutting.
- As for genuine leather, it is easiest to work with material up to 1.5 mm thick (maximum 3 mm), since, most likely, you will have to sew several parts together. In addition, the leather must be dry when working to prevent shrinkage when drying.
Features of the “growing” Kidfix chair, tips on selection and assembly
To make the chair softer, foam rubber 40–50 mm thick (density 30–50 kg/m3) is used as a filler. The upholstery will be easier to install and stretch without wrinkles if an additional layer of synthetic padding is placed between it and the foam rubber. The color of the fabric for upholstering a chair depends on the overall palette of the interior.
To minimize material consumption, you should give preference to small patterns or plain textiles.
Tapestry
Chenille
Jacquard
Flock
Velours
Leather
For frame
To restore an old chair, tools are selected depending on the work that needs to be done. To prepare them, use sandpaper of varying degrees of grain or a special mesh to remove old paint and varnish. After that:
- What material are kitchen sets made of?
Kitchens with patina: decor options and tips on color combinations
Kitchen design without upper cabinets: photos of interiors with different layouts and styles
- to preserve the visible texture of wood, stains, tinting compounds and varnishing are used (you will need a long-drying polyurethane varnish, since furniture varnish sets too quickly and is toxic);
- to change the color you will need the paint you like, a tray for it, a spray bottle, a primer, brushes and a paint roller, tape and varnish;
- for the aging effect - a special type of paint, solvent, varnish, rags;
stain
Polyurethane varnish
Dye
Varnish with aging effect
To decoupage wooden chairs, you need to prepare special stencils or paper napkins with a pattern and PVA glue.
Materials for sealing cracks are selected depending on their size:
- for very small scratches - retouching pencils, iodine solution;
- for shallow cracks, use special wax, carpenter's or car putty, as well as flour mixed with PVA glue;
- for deep ones - shoe polish, mastic (a mixture of turpentine and heated beeswax in a ratio of 3:4).
For almost all painting work, brushes, containers for paint, varnish, a respirator, and rubber gloves are also useful.
Napkins for decoupage
Wood putty
Corrector pencil
Second life for old things: new design for a standard bookshelf
The author's daughter grew up and needed a place to store books and toys. Instead of buying a new wardrobe, a small chest of drawers from the living room was placed in the room. But before that they worked hard on him. Instead of a standard dark piece of furniture, we got a delicate cabinet that fits perfectly into the atmosphere of the nursery.
For the girl’s mother, this alteration became a kind of finale. After all, my daughter is growing up and will soon make all the decisions about renovating her room herself. And only while the child is still small can the mother be creative and decorate the nursery to her liking.
This is what the chest of drawers looked like before the remodel:
The cabinet looked a bit heavy, making the living room feel somewhat cluttered. Therefore, no one objected to freeing up space. For the nursery I needed something light and cheerful. As a result of the rework, this was achieved.
The preparatory stage is a thorough cleaning of the cabinet. The author used ammonia and rough cloth to remove grease and marker marks.
After this, the cabinet was treated with a water-based primer. The girl’s mother carried out all the work at home, right in the kitchen. Therefore, it was important to choose materials without strong chemical odors.
The chest of drawers was then painted with chalk-based paint. We chose a soft cream color. There is no need to paint the back wall - it will be covered with wallpaper. In addition, the places where the shelves are attached must be left unpainted.
The legs were painted with sage-colored paint to complement the wallpaper pattern.
Chalk paint creates a nice matte color, but is not durable. Secure the coating with wax or varnish. In the first case, you will get the matte texture preserved, and in the second, the paint will become somewhat brighter. Varnish protects better from scratches and damage.
Cover the back with thick wallpaper. It is better to choose those that have a non-woven base. You can apply glue to the surface of the cabinet and move a piece of wallpaper along it. You can remove the wallpaper and straighten it without worrying about the formation of bubbles. It is important that the surface is completely flat.
If you are using leftover wallpaper, or the width of the cabinet is greater than the width of the tube, follow the pattern. It is important to ensure that it matches completely. It’s easier to work with a small pattern, and it’s easier to hide any imperfections.
And here is the final result.
The chest of drawers delicately fits into the interior of the nursery. All that remains is to arrange the baby’s things.
The girl was delighted with the result of her mother’s work. She even helped me move my things into the room and place them on the shelves of the new chest of drawers.
Progress
Cleaning, washing and drying the product
Restoration begins with cleaning the frame and seat. It is necessary to wash all parts with any gentle composition using soft cloths and sponges. It is important to do this as quickly as possible so that the natural wood does not get wet. Then dry the stool completely in natural conditions, away from heating devices.
To wash the stool, you can use soft napkins to avoid scratching the surface.
Removing old paint
To completely renew a chair or stool, it is necessary to clean the frame of the old covering.
There are several ways to remove paint or varnish:
- Mechanical. Using a sander or sandpaper of different grain sizes.
- Chemical. Some paint can be removed with acetone or factory remover. If necessary, re-process.
- Thermal. Using a hair dryer. When exposed to hot air, old paint or varnish becomes blistered and easily comes off the frame.
Chemical remover will soften the coating
Product repair
When disassembling a chair, the parts of which are fastened with a tenon joint, act carefully, trying not to damage the fastening points. To do this, you can lightly tap them with a hammer and try to loosen the tenon. When the chair is disassembled, use a chisel or knife to remove dirt and glue residues from the grooves. The elements are coated with casein or flesh glue, assembled and clamped with a clamp for 3 hours.
Types of tenon joints
Repairing a chair may involve the following steps:
- When loosening a bolted connection, you can place a metal or plastic washer under the nut, and then tighten the nut tightly.
- You can ensure a tight fit of the wooden fragments to the eyes by increasing the missing volume using thin pieces of wood.
- If a tenon breaks, a new part will need to be made.
- If the upholstery or soft filling is damaged, they are completely replaced. This stage can already be attributed to decorative design, since you can choose absolutely any color of the upholstery, design of the back and legs of the chair.
Tape (belt) clamp
Note! When choosing a design option for a chair during its restoration, the properties of the material from which it is made, the density of the wood, and its texture are taken into account.
Upholstery of an upholstered chair seat
In Soviet-made chairs, softness was ensured by a durable jute backing. Now other materials are used that caking less and do not lose shape when exposed to heavy objects. In addition, jute is expensive.
New seat backing products use:
- thin furniture foam;
- padding polyester;
- batting;
- coir is a material made from the nut of the coconut tree.
For upholstering chairs at home, foam rubber up to 5 cm thick is best suited for the backing. The top covering is made of any dense fabric.
Work algorithm:
The foam rubber is cut out strictly according to the shape of the seat. Coat the base and foam rubber with glue. If this is not done, over time, bulges will appear on the surface of the chair, and the backing will bunch up to one edge.
Connect and press the backing and the seat, allow the glue to “set.” Thin batting is stapled around the perimeter of the base.
Cut the fabric so that when stretching there is a margin of 5-7 cm on each edge of the seat.
The fabric is attached to the front and back of the seat from the bottom. Use a stapler. The upholstery is carefully straightened at all stages of work to prevent the formation of wrinkles.
When the covering is leveled, nail the material on the left and right sides of the seat. At the last stage, the upholstery is stretched and secured in the corners. Special care is required. Incorrectly driven staples are removed and the process is repeated.
To get the best result, upholstery fabric is nailed on top of the foam rubber and only then the finishing fabric.
When working with nails, additionally place a tape of thick fabric under them. Using a stapler eliminates the need for additional materials.
Painting a chair
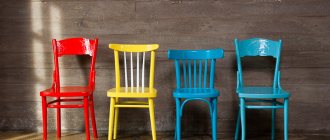
Even the most old-fashioned or simply ordinary chair, say, a “Viennese” wooden, plastic, folding or office chair, can be transformed by painting. The main thing here is to choose the right color. Here are some inspiring examples where color alone saved furniture from ending up in a landfill.
Viennese chair before and after coloring
Folding chair before and after painting
Chair before and after staining
Chair before and after painting
Old Viennese chair before and after renovation
A few more examples of remaking the most common Viennese chairs made of bent beech, which can be found in almost every home or cottage.
Here are some cool ideas for painting stools.
Inspired? Then let's get to practice!
To paint the chair you will need:
- Acrylic paint, or preferably chalk paint, in one or more colors;
- Synthetic flat brushes (separately for primer, paint and varnish);
- Protective gloves (better to buy at a pharmacy);
- Primer for wood/metal (depending on the frame material);
- Wax or matte varnish (polyurethane or acrylic);
- Medium to fine grit sandpaper.
How to paint a chair with your own hands:
- Prepare the chair for painting: wash it to remove any rough dirt and dust, then sand it with medium-grit sandpaper to remove the top layer of old varnish or paint. The surface should be slightly rough.
- If you want to update a metal chair, then it is not necessary to sand it (although it is safer to sand off the top gloss), but before priming/painting, the frame must be degreased with white spirit.
- Also, you can avoid the tedious sanding step if you use chalk paint, but you won’t be able to do without a primer.
- If your chair is varnished, it can be removed with a special varnish remover.
- If the chair has any damage, such as scratches, chips or cracks, fill them with furniture putty.
- Wipe the chair from dust, wait for it to dry and apply two layers of primer to the entire frame, allowing each layer to dry for about a day. Between layers, it is advisable to sand the primer with fine-grained sandpaper (no. 220 is suitable).
- Take a new brush and paint the chair in 2-3 layers, allowing each layer to dry completely. Make sure that the paint does not smudge.
- If you want to paint a chair with a distressed effect, then first apply a dark paint, say dark gray or dark blue, to some places (for example, the edges of the seat, back and armrests), and then cover them with wax. Next, you should paint the chair with the main paint in 2-3 layers. And finally, lightly work with fine-grained sandpaper to expose the dark “substrate”.
- Do you want to achieve the effect of a perfect factory paint job? Then be patient: each layer of primer and paint (except for the finishing layers) will have to be sanded with fine-grained sandpaper. This way the coating will be as smooth and reliable as possible.
- To paint only certain parts or parts of the chair, use masking tape.
Treat the chair with wax or matte varnish. Voila, your “four-legged friend” has found a new life!
Helpful Tips:
- Don't know what color to paint your chair? You can't go wrong if you paint it white, because this color is the most versatile and goes well with any bright upholstery;
- Before painting, you can glue the stucco decor to the back of the chair using wood glue;
- You can achieve the effect of a very old and dirty Provence style chair using dark brown wax;
- Chalk paints are a relatively new type of paint that are not yet widely available. However, we recommend using it, because due to its thickness, increased adhesive properties and super-fast drying (in 30 minutes), it saves a lot of time and effort. In Russia, you can purchase chalk paints from designer Daria Geiler, and in Kazakhstan – from Vernenskaya Manufactory. You can also always order paints from foreign manufacturers - Annie Sloan and Rustoleum.
This video master class will help you better figure out how to paint an old chair with your own hands.
Decoupage technique
Decoupage allows you to hide unevenness and damage to the surface of the chair. In addition, you can choose a print to match any chosen style from Provence to techno.
The technique involves covering a chair with paper or fabric and then covering it with several layers of transparent varnish.
Decoupage with paper
The structure of the paper makes it easy to paste over not only flat, but also curved surfaces, including chair legs.
Work algorithm:
The chair is disassembled and treated with sandpaper, achieving the most even surface possible. Degrease.
If necessary, furniture is painted. If the chair is dark and the background should be light, it is first painted white, then in the chosen color.
Cut out the part of the picture you like. Lubricate the chair with PVA furniture glue and apply the cut out design.
Smooth the paper, achieving a perfect fit. Use rollers or soft cloth. If necessary, the paper is moistened with water to make it softer.
After drying, apply a new thin layer of glue over the design. Decorate with paint if necessary.
The final finishing consists of applying 3-4 layers of clear varnish. Each layer must dry completely.
To decoupage small surfaces, for example, legs, the paper is torn into fragments up to 10 cm in size. You can paint it with paint in the general style.
Decoupage with fabric
Decoupage with fabric is only suitable for seats and backs of chairs; legs cannot be processed.
Operating procedure:
The chair is disassembled and the surface is prepared. The fabric is laid out on the table. Place the seat and trace the edges with a marker or pencil. Make a pattern, departing from the intended line about 2 cm.
Cover the seat with glue: PVA or special for blending. Glue the fabric, carefully level it, remove folds and air bubbles. Apply a layer of glue on top of the fabric.
After complete drying, the material should become rigid. Using a stationery knife, cut off excess fabric strictly along the edges of the part to be pasted.
Apply another layer of glue to prevent premature wear and the appearance of fringe along the edges.
Decoupage with fabric ends by applying 2-3 layers of transparent varnish.
Restoring an Old Shelf Using Homemade Chalk Paint
Almost every home has an old shelf that has been an eyesore for a long time, but it was a pity to throw it away. What can be done with it so that it fits harmoniously into the interior? Let's try to decorate it using homemade chalk paint.
First of all, we need to decide on the functionality of our shelf: where it will be located - in the kitchen, room, hallway, or in the country house. This will determine what materials can be used. For example, country wooden furniture must be treated against fungus and mold and must have a moisture-resistant coating; if the shelf hangs in the kitchen, then it should be ready for intensive cleaning using detergents and so on. I decided that my shelf would be more useful in my fifth-grader’s room so that he could put away his school textbooks and sheet music without fear of being “read” by his little sister.
So, the image begins to gradually take shape - we will make a shelf for books in the room of a teenage boy. Now you need to decide how the shelf will look, that is, create a design project. To be honest, I can’t work if I don’t imagine the future product. A certain image, a photograph, should form in your head. Although I know that many masters work on inspiration, and they produce excellent work. But I still live by the principle, which is expressed in one quote: “If we do not know where we are going, we will be very surprised if we arrive in the wrong place.” After consulting with my son, we chose the “Journey” look and the “Old Attic” style. It is not intrusive, it suits his character well and does not depend on teenage fashion. I select the color scheme, focusing on harmonious color palettes. The following palette suited the interior of the room:
Not long ago I became interested in working with chalk paint; it has many advantages for painting furniture, especially old ones - it goes on almost any surface, does not require a primer, and is very opaque. Despite all the advantages, one very big problem arises - in our country the range of chalk paint for decorating furniture is not large, and the prices are very steep, taking into account delivery to the regions. Therefore, there is only one way out - to make the paint yourself. If the paint turns out to be of high quality, then you can get any quantity and almost any color. But first, let’s tidy up the surface of our shelf and prepare it for decoration. Of course, chalk paint applies to almost any surface, but do not forget that old furniture has dirt - grease stains, traces of cosmetics, etc. In addition, it can be coated with some kind of “super-resistant nitro varnish,” as in my case. Therefore, before painting, be sure to degrease the surface, you can even wash it with detergent, and lightly sand the old coating for better adhesion.
Now we’ll use putty and smooth out all the knocked out knots and broken joint tenons. In order to get the desired consistency, I mix two putties - I saw this technique at Tatyana Chimbir’s master class. One "Tex" for wood - it is very dense, but finely dispersed and will not close large holes. I don’t remember the name of the second putty; it has a loose, voluminous consistency, but, unfortunately, it quickly chips off when using a sander. By mixing these two putties (1:1) I got a mixture that was both voluminous and durable.
Now I need my favorite thing when working with wood, plywood, especially prefabricated products - a sanding machine. Use 80 or 100 grit sandpaper to smooth out the putty. Then, using sandpaper No. 150-200, we go over the entire shelf from the outside and inside. In summer I sand on the balcony, and in cold weather in the bathroom.
Now is the time to start making your chalk paint. On the Internet I found several recipes for chalk paint, with grout, plaster, tooth powder, calcium carbonate, soda, starch, etc. And what I want to say is that the quality of the paint will depend on the ingredients that you have available. Basically, a chalk paint recipe includes 3-4 main components: 1) water-dispersion paint (latex or acrylic); 2) gypsum, grout, starch, soda, and so on; 3) water. The quality of chalk paint will depend on the composition of each component. When I first became interested in chalk paint, I took the most common recipe, which is in Svetlana Shamshina’s book, but the paint turned out to be of disgusting quality. I believe this is because we do not have latex paint from the companies that craftsmen use to make chalk paint. If I add grout in the proportions specified in the recipe, then the latex paint curls up into a lump, and if it is less, then when varnishing, the paint is washed off with varnish. Then I decided to look into this issue, what was wrong. It turns out that the composition of latex paint for walls and ceilings is very diverse, from acrylic to carbonate base. Accordingly, the result of applying paint will be different. The same goes for the second component, especially if you use plaster. The fact is that gypsum comes in different consistencies. I tried to use architectural plaster and plaster for children's crafts - the paint did not work out, since the gypsum was ground too coarsely, in addition, the quality of the gypsum itself may be low. On English-language sites, the so-called “Gypsum of Paris” is mainly used to prepare chalk paint, which many consider to be the standard of quality.
What else would I like to say about preparing chalk paint? Never take a recipe thoughtlessly; try to understand the ingredients. This will give you more room to experiment. Think about what role each component plays in the composition. For example, carbonate latex paints are more fragile; using chalk paint based on them can very successfully emphasize the structure of the wood in a product. To do this, apply the paint, let it dry, and then sand it with a soft sanding sponge. If you need a durable base, then try latex paint for exterior and interior use. I also tried making acrylic-based chalk paint for exterior and interior use, and the result was also good. As for the second component - grout for joints or dry gypsum putty, the consistency of the paint, the strength of the coating, and resistance to external influences depend on them - the more of the second component, the thicker and harder the coating will be.
Another point is why I don't like using just acrylic paint to paint furniture. I read a lot of master classes at the Crafts Fair and many people use simple construction acrylic paint. But I don't like that it doesn't give an even coverage, leaves brush marks and comes off quickly. Chalk paint is multi-component and can have as many functions and effects as you want. You need to try, don’t be afraid to experiment. As a result of numerous experiments, I have developed my own recipe for chalk paint, which is not inferior in quality to industrial paint, but for now I will not publish it until I test it with various decorating techniques.
Now a few words about the selection of colors for tinting. When tinting, I use color combinations for Annie Sloan chalk paints, which are widely published on the Internet. I really like the color palette of these paints - there are bright colors, but they are very comfortable to read, they don’t hurt the eyes, there are a lot of pastel shades. I printed out a color chart and color based on it.
Now from theory and preparatory work, let's return to the book shelf. I mix the paint in small jars with a wide neck. We have a hard time finding good brushes for painting furniture, just like with paint. Brushes with natural bristles sold in hardware stores are hard and liquid, not at all what we would like. Good quality Matrix and Bison. But probably the best brushes are professional paint brushes, which can be bought in online stores.
We paint the shelf in two layers with intermediate drying.
This is what happened. The coating is very dense, two layers of paint are enough. I painted the inside of the shelf with Emperor Silk, sanded it with a soft sanding sponge (you can use 500-1000 sandpaper) and covered it with two layers of acrylic parquet varnish.
Now let’s decorate the outside of the side walls using napkins and implantation. I chose napkins with black and white photographs, and for implantation I took drawings of vintage postage stamps printed on a laser printer.
Cut out a picture from a napkin and glue it in the usual way. By the way, the napkin sticks perfectly to chalk paint. After drying, sand the entire surface with a sanding sponge and wipe with a dry cloth.
Then we cover the entire outside of the shelf with two layers of varnish. By the way, after varnishing, a very interesting decorative effect was obtained. Dry the surface and implant the picture. To ensure that the edges of the picture are not visible, we apply varnish only to the stamp itself, and not to the entire sheet of paper. After drying, wet the paper and roll it up. If the edges of the picture are still noticeable, then you need to carefully sand them with sandpaper No. 320-500. We cover it with a finishing varnish, acrylic, acrylic-urethane or another one that you like.
After drying, I decided to add hooks to the shelf so that the child could hang some of his small things. The hooks I had were the color “Old Bronze”, but I had no luck with the self-tapping screws; I couldn’t find any bronze ones. But it doesn’t matter - they can be coated with bitumen varnish and they will take on an old look.
It is better to choose stronger hinges, knowing the weight of school textbooks.
This is what we ended up with: “A shelf from the old attic,” that’s what we called it. In my opinion, it is quite interesting and functional. You can hang it on the wall and stack textbooks.
I hope my master class will be useful to all lovers of alterations. Thank you for your attention.
