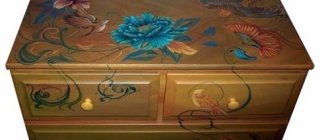
We need to decide which part of the object we want to restore, as well as the method by which we will carry out the restoration. The scope of work may include several elements:
For any type of work, it is necessary to prepare well ahead of time to improve the future result. When restoring furniture, you need to carefully prepare the surfaces . This applies to both wooden and soft surfaces. But it is the wooden surface that will bring more difficulties.
In order for the preparation to be of the highest quality, you need to follow these steps:
- Inspect and record all damage - both large and small, even scratches.
- Then you need to wash the item from various contaminants and dust. This can be done with warm water and detergent. After washing, be sure to dry it.
- It is necessary to disassemble the furniture into pieces as much as possible. For example, if we are restoring a table, then it is necessary to disconnect the tabletop from the legs. This will make it more convenient to work and all the elements that will not be restored will not be damaged during processing.
- If an element not involved in the restoration cannot be detached, then it must be sealed with tape to avoid damage. Craftsmen recommend masking tape for this work.
- The soft parts are completely replaced. You need to remove them carefully so as not to damage them, since you will need to make a pattern from them from new fabric. The packing will also need to be replaced with new one.
In order to completely eliminate all damage and not forget about the details, you need to write them down on a piece of paper. This way you will repair it perfectly.
Expert opinion
Strebizh Viktor Fedorovich, leading construction foreman
If you do not have the opportunity to select the desired coating during the renovation, then it is better not to paint the old furniture, but leave the natural, cleaned wood texture. If you want to clarify something, please contact me!
Corner for a child
Sometimes there are a lot of unnecessary fragments of the tabletop left, and then it is possible to build an unusual corner for the baby for toys, books, accessories and children's hiding places.
If there are a lot of scraps, you can make a desk and computer desk, stool, cabinet, small chest of drawers, sink in the same color scheme.
Ideas for creativity and implementation are varied and suitable for a master of any level. All you have to do is choose what you liked the most and get to work. Good luck!
- Author: Ksenia Gavritski
Rate this article:
- 5
- 4
- 3
- 2
- 1
(18 votes, average: 3.5 out of 5)
Share with your friends!
FIGURE MILLING
The seat of the stool can be left rigid, in which case the ends should be trimmed with a flexible PVC mortise profile. Or you can make it soft, then you will need an additional piece of foam rubber measuring 32x32 cm and a thickness of one to one and a half centimeters, as well as a piece of suitable fabric approximately 40x40 cm.
A compact table for the living room is assembled from the following parts:
- table top – 1 piece
- planks - 4 pcs.
- shelf - 1 piece
- bottom - 4 pieces
- wheels or legs - 4 pcs.
Additionally you will need:
- plastic corners - 4 pcs
- self-tapping screws 3.5x16 mm - 16 pcs.
- confirmations – 8 pcs.
- edge for cutting laminated chipboard and self-adhesive to hide the fasteners
Adviсe
Don't rush and don't be upset if the result is a little disappointing the first time. To do everything beautifully and quickly you will have to learn. Of course, this is not a matter of one day, but when you already have enough experience, you will be able to make any interior elements from almost any materials.
The most important thing is to just take your time and carefully consider your every action. And of course, you shouldn’t forget about safety rules, since carpentry work is always associated with some risk. But don’t be afraid, if you are attentive and careful, accidents can be avoided. Start with simple ones and gradually move on to more complex tasks. Then you can become a real craftsman for whom decorating your interior will not be a problem.
General recommendations for making stools
You can make a stool with your own hands, having professional and non-professional elements and devices at hand.
You can make a stool with your own hands, having professional and non-professional elements and devices at hand.
The seat of the resulting chair can be made soft using foam rubber and upholstery material.
Required tools include:
- electric jigsaw, complete with a fine file;
- screwdriver
To decorate the seat of the stool, you can also prepare foam rubber and upholstery materials.
You may also need a drill with a drill and a stapler for construction purposes.
The upholstery can be fabric, oilcloth, leatherette.
To simplify the assembly task, you can first glue the parts together and then secure them with self-tapping screws.
Materials for production:
- chipboard sheets, new, substandard or remaining spare parts from old furniture;
- self-tapping screws, no longer than the thickness of the chipboard;
- confirmations 4 pieces. Dimensions 6.4 mm by 50 mm;
- metal corners 4 pieces;
- adhesive tape for processing sheet edges;
- thrust bearings made of any acceptable materials;
- sandpaper for sanding.
Creating a stool from chipboard with your own hands allows the master not to limit himself to standard models.
Non-professional tools that can be found in any home:
- pencil or marker;
- cardboard for making templates;
- ruler or tape measure;
- knife of any configuration, most importantly sharp.
The seemingly simple design of a stool has several dozen different models.
The parts of the stool are assembled using confirmations and self-tapping screws.
To decorate the seat of the stool, you can also prepare foam rubber and upholstery materials. The upholstery can be fabric, oilcloth, leatherette.
You can look at visual examples in furniture stores, from your neighbors or on the Internet.
Do-it-yourself furniture restoration: step-by-step instructions
- synthetic paint brushes of medium hardness (one for paint and one for varnish - at least two centimeters wide);
- wood paint;
- sandpaper (harder and finer);
- water-based varnish for wood (matte or glossy - at your discretion);
- acrylic primer for wood;
- masking tape;
- paraffin candle;
- napkins for decoupage or drawings printed on thin paper;
- PVA glue;
- spray bottle with water.
Edge
As noted earlier, any part made of laminated chipboard must have an edge that will protect the material from moisture and the environment from the harmful effects of formaldehyde. Having a drawing of the product in hand, you can order sawing and edging from a specialized company that has special equipment. In the future, you can assemble the finished product yourself.
Which is better: heated floors or radiators?
Warm floorBatteries
Do-it-yourself furniture restoration: decoration and restoration techniques
For restoration you will need a melamine edge, which can be purchased at specialized retail outlets. It can be matched to the tone of the furniture.
Expert opinion
Strebizh Viktor Fedorovich, leading construction foreman
Restoring furniture with your own hands at home is a fun and creative activity that allows you to give new life to your favorite items. If you want to clarify something, please contact me!
Assembling the stool
When starting the final assembly of parts, it is necessary to pre-treat all cut edges with a special tape. The tape must be chosen to match the color of the sheet or, conversely, contrasting shades.
The tape is applied to the cut of the legs and seat and glued with a hot iron. The iron must be applied with quick and short movements. The warm tape should be pressed down with a clean cloth. The glue, which is on the back of the tape, sets very quickly and does not require long heating or cooling.
The parts of the stool are assembled using confirmations and self-tapping screws. To simplify the assembly task, you can first glue the parts together and then secure them with self-tapping screws.
The seat of the resulting chair can be made soft using foam rubber and upholstery material.
For further ease of use of the manufactured furniture, the corners of the parts should be rounded.
It is better to make even curves using a compass.
Chips on furniture: how to repair damage - scratches, abrasions - on wood or chipboard?
- The defect is wiped with a degreaser and dried.
- Then, without preliminary preparation, they cover it with a marker, soft wax or furniture “Stroke”. Excess is removed with a dry cloth.
- After 15–20 minutes, the surface is polished with cotton material.
Repairing deep scratches and chips
If scratches or chips on the surface exceed 0.5 mm, you can disguise them as follows:
- The damaged area is cleaned with a chisel, trying to give the recess an even rectangular shape.
- Choose furniture wax to match the chipboard. It is often necessary to mix several crayons to find the desired shade, since you are unlikely to find the desired color in its pure form.
- The wax is heated with a hair dryer or other methods and the damage is filled with it using a rubber spatula.
- Allow the wax to dry slightly and remove excess to obtain a smooth surface.
- After drying, the restored area is sanded with fine sandpaper.
- Lines are then drawn onto the surface with a felt-tip pen to restore the texture of the material.
- The final stage is to consolidate the result of the work with transparent furniture varnish.
Light furniture can be treated with a mixture of olive oil and vinegar (5:2). The damaged area is wiped with the mixture and left for a day for complete absorption. Then polish with a dry cloth.
Expert opinion
Strebizh Viktor Fedorovich, leading construction foreman
A drawer is a convenient storage element, which is present in models of cabinet furniture made of chipboard for any purpose in a kitchen set, in a desk and office cabinet, in a closet, at the bottom of a bed. If you want to clarify something, please contact me!
Shelf
The shelf, despite its simplicity, is a very useful piece of furniture, not only in residential premises, but also in office ones. It is suitable for installing books, any decorations, tools, kitchen utensils. It may also contain photographs and handmade crafts. Thanks to the shelves you can store things neatly.
When creating the most beautiful shelves, the manufacturer does not deviate from the classic style, and at the same time uses L-shaped brackets. Some of them look so beautiful that they can serve as a worthy interior decoration.
Initially, you need to look where in the room a shelf is needed. Then, using a measuring tape, determine the length of the product. Next, attach the bracket to the wall and, using a pencil, mark its location. A tape measure and a level will help you mark the position of the second bracket so that they are level.
Before using a drill, you should first check to see if there is any wiring in the wall. When creating a shelf with your own hands, you need to mark on it the places where the screws will be attached. Then drill holes for them with a drill. Subsequently, to begin with, the shelf should be secured to the brackets, and then attached to the wall.
Book rack
Initially, you should decide on the place where the bookcase will stand. Based on this, it will be easier to determine the dimensions. When thinking about the size of the rack, you should take your needs into account. The number of racks and shelves in such a product is unlimited. The same applies to its height and width.
Before you start working with building materials, you first need to sketch out a simplified diagram on paper that allows you to determine what dimensions are needed for each specific part. After this, you can start cutting racks and shelves. If you don’t want to install the back wall, then you will still need to determine whether there is a need for stiffeners. In this case, everything will depend on how wide the rack is.
When assembling furniture from prepared parts, it is better to start from the top section. To screw the shelves to the base you need to use screws. They can also be secured by using wood glue.
Repair tools and materials
Each type of defect and restoration requires its own approach, materials and tools.
The following products are used to repair laminated chipboard furniture:
Markers or felt-tip pens, with the help of which the texture of the material at the restoration site is completed after treatment with furniture wax. For these purposes, you can use paints, office corrector, iodine and even shoe polish.
Soft and hard. It has moisture-repellent properties and is used to seal scratches, cracks, and chips on wooden and laminated surfaces of furniture, doors, and parquet.
Two-component adhesive, wood cokes for filling holes and recesses from fasteners and hinges.
To add gloss to restored surfaces.
The work is carried out with the following tools:
How to remove scratches and chips on laminated chipboard: restoration methods, materials and tools, tips and tricks
Furniture damage can be avoided by pre-treatment. The joint must be dried, then coated with PVA glue. After it dries, apply construction sealant or silicone as additional protection.
Expert opinion
Strebizh Viktor Fedorovich, leading construction foreman
Do not forget to purchase protective durable gloves, as well as a respirator that will not allow toxic fumes of varnishes and paints to enter the respiratory system. If you want to clarify something, please contact me!
