Features of hinges with closer
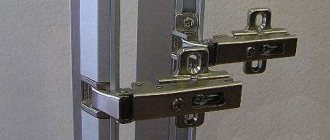
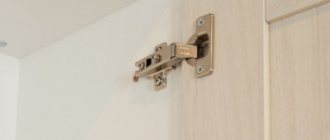
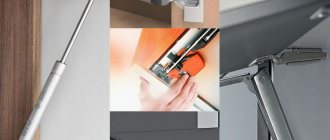
This type of fittings is actively used in furniture production instead of conventional hinges. The entire design of this part is a canopy with a shock absorber, which allows you to smoothly open and close the doors.
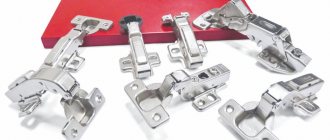
All types of canopies are different:
- type;
- size;
- configurations;
- purpose.
The most common type of closers that are found on almost any modern furniture
The main difference between a hinge with a closer and a regular one is its silent, smooth operation. When closing the door there will be no bang or impact, thanks to which the furniture is protected from mechanical damage.
Inside the hinge body there is a spring with a characteristic filling. It could be:
- oily;
- with silicone medium;
- gas.
Doors with such canopies can be opened at different angles, for example 180 or 270 degrees. It all depends on:
- type of furniture;
- the width to which the cabinet needs to be opened.
Thanks to these hinges, doors can be opened to any width.
The principle of operation of the design
When the doors are closed, the special contents of the spring begin to flow into the sleeve located in the closer capsule. When the loop is acted upon, the liquid begins to move, activating the piston. The door closing speed can be adjusted.
Advantages of hinges with a closer
If you need to equip furniture with high-quality fittings, then you cannot do without hinges with a closer. This part has a lot of advantages over its analogues. Among the advantages, we can highlight:
- silent, smooth operation of doors;
- high operating period;
- possibility of installation even on massive, heavy doors;
- high-quality fasteners on the facade;
- ease of adjustment;
- big variety;
- various manufacturers;
- the design is protected from leakage of working fluid.
A canopy with a closer is a more practical solution than conventional hinges
How to install furniture hinges, templates, marking diagrams on an overhead, internal or corner cabinet
To install the hinges on the cabinet and adjust them correctly, you need to have a general understanding of the mechanism of operation and the position of the adjusting screws. The most complex design has four-hinged furniture hinges with a built-in closer and CLIP TOP (Blum) snap mechanisms.
- A strike plate with holes for fastening to the sidewall.
- Shoulder.
- Bowl.
- Three latches.
- Safety pin.
- Clip mechanism.
- Screw for adjusting the installed front in depth.
- Eccentric for adjusting the height of the façade (on the strike plate).
- Width adjustment screw.
- Holder.
- Spring closing mechanism.
- External hinge.
- Internal hinge.
- Mounting screws.
- Deactivation.
- Blumotion door closer.
Regardless of the number of components, the presence of a built-in or overhead closer, absolutely all four-hinge furniture hinges are correctly installed in the same way.
- A counter plate (1) is screwed to the body from the inside.
- A part of the hinge with a bowl is put on the installation hole and secured with screws (11)
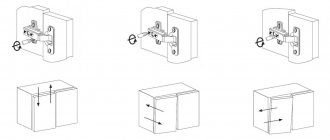
- Using the adjusting screws (7), (8) and (9), the façade is pressed stronger/weaker against the body, higher/lower vertically and left/right horizontally.
When installing, it is convenient to use special furniture templates (conductors) - they make marking for installing hinges on the cabinet much easier.
But they are needed only, for the most part, for production. In domestic conditions, when installing or replacing hinges on cabinets and cabinets is rarely required, you can apply the markings manually, using a square and a tape measure.
Diagram of how to install overhead hinges on a cabinet
There is a general diagram of how to install overhead hinges on a cabinet with a bowl diameter of 35mm. It’s more convenient to imagine it using the example of a kitchen cabinet 700mm high and 400mm wide with a front of 696x396mm, respectively.
To properly install the canopy on the facade, you need to make holes for the hinge bowl with a diameter of 35mm with a distance from the edge of 22-22.5mm. The bowl is attached with screws - you can also make preliminary markings for them, at a distance of 48mm from each other.
A counter plate is installed on the inside of the sidewall, at a depth of 37 mm along the fastening screws from the edge, coaxially with the location of the hinges on the facade.
Installation diagram of internal hinges on the cabinet
Inset or internal hinges are installed on the cabinet in exactly the same way. The only caveat is that the counter plate on the side of the cabinet is recessed to the thickness of the facade.
That is, with a standard fastening, 37 mm is measured from the edge, and with an internal loop - (37 + 16) = 53 mm. If the façade is thicker, 18-22mm, then the distance for installing the hinge strike plate on the cabinet increases accordingly.
Installation diagram for corner hinges and mini hinges with a 26mm bowl, distinctive features
As a rule, corner hinges can be installed on a cabinet in the same way as regular overhead hinges, according to the same scheme.
Four-hinged transformable hinges and carousel hinges with a 35mm bowl are installed in the same way, unless the manufacturer provides other sizes in the instructions. But sometimes an additive of 37mm can increase to 42-45mm with beveled ends of the sidewalls and other non-standard cases, so be careful.
Installing a 26mm furniture hinge on a cabinet is done in the same way, but with different dimensions for marking on the facade. For the sidewall, the additive remains the same.
How many furniture hinges should I install on one façade?
There are generally accepted standards for installing four-hinge furniture hinges. Thanks to them, you can easily replace one canopy with another, and also choose any manufacturer based on price, quality and additional equipment.
When choosing how many furniture hinges to install on one door, they are guided by three criteria: the height of the facade, its width and weight. Moreover, the height is decisive in determining the amount of fittings.
Leading manufacturers of furniture components conduct a lot of tests and develop more accurate standards for their own products. For example, recommendations for choosing the number of hinges for installation on one façade from Blum are shown in the catalog as follows.
- It is not recommended to design the cabinet façade wider than 600mm. The number of hinges for installing the door on the frame depends on the weight and height.
- To ensure maximum stability and stability when opening and closing, it is recommended that the awnings be installed as far apart as possible.
- To facilitate marking, the following standard is used: the outer hinges are installed at a distance of 100 mm from the edge of the body and 98 mm from the edge of the facade itself (with 2 mm gaps between the facades).
- The approximate distance between cabinet hinges is 500mm. So, on a cabinet with a height of more than 1000 mm, there is a reason to secure the door with three hinges.
Drilling a hole
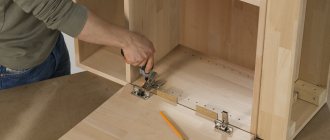
The next step in installing furniture hinges is preparing holes for screwing in screws. The holes are made using an electric drill and a small thin drill according to the markings made. In addition, to install the hinge cup, you will need to use a special cutter - with its help, you will need to make a round hole in the door leaf with a depth equal to the depth of the hinge cup. You need to choose a cutter designed for woodworking - otherwise, traces of deformation may appear on the outside of the facade, and chips of the material may appear on the inside plane.
To drill a hole, the cutter must be sharpened - only in this case can you be sure that it will not damage the door material. To work, you will need to fix the cutter in the chuck of an electric drill. The tool is brought to the markings on the door leaf, placed in a strictly perpendicular position, then the drilling process is performed at low speed speeds of the power tool. The depth of the hole is made no more than 12-13 mm. It is necessary to constantly monitor the operation of the tool without increasing the speed of rotation.
Using a cutter requires some experience, so if this is your first time working with such a tool, you should first try your hand at a piece of rough wood. Only after understanding the specifics of the process can you proceed to drilling the furniture facade.
In order to make mounting holes for furniture screws correctly, you must follow the recommendations of specialists:
- when drilling holes for attaching furniture hinges, you must remember that any of them cannot exceed a depth of 13 mm;
- the diameter of the holes must correspond to the size of the hinge fasteners;
- work on drilling holes must be performed carefully and only at low speeds of the electric drill, constantly monitoring the process;
- Having completed the first hole, you need to proceed to the second, and then to the next one - continue this until all of them are completed.
For example, if furniture doors are made of pine or birch, then the drilling process is easy and quick, while ash, oak or walnut are quite difficult to drill due to the high density of their wood. During operation, you must ensure that the drill is always at a right angle to the working surface - if you are drilling dense wood, the tool can easily deviate from the drilling path given to it.
What is an overhead and inlay loop?
Structurally, the loops are very similar. They consist of:
- cup located on the mounting plate;
- counter fastening loop;
- hinged device.
An inset furniture hinge is attached to a drilled hole; an overhead hinge does not require a recess. Why is this design difference needed, and why inset and overhead:
- The position of the doors relative to the facade changes. If the fastening is overhead, the door overlaps the end of the body strip. When hanging in a mortise, it is visible; the door goes deep into the body.
- The hinges are suitable for furniture structures of various thicknesses. inserts are impossible without the use of a cutter; a recess of 11 mm is made under the cup into the body strip. With the minimum standard thickness of cabinet furniture (16 mm), it is difficult to install. Furniture manufacturers sometimes press the hinge cup into the cabinet panel during the manufacturing process.
- The response plate has a different bend; the inset hinge has less bending; it swings open due to hinges.
How to adjust furniture hinges with your own hands
Modern furniture models are equipped with various fittings, including furniture hinges. Today there are quite a few varieties of them, which can be classified in different ways. For example, furniture hinges can be of the following types:
- invoices;
- semi-overhead;
- internal corners;
- hinges with closers;
- hinges without closers;
- spring.
However, the purpose of our article is to explain how to adjust furniture hinges, so we will focus on the methods of installing and adjusting hinges.
What are furniture hinges?
This element is present in almost any piece of furniture that has doors, for example:
- in the closet;
- in the locker;
- in the cabinet.
This mechanism is recognized as functional and reliable. This is the most optimal solution, which ensures the opening of doors located on the facade of furniture.
Modern furniture production most often uses four-hinged hidden furniture hinges. In other countries they are called “hidden furniture hinges”. In the USA they are called “European-type furniture hinges”. The name “four-hinged” is due to their mechanism of operation, which is performed using four hinges.
Such hinges are made from steel by stamping.
To prevent the formation of corrosion on the hinges, a special galvanic coating is applied to them, thanks to which the hinges are not only protected, but also acquire a rather attractive appearance.
The function of four-hinged hinges is to open and close furniture doors smoothly. In addition, with their help, the doors are held closed, since a spring is built into the hinges.
Hidden furniture hinge design
These loops were invented by Italian-born master Arturo Salice. A company is named after him, which remains on the furniture market to this day. The main elements of this type of loop include the following:
- cup;
- shoulder;
- response plate.
The cup is a portion of a cup-shaped loop that has mounting tabs. They are attached directly to the furniture door.
The hinge arm serves as a lever attached to the inside of the furniture body. This is done using a strike plate. The hinge cup is attached to the hinge arm using a four-joint mechanism.
The strike plate refers to that part of the hinge that is attached to the inside of the housing. It makes it possible to adjust the hinge in the desired direction after it is secured to the strike plate.
Cup Diameter Standards
There are several standard diameters for the hinge cup, namely:
- hinges for full-size furniture with a cup diameter of 35 mm;
- small hinges for small lightweight doors, for example, for bathroom furniture with a cup diameter of 26 mm.
Rules for setting and regulating furniture hinges
Furniture hinges are adjustable in several directions. If you show a little diligence and patience, then your furniture items, namely cabinets and shelves, will close neatly.
1. First of all, you need to close the cabinet door and determine the following:
- in which direction the door needs to be adjusted;
- Are the adjacent doors on the same level?
- What is the gap between them - even or not?
2. Then you need to open the cabinet door wide to gain free access to the hinge.
3. If necessary, you need to make vertical adjustment. Most often, such adjustment affects all door hinges at once. In order to adjust the hinges vertically, you need to loosen the screws at the bottom and top, then press the door at the top or bottom and tighten the screws again.
4. If necessary, the hinges are adjusted so that the door moves forward or backward. This adjustment will increase or decrease the gap between the door and the cabinet body. This adjustment must be made for each hinge separately. First you need to loosen the screw, and then pull the door towards you, or vice versa, move it away and tighten the screw again
5. Horizontal adjustment. To adjust the hinges horizontally, you need to tighten the screw by turning it clockwise and move the corner of the door a little further towards the frame. If the door needs to be moved away from the frame, the screw must be loosened slightly by turning counterclockwise.
Materials and tools
Do-it-yourself installation of hinges begins with disassembling the part itself. When making furniture, various cabinet hinges are used. The most popular hinges are overhead ones. They are used when attaching facades to the body. There are also semi-overhead, internal, corner, using a closer and spring ones. The question of how to install overhead furniture hinges will be discussed in more detail. In particular, the well-known four-joint model. The sizes of such loops vary. The most common with a diameter of 35 mm. The canopy includes the following parts:
- cup;
- mounting plate;
- shoulder.
The cup is fixed to the facade, and the mounting strip is attached to the cabinet body. The shoulder is involved in bridging the connection of these two elements. To properly install furniture hinges with your own hands, you need to prepare the following tools and materials:
- screwdriver;
- drill;
- ruler;
- construction level;
- cutter;
- pencil;
- screwdriver;
- screws.
The diameter of the cutter is 35 mm. When all the tools and materials are ready, the next stage begins.
Installation stages
Installation of hinges on facades is carried out in 4 stages:
- first create markup;
- then make holes using a drill;
- then installation is carried out, as well as assembly of parts of the fittings;
- At the last stage, the doors are installed.
The most important and difficult step is adjusting the position of the door relative to the furniture body. If the work is done incorrectly, the sash will quickly sag and the cabinet (or any other product) will fail.
Creating markup
To install furniture hinges correctly, you must initially make even markings that correspond to the parameters of the hardware plate. Otherwise, there will be problems with opening and closing doors. The marking of furniture hinges is done as follows:
- The distance between the canopies should be at least 50 cm. At this stage, the number of hinges required is determined.
- Start marking the center of the canopy holes. At the same time, they retreat from the edge of the door by 2–2.5 cm.
- Marks are applied taking into account the width of the door. At the intersection points, holes are made with self-tapping screws. At this stage it is worth using a template for marking furniture hinges.
Despite the fact that templates for furniture hinges are made of durable materials, they must be handled very carefully. It is strictly forbidden to drill through them, otherwise the service life will be reduced. To determine the number of loops needed, it is worth studying the recommendations presented in the table.
| Door weight, kg | Facade height, mm | Recommended number of loops |
| 4-5 | up to 500 | 2 |
| 6-9 | 500-1000 | 2 |
| 10-13 | 1000-1500 | 3 |
| 14-18 | 1500-2000 | 4 |
| 19-22 | 2000-2500 | 5 |
Hole preparation
The next step will be preparing the holes. To make the notches correctly, you need to accurately follow the markings already made. To carry out this operation, a drill with a special drill and a milling cutter are used. The holes are made like this:
- First you need to lay the door on a flat surface.
- Fix a cutter for furniture hinges of a suitable diameter in a drill. The depth of the hole should not exceed 1.25 cm.
- During the drilling process, the drill must be positioned strictly perpendicular to the surface of the door.
- During the process of forming the hole, you need to carefully ensure that the cutter or drill does not drill through the door.
When the main holes for the screws are ready, you can move on to the next stage. Inserting canopies in accordance with the markings and formed recesses is much easier and of better quality.
Hinge Attachment
The hinges are attached in the following sequence:
- The part of the loop that will be directly attached to the facade is placed in the bowl.
- The hinges are carefully positioned in the recesses to ensure optimal placement.
- Using a construction angle and a level, achieve an even position of the loop in the cup.
- If you need to correct the hole to lay the canopy evenly under the level, use a furniture cutter to install the hinges.
- Using a screwdriver, screw the screws into the holes on the hinge itself.
After fixing the screws, you need to check the strength of the canopy. It is recommended to try to loosen the hinge in the cup and move it relative to the surface of the facade. If no changes are observed, then the fittings are secured well.
Hanging the door
The most difficult stage in this work is the installation of the door. To simplify the task, if possible, it is worth laying the furniture body so that the doors are attached to the hinges in a horizontal position. Algorithm for installing doors:
- In the inside of the furniture body it is necessary to make the same markings as on the door. To install the hinges, you also need a furniture bit.
- Next, secure the platform to secure the canopy using self-tapping screws.
- Connect the two parts of the canopy.
- Finally, adjust the position of the fittings relative to the door and furniture body. This can be done using a screwdriver and a level.
Hanging the door is not the final stage of work. Even after the initial adjustment, additional measures must be taken to align the position of all components.
Installation sequence
To install 180 degree hinges you do not need to have any special skills or knowledge. The product comes with instructions that describe the installation sequence and features in detail. Before work, you need to carefully consider the fastening device, evaluate its strengths and weaknesses.
Hinge installation steps:
Preparation. You need to make sure you have the necessary tools for the job. You need to take a drill, a cutter, a level, a tape measure, and a marker. Marking. It is carried out in accordance with certain rules. The hinges should not be level with the shelves, there should be a distance of 50 cm between the fasteners, and 1.1-1.2 cm should be removed from the edge. Drilling. Holes for self-tapping screws are made in accordance with the markings. Screwing the hinges. The fittings are tightened using screws. Adjustment. Here you need to use a level and a screwdriver
It is important to place the fasteners evenly, to eliminate distortions, cracks, backlashes and other defects.
All nuances must be taken into account at the preparatory stage
When creating markings, it is important to design everything accurately so that the facades do not touch. To do this, use a special tool - a building level.
The depth of the holes depends on the thickness of the doors.
An equally important adjustment step. The correctness of the process determines the functionality of the furniture. You can adjust the depth by adjusting the pressing force of the screws. Twisting oval holes helps to avoid sagging. It is possible to eliminate gaps by lateral adjustment.
Four-hinge hinges
The most widespread in the production of cabinet products intended for the arrangement of any residential and domestic premises are four-hinged hinge structures, the advantages of which are:
- high strength of individual elements, ensuring reliable operation of the product as a whole;
- a large number of operation cycles, ensuring the operation of the product during its entire service life;
- Possibility of adjusting the door leaf in three planes.
The design of the four-hinged hinge includes:
- cup;
- shoulder;
- installation site;
- additional elements - an adjusting screw and a decorative flange.
As a rule, the cup is installed in a special recess milled in the door. In order to reduce the range of cutters (Fosner drills), most loop specimens have a cup with a diameter of 35.0 millimeters.
Cups with a smaller diameter (26.0 millimeters) have models designed for installation on door leaves that are small in weight and size, as well as on hinged glass doors, such as in sideboards. The lever arm is the body of the adjustment mechanism and is connected to the installation platform, fixed inside the furniture compartment, on its sidewall. Fastening of all elements of hinge fittings is carried out with self-tapping screws or using a screw confirmation.
Adjustment
A furniture hinge, the marking and installation of which has already been completed, requires adjustment. This procedure is performed with a square screwdriver. The strike plate is attached to the inner wall and pressed with a special bolt, with the help of which the position of the door is adjusted deeper and closer. With another screw, which rests on the installation platform, the facade is adjusted left and right. To adjust the doors up and down, you need to loosen the screws that secure the strike plate itself.
There are models of furniture hinges of a different design, where adjustment is performed in two planes. The façade is shifted up and down using a special bolt located in the bar.
Repulsion systems
Is it possible to open a cabinet without handles? Can. To do this, you can use the repulsion system. Externally, it is very similar to a shock absorber and even performs its functions. But the main feature of this system is that when you press the door, the pusher moves the door to a distance of up to 6 cm, which allows you to open it further by hand without using the handles. In this way, you can make a facade without handles, and at the same time save a lot of money on the latter.
Fig.35.
Repellers come in mortise and overhead types. They are installed similarly to shock absorbers. The difference in installation is that they must be mounted on the wall opposite to where the hinges are installed. To hold the door, pushers can be equipped with magnets. The repeller operation is adjusted by rotating the rod, so you can select the optimal repulsion value.
Repulsion systems can be used for both doors and drawers, together with any other mechanisms, from hinges to elevators.
Characteristics of hidden loops
Indoor installation is ensured by hidden hinges. The design ensures the aesthetics of the fastening, since the cup is completely recessed into the body of the cabinet. Hidden fittings can withstand loads similar to other types of hinges. The fastener is quite durable, ensures fixation of the facade in a convenient position, and has high functionality.
Characteristic features of hidden loops:
- Aesthetics;
- Strength;
- Possibility of fixation.
There are also disadvantages of hidden installation. These include the inaccessibility of the mechanism. It is difficult to clean or lubricate the hinges. And if this is not done in time, then dirt will lead to breakdowns.
Calculation of the number of loops
Most furniture manufacturers specify the recommended number of fasteners in the assembly instructions. The calculations take into account the mass and parameters of the web.
For bedside tables made of laminated chipboard, on the doors of which a mirror is attached, additional fastening devices are provided, because the standard number of hanging elements may not withstand overload.
Recommended number of hinges depending on the weight and height of the facade:
| Weight, kg | Height, cm | Number of fasteners |
| 4-5 | up to 50 | 2 |
| 6-9 | 50-100 | 2 |
| 10-13 | 100-150 | 3 |
| 14-18 | 150-200 | 4 |
| 19-22 | 200-250 | 5 |
It is also not recommended to use wide doors. If the width of the canvas is greater than the height, it is better to make 2 doors.
How to choose the right one
To choose the right accessories, there are a few things to consider:
First of all, pay attention to what material they will be made of. Depending on this, several groups can be distinguished:
- products that are suitable for chipboard or MDF fibreboards,
- elements that can be mounted on the glass door,
- parts for attaching to a metal profile.
The modern hardware market is represented by a huge assortment of hinges for fastening doors.
When it comes to making a cabinet in the corner, you need to understand at what angle the facade will be installed in order to select the right fasteners.
Installing overlay door hinges on kitchen cabinets is a simple process. But still it requires little knowledge and skills.
Important! We take into account the dimensions and weight of the front panel in advance. It may be worthwhile to provide more hinge mechanisms or purchase reinforced models
Furniture hinges: varieties
By popularity
The most popular are overhead awnings with four hinges (“frogs”). They differ from others in their versatility and reliability.
Special frog hinges allow you to open the door from 90 to 165 degrees. The main moving part of the hinge is similar to a jumping frog, which consists of a spring and four hinges.
The frog loop is attached to the body with its base and a cup, which is inserted into a hole in the door previously prepared for it.
According to the method of attaching the door to the body
- Invoices. When closed, the door overhangs fit quite tightly onto the end of the furniture body. This method of fastening is the most common and is chosen for use on almost every piece of furniture: kitchen, bedroom, living room, and so on. These four-hinged overhead awnings allow the door to provide maximum coverage of the furniture frame they are attached to.
- Semi-overhead. The part of the door where the hinges are located is half overlapped with the furniture body. Such canopies are used when two doors are placed on one side of the body at once. Semi-overlay awnings differ from others by the smooth bend of the base, which creates a gap between two doors located on one side. Such hinges are used on bedside tables with two doors that open in different directions.
- Internal. Such awnings are often confused with semi-overhead ones, but their purpose is different. They are used to place the facade inside the cabinet, and at the same time, part of the sash with a canopy must be in contact with the adjacent wall of the furniture cabinet. The base of such loops has a strong bend.
- Angular. Such canopies are used to attach the facade at the required angle. The main purpose of corner canopies is to use them when assembling corner cabinets. They have a varied structure depending on the desired angle. There are corner canopies for installation at an angle of 30, 45, 90, 135, 175 degrees, as well as those produced by the manufacturer.
- Inverse. These are canopies that allow the door to be opened 180 degrees and at the same time the doors create a straight line with the side wall during opening.
- Pianos. This is the oldest type of furniture canopy, which is quite rare today due to its unreliability. They are used on the doors of antique and retro furniture, as well as in book tables. And also with the help of such canopies, the lid of the piano is most often attached, which is why such a consonant name.
- Card. This view is similar to a piano. There are two types of card canopies: collapsible (two tubular) and non-collapsible (multiple tubular). One such loop consists of two plates, which are mounted on the hinge using their internal ends and roundings. They, like piano canopies, are used in retro furniture.
- Mezzanine. Choose such fastenings for installing horizontal doors that open upward. Such canopies can be seen on cabinets of all types, as well as on kitchen cabinets. Mezzanine hinges are similar to overhead hinges, since they are also based on a spring.
- Secretarial. This type of hinge is similar to card and piano hinges, since it also consists of two plates with a hinge. Hinge fasteners are used to attach horizontal sashes that open downwards. This name comes from a small cabinet where papers are stored - a secretary. They are attached to the frame either with or without mortise.
- Adit. Such hinges are used for facades that are attached to the side walls located near the wall. Their second name is “blind”, because solid (blind) walls of cabinets and bedside tables are attached to them, as well as facades to false panels.
- Ombre. This type of furniture hinge is used specifically for securing folding facades. Card awnings are attached to two halves of the furniture structure and allow the door to be opened 180 degrees. Most often they are used on folding kitchen tables.
- Pendulum. These awnings are similar to roller awnings. They are also called spring, double-sided, swing, reversible or “subway” hinges - those that allow you to open the doors 180 degrees, like in American bars. Hence the peculiar name.
- Pyatnikovye. They are either installed hidden, or a hole is cut for them. Such hinges are attached at the top or bottom on the inner corner of the sash and are suitable only for heavy facades. Because of this, manufacturers rarely use them.
Furniture hinges
Basic characteristics
Furniture hinges are semi-mechanical devices for fastening the facade to the furniture body and making doors comfortable to use. Installation is carried out using self-tapping screws. The cup of the furniture hinge is fixed to the facade, and the mounting strip is fixed to the frame. There are several types of products depending on the opening angle:
- 45 degrees. Used for corner cabinets, trapezoid-shaped cabinets with one or two doors. This could be kitchen or wardrobe furniture.
- 90 degrees. Allows doors to be opened at right angles. There are several types of loops. Overlays do not require bending and are suitable for facades that completely cover the side walls. Semi-overlays have a medium twist, while internal ones have a large twist. The former are used in three-leaf wardrobes, the latter in office furniture.
- 165 degrees. Carousel loops are distinguished by the complex shape of the bowl elbow. Relevant for corner bedside tables.
- 180 degrees. Used for mounting false panels and connecting the facade to the sidewall. A popular option for kitchen sets.
- 270 degrees. Suitable for any folding door.
The selection of suitable hinges is based on the design features of the products. The purpose of the interior items must be taken into account. Other factors also matter: the intensity of use, the material from which the furniture is made.
What types of these loops are there?
Leading fastener manufacturers produce large volumes of four-hinged designs with a cross-shaped hinge mounting plate. This fastening allows you to adjust the door with great precision; eccentrics are built into the striker of this design. The cost of such fasteners is higher, but they are more reliable and easier to use. All models have unified dimensions, the dimensions of the loop are the same:
- according to cup diameter (35 mm);
- by distance to the mounting holes.
- Replacing hinges when they fail is simplified.
Frog
This is the name given to a hinge of complex design with 4 rotation units (hinges) and a spring. Thanks to them, the doors open to an angle of up to 175° (the maximum opening value is indicated in the marking). The hinge got its name because of the jumping vibrations when the door moves. The peculiarity of these hinges is their ability to withstand heavy loads. They are used for chipboard and dense wood.
With door closer
Fasteners equipped with a closer ensure smooth movement of the doors. The shock absorber eliminates noisy slamming when closing furniture, fixing is carried out silently. Structurally, the closer is made using a dense medium: the spring is located in oil or other viscous substance, ensuring uniform movement of the hinges. The cylinder is made in such a way that leakage is excluded. One of the advantages of such fastenings can be considered:
- safety of furniture;
- The fastening lasts longer, as the mechanical load on the hinges is reduced.
Using the regulator, the door slamming speed is adjusted. The loop is designed for heavy loads and can be used for any materials.
There are numerous models of such fasteners on the market. Manufacturers of cabinet furniture often use overhead furniture hinges 768 100 with a closer; they are universal, indispensable for glass doors, and significantly reduce the risk of damage when slamming.
For doors that open upward, it is better to use fittings with a large opening angle; a 110-degree furniture hinge is produced by the Russian company Boyard and the Italian Ferrari. The most in demand is a loop with a closer (damper) from the German company Hettich (Hettich sensys) made of durable metal. This leading fastener manufacturer is constantly improving its models. Hinges with closers require precise adjustment.
Furniture hinges Вlum overhead
The Austrian-made fasteners are distinguished by three-dimensional adjustment. Start installing the doors from a vertical plane; to do this, install the nearest screw in the desired position. Then the far one is weakened, the required height level and the front location of the doors are fixed. Bloom overhead hinges (Blum) guarantee 20 thousand operation cycles. These fasteners are more often used for kitchen cabinets; they are not afraid of humidity and temperature changes.
