It’s very easy to diversify your kitchen interior and make the design brighter and more attractive - just add one decorative accent to it. Any room, even one furnished with rather modest furniture, can be decorated with a well-chosen apron.
This part can be made of different materials. Recently, glass aprons, due to their many positive properties, have become very common in kitchens.
Glass apron for the kitchen
Dimensions of glass aprons
The dimensions of the skin are determined by customers.
Kitchen apron sizes
The thickness of glass aprons may vary. It is selected depending on the size of the panels and customer requirements. Most often, materials with a thickness of 6...8 mm are used, but it is possible to select coatings from the range of 4...19 mm. However, you should understand that you should not choose excessively thick glass. This is not only expensive, but also significantly increases the load on the fasteners and the base.
The width of the panels varies from 0.4 to 1.5 m. This parameter depends on how the kitchen modules are installed. Usually it is equal to the distance from the desktop to the bottom edge of the hanging cabinets, to which a small allowance is added (about five cm).
Existing sizes of finished glass skins
Most often, the length of the skin is limited to 3 meters. But if necessary, you can order a longer panel (up to 5 m). However, in this case it is necessary to take into account the difficulties with transportation. If the dimensions of the kitchen require the installation of a long apron, most often you have to use the joining of several parts. Corner models also consist of two panels.
Video - Measurements for a kitchen apron
Optimal size and location
The size and location of the kitchen apron depends on the following factors:
- type and size of hob;
- dimensions of the lower part of the furniture set, as well as the installation height of hanging cabinets;
- design features and installation height of the hood.
Important! The kitchen apron should extend 2-5 cm below the level of the kitchen countertop.
The distance between the wall cabinets and the floor part of the kitchen unit, in accordance with standards and natural ergonomics, is 45-90 cm. Thus, the width of the apron will be within the same limits, taking into account 2-5 cm for overlap.
Apron design options
Glass can be used to produce real designer masterpieces. This is determined by its characteristics and existing processing technologies.
Transparent panels
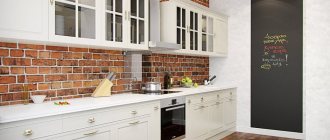
Aprons made of colorless glass are used mainly not for decorating rooms, but as protective panels for interesting cladding of the kitchen. For example, if there is no desire to cover brickwork, printed wallpaper or wood trim, transparent screens are used. In this case, the overall design solution remains the same, since the panel is practically invisible.
Clear glass apron
If you want to diversify the design, you can use products with a textured surface.
Important! You can also make an interesting design panel from transparent glass. Using a self-adhesive film with printing glued to the back side of the material, it becomes possible to get an attractive apron without significant investment. In addition, the film can be removed and replaced with a new one if desired.
Not only for transparent skinnels, but also for designer aprons, it is recommended to use not simple glass, which usually has an inconspicuous tint, but a special material - Optiwhite. This glass is brightened, resulting in the elimination of distortion and extraneous tones.
Optiwhite glass splashback
Matte apron
The matte surface can become a decorative element. Glass shades may vary. White matte aprons look stylish in many interiors.
Matte apron
In this case, decor can be applied to the surface, for example, satin.
Glass satin finishing
Tinted glass
In the interiors of a number of style concepts, it is appropriate to use tinted glass to decorate and protect areas above work surfaces. Their colors can be different, even black.
Tinted glass
As a rule, coloring of the material is done in bulk, at the production stage. However, film gluing is also used.
You can also color glass using another technology.
Stemalit
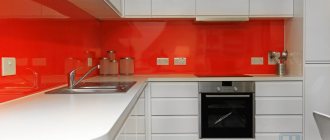
Interesting designs are made from glass onto which a tint is baked in using ceramic paint. This uniform decor becomes part of the glass. It cannot be removed. A wide range of colors are used. The glass itself can be transparent or tinted. With the help of this technology, it became possible to create interesting design effects.
Red glass apron
Apron with a pattern
Photo printing is most often used to produce panels with images. This uses special UV-curable inks. Using a printer, the image is applied to the back of the glass panel. The choice of topics is unlimited. It is possible to transfer your favorite family photos to the glass.
Apron with photo printing
Photo printing on glass
A fairly expensive apron can be made from triplex, in which the images are between the layers. In this case, the drawing is completely protected from damage.
Standardly, a triplex apron is made with a thickness of 8.38 mm using sintering of two 4 mm glasses
Sandblasted glass
By exposing the glass surface to an air flow mixed with an abrasive, it is possible to create various, even the most intricate, patterns.
Using a rather complex but effective processing method, you can perform exclusive engraving
Artistic sandblasting
Mirror aprons
Mirror coating has an important effect - it can visually significantly expand the space of the kitchen. However, as practice shows, more often they install not solid panels with a mirror coating, but aprons with a printed pattern, or they install cladding from individual mirror tiles.
Mirrored apron with diamond patterns for a bright kitchen
When making aprons, a combination of several types of finishes is often used.
Mirror apron for the kitchen
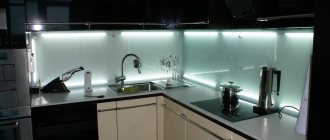
An interesting design technique, regardless of the type of glass processing, is the installation of decorative lighting. It is performed using strips with LEDs.
Mirrored apron with lighting
Backlight
The use of transparent materials as a kitchen apron provides ample opportunities for using various options for illuminating the work surface. Special glass panels are produced (usually triplex with significant thickness) with built-in lighting from LED strips. This lighting is mounted in a rigid box on the upper or lower end of the apron.
Built-in LED backlight option:
You can also make LED lighting yourself by gluing an LED strip to the bottom of the hanging cabinets in the kitchen close to the apron. There will not be much difference in effectiveness, and the efficiency of lighting the work area will increase significantly. The only condition is to use LED strip with external silicone protection to prevent contamination and damage.
Installing an LED strip near the apron:
Recommendations for installing glass aprons
Usually the ordered product is produced within a week. The panel comes with holes for fasteners (if necessary) and sockets. After this, it is possible to order and installation by qualified specialists (usually the process takes about two hours). If you want to save money, you can do the work of installing a glass apron yourself. The most important thing when installing is to be careful.
Regardless of the type of installation, it is first necessary to prepare the area where the work is being carried out:
- All items are removed from the desktop and hob. The sink should also be empty.
- the modules for which the apron will be installed are dismantled: cabinets, hood, etc.
- if plumbing elements or other objects may interfere with the installation of a panel that has significant dimensions, they must also be removed.
- External electrical devices (sockets and switches) should also be dismantled. It is important not to forget to turn off the power supply.
When determining the type of fastening, you should take into account the preferences of the owners, the configuration of the set and the condition of the walls in the room. The junction of the skin and the working surface is decorated with a special side.
Important! It is recommended to use special suction cups to move glass.
Jack for carrying glass
Three methods of installing glass splashbacks are used.
Mosaic tiles
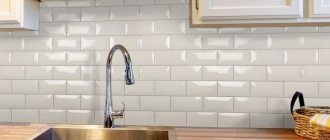
Imitation mosaic - a format of glass panels with small dimensions, called glass tiles . Mosaic patterns vary from manufacturer to manufacturer. Signature, celebrated patterns are not limited to a quadrangular shape, but have hexagonal and other structures. Fashion trends imitate stone, there are glass subway tiles. Here are some major trends:
- To add a little modern flair to a traditional kitchen, consider Mochachino hexagonal mosaic tiles. This elongated hexagonal tile is a stained glass mosaic consisting of cool gray, warm gold tones. Because of the color differences, this geometric tile also loves brown, beige colors on cabinets and countertops.
Apron in purple color
- For a white kitchen to make it look lighter and airier, consider choosing a glass subway mosaic tile in white. These glazed glass tiles have a soft white hue and help reflect natural light while blending beautifully with other white tones.
- For a bold accent area, Desert Mirage subway tiles are a good choice. This is a mosaic mixture of four different elements: cream-colored natural stone tiles, as well as light blue, beige, dark brown glass tiles. The combination of randomly arranged materials adds depth and character.
- For a more subdued look that blends multiple styles, check out Monterra Blend 8mm Hex Tile. This mix of natural stone and hexagon shaped glass tiles has a nice mix of grays and greens with creamy, beige tones. The stone pieces are truly made of natural stone and have veins that complement the colors and shades of the glass elements. The random arrangement of colors will emphasize the pattern and give movement and life to even the most neutral traditional kitchen.
In white and brown
- If your goal is to achieve a monochromatic look, the options for glass mosaic tiles are almost endless. One way to add interest to your kitchen is to choose a material that mimics the cabinets and countertops.
Metallic glass subway tiles are another trendy design favorite. Glazed with glass, they are used in a medium shade of gray primarily in minimalist culinary spaces. Often distinguished by contrasting white lines on the seams.
Installation with adhesive
In this case, silicone glue is used. The main nuance of installation is that the surface on which the panel is attached must be properly leveled. The glue must be neutral to the decorative layer applied to the glass. This method is not used for transparent aprons.
Installation is not difficult (but it is not suitable for massive elements).
- For better adhesion of materials, it is recommended to prime the wall surface.
- Glue is applied pointwise to the wall. It is important to treat the area around the removed sockets and switches.
- The apron is pressed against the wall.
Installation of the apron with glue (liquid nails). Applying glue
Installing a glass splashback
The disadvantage of this method of installing the skin is that it is impossible to dismantle it in the future without damaging it.
Video - Installation (sticking) uploaded
How to choose?
When choosing a glass apron, you should pay attention to some details:
- If you need a laconic and stylish apron to protect the wall, you should use a transparent panel that does not catch the eye. The glass surface will help protect wallpaper or paint when you don’t want to overload the kitchen interior with various textures.
- The standard height of the product is 60 cm, but there are manufacturers who can make the product of any size and shape.
- The panel can consist of several sheets or one solid one.
- The product is fixed either with special fasteners using through holes (transparent products can only be installed in this way), or with liquid nails.
What else you should pay attention to when choosing a glass apron, you can find out in this video:
Profile mounting
In this case, as in the previous one, there are no holes for fastening on the panels themselves.
Apron installation diagram
To install the apron, you need to use self-tapping screws to secure the mounting profiles designed for fixing the glass to the wall (top and bottom).
After this, the panel can be installed.
- To do this, its lower edge is moved slightly away from the wall, and the upper edge is inserted into the profile.
- The bottom of the glass is brought to the profile and is also inserted into it (you have to press a little on the product).
- If several panels are installed, it is necessary to ensure that the gap between them is as small as possible. A rubber mallet is used for this, but the tool should be used with caution.
Hardened (stalinite)
It is processed in a special way: it heats up very much, then from the outside it cools sharply. The cooled side acquires the qualities of special hardness, while the inner surface remains the same.
An apron in the kitchen made of tempered glass is considered the most popular, as it is especially durable. Its main drawback is that stalinite cannot withstand pinpoint hits with a sharp object and crumbles.
Plexiglas
It is made of polymer materials and has a low price. It is durable, light weight and easy to maintain. Since it does not have sufficient hardness, it often suffers from sharp objects and abrasive substances.
You can easily apply any image or texture to its surface. A significant disadvantage of such an apron is its inability to withstand high temperatures.
In any catalog of aprons you can find products made of cast polycarbonate, similar in quality to plexiglass. This material is more resistant to mechanical stress, does not suffer from moisture and bends well, which makes it possible to use it in the implementation of interesting design projects.
Care
As already mentioned, glass kitchen splashbacks are very easy to clean. To keep such a panel clean, it is enough to use ordinary household glass cleaning products, which can be purchased at any supermarket.
They are sprayed onto the entire surface of the apron, after which the panel is wiped with a soft, dry cloth. This procedure should be repeated as the glass panels become dirty. Since the seams in such an apron are either completely absent or almost invisible, dirt does not accumulate on its surface, and the maintenance process does not take much time.
UV painting
Ultraviolet printing on glass using varnish is characterized by applying the design directly to the panel. The materials used allow you not to worry about the quality of the image; it can be washed. It does not require additional coating, but the cost of this method of applying the image will be higher.
Purpose skinned
In addition to the aesthetic design of the kitchen, the main role of the apron is to protect the wall surface from dirt. And they cope with this in the best possible way.
Anyone who often cooks in the kitchen knows how quickly the area of the wall near the stove and sink gets dirty from splashing water, boiling and frying dishes. And if you don’t wipe it off right away, the plaque eats in, dries out, and removing it becomes problematic over time.
The kitchen work area from the table to the upper cabinets gets dirty especially quickly. It is to protect this zone that the skins are intended. The surface of the panels is smooth, which makes it possible to easily and quickly deal with any type of contamination using wet cleaning and the use of soft, abrasive agents.
