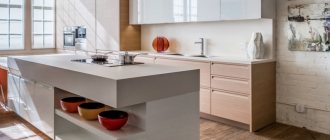
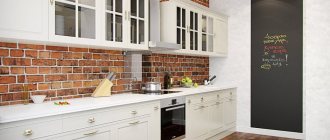
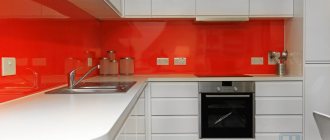
It’s very easy to diversify your kitchen interior and make the design brighter and more attractive - just add one decorative accent to it. Any room, even one furnished with rather modest furniture, can be decorated with a well-chosen apron.
This part can be made of different materials. Recently, glass aprons, due to their many positive properties, have become very common in kitchens.
Glass apron for the kitchen
Dimensions of glass aprons
The dimensions of the skin are determined by customers.
Kitchen apron sizes
The thickness of glass aprons may vary. It is selected depending on the size of the panels and customer requirements. Most often, materials with a thickness of 6...8 mm are used, but it is possible to select coatings from the range of 4...19 mm. However, you should understand that you should not choose excessively thick glass. This is not only expensive, but also significantly increases the load on the fasteners and the base.
The width of the panels varies from 0.4 to 1.5 m. This parameter depends on how the kitchen modules are installed. Usually it is equal to the distance from the desktop to the bottom edge of the hanging cabinets, to which a small allowance is added (about five cm).
Existing sizes of finished glass skins
Most often, the length of the skin is limited to 3 meters. But if necessary, you can order a longer panel (up to 5 m). However, in this case it is necessary to take into account the difficulties with transportation. If the dimensions of the kitchen require the installation of a long apron, most often you have to use the joining of several parts. Corner models also consist of two panels.
Video - Measurements for a kitchen apron
Requirements for socket boxes and fastenings
Practical use of kitchen space is another issue that should be taken into account before measuring and installing a glass kitchen splashback. If there are socket boxes on the walls where the glass panels will be installed, they must be “smeared” so that they are flush with the surface. If you want to attach a microwave, TV, other equipment or any furnishings to the apron, you must correctly position the dowels before taking measurements. If there are railings on the walls, you don’t have to put dowels under them, since their location will be taken into account by a specialist when taking measurements.
Glass panels have a certain thickness, so the standard screws that secure equipment or roof rails will need to be replaced. To securely fix all the items that will be located on the kitchen glass splashback, you will need to use longer self-tapping screws.
Apron design options
Glass can be used to produce real designer masterpieces. This is determined by its characteristics and existing processing technologies.
Transparent panels
Aprons made of colorless glass are used mainly not for decorating rooms, but as protective panels for interesting cladding of the kitchen. For example, if there is no desire to cover brickwork, printed wallpaper or wood trim, transparent screens are used. In this case, the overall design solution remains the same, since the panel is practically invisible.
Clear glass apron
If you want to diversify the design, you can use products with a textured surface.
Important! You can also make an interesting design panel from transparent glass. Using a self-adhesive film with printing glued to the back side of the material, it becomes possible to get an attractive apron without significant investment. In addition, the film can be removed and replaced with a new one if desired.
Not only for transparent skinnels, but also for designer aprons, it is recommended to use not simple glass, which usually has an inconspicuous tint, but a special material - Optiwhite. This glass is brightened, resulting in the elimination of distortion and extraneous tones.
Optiwhite glass splashback
Matte apron
The matte surface can become a decorative element. Glass shades may vary. White matte aprons look stylish in many interiors.
Matte apron
In this case, decor can be applied to the surface, for example, satin.
Glass satin finishing
Tinted glass
In the interiors of a number of style concepts, it is appropriate to use tinted glass to decorate and protect areas above work surfaces. Their colors can be different, even black.
Tinted glass
As a rule, coloring of the material is done in bulk, at the production stage. However, film gluing is also used.
You can also color glass using another technology.
Stemalit
Interesting designs are made from glass onto which a tint is baked in using ceramic paint. This uniform decor becomes part of the glass. It cannot be removed. A wide range of colors are used. The glass itself can be transparent or tinted. With the help of this technology, it became possible to create interesting design effects.
Red glass apron
Apron with a pattern
Photo printing is most often used to produce panels with images. This uses special UV-curable inks. Using a printer, the image is applied to the back of the glass panel. The choice of topics is unlimited. It is possible to transfer your favorite family photos to the glass.
Apron with photo printing
Photo printing on glass
A fairly expensive apron can be made from triplex, in which the images are between the layers. In this case, the drawing is completely protected from damage.
Standardly, a triplex apron is made with a thickness of 8.38 mm using sintering of two 4 mm glasses
Sandblasted glass
By exposing the glass surface to an air flow mixed with an abrasive, it is possible to create various, even the most intricate, patterns.
Using a rather complex but effective processing method, you can perform exclusive engraving
Artistic sandblasting
Mirror aprons
Mirror coating has an important effect - it can visually significantly expand the space of the kitchen. However, as practice shows, more often they install not solid panels with a mirror coating, but aprons with a printed pattern, or they install cladding from individual mirror tiles.
Mirrored apron with diamond patterns for a bright kitchen
When making aprons, a combination of several types of finishes is often used.
Mirror apron for the kitchen
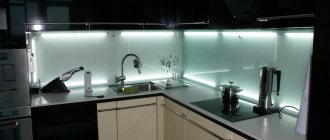
An interesting design technique, regardless of the type of glass processing, is the installation of decorative lighting. It is performed using strips with LEDs.
Mirrored apron with lighting
Photo printing
Photos and drawings printed on a printer look more original than drawings on self-adhesive film. Thanks to photo printing, three-dimensional and deep images are created that allow you to convey all the beauty of the selected design. Making an apron for the kitchen with your own hands using a pattern of this technology is difficult, but possible. Initially, you will need to order the production of a painting. The design is glued onto tempered glass, which is several times stronger and more durable than regular glass. Images do not roll or peel at the edges.
It is impossible to take a photo on glass with your own hands at home. This requires a special printer. Therefore, if you want to have a panel with a photo, it is better to contact a photo printing workshop.
You can choose absolutely any picture
Recommendations for installing glass aprons
Usually the ordered product is produced within a week. The panel comes with holes for fasteners (if necessary) and sockets. After this, it is possible to order and installation by qualified specialists (usually the process takes about two hours). If you want to save money, you can do the work of installing a glass apron yourself. The most important thing when installing is to be careful.
Regardless of the type of installation, it is first necessary to prepare the area where the work is being carried out:
- All items are removed from the desktop and hob. The sink should also be empty.
- the modules for which the apron will be installed are dismantled: cabinets, hood, etc.
- if plumbing elements or other objects may interfere with the installation of a panel that has significant dimensions, they must also be removed.
- External electrical devices (sockets and switches) should also be dismantled. It is important not to forget to turn off the power supply.
When determining the type of fastening, you should take into account the preferences of the owners, the configuration of the set and the condition of the walls in the room. The junction of the skin and the working surface is decorated with a special side.
Important! It is recommended to use special suction cups to move glass.
Jack for carrying glass
Three methods of installing glass splashbacks are used.
Results
As you can see, installing a glass splashback requires attention and a responsible approach. Even a small mistake in the planning process can lead to the fact that this element will look extremely inharmonious in the kitchen. To prevent this from happening, draw up a project in advance and implement it step by step.
Sources:
https://stroiremdoma.ru/kukhonnyjj-fartuk-iz-stekla-osobennosti-montazha/ https://diy.obi.ru/articles/steklyannii-fartyk-na-kyhne-vibor-i-ystanovka-20408/ https: //www.forumhouse.ru/journal/articles/6576-steklyannyj-fartuk-dlya-kuhni-izgotovlenie-dekorirovanie-i-montazh https://bouw.ru/article/montazh-steklyannogo-fartuka-na-kuhne
Installation with adhesive
In this case, silicone glue is used. The main nuance of installation is that the surface on which the panel is attached must be properly leveled. The glue must be neutral to the decorative layer applied to the glass. This method is not used for transparent aprons.
Installation is not difficult (but it is not suitable for massive elements).
- For better adhesion of materials, it is recommended to prime the wall surface.
- Glue is applied pointwise to the wall. It is important to treat the area around the removed sockets and switches.
- The apron is pressed against the wall.
Installation of the apron with glue (liquid nails). Applying glue
Installing a glass splashback
The disadvantage of this method of installing the skin is that it is impossible to dismantle it in the future without damaging it.
Video - Installation (sticking) uploaded
Advantages
Skinali have won appreciation due to their advantages:
- Presentable appearance. Artistic painting on glass or photo wallpapers add exclusivity to the room. Skinals fit organically into any design. A panel decorated using painting technology looks romantic and relaxed, and photo printing helps to enliven the atmosphere.
- Difficult to scratch.
- Not exposed to the negative effects of household chemicals. All materials and means known for this purpose are used for washing and cleaning.
- Moisture resistance.
- Possibility of creating a single panel without joints or seams. A single surface will help fulfill not only its functional purposes, but will simplify cleaning and washing.
- Skinals fit organically into any design. Suitable for all styles of kitchen sets and interiors.
- Easy to install. To install the panel, just glue it to liquid nails.
- Strength.
- Visually increases the space. This is especially true for mirror panels.
- Glass is not destroyed by grease.
- Resistance to mechanical damage.
- Hygiene.
- Long service life. With proper care, the panel will last more than 15-20 years.
- Easy dismantling if necessary.
- Fire resistance. Tempered glass can withstand up to 120 degrees of heat.
- Fire safety.
- Environmentally friendly.
Glass has very good qualities as a material for the kitchen
Profile mounting
In this case, as in the previous one, there are no holes for fastening on the panels themselves.
Apron installation diagram
To install the apron, you need to use self-tapping screws to secure the mounting profiles designed for fixing the glass to the wall (top and bottom).
After this, the panel can be installed.
- To do this, its lower edge is moved slightly away from the wall, and the upper edge is inserted into the profile.
- The bottom of the glass is brought to the profile and is also inserted into it (you have to press a little on the product).
- If several panels are installed, it is necessary to ensure that the gap between them is as small as possible. A rubber mallet is used for this, but the tool should be used with caution.
