There are quite a few methods for finishing a kitchen. Of course, the choice of materials here is somewhat limited, but even in the rich assortment that the market offers today, you can find a variety of options.
One of them is wall panels for cladding of various types and designs. And one of the important features of this solution is their easy fastening.
Advantages of wall panels
Main advantages:
- Easy to install. One piece covers a large area.
- Save time. Many people value these materials for their speed of installation.
- Wall defects are masked.
- Acceptable price. Cladding is cheaper than tile adhesive.
- The surface is quickly washed and protects the base from water.
Panel selection criteria
Features of the room are taken into account when purchasing panels:
- Humidity indicator and optimal temperature. The microclimate in the room affects the condition of the furniture. Finishing materials must withstand aggressive influences well.
- Plaque on surfaces appears due to the constant adhesion of fat. These components make maintenance difficult and negatively affect various surfaces.
- Various chemical compounds are formed during use. Aprons can withstand such exposure and do not corrode.
Products must be visually attractive and durable
This makes it possible to create an interesting design that is practical.
Types of wall panels:
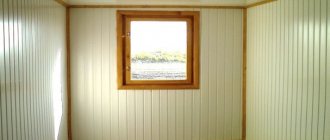
- Natural wood with an unusual design. They fit into any interior and can withstand heavy loads.
- MDF panels for the kitchen, like chipboard and fiberboard, resist external factors well.
- PVC is a durable and versatile coating with a wide range of textures and colors.
Wooden aprons are treated with moisture-resistant material for protection
Options for work wall
Plain
MDF aprons are incredibly varied in their color scheme. Single-color options are produced in a wide range and are suitable for both light and black interiors, bright and pastel, matte and glossy. You can choose a panel that exactly matches the kitchen unit, opt for a contrasting solution, or purchase an apron that is just 1-2 shades lighter/darker than the existing furniture. Read our tips on how to choose an apron for a white kitchen at this link.
Colored
A one-color solution is not for you? Pay attention to the colored aprons. Panels with imitation wood, cork, stone, parquet boards, ceramic tiles... The range is limitless
At the same time, there is no point in choosing a panel according to the principle “dark colors show less dirt,” because the MDF surface of any shade can be easily washed with water.
Photo printing or artistic drawing
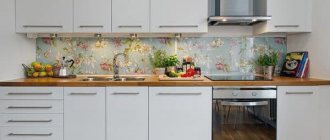
This option is suitable for connoisseurs of non-standard solutions. A real painting will appear in the kitchen area, a canvas that will become a bright accent. You can choose panels with floral patterns, panoramas of metropolises, still life, picturesque landscapes of mountainous areas, or one of hundreds of thousands of other options. Read how to choose an apron for a white kitchen with a black countertop in this material.
For an interior decorated in red and black shades, a Japanese-style panel, options with imitation animal skins, black and white panels, white panels with large photographs of red berries, etc. would be acceptable.
For a kitchen in soft colors and with floral wallpaper, panels depicting fruits, a spring meadow, and bright butterflies would be appropriate.
Suitable materials
The walls are lined with the following materials:
- PVC.
- Durable glass.
- Natural wood or MDF panels.
- Tile.
Plastic panels are used more often than other materials. PVC is available and produced in different colors.
Textures like natural wood or stone
Paintings or photo printing look impressive.
Advantages of plastic:
- Moisture resistance.
- Hygiene.
- Easy to care for.
- Easy to install.
The plastic cover is installed on your own.
MDF panels are affordable and practical. They look beautiful
The kitchen uses cladding covered with laminate on both sides. It protects against mold and moisture. The surfaces are light and durable, and grease does not stick to them. Changes in humidity do not deform the coating.
Tempered glass cladding is the most expensive
The coating can withstand impacts, liquids and mildew. There are no scratches on the front side. Laminated plywood is resistant to liquids. The top of the sheets is covered with plastic. This is a good method for organizing a kitchen. The environmentally friendly product is perfectly protected from moisture. Melts on contact with open flame. Artificial stone is strong, moisture-resistant, and does not melt. The coating will last for decades.
Environmentally friendly coating does not contain aggressive chemicals or acids
What should an apron be like?
An apron, as an interior element, not only decorates the space between kitchen cabinets.
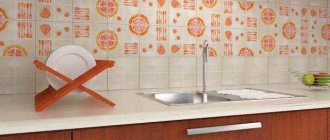
It is designed to protect walls from liquid, grease, dirt and soot. In order for the coating to fulfill its function, it must be made practical, easy to clean, resistant to high temperatures and chemical detergents. The wall cladding near the work surface should have a pleasant appearance. Nowadays, aprons are made of ceramic tiles, mosaics or glass. For those who want to make a renovation that will last forever, cladding made of natural stone, metal or brick is suitable.
Installation method on the sheathing
Using this method you can hide uneven walls or unsightly old finishes. One of the disadvantages is the visual reduction of space.
Marking and cutting MDF sheets
The measurement is taken before marking. MDF can be cut easily with any tool. Circular saws with large teeth cause the material to crumble. Rough tools leave an uneven cut end.
Important! The horizontalness of kitchen cabinets is checked before marking is applied. You cannot carry out drawings starting from the line of furniture location.
Suitable tools:
- Saw for iron;
- Jigsaw;
- A circular saw with special tips on the teeth.
The panels are manufactured in a rectangular shape. It is necessary to calculate the number of parts and determine their approximate placement. A gap of up to 50 cm is maintained between straight slats. When plastic linings are attached, this figure decreases to 20-30. Deflection from light pressure decreases. The number of multidirectional materials depends on the area of the walls and the type of panels. The approximate number of parts is calculated in this way.
How to cut and assemble a frame
Wood, plastic and metal are used to make the frame. Some materials have good moisture resistance. First, metal slats are installed, then the profile and apron are attached. The technology eliminates warping of the product. The frame slats are wrapped with moisture-proof film before installation. Service life increases. Improves resistance to external factors.
How to install supports:
- Wooden slats are prepared according to size. A simple hacksaw is used for cutting.
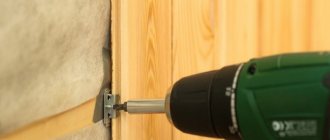
- At this stage, the planks located around the perimeter are attached. The parts are attached with self-tapping screws. The level is used to maintain even stripes.
- Vertical jumpers are installed between the slats. You can't attach them to the wall right away. The parts are aligned along a stretched rope. Self-tapping screws for fastening are used last.
If the frame is created in hard-to-reach areas, the visible location is taken into account
Fastening rules step by step
Fastening algorithm:
- The aprons are placed in their final position. It is pressed against the frame using a stapler or screwdriver.
- The next element is implanted into the groove. It is necessary to control the location of the apron using a building level.
- Other decorative elements are displayed in a similar way.
Skirting boards are attached to the ends so that the edges do not cover
Interesting! For temporary fastening of parts, construction staples or self-tapping screws are used.
An adhesive mixture is used if there is no desire to install a frame. This finishing method is used for light aprons in small kitchens.
How to glue a plastic kitchen apron with your own hands
The installation process itself is not difficult, but requires care.
At the marking stage, you should take several horizontal measurements, since walls are not always perfectly level.
How to properly glue an apron?
The process consists of several successive stages:
- Surface preparation. If there is wallpaper on the walls, it should be removed. The wall is cleaned of peeling plaster and various contaminants and covered with a primer. It is better to choose an acrylic primer for rooms with high humidity - it contains antibacterial and antifungal additives.
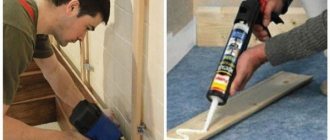
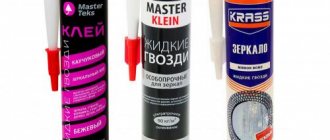
- Applying glue. Liquid nails LIQUID NAILS and any others are applied using a special gun only to a dry, grease-free surface. This should not be done in a continuous layer, but dotted or in a snake pattern.
- Gluing. The surfaces to be glued are pressed tightly against each other and immediately separated to ensure that there is enough glue. After 3-5 minutes, final gluing is carried out, pressing the panel tightly against the wall. The adhesive sets almost instantly, but the greatest adhesive strength is achieved within a day.
VIDEO INSTRUCTION
We glue an MDF apron in the kitchen
This procedure differs little from working with a plastic panel; it also consists of three stages:
- Surface preparation. The wall is cleaned and, if necessary, leveled. Highly absorbent surfaces are treated with a primer.
- Application of liquid nails. The workpiece is tried on in place and cut to the required size. A layer of glue is applied pointwise or in a snake pattern to the MDF panel.
- Gluing. The panel is applied to the wall and pressed lightly, after which it is removed and a technological pause is maintained (3-5 minutes). Then the panel is finally glued. For greater reliability, a heavy apron can be supported in several places with slats; after the glue has completely dried, they are removed.
VIDEO INSTRUCTION
Useful tips
Do not try to glue a plastic panel or MDF apron the first time, as this is not always possible. Place the panel against the wall, then lightly tap it and remove it.
After pausing for a few minutes, you can begin the final gluing. In most cases, it is enough to firmly press the surfaces at the joints once to achieve rapid setting of the adhesive.
Visible parts of the edge of the apron should be additionally refined with MDF corners of a suitable color.
How to stick using liquid nails
This is a popular finishing method. The entire back surface is coated and pressed firmly into place. It is compressed by a heavy load or special spacers. Screwing it to the wall using dowels is easy. To do this, 4-6 holes are made in the aprons. Fittings for the additive are inserted into them.
Important! Plastic, plywood, MDF sits on the glue. heavy cladding is attached to a supporting frame and secured with self-tapping screws.
The glue gradually loses its qualities due to constant changes in temperature and humidity
Decorative plugs are used if the holes are on a visible surface. Hats are covered with kitchen cabinets and cabinets
The panel does not need to be secured. The bottom edge is placed on the tabletop and pressed down with a plinth. The top one is pressed against the cabinets.
Tempered glass is placed in metal frames. But such frames are still attached to the wall.
Important! Installation of sockets in the wall panel is carried out after fixing it to the frame. The wiring is pre-laid to the desired location.
Polyurethane mixture or liquid nails hold the cladding well
In order for the apron to hold well, you must follow the following rules:
- The vertical of the base is measured.
- The coating is primed.
- A waterproof mixture is applied to eliminate curvature.
- The plane is leveled and polished.
- Several balls of primer are applied on top.
- After this, the wall is pasted over.
Installation of wall panels does not require preparation and is simple and easy. A smooth surface is created on a flat base.
Stages of work:
- Measurements and preparation of structural elements. Marking is carried out, the required amount of materials is determined. The length and height of the apron are calculated. The calculations take into account the width of the plastic parts. Plastic is cut with a jigsaw or hacksaw.
- Installation of the frame is the next step. The rail is installed horizontally along the bottom and top sides of the cladding. For an apron, two slats are enough.
- Fastening cladding with curved profiles. The first overlay is inserted into the groove. The second one is inserted into the groove of the previous one. The fastening edges are attached to the frame.
Important! The level is used to check the verticality of the coating. The structure must have the correct shape.
Each part is attached to the frame with self-tapping screws. The edges of the cladding are covered with plinths. Creates an attractive smooth surface.
Varieties
The following materials are used in the manufacture of plastic aprons:
- PVC panels, the standard width of which is 25 cm and thickness - 0.8–1.2 cm. They are produced in lengths from 2.6 to 3 m. Their main feature is the presence of special locking fasteners on glossy or matte parts for seamless connections. Therefore, with proper installation, you can independently make a kitchen apron for the kitchen on the wall in the form of a monolithic surface from individual elements. The main thing is that there are no cracks, otherwise water and debris will get into them. PVC is used to make plain, thermo-film-coated or varnished aprons.
- ABS sheets are single-layer plastic materials decorated with photo printing or designs. A finished kitchen apron made of ABS plastic is usually produced in dimensions of 200 x 60 x 0.15 cm. Its main advantage is its high resistance to mechanical damage and the absence of deformation during bending. Aprons made of sheet plastic are produced in a wide variety of designs, since high-quality images are applied to the surface of the product. In addition, you can order an apron with an original design.
- Cast polycarbonate is a refractory plastic material that looks like ordinary glass. The surface can be glossy or matte. Kitchen aprons made from this material are sold ready-made. Images imitating tiles, decorative stone, brick and other materials are applied to the inner polycarbonate coating. In addition, such an apron can be equipped with lighting elements (for example, LEDs) that will highlight the product.
Taking into account the size of the kitchen wall that needs to be tiled, you need to calculate and select the appropriate model.
Installation with glue
Features of gluing:
- They are glued flat.
- Aprons are glued to wooden sheathing.
- You can press them with dowels.
- The products are inserted into aluminum slats.
The easiest way to make a wall panel in the kitchen is to stick it with glue.
The surface is leveled, bends in the cladding appear if the base is curved
Important ! The plaster is falling off after replacing a damaged panel. It is recommended to fasten it with dowels and self-tapping screws.
MDF panels are attached to the wall using liquid adhesive. The mixture is evenly distributed by the gun
The back side is covered with glue. After 15 minutes they stick well to the base. To prevent the MDF from moving under its own weight, wooden wedges are used.
