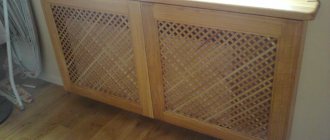
People of the older generation still remember constantly smoked ceilings in kitchens, unpleasant odors, dampness, etc. The reason is the ineffective operation of natural ventilation. Some residents, in order to save thermal energy, tried to close the ventilation openings, which noticeably worsened the air parameters in the room. The emergence of modern hoods has made it possible to solve problems and significantly increase the comfort of living in kitchens.
Hood built into cabinet 60 cm
Types of hoods and their design features
A variety of kitchen air filter devices
Before purchasing equipment, you should decide on the location where the stove will be located, since the hood is installed above it. The design features of the model depend on the installation location of the slab. Depending on the type of location of the kitchen area, hoods are divided into several types.
- Flat. It is small in size and does not require installation of an air duct. It has built-in filters through which polluted air passes. The disadvantage is that they need to be changed periodically. The service life of the filter directly depends on the intensity of use of the stove and hood.
Flat hood - an inexpensive option with built-in filters that takes up little space
- Dome. The equipment of this group is connected to ventilation and has high performance. The more impressive size of the case makes it possible to install larger fans than in flat ones. Therefore, they are used in spacious rooms where there is a need to filter a large air flow from the kitchen. Remove odors from far corners of the room.
A dome or fireplace hood has good aerodynamics, operates almost silently, but is more expensive - Built-in. The most widely used type. The main advantage is that it hides in kitchen furniture or countertops and does not spoil the overall style of the interior. Another plus is that installing a built-in hood in a cabinet is easy to do independently and there is no need to call a paid technician.
A built-in hood is the most optimal solution for small spaces
Which type of hood to use depends on the size of your kitchen. If the kitchen is small, then the power of a flat hood will be quite enough. Built-in models are good in typical Khrushchev buildings. They save space, since the air duct and the frame itself fit neatly into the closet. In the kitchen, where space allows, there is a free-standing island; a fireplace or dome hood would fit perfectly there.
Scheme of operation of kitchen hoods
Types of built-in hoods
We do not consider the operational characteristics of the units, but only the fundamental technical differences.
Table. Types of hoods
| Hood type | Brief description of operating features |
Flow-through | The simplest devices are most often used in public buildings. Exhaust air from the premises is discharged directly onto the street. Some more modern models have special filters for partial purification of air masses. Disadvantage: a large amount of heat is removed from the premises; it is necessary to increase the costs of maintaining buildings in the winter. |
Recirculation | Modern designs with various effective filters for air purification. After cleaning, it is not thrown out into the street, but is fed back into the room. Due to this, thermal energy is not lost. Disadvantages - expensive filters need to be changed periodically, making maintenance difficult. If the recommended modes of use are not followed, the effectiveness of air purification sharply decreases. The advantage is that they can be installed in closed, sealed rooms. |
Combined | The most successful design. The hoods have two modes of operation; special dampers are installed to change the type. Switching is done manually depending on the need in specific conditions. The only drawback is the highest cost among all types of devices. |
When choosing, you need to weigh all the features of the premises and the conditions of their use. It is important to remember that errors when selecting a model bring not a positive, but a negative result on the air quality in kitchens.
Operating principle of hoods
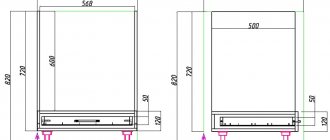
Built-in hood dimensions
Diagram of a hood with a retractable unit with detailed dimensions
In order to correctly install a built-in hood, measurements are taken of the slab and the existing cabinet into which the equipment will be built. If you do not pay attention to this, it may turn out that the size of the device will exceed the dimensions of the cabinet.
The importance of a cabinet for a built-in hood in a kitchen interior
A cabinet for a built-in hood is the top element of a kitchen unit, designed specifically for installing an exhaust system in it.
It allows you to perform several functions at once:
- disguise the hood, making it an aesthetic piece of furniture;
- complemented by a convenient storage system;
- save space in cramped kitchens.
As a rule, such a module is located above the hob and is designed to match the overall style of the kitchen unit. If necessary, it can be purchased separately.
Installation of built-in hood. Required materials and tools
Correct installation of a kitchen hood
Let's consider the option when you decide that there is no need to make a new box, all that remains is to re-equip the existing wall cabinet. Before you begin installation, you need to decide on the material from which the ventilation duct will be made, and prepare the necessary tools so that everything is at hand.
Types of materials from which the air duct is most often formed.
Plastic air duct for connecting to the hood
Corrugated exhaust duct hidden behind the panel
Both types have a number of pros and cons. What to choose, you decide based on the parameters of the equipment, the capacity of the cabinet, and your preferences.
A structure made of flat rectangular pipes can be hidden in a suspended ceiling, almost without taking away the height of the room
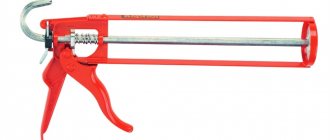
The following tool will be useful for this work. For marking and measurements you need a tape measure, a square, a pencil. For cutting holes - a jigsaw, wood saws. A screwdriver, bolts, and screws will also come in handy. To glue joints, purchase adhesive sealant. To enhance the tightness, clamps are used; they need to be prepared.
Manufacturers
Built-in hoods are produced by most manufacturers of household kitchen appliances, so that the entire room can be furnished entirely with equipment from one company. There are also companies specializing in hoods.
Popular manufacturers of similar designs:
- Bosch - this company has a good range of products from affordable models to premium ones. The latest models are equipped with a touch control panel and automatic selection of operating modes, filter indication, and an additional cleaning system. They are distinguished by their noiselessness;
- Krona - this company specializes in built-in kitchen appliances. Their hoods meet all modern requirements put forward by consumers. The sizes of hoods vary from 45 to 80 cm. There are both ultra-modern models and simpler ones;
- Elikor - products of a popular Russian manufacturer meet all international requirements and standards. Elikor hoods are produced not only in various colors, but also with decorative decorations in the form of gilding and carvings. A distinctive feature of this product is its unusual design (look at the photo);
- Hephaestus - hoods from this company are easy to operate and equipped with high-quality lighting. Their power and performance make the equipment suitable for both small and large spaces.
Whatever the brand is chosen, each of them has a product line full of a variety of models of hoods, from the most compact, allowing them to be built into a 50 cm cabinet, to 80 cm. And also in various colors and styles. A built-in kitchen hood is a universal solution for any room where culinary masterpieces are prepared. By installing it, you can forget about unpleasant odors, freshen the air and make cleaning much easier.
Working with the bottom shelf of the cabinet
Preparing a kitchen cabinet for installation of a built-in hood
When installing a built-in hood in a cabinet, you can go in several ways.
- Order a kitchen cabinet without a bottom. To bring out the air duct, you will need to make appropriate holes for it in the middle shelf and the top.
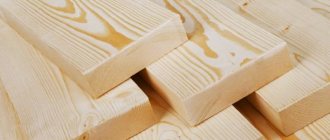
- Make a cabinet for the hood with your own hands, based on the dimensions.
- Remodel an existing piece of furniture, first remove the bottom or cut a hole according to the existing dimensions.
There is no need to disassemble the cabinet. You need to remove it from the wall and disconnect the doors. It will be more convenient to perform your actions on the floor. “Unstitch” the back wall, unscrew the side fastenings, then the bottom shelf will easily come off on its own.
When you cut out a place for a hood, you need to do it so that the body of the device fits tightly to the front wall, and not vice versa. Mark the place where you will cut with a marker, drill holes in the corners of the mark, and then cut.
Hood cabinet dimensions
- depth - 30 cm;
- width - 60 cm;
- height - 50 cm.
Detailing:
- upper horizon - 57 x 12 cm (1 pc.);
- lower horizon - 57 x 30 cm (1 piece);
- side bar - 50 x 30 cm (2 pcs.);
- rear wall - 47 x 57 cm (1 pc.);
- shelf - 57 x 10 cm (1 pc.).
The facade can be chosen to suit every taste. You can install double hinged doors or one single door.
The marking of the lower horizon must be done under the corrugation. The opening in it should coincide with the opening of the hood. The hood itself must be attached to this hole.
There are threaded holes in the corners of the hood; they are intended for fastening. But marking the lower horizon for such fasteners is not at all necessary. It is necessary to drill holes in the lower horizon and use self-tapping screws to tighten the horizon and the hood.
Transforming the middle part of the cabinet
You will have to cut holes in the cabinet shelves to allow the air duct to pass through.
Most often, the hood is attached to the middle shelf. Therefore, you also need to make a cutout for the air duct. We mark the cut location with a pencil; if it is round, we drill a hole with a diameter of 10 mm for the saw to enter and cut along the mark.
Then you need to mark the places where the device is attached to the middle part. Attach the shelf to the body of the device, make a notch with a sharp object in the location of the future location of the screws.
Example of mounting a hood to a wall
To secure the shelf to the sides, use plastic corners. First, we attach the four corners to the shelf, adjust its position by placing the box on the floor.
Exiting the power cord above the hood, as well as organizing a hole for a corrugated pipe
We build the hood into the cabinet and install the air duct
Ceiling version of ventilation installation
The penultimate stage of work will be the connection of all parts. The cabinet with the middle part and the hood attached to it is hung in place. We must not forget that the retractable part of the equipment must move freely back and forth. This part contains a filter that catches grease. It starts working when the moving part is located above the stove.
Installing Ductwork on the Top of the Cabinet
The last stage is the installation of the air duct. It is inserted through the top of the cabinet, into a hole cut in advance, and connected to the device. The joints must be coated with glue and secured with clamps. It is also important to maintain the ability to detach parts to clean the system from dirt.
Then the air duct is connected to the ventilation. Special grilles are used for fastening. A hood is an electrical appliance; there should be a grounded socket nearby.
Connecting the air duct to the ventilation duct
The work is not at all difficult if you take into account the points described above. A built-in hood is a good option for those who want to save space and maintain a beautiful interior.
An example of mounting a hood in a cabinet above the hob
Features of operation
The operating rules for both fully built-in and canopy, retractable hoods are not much different from the use of any other household appliances. It is important to avoid overheating of the equipment (to do this, install it correctly), ingress of water, promptly wipe off dust and other contaminants, do not drop or hit, avoid twisting the wire or its contact with hot surfaces.
Regarding the hood, which is built into the cabinet, the following rules should also be observed:
- The grease filter protects the internal system of the structure, trapping droplets of fat and splashes of cooking food. The performance of the hood depends on its cleanliness. Therefore, it is necessary to regularly remove it when it becomes dirty and wash it with detergent. It can be easily removed and put back;
- The carbon filter of a recirculation hood is one of its most important elements. Over time, it loses its cleansing abilities. Therefore, it is necessary to replace it with a new one at least once every six months. There are different brands of carbon filters;
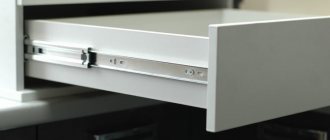
- It is necessary to ensure that the sliding panel slides out and slides back easily. To do this, it also needs to be regularly cleaned of dust, dirt and grease particles;
- If the hood has touch control, then in the kitchen it is especially susceptible to contamination. There are fingerprints on it, food splashes, and dust sticks to it all. The ease of operation of the device depends on its cleanliness, and a strong degree of contamination can lead to breakdown. Therefore, it is necessary to especially carefully monitor the cleanliness of the touch panel, wiping it with special wet wipes;
- The push-button control system can also be damaged by grease particles and kitchen fumes. When dirt gets stuck between the buttons, it can impair their performance. Therefore, the cleanliness of the control panel must be as carefully monitored as a grease filter.
If the equipment breaks down or its performance deteriorates, you must contact the service center. Timely handling can save equipment and extend its service life.

