It is difficult to surprise a modern person with such a material as MDF panels. It is present in the decoration of public places, metro and railway passenger cars, hallways in apartments and other places with a high level of attendance. However, the rapid development of the latest technologies can surprise even connoisseurs of the assortment of the building materials market.
Trendy look of MDF panels
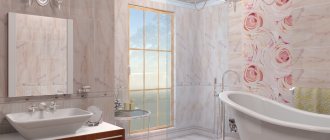
We devoted this article to getting to know the trending trends in the design of MDF panels, to remind you of their features and rules of use in the design of residential premises.
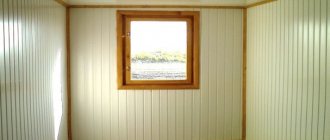
A trendy option for decorating a room with MDF panels
Technology for attaching panels to the wall
The technology of each method differs significantly. You should take a closer look at how to attach MDF panels in each individual case.
Mounting MDF panels on walls is done in two ways
Pasting material
The time it takes to complete this procedure can be completely different. Everything will depend on the general condition of the surface. The general preparation procedure is as follows:
- The walls are cleared of everything unnecessary. Anything that sticks out or protrudes is subject to dismantling. The old decorative layer is completely removed. You need to know that it is impossible to properly stick the material on surfaces on which there is a layer of whitewash, wallpaper or untreated areas of paint.
- The plaster is checked. It should hold well and have no signs of shedding. Any defects indicate that the wall will have to be re-plastered.
- After preliminary preparation, a lot of dust and dirt remains. Everything is removed with a damp cloth and a vacuum cleaner.
- The surface is primed.
General requirements for preparing walls before installing panels
Installation is carried out as follows:
The glue is being prepared. “Liquid nails”, which are sold in tubes, are excellent
They are applied using a special gun. For independent work, the simplest tool is suitable, the cost of which is usually equal to the price of one tube of glue. It is important to consider that the panels are brought into the room and unpacked in advance. They need time to mature
This will help the material adapt to temperature and humidity. Markings are made on the walls. Lines allow you to navigate faster. The first element is laid on a flat base. The glue is applied in waves to the reverse side. The fragment is applied to the surface and pressed lightly. Correct installation is checked by level, which is used to take measurements in several planes. You need to wait until the glue sets well. Sometimes, for example, with a horizontal layout, the panels can be secured with dowels. This is done in the place where the baseboard will be installed. When the first element has set, the second fragment is coated with glue, inserted into the groove and pressed to the surface. Further, you can not expect gluing, but completely cover the surface. To hide transitions, joints and corners, MDF overlays are used, which are also glued.
Additional elements that hide joints and transitions are also placed on glue
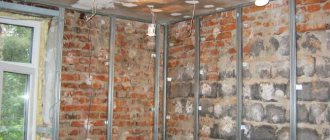
Creating a wireframe
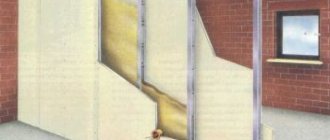
How to properly attach MDF wall panels to the sheathing? It is worth noting that the technology for constructing the frame is reminiscent of working with gypsum board slabs, but is more simple.
Ready-made wooden lathing for laying MDF
Installation is carried out according to the following instructions:
- It is preferable to use wooden beams as guides. The optimal size is considered to be 30*50 mm. A metal frame and hangers are used when the defects are so large that it is necessary to install the profile at a large distance (more than 10 cm).
- The timber is laid in the required plane. This depends on the scheme by which the panels will be fixed. That is, the MDF element and the profile (stand) must be perpendicular to each other.
- The slats are attached to the wall with dowels. The timber is leveled by laying OSB or sawn boards. It is necessary to strictly align the profile so that it is in the same plane.
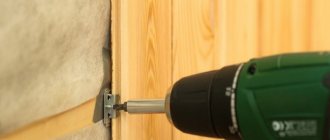
- The panels are attached using clamps that resemble staples. This element has a hole for self-tapping screws, through which it is fixed to a wooden stand.
- The first fragment is fixed directly, strictly along the edge. The screw is completely recessed. Then the overlays will hide this defect.
- The remaining products are attached.
Leveling timber for wooden sheathing under MDF panels
Thus, everyone chooses for the walls the option that is more preferable from the point of view of installation, the totality of advantages and disadvantages.
Kinds
MDF panels differ in technical characteristics, types of finishes and sizes.
Manufacturers offer 3 types of panels:
Whole pressed
Slabs that are homogeneous in structure and do not have a decorative coating. They have good sound insulation performance and are affordable. In finishing works they are used for painting. After applying the paint, moisture resistance increases.
Laminated
Such panels are lined with a moisture-resistant film on which a decorative pattern is applied. The technical parameters of this material are much higher, due to the insulating layer from moisture and temperature changes.
Moisture resistant
Panels characterized by the highest fraction density, which prevents moisture or steam from penetrating inside. The material belongs to a high price category.
Based on the type of decorative cladding, panels are divided into the following types:
Veneered
The most expensive type, a thin cut of natural wood – veneer – is used for cladding. The finish is glued to the outside using a vacuum, glue or by pressing under high temperatures.
Another option is to apply veneer using fine-line technology. Thin sections of wood are laid on top of each other at a special angle with the addition of binders, and then pressed. The surface is smooth, silky with a beautiful pattern of interlacing wood fibers.
Embossed (3D panels)
This is a new trend in the production of MDF panels, with the help of which the surface is given a certain relief, the material is visually aged, golden or silver highlights are introduced into the texture of the picture, a three-dimensional picture and even a photo are placed.
Glossy
They look stylish, respectable and seem to be illuminated from within. A similar effect is achieved by laminating with a high-gloss transparent film.
Painted
The effect of deep color is achieved by applying a special paint to the panel, which smoothes out all the unevenness, spreading across the canvas. Painted panels can be matte, glossy or have a “mother-of-pearl effect”.
The design of MDF panels exceeds the wildest assumptions.
Modern technologies make it possible to imitate any natural material:
natural stone and brick, which allows you to imitate real masonry without creating a load on the base;
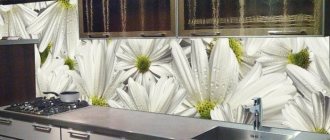
photo printing capable of reproducing any image, including imitation of frescoes and mosaics;
types of wood of any shade;
relief pattern with 3D effect;
metal is an indispensable material in high-tech or loft style rooms.
According to the size and shape of the release, they are distinguished:
sheet panels
tiles
clapboard or rail
A special position is occupied by the original look - perforated panels. These are slabs with slotted patterns applied to them. The material is mainly used for finishing ceilings and installing partitions to separate zones within one room.
Method one. Installation using lathing
- recommended in cases where the base surface has severe unevenness that cannot be corrected manually;
- for rooms with high humidity, it is best to use metal profiles rather than wooden slats as a base for the frame;
- the method using lathing is indispensable in cases where additional wall insulation is planned.
The main disadvantage of this option is the need to install a frame, which slightly lengthens the duration of the work. In addition, the frame takes up a certain number of centimeters of free space. Are you ready to put up with such “arbitrariness”? Very often you simply have no options, because achieving an ideal surface is not possible every time you need it.
Sheathing device
A very important point is to know the method of attaching MDF panels to the wall: vertical
or
horizontal
.
The nature of the design of the auxiliary frame directly depends on this.
- horizontal arrangement of MDF panels - vertical sheathing scheme;
- vertical arrangement of MDF panels - horizontal lathing scheme.
As you can see, everything is quite simple - it’s unlikely to be confused! Some points to pay attention to:
- Before installation, you should treat the slats with an antiseptic - this will protect the wood from the appearance of microorganisms;
- the length of the slats should be at least a few millimeters less than the actual distance from the top to the bottom point of the structure.
Subsequence
- no matter what type of frame you are going to construct - metal or wood, in any case, first of all you need to fix the corner posts, and then the transverse ones and those that will be located in the openings;
- a step of 50 centimeters is optimal for all types of sheathing;
- To fix narrow and wide metal profiles, it is best to use self-tapping screws, since the so-called dowel-nails are less reliable for this type of fastening.
Fixing panels
- we cut off the ridge at the first panel and clamp it with the same side to the sheathing of the adjacent wall;
- we fix it to the horizontal planks using self-tapping screws, do not forget to retreat 1 centimeter from the very bottom;
- each subsequent panel is inserted in a similar way into the groove of the previous one and secured with nails or clamps;
- the most difficult element is the last one: it is cut to the required size, inserted and fixed on the vertical post of the frame with self-tapping screws.
A video detailing the key points of the operation is below.
Rules of care
MDF panels are not particularly dirty, so it is enough to periodically wipe them with a slightly damp cloth. If stubborn stains appear, detergents can be used.
To avoid damaging the top layer, it is important to adhere to the following rules:
- Do not use aggressive chemicals or abrasives. This is especially important when caring for veneer panels.
- Lacquered veneer is wiped with a damp cloth without adding soap.
- Waxed or oiled veneer is periodically treated with special products to care for natural wood. The oil or wax coating is renewed every few years.
If the top coating of the film peels off during operation, it can be removed using fine-grained sandpaper. Any of the damaged slabs can be easily replaced with a new one.
How to use plasterboard wall panels
A new generation of finishing material is gaining popularity and demand. Today, wall panels are used with great success for covering various surfaces. The material is environmentally friendly for humans and has high technical characteristics. This includes fire resistance, moisture resistance, as well as sound and heat insulation, high-quality plastic with a vinyl-silt coating and other raw materials. The main purpose of plasterboard panels is to create partitions in a living space or office. And also, cladding walls, supporting structures or other interior elements.
How to install correctly - installation options
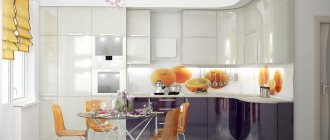
How to install an apron in the kitchen from MDF sheets? And although the process of installing an MDF apron is quite simple, there are several issues that a novice installer may encounter. There are many videos on the Internet of installing an apron in a kitchen made from MDF material.
Below is a step-by-step installation of an apron in a kitchen made from MDF panels. Here is a list of preliminary work before installing the MDF apron. Take correct measurements of the work area. Thanks to the ease of processing MDF panels, you can give the desired shape to the apron. Much depends on how long you plan for the apron.
Some owners want the space from the bottom of the cabinets to the floor to be covered with an MDF sheet. In this case, you need to measure the space from the bottom of the wall cabinet to the floor.
And additionally add another 20 centimeters to the value so that the panel extends slightly under the hanging cabinets. This approach will provide additional aesthetics to the design.
This method is effective if the lower part of the kitchen unit is not solid. Otherwise, you will overpay for extra meters of material, which no one will see anyway, but the strength of the structure will be much higher.
It is almost impossible to carry out interior finishing work without putty. Here you will find out how long the putty takes to dry.
Partial fastening method
Another option for attaching a kitchen apron made of MDF is partial. You do not overpay for extra meters and attach only the visible part of the apron between the tabletop and shelves. Fasten the MDF panel with a margin of about 25 cm, this will allow you to additionally fix the apron plate.
Horizontal measurements are also important, especially if there are sockets or switches in the kitchen splashback area. To do this, make a pattern with marked places where the sockets are located.
How to install in the kitchen
How to hang an MDF apron in the kitchen? After the preliminary work necessary for correct fastening of the apron, you can install the MDF sheet itself.
Work carried out using a frame structure takes more time, but provides additional reinforcement and a longer service life without defects. How to fix an MDF apron in the kitchen using the frame method? The work area assembled from parts allows you to quickly assemble the apron.
How to install with self-tapping screws
How to attach a kitchen apron made of MDF with self-tapping screws? Here you will also need planks on which the entire structure will be supported. It also needs to be treated with special antiseptics. Then, in the marked places along the perimeter of the planks, the MDF sheet is attached to dowels.
It is better to fasten an MDF apron for the kitchen with help to avoid defects. Below is a video on how to attach an MDF apron in the kitchen using self-tapping screws.
For more information about installing a kitchen apron made of MDF, watch the video:
Features of production and advantages of MDF
MDF panels are a material consisting of a finely dispersed fraction of wood shavings.
To obtain panels, wood waste is crushed, the resulting fraction undergoes heat treatment, and as a result, an adhesive composition is released - paraffin or lignin. It glues the mass together, and by pressing it gives the necessary strength. Then a melamine film or veneer is glued onto the surface, which gives a beautiful decorative look. Film lamination gives the material an almost indistinguishable resemblance to natural material, while the price remains affordable. The film has different colors and textures, which justifies the widespread use of MDF panels for interior finishing work.
The manufacturing process for MDF is similar to that of particle board. But chipboard contains formaldehyde resins, which are harmful to human health.
In terms of ease of use in the construction industry, chipboard is inferior in reliability of fastening with screws. After some time of use, the holes may become loose and fasteners may fall out. Repairing chips is difficult and sometimes impossible.
MDF boards have a denser structure, which allows them to securely hold fasteners. It is also worth noting the environmental friendliness of MDF. A high-quality board contains only natural substances that are safe to use: wood and carbide resins.
Additional advantages of MDF:
- durability and ability to resist mold and rotting processes;
- water resistance, so the material can be used in rooms with high humidity;
- flexibility when heated, allowing the panel to be slightly curved if necessary.
- maintainability: damaged elements can be easily replaced with new ones without dismantling the entire cladding;
- ease of installation: even beginners in finishing can cope with attaching MDF to a suitable base;
- panels allow you to hide electrical and other communications behind you;
- the material is hygienic and easy to care for: the panels are easy to clean, and if necessary, they can be treated with non-aggressive household products.
The disadvantage of MDF is:
- low resistance to mechanical stress. Although the damage can be easily eliminated by masking it with paint of a suitable color.
How to install?
There are two main ways to install MDF wall panels:
- stick;
- place on a metal or wooden frame.
In the first case, you need glue suitable for working with wood products. It can not only be used for gluing, but also for leveling recesses in places where screws are screwed in. The glue can be colored or transparent.
In the second case, a wooden sheathing or metal structure is applied to the wall. The advantage of wood is ease of installation, environmental friendliness and the use of fewer hardware and connecting parts. But wood will cost more than metal, so this method is less affordable. Installing a metal frame has its own difficulties - it requires a certain skill and the acquisition of special tools.
Let's look at the process of attaching MDF wall panels to a frame base in more detail.
- The working wall needs to be prepared. Remove baseboards and switch and socket boxes. Take care of the output of wires for sockets that will be located on the panels. Damaged wall trim must be cleaned down to the base.
- The wood slats or blocks you will use will need to be pre-treated to make them resistant to mildew, mold or pests.
- Additionally, you need to take care of fastening the planks to the wall. For wood, you can use self-tapping screws or dowel nails.
- We start with the corner vertical slats. They are placed in pairs to form an angle. Having made the markings, we drill holes in the wall for hardware (in increments of about 7 cm on average) and put plastic sockets for self-tapping screws in them.
- We apply the strip to the wall, transfer the markings to it, drill it, and connect it to the wall.
- Horizontal parts are attached in the same way.
- Door and window openings deserve special attention. The slats are fixed along their perimeter, regardless of whether the step mark falls on them or not.
- The evenness of the vertical slats and crossbars is checked using a level or plumb line. Irregularities at the joints of the slats must be smoothed with a plane.
The technology for installing a metal frame has its own characteristics.
- The process itself is similar to installing a wooden one. However, for a metal structure you will need CD profiles and UD guides.
- CD profiles are inserted into the vertical racks (UD) and pushed to the required location.
- Then we drill holes in the wall, similar to wooden joists. Long self-tapping screws are used for fastening to the wall surface. And the profiles are connected to each other by short ones. The CD profile requires connectors (also called ears).
After installing the frame, laying the panels begins.
- You should start from the corner. The panel with the sawn ridge is placed first, and the next one is attached to it using a lock in which the ridge of one piece is aligned with the groove of the other.
- The panels are secured with small nails (if the frame is wooden) or clamping brackets (if metal).
- To attach the last two panels correctly, the last one needs to make the ridge less wide. Then connect both at an angle and press on them, straightening the connection.
- The last pieces should be pressed tightly against each other and fixed to the frame with self-tapping screws.
- Gaps in the corner, as well as between the wall and the floor (ceiling), are closed using corners and decorative skirting boards (they can be glued on).
Tips for novice builders
If installation is carried out in winter, it is first necessary to keep the wall panels indoors for several days so that they restore their size. When choosing panels, keep in mind that the narrower they are, the longer the work will take, but there will be less scrapping.
It is necessary to determine how smooth the walls are. If the level shows good data, then there is no need to make a wooden sheathing.
You can simply glue them to the cement using special glue. If the walls are not level, you will need to do lathing.
This situation is more common. What materials will be needed for it? The sheathing is made from soft wood. Preliminarily think about what kind of sheathing will be. In dry rooms it is better to use wood, and in wet rooms it is better to use a metal profile. It is necessary to select fasteners based on the same parameters.
Decorative gypsum board wall panels
Products based on plasterboard sheets are used as a budget option to level or decorate walls. And also, install soundproofing partitions in the room. They are made using a hot press from gypsum and construction paper, so they are used mainly for interior decoration of rooms.
Thanks to a special coating, the panels retain their appearance for a long time. They make maintenance easier. No special knowledge or skills are required to install them. Everything is easy and simple. Moreover, due to the environmentally friendly material used for production, gypsum board panels are used in kindergartens and schools.
Features of the panels:
- High-quality coating;
- Reliability;
- Original interior solutions;
- Ensuring fire safety.
To create an interior you don’t have to paint the walls or glue wallpaper. It will be enough to install plasterboard decorative panels. They are highly popular in the construction industry as a cladding material. Thanks to the automation of the process, installation of decorative cladding panels is carried out quickly.
Examples in design
To assess the feasibility of using MDF panels to decorate a specific room, it is worth getting acquainted with already implemented projects. We have prepared interesting solutions that you can safely use as a basis when developing your own design project.
Panels can be positioned vertically:
Horizontal arrangement possible:
Combination options are no less relevant, when some of the panels are located horizontally, others vertically:
Using MDF panels, rooms with various functional purposes are decorated:
Each of the examples presented can be taken as a basis. Which one did you like personally?
Soft sheathing
Double-sided foam tape
Installing plastic panels over a soft sheathing seems flimsy, but in fact it is precisely these sheathings, which came out of the hands of the greenest but neatest beginners, that last for 10-15 years without signs of damage. Why? The soft sheathing is made of double-sided foam tape, see fig. In terms of thermal deformation properties, it exactly matches PVC, and its adhesive layer is very viscous and elastic: it stretches behind the board and then returns it to its place.
For soft sheathing to be truly reliable, three conditions must be met:
- Clear the wall of wallpaper, paint and level it with a rough, durable putty (Hercules, Prospector, etc.) to within half the thickness of the tape, 2-4 mm. Sharp small protrusions and depressions are acceptable, so puttying, which is already not difficult, is even easier.
- Stock up on a high-quality finishing profile; without it, sheathing over soft sheathing cannot be done. However, see the penultimate section.
- Reduce the contact time of the adhesive layer of adhesive tape with air as much as possible, up to an instant. This is something we need to talk about in more detail.
Installation of sheathing
The lathing scheme is the same as for the others. It is better to take the width of the adhesive tape from 25 mm, and best of all – from 60 mm. Technology:
- From the initial end of the tape in the roll, 300-350 mm of the upper (outer) protective tape is removed, and the tape with the bottom tape is cut off, as shown in the figure;
- The master (it’s him!) presses the initial end against the wall, and the assistant pulls the final strip;
- The master peels off the lower (adjacent to the wall) end of the protective tape and carefully pulls it out from under the tape, immediately pressing the tape against the wall;
- At the final end, a tail of the upper protective tape of 100-120 mm is left;
- The remaining strips of tape are applied in the same way.
Installing profiles
The principle is the same - the shortest possible contact of the “bare” tape with the air:
- The long tails of the protective tape are pulled back and the strips are stuck to the “back” with ordinary, narrow and cheap stationery tape;
- Apply the upper installation profile (horizontal), carefully pull out the protective tape from under it by the tail, immediately attach the profile with pressure, and an assistant supports it;
- The lower installation profile is also glued;
- The starting profile (vertical) is applied, the assistant holds it, and the master one by one pulls out the protective tape from under the profile, immediately pressing the profile to the tape, the operation proceeds from the bottom up so that the profile does not hang on the tape even for a short time;
- The finishing profile is also installed.
Panel installation
The panels are mounted similarly to profiles, but with some subtleties:
- You need to cut to size very cleanly and precisely to avoid jamming.
- The next panel is brought into place by hand using two ends in agreement; You cannot use a mallet and rule.
- After installing each board, the tails of the protective film are re-glued, and those that are too long so as not to interfere with work are cut off.
How to attach a wall panel in the kitchen to the sheathing
The workflow is divided into three stages. The starting point is marking.
Marking
Using a building level, a tape measure and a pencil, mark the surface of the wall where the sheathing will be located. Usually the main frame is screwed around the perimeter, and horizontally or vertically located slats are placed on it. The distance between the jumpers should be 50-60 cm for MDF, chipboard and 30-40 for PVC elements (this increases the strength of the structure, the plastic will not bend much).
Cutting and assembling the frame
Most often, the frame is made of wood, since it is more economical than plastic or metal profiles. Wall panels in the kitchen are fastened using slats with a cross-section of at least 20*20 mm, without bends or other defects. Before installation, they must be treated with an antiseptic and water-repellent impregnation. After the wood has dried (this will take about one day), you can begin to work. The distance of the lower part from the floor should be 1-2 cm.
- Install the base - four planks around the perimeter. If necessary, place bars under it for leveling.
- Attach additional guides using self-tapping screws or self-tapping screws. Do not skimp on fasteners to ensure the structure is reliable.
- If thermal insulation was provided, place the material in the resulting cells. MDF can be insulated with polystyrene foam and polystyrene foam.
Metal sheathing is considered the most reliable. It is made according to a similar principle, but the process is more complex. This video shows a detailed example of installing such a profile.
With plastic guides, as with wooden ones, everything is quite simple. According to preliminary markings, they are attached to the wall with dowels. The elements must be located perpendicular to the PVC sheets.
Creating the frame is the most labor-intensive stage. When it is finished, you can begin the final part of the work.
Sheathing
The planks can be fixed to the frame horizontally and vertically. Craftsmen advise starting installation from the bottom and from the corner to the window or door. If the top part has to be cut off, it can be hidden behind the wall set.
Step by step instructions
- Trim the sheets if necessary.
- Attach the corner element with self-tapping screws and close it with a corner.
- The plastic corner strip is inserted into a pre-installed corner and attached to the frame with a stapler.
- Insert the second sheet into the groove of the first and attach it to the profile with clamps, screws, glue or staples.
At the final stage, the floor plinth is installed. The video shows a clear principle of installing the frame and PVC planks.
Finishing nuances: processing joints and corners
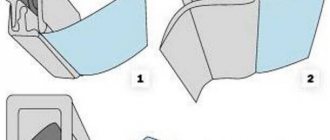
A universal corner is used for finishing corners. It consists of two plates made of chipboard and connected on the front side with a film.
The strips can bend both inward and outward, which allows the element to be used to decorate any corners.
- The corner is cut to the required length. Docking, if the top edge is being decorated, is done at an angle of 45 degrees.
- It is recommended to apply glue to the glue in two stages: light pressing so that the composition is distributed both over the cladding and on the surface of the corner, and then firmly with pressure.
- Remains of glue, if they do appear, are cut off with a painting knife after complete hardening. They are difficult to remove with cleaning agent or solvent.
Joints are finished in exactly the same way, if such a need arises. However, in this case it is necessary to carefully select the element by color.
Finishing MDF with boards is not a job of a high level of complexity and requires not so much experience as careful execution.
From an aesthetic point of view, it is not recommended to decorate both the ceiling and the walls of the room with slabs at the same time. Styles that involve such a solution are not implemented in city apartments. But for a balcony or loggia this is a completely acceptable option.
Installation of panels on the sheathing
This method involves installing a frame for PVC panels. It simultaneously serves as a load-bearing structure and a product for leveling walls. Before attaching PVC panels, you should prepare all the necessary tools, fittings and materials, as well as carry out some preparatory work.
What is needed for preparatory work
Fastening PVC panels to the wall requires the following things:
- wooden or metal profiles from which the frame will be made;
- building level and plumb line - to determine the angle of inclination and location of the main elements of the sheathing;
- dowels - for attaching slats to the wall;
- screws - for connecting structural fragments;
- tape measures - for measuring distances;
- material for the backing for the guides - wooden beams or thick plywood;
- screwdriver and drill.
Tools and materials needed to create lathing for PVC panels
Additional tools may require metal scissors (in the case of aluminum profiles) or a saw, chisel and mallet if you plan to create a wooden base.
Creating a wireframe
To answer the question - how to properly attach plastic panels to a wall using lathing, you must first consider the principles of creating a frame.
Installation of the sheathing begins with marking the working surfaces. To do this, find the most protruding point of the wall in its lower part, after which they draw a strictly horizontal line, which is constantly checked with a building level. The first profile is screwed strictly along the line. Then they move on to marking the upper part. To do this, two vertical profiles are installed into the cavity of the lower profile at both ends, after which their verticality is checked with a plumb line. The upper points are connected into one line, along which the upper profile will need to be attached.
Screwing the profile to the wall
Using a drill, the profile is drilled through, partially drilled into the wall, after which the slats are screwed to the surface using dowels or screws and a screwdriver. Fasteners must be fixed every 25 cm for wooden frames and every 20 cm in the case of metal slats.
After this, you need to install internal jumpers
It is important to remember how the PVC panels will be fastened: horizontally or vertically. The fact is that plastic products should be mounted perpendicular to the frame slats
After installing the frame and checking that it is installed correctly, you can begin screwing the panels.
Creating a frame for vertical installation of plastic panels
What is needed for basic work
To carry out installation work on plastic panels, it is recommended to prepare the following:
- PVC panels - they need to be given time to acclimatize. To do this, they must lie in the room where the finishing will take place for at least 24 hours;
- moldings - special corner profiles that provide tight and reliable contact;
- clamps - metal brackets used to fasten panels to the sheathing;
- building level - with its help it will be possible to accurately determine the location of the first plastic panel on the sheathing, which is a guideline for subsequent installation;
- A special knife for metal is required for cutting PVC panels.
