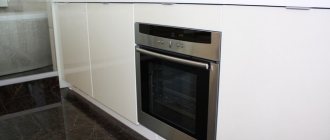
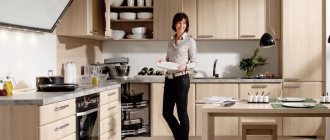
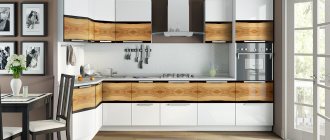
In modern kitchens you can increasingly see built-in appliances. And this is not surprising. Integrated stoves and refrigerators, washing machines, dishwashers, microwave and UHF ovens into the kitchen unit allow you to save the work surface and manage the interior space of the cabinets more functionally. And, of course, they give a more holistic and harmonious look to the overall kitchen design. How to build an oven with your own hands? You should start with the correct layout of the kitchen unit.
Let's calculate the module details:
Horizon – 600 by 460 (mm) – 1 pc.
Side – 870-28-100-16=726 (mm), where 28mm is the thickness of the tabletop, 100mm is the distance from the box to the floor (height of the supports), 16mm is the thickness of the lower horizon.
- Side – 726 by 460 – 2 pcs.
- Horizon 2 – 600-32=568 (mm), where 32mm is the thickness of the two sides of the box.
- Horizon 2 – 568 by 460 – 1 pc.
- Cabinet strip – 568 by 100 – 1 pc.
It’s also worth saying a few words about the body strip.
In this case, it is designed alone, and is located 10mm below the upper edge of the side (more details here).
This is done so that when using a 28mm thick countertop, the hob is normally attached to the countertop and does not rest against the bar itself (sometimes the dimensions of this equipment may exceed the height dimensions of the countertop).
By the way, I have often come across training materials online where the casing strip is not designed at all in the box we are considering.
I think this approach is not correct, since this bar maintains the distance between the sides of the module, and it is necessary in any case.
Let's calculate the front for the drawer below
The height dimension that it covers is:
870-28-100-600=142 (mm), where 100mm is the height of the adjustable supports, 600mm is the internal opening of the box.
In this calculation, one nuance must be taken into account: For this facade, the upper gap (for the height it covers) is given 8-10 (mm).
The fact is that the oven is fixed in the box thanks to its flanges located along the perimeter of its front side. Therefore, the upper horizon of the box is partially covered by these flanges. It is for this reason that a gap is given from the upper edge of this horizon to the facade (for normal operation of the drawer).
Let's give this indentation 10mm.
In this case, the calculated facade will have the following height:
142-10=132 (mm)
The width is calculated as usual:
600-3=597 (mm)
Now you can write down its dimensions:
- 132 by 597 – 1 piece.
Usually, a handle is not designed for such a front, since it will be located too low and create certain inconveniences (it will simply cling to the legs).
In order for the front to be opened without a handle located on it, in the lower horizon, a small cutout is designed in the middle.
Thanks to it, the element we are considering can easily be hooked from below and opened.
Although, by the way, this box is not used as often as others (due to the fact that it is often short in height, and only certain things can be put in it).
This cutout can be any size. In our case, they will be like this:
- Width – 100mm
- Depth – 20mm
Knowing the dimensions of the facade for our box, we will calculate the details of the drawer.
To do this, we find out the height of the opening (the distance between the horizons):
142-32=110 (mm), where 32mm is the thickness of the first and second horizons.
Let's give 10mm gaps at the top and bottom, and we get:
110-20=90 (mm) - this will be the height we need.
Now let's write down its dimensions:
Part 1 – 600-90=510 (mm), where 90mm is the sum of two sides, two gaps for the guides and two side parts of the drawer.
- Part 1 – 90 by 510 – 2 pcs.
- Part 2 – 90 by 450 – 2 pcs (450mm – the depth of the drawer under the guide is 450mm).
- The bottom (fibreboard) will have a size of 542 by 450
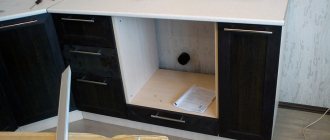
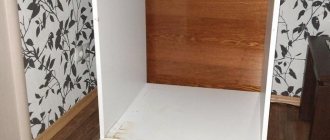
You also need to know that the depth of the oven is such that when the back “overlap” of the countertop onto the box is 100 mm (namely, this (and more) size should be given to kitchens that include similar modules), in the projection of the oven (on the wall ) there should not be anything (sockets, pipes, etc.), since the cabinet may simply not “fit” into the box.
The photo shows an option when there are sockets on the part of the wall visible through the opening, which then had to be removed. Therefore, these problems need to be solved at the kitchen design stage, and not when it is almost installed. You also need to take into account the evenness of the floors. If they are not level, then the lower modules will be adjusted, and accordingly, the position of the projection of the opening of our box on the wall will change.
This all needs to be taken into account.
Such modules can also be designed in such a way that the drawer is located not at the bottom, but at the top, but we’ll talk about this another time.
That's all.
See you in the next articles.
In modern kitchens you can increasingly see built-in appliances. And this is not surprising. Integrated stoves and refrigerators, washing machines, dishwashers, microwave and UHF ovens into the kitchen unit allow you to save the work surface and manage the interior space of the cabinets more functionally. And, of course, they give a more holistic and harmonious look to the overall kitchen design. How to build an oven with your own hands? You should start with the correct layout of the kitchen unit.
Content
Where should there be an outlet for the oven and hob?
With a competent approach to developing a kitchen design project, the location of a free-standing stove or the “oven + hob” duo is inextricably linked with the supply of the hood to the ventilation shaft. Therefore, even at the stage of starting repairs, you can clearly determine the location of the oven. And, accordingly, provide sockets for its connection.
However, not everything is clear here. The outlet must not be located strictly behind the oven. When the plug is plugged into it, a “dead” zone is formed, which will not allow the oven to move to the desired depth.
The option of locating the outlet below the oven level is also not very successful. It is much more convenient to first turn off the equipment, and only then remove it from the kitchen cabinet. And not the other way around - when the need arises to disconnect from the network, start pulling out a rather heavy unit.
The best solution is to move the socket below the level of the countertop to a nearby cabinet. It would be ideal if the adjacent cabinet table near the oven would have drawers. Then you don’t have to install the back wall in the cabinet itself at all. It is enough to remove the desired drawer and access to the outlet is open.
It’s also a good idea to screw an overhead socket to the side of a cabinet with hinged doors. It will not interfere with the internal filling of the cabinet, and it is quite convenient to use.
The main thing is that this cabinet does not turn out to be a table under the sink. Such close proximity to water and sewage drainage is undesirable.
Types of structures
There are several types of cabinets for installing ovens:
- Cabinets. In this type of design, ovens are built in at eye level, and spacious cabinets are installed below for storing various kitchen utensils.
- Under the hob. Such devices are more like the classic version of ovens combined with stoves. They are less convenient than pencil cases, because when cooking you need to constantly bend over, which brings some discomfort. There may also be problems with cleaning the oven. But they have advantages in some situations. For example, in small kitchens it will be difficult to install a large cabinet for the oven. Also, this design is suitable for those who concentrate all the cooking items in one place.
Drawings on how to build an oven with your own hands
This task is not as difficult as it might seem at first glance. To facilitate installation, household appliances are produced in certain standard dimensions. You can always replace one built-in oven with another without changing your kitchen furniture.
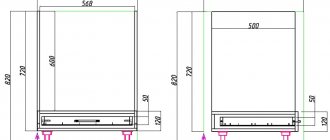
The standards here are simple: any electric or gas oven is built into a 600x600 mm niche. Moreover, the width of the niche is 600 mm, taking into account the thickness of the side walls of the oven module (according to the requirements of most models, the finishing size of the opening must be at least 560 mm).
The depth of the oven is designed to fit under a worktop with a standard width of 600 mm. That is, the body to the front overhang should be 550-560 mm. It will not be possible to build an oven with your own hands under a narrowed countertop. But for an expanded one, in various design variations, it’s fine.
Nuances may arise in specific non-standard cases. Therefore, carefully study the instructions when purchasing household appliances. Some ovens require space for ventilation in the box design.
Or even a special cutout for air circulation in the bottom of the cabinet or countertop.
A typical oven cabinet design is shown in the drawing.
If the cabinet table is “clamped” between adjacent modules, then there is no need for an upper tension bar. Many furniture makers do not install it at all.
If the height of the kitchen set is standard (840-850 mm with different tabletop thicknesses), then the height of the very side of the oven cabinet will be 720 mm. By simple calculations (720-600), we obtain a space of 120 mm at the bottom of the installation. More precisely, the free space will be (120-32) only 88 mm, minus the thickness of the bottom and shelf.
A drawer with a box 50-60 mm high is usually built into this space. If you increase the height of the bottom row of the kitchen to match your height (you can read about this here), then the drawer will be deeper and more functional.
Actually, using the same principle, the cabinet “turns” into a cabinet for a built-in oven. We simply increase the height of the space in the bottom drawer.
But there is one important nuance here. The depth of the sides of a cabinet that has been increased in height must also be increased so that the gap between the wall and the cabinet body is not visible.
This means that the air circulation near the oven built in this way will be disrupted. It’s not for nothing that the instructions for ovens for installation in a pencil case include a separate drawing. In which you can see that you need to leave the drink under air circulation.
Therefore, a cutout should be provided in the countertop covering such a low cabinet for a built-in oven with your own hands. It can be covered with a ventilation grill.
Kitchen set design
And so, the design of a kitchen set should begin with the creation of a fundamental design of kitchen furniture, i.e.
from determining the location of the sink, its size and plate. The location of the hood, cupboard, drawer for spoons and forks, etc. will depend on these two elements. As an example, we can cite the following aspects of organizing the kitchen workspace.
It is convenient to install a narrow pull-out basket (15-20 cm wide) on the left or right side of the stove at the bottom of the kitchen unit for oil, salt, etc.
At the top of the kitchen unit it is convenient to place a similar cabinet for spices.
It is convenient to place the dish drainer directly above the sink.
It is convenient to make a drawer for spoons and forks in the lower part of the kitchen to the left or right of the sink.
In general, before starting the actual design, it is important to sketch out a rough design of the kitchen set. If this is quite difficult to do, then you can apply for a project to some organization that produces custom-made furniture
As a rule, a design project is not expensive.
Once the rough plan is ready, you can begin designing the kitchen. To do this, it is advisable to use standard elements to determine the location of cabinets, both the bottom row and the top. The space that a standard cabinet does not fit into is filled with a non-standard one. In this case, a distance of 1-2 cm from the wall should be provided in case of compensation for unevenness of the walls.
Once the general plan is ready and the overall dimensions of all cabinets have been determined, you can begin to calculate the dimensions for ordering the parts of the kitchen set. At this stage, you should pay a little attention to the design of the cabinets.
DIY oven cabinet, drawings and calculations
Let's take as an example the calculation of a cabinet for a built-in oven of standard sizes. Its drawing will look like this.
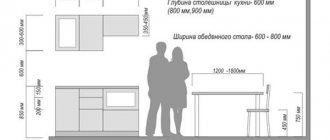
With a tabletop width of 600 mm, taking into account the overhang at the front and rear, the cabinet depth will vary between 460-500 mm.
If you decide to install the tension bar in the center of the module, then it should be lowered by about 10 mm relative to the sidewalls. Otherwise, it will interfere with embedding the hob into the countertop above the oven with your own hands.
If the body of the cabinet is made of 16 mm thick laminated chipboard, then the calculation of the parts will look like this.
| № | Part name | length | width | quantity |
| 1 | Bottom | 600 | 500 | 1 |
| 2 | Shelf | 568 | 500 | 1 |
| 3 | Sidewalls | 704 | 500 | 2 |
| 4 | Backdrop behind the drawers | 88 | 568 | 1 |
| 5 | Side of the drawer | 450 | 60 | 2 |
| 6 | Drawer forehead | 510 | 60 | 2 |
| 1 | Drawer bottom (fibreboard) | 540 | 448 | 1 |
| 2 | Drawer front (chipboard, MDF, solid wood) | 116 | 596 | 1 |
Sometimes a drawer in the design of a box for an oven is completely abandoned. It is absolutely not needed as a storage place if the kitchen is large and the housewife has enough drawers and shelves in it. Then a “fake” (rigidly fixed facade) is placed on the opening under the oven.
When buying a gas or electric stove, no one thought about its dimensions, because they were standard - 50 or 60 cm. But the depth of the built-in oven can be different: starting from 40 cm and more. For built-in appliances, it is very important to choose the right dimensions so that they fit perfectly into the kitchen furniture, as in the photo.
Choosing depth
Assembly
Using a hex wrench, we assemble the table using furniture screws, just like regular store-bought furniture or a children's construction set.
The middle shelf must be secured with screws.
It should not be placed on holders. This shelf is a structural element. Without it, the product will be shaky.
I didn't have enough furniture screws in my supply, so I used mounting angles to attach the top slats.
The last step is to screw the legs.
The table is ready. Now you can install the hob. Let's compare the result with the project.
Such a table for temporary purposes can be made from any material: non-laminated chipboard, plywood with a thickness of at least 12 mm, and even boards are also suitable.
Don't like to read? Then look:
If the article was useful to you, like and subscribe to the Xev Workshop . There is still a lot of interesting things ahead.
Depth and volume
Most oven models have a depth of 60 cm, the same as the standard width of kitchen furniture. But this is an excellent option for a spacious room of 8-9 square meters. m. In small kitchens 5-6 sq. m have to save every centimeter of space, so it is more advisable to choose narrow models of built-in household appliances. Today you can make custom-made furniture with countertops up to 40 cm, and choose a built-in oven of the same depth.
But the useful volume of such a cabinet is quite small, and is more suitable for use by 1-2 people. For a large family, it is better to choose full-size wide models. As an alternative, you can consider models with a depth of 60 cm and a height of 45 cm. They are quite compact, but you can fit a wide baking tray in them and, accordingly, cook more food at a time.
The depth of the oven can reach 90 cm, but this option is quite expensive. In addition, it can only be placed in a large kitchen with an area of more than 8 sq.m. And for those who use the oven extremely rarely, you can consider small-sized models with a volume of 37-45 liters.
Peculiarities
Built-in household appliances today are both a tribute to fashion and the implementation of new opportunities provided by the modern construction industry. Widely used frame technology for building construction makes it possible to create large open spaces. It becomes possible to implement original design projects, but there are certain nuances. In an interior where the kitchen becomes part of the living room, and the living room is integrated with the kitchen, the unity of perception of the entire composition plays an important role.
The evolution of built-in appliances began with the revolutionary idea of dividing the oven and hob of a traditional stove into two separate appliances.
Today, the family of built-in appliances has expanded to include microwave ovens, coffee makers, and refrigerators, but in this article we will pay attention to the “hot shop”
Narrow models
Ovens with a depth of 45 cm or 50 cm have a relatively small volume. But on the other hand, they also have a lot of advantages:
- Economical energy consumption. Regardless of whether the cabinet is gas or electric, it will consume much less natural gas or electricity.
- The minimum dimensions of a built-in oven can significantly save space in the kitchen.
- The cost of miniature models is slightly lower than standard ones.
- For those who cook in the oven infrequently, small-sized models of built-in ovens are the most ideal option.
Despite the fact that the depth of the electric oven is 45 cm, the technical capabilities of the device remain unchanged. Today on the market, customers are offered a huge number of options for built-in ovens with grill, convection, microwave functions and different cleaning systems.
Factory pencil cases
Kitchen manufacturers offer customers ready-made furniture options for built-in appliances. The main difficulty is to ensure that the dimensions for installation coincide with the actual dimensions of the furniture. That is, you will have to do the opposite - choose an oven for certain parameters, or adjust the furniture during installation.
Remember, the control panel should be above waist level, and the installation height of the oven should not exceed your eye level, otherwise operating the device during cooking will not be comfortable.
A unified style and competent layout allows this kitchen to look organic, despite the high module for appliances and the variety of colors in the furniture area. The refrigerator and pencil case close the furniture on both sides, forming a complete image in the kitchen design.
Photo: website, dizainkuhni.com, fabrika-linda.ru, ideas.vdolevke.ru, kuhni-iz-spb.ru, umbrellak.ru, myhome.ru
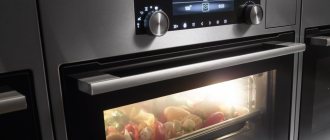
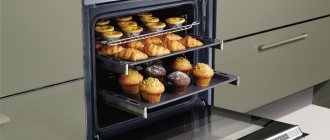
In traditional kitchen ovens, the oven is combined with a hob. But not all housewives are satisfied with this option for organizing their workspace. To make the cooking process as convenient as possible, and the kitchen interior stylish and compact, special furniture is used to build in ovens.
Standard models
These are ovens familiar to many housewives with a capacity of 60 to 70 liters. Their depth ranges from 55 to 60 cm. They are not much different from the ovens of gas electric stoves. However, built-in kitchen appliances are harmoniously combined with pieces of furniture, and this is an excellent solution for creating a modern interior.
Models with a depth of 55 or 60 cm are offered by many well-known manufacturers such as Gorenje or Bosh. They are perfect for a spacious kitchen and a large family. They also have all the necessary features and an attractive, cutting-edge design. Their choice on the household appliances market is much larger, and the price range is quite wide, starting from 15,000 rubles and above. Almost all user reviews are positive.
conclusions
Ovens are a real miracle of technology. After built-in appliances without a cooktop appeared in the world, people now have the freedom to choose the location of this appliance. They are compact, they have more useful and interesting functions that will help you create culinary masterpieces.
Although such ovens require the purchase of special kitchen units, with a competent understanding of this issue, we can not only purchase comfortable and high-quality cabinets, but also create them with our own hands, having basic skills and the necessary materials.
Subscribe to our Social networks
How to choose the right built-in oven: gas or electric
The depth of the built-in oven is of great importance when choosing. Almost all compact models with a depth of 40 cm, 45 cm or 50 cm are electric. Therefore, if the fuel source is natural gas, you will have to choose standard sizes with a depth of 60 cm.
Modern models of electric built-in ovens have a greater range of functions than gas ones. In addition, the heat for heating the food inside is distributed more evenly, due to the upper and lower heating elements. If the volume of the built-in electric oven is small, for example, 37 liters, then, accordingly, to prepare a small dish the device will consume a minimal amount of electricity.
It is important to pay attention to the energy consumption class when choosing. The most economical in terms of energy consumption are the A-class models. If the letter C is indicated on the model, then the device is the most energy-consuming.
Brand selection
Many buyers, when choosing household appliances for their home, pay special attention to the manufacturer. According to numerous consumer reviews, the best-selling brands in Russia are:
- Bosch;
- Gaggenau;
- Miele;
- Siemens;
All devices produced by these manufacturers have a fairly long service life. Many models produced under these brands are equipped with all the latest features. For a small kitchen, you can purchase a compact built-in oven model with a microwave function and thus save both space in the kitchen, since it has a minimal size, and money for the purchase of a microwave.
No housewife can do without an oven, because you can cook so many delicious and healthy dishes in it. And to create a modern, attractive design in their kitchen, many people prefer to buy built-in appliances. Fortunately, today buying an oven with a depth of 50 cm, 40 cm or 45 cm is not a problem. It is very important to decide and make the right choice. By the way, it is best to first buy built-in appliances, and only then order kitchen furniture.
Built-in modules for kitchen equipment make the set more complete and visually neat. If you are designing a kitchen in a furniture showroom, the managers will calculate everything themselves, all that remains is to pay. But when ordering a separate module, it is important to carefully consider the parameters. Especially if you buy equipment from another store. Otherwise, the cabinet may not fit. The calculations will also be useful for making your own furniture.
Let's consider the dimensions for designing a cabinet for a built-in oven, standard and non-standard designs and options for calculating the frame.
Dimensions of the oven cabinet MBS DE-607IV
Ergonomics
A cabinet for a built-in oven can be either a low floor-mounted module or a high cabinet-column, in which the equipment can be placed at any convenient height. This arrangement provides convenience, ergonomics and guaranteed protection from children (more precisely, children from technology). Many today choose the second option, but it should be remembered that it is not suitable for small rooms.
If the size of the space allows, tall furniture can significantly enhance the functionality of the kitchen. The closed lower and upper tiers serve as a spacious storage system and visually unload the facades without attracting attention. Blind doors are usually used for these modules. In combination with other cabinets they form a monolithic wall. The oven compartment must first be reinforced.
Standard sizes
Many manufacturers offer ovens whose height and width are about 60 cm, and the depth does not exceed 55 cm. Small deviations are possible, usually downward (1–2 cm), but this does not prevent you from adjusting the internal cavity of the cabinet to your appliance. Please note that the internal usable volume may be significantly smaller than the external dimensions. The height of the oven inside rarely exceeds 50 cm, since controls are usually installed on top. The width and depth of common models range from 50–55 cm.
A set with a tabletop 60 cm wide is considered standard. The height of the facades is either 703 mm or 716 mm (for some manufacturers a height of 713 mm is possible). The frame is designed so that on the front side it is possible to install the oven at the level of the other facades, and at the back there is space for supplying communications and normal air circulation. If the cabinet is purchased assembled, the depth of the side walls may be less than the corresponding oven parameter. After installation, a slight overhang of the case is acceptable, the main thing is that there is additional space for fasteners.
Oven module
Detailing for the bedside table
The calculation for a facade with a height of 716 mm looks like this:
Installation recommendations
The physical installation does not require any special operations, but some nuances are still worth considering. The lower part should have a solid backing 2-3 centimeters in height. It must have anti-slip, fire-resistant and damping properties. Such materials are usually produced by the manufacturers of household kitchen appliances themselves. Direct fastening is carried out with screws, but not in all cases. If you build the oven into a cabinet on the second tier of the unit, then it is necessary to perform a rigid fixation, and to the wall itself. Floor installation usually does not require such actions.
Custom cabinets
The dimensions of built-in equipment can vary both up and down. For small kitchens, common in older apartments, compact models are suitable. In private homes with spacious rooms, larger ovens are usually installed.
An increase in height is often necessary not for a larger internal volume, but for placing in one module, either two types of ovens, or separate oven chambers. In the first case, a microwave is additionally installed, in the second, the chambers are made of different sizes. The height of non-standard ovens is no more than 90 cm. The lowest ones can consist of one small chamber of standard width, but with a height of 35 cm.
Connection Safety Tips
Not only its performance, but also the safety of the house as a whole depends on how correctly the equipment was connected. First of all, experts warn against any twisted connections. Although this is a simple, but unsafe way to connect wires. It is also not recommended to make direct connections between cores made of different materials, such as copper and aluminum. The oven can be properly installed and connected correctly only using screw terminal blocks. In addition, the wiring must be connected to the electrical panel through an automatic machine operating in a separate manner.
Narrow and wide
Models for domestic use with a standard height (60 cm) can vary significantly in width. The narrowest of them are 45 cm. Such stoves usually have only basic functions, but they can be placed in a compact vertical module, such as a side cabinet, at tabletop level. A convenient option, especially relevant for families with small baking needs.
Despite its small size, the Maunfeld MEOXN.376RCC.TA oven costs about 50 thousand rubles
Wide ovens (up to 90 cm) are powerful, expensive devices capable of operating in a wide range of modes (12 or more). To install such a stove at the level of the working area, you will need a fairly large frame. Therefore, they are most often located in floor cabinets, below the countertop, under the hob.
Subtleties of installing household appliances in the kitchen
To create an ergonomic, functional and comfortable room, a built-in oven must comply with:
- operational safety;
- energy saving;
- easy cleaning after work;
- easy to use.
By the way, the equipment should take into account not only the parameters of the kitchen. The color scheme of the room deserves special attention. The main part of the household appliances of this plan is made of stainless steel. This allows technical devices to blend seamlessly with furniture, since the fittings are mostly chrome-plated. That is why such a universal option is ideal for a countertop.
Oven cabinet depth
The common depth of the working area in the kitchen is 60 cm. This value is convenient for performing any operations related to cooking. Manufacturers of built-in appliances usually focus on this standard and make the maximum external depth no more than 56 cm. If you need to place a model with large dimensions in a set with a regular countertop, it is placed in a corner module.
There are non-standard models for placement in wall cabinets. Their depth does not exceed 450 mm. A relatively common technique of this type is microwave ovens. Finding a full-fledged oven with a depth of less than 50 cm is quite difficult.
Sources used:
- https://www.sdmeb.ru/kuxni/raschet-koroba-pod-duxovoj-shkaf-i-varochnuyu-poverxnost.html
- https://shkaf-info.ru/kak-vstroit-duhovoy-shkaf-svoimi-rukami-chertezhi-i-raschety/
- https://www.duhovka.vyborkuhni.ru/vybrat/glubina-duhovay-shkafov
- https://made-box.ru/plan/shkaf-pod-duhovku-razmery.html
IKEA mount
Almost all models of IKEA wall cabinets have this type of fastening.
The fastening is a corner that is screwed to the side wall inside the cabinet; the second side with a large round hole for hanging is located in the slot in the back wall.
To hang furniture, a hole is drilled in the wall, a dowel is driven into it and a self-tapping screw is screwed in, its head is threaded through a round hole in the corner. Fastening to the wall is carried out through a self-tapping screw from the inside, onto which a washer in the form of a metal plate with pointed ribs is placed; it is pressed against the notches of the mounting angle near the hole when screwing.
