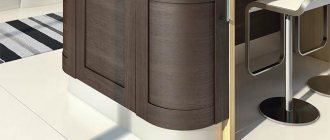
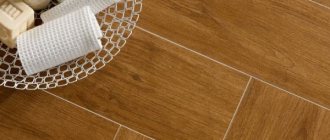
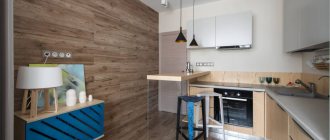
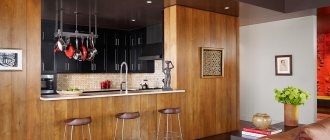
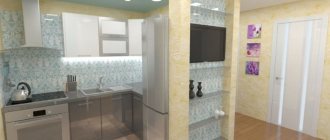
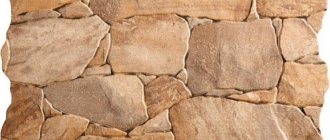
The combination of tiles and laminate in the kitchen has long become a classic option for arranging flooring in the busiest room of an apartment or private house. Wooden floors, parquet and linoleum gave way to the kitchen area to a combination of ceramic tiles and wear-resistant laminate. Practice shows that today this is the most optimal flooring option for a kitchen area. At the same time, kitchen floors made of tiles with laminate photo in terms of expressiveness and effectiveness of design can compete with parquet or panel covering.
Flooring requirements
To understand why finishers and designers came up with such a difficult combination as laminate and tiles in the kitchen, you can remember that the load on the kitchen floor is so great that any modern coating, laminate, and especially linoleum, rarely withstand more than four years of use . It would be possible to use traditional oak floors, but such a solution is not suitable for all kitchen interior options.
In addition, kitchen floors have special requirements:
- The coating should not absorb liquids spilled on the kitchen floor. Ideally, the material should have a dense and at the same time smooth, non-porous surface structure. Everything that was spilled could be collected, wiped, and put away without much effort in scrubbing off stains;
- Safe floors, no slipping effect. No one wants to fall on wet tiles or plastic tiles;
- Enormous resistance to abrasion loads. According to experts involved in the ergonomics of modern housing, residents spend up to 40% of their time in the kitchen and living room watching TV.
For your information! Do not forget about sanitation; the flooring in the kitchen must withstand treatment with special means without loss of color and quality.
In such conditions, a traditional linoleum or wooden floor wears out very quickly, and most of the coating remains in satisfactory condition, only a small part in the form of a path located along the kitchen facade is wiped away.
The most effective solution turned out to be the most obvious. Instead of the most worn part of the laminate along the countertops and kitchen cabinets, the designers laid a small section of tiles that have undergone a special treatment, making the tiles non-slip and smooth at the same time.
Basic rules for combining colors in the kitchen interior
When choosing a tone for decoration, it is important that the interior looks harmonious, but not boring. Following the basic rules for combining colors in the kitchen interior will help with this:
- To avoid making the interior too bright and tasteless, do not use more than five colors. Moreover, only one of them must be active.
- If you plan to use bright or contrasting shades, the base should be made in the most soothing colors possible.
- It is not recommended to use more than one print in decoration.
- Bright colors are best used as accents.
- The ceiling should be lighter than the floor. Otherwise, the room will look compressed. This visual effect is only suitable for rooms with high ceilings.
- It is not recommended to combine more than two colors in a kitchen set. There is only one exception when a multi-colored kitchen set looks appropriate - if it is decorated in pastel colors based on the rainbow principle. In this case, the rest of the interior should be neutral.
- The color in gloss looks more active. Matte shades are more restrained and calm.
What colors go best together?
To make the interior look stylish, it is important that all the shades used to create it are combined with each other. The list shows the main color combinations:
- White, gray and black. These are the basic colors. They go with absolutely any shade. White softens the intensity of tones, while black enhances them. There is no effect on appetite.
- Beige. In such a kitchen, food will seem tastier. This option is also universal. It looks best in a pastel color palette.
- Brown. Not suitable for those losing weight: chocolate and coffee shades increase appetite. Combines with blue, green, yellow and green. The natural shade of solid wood looks good with any colors.
- Green and olive. They lift your spirits, energize you, and do not affect your appetite. Looks good with red, yellow, brown, blue and pink.
- Blue and blue. Suppress the desire to eat. Combined with orange, red, yellow, white, pink, purple.
- Purple and lilac. Reduces appetite. They are combined with green, brown, yellow, pink and basic shades.
- Red. Makes a person more active and emotional. Strengthens all desires. It is often complemented with blue, green, turquoise, light blue. Looks best with base shades.
- Yellow and orange. Increase appetite and charge with positive energy. Combined with blue, purple, green, lilac.
Pros and cons of combined flooring
They didn’t come up with anything new, they just installed two types of coverings in one kitchen area. As a result, the use of a combined tile and laminate floor in the kitchen allowed us to get rid of several problems:
- A safe sanitary area has appeared with a very durable tile coating, the wear resistance of which is two orders of magnitude higher than even the best laminate;
- The problem of water flowing under kitchen furniture has been solved. It is much easier to collect and wash off dirt on tiles than on a wooden floor, and most importantly, there are no such severe consequences as in the case of a water spill on laminate floors or parquet;
- The heavy set sits on the tile like a glove, without any play or swaying characteristic of linoleum or laminate, when metal supports push through PVC or pressed paper;
- It remains possible to leave a very convenient and practical laminate covering on almost the entire kitchen area.
But this solution also has its problems. For example, you will need to think through in detail the design of laminate and tiles in the kitchen, photos, so that the flooring looks like a single whole and does not create the impression of an unfinished renovation.
A combination of two completely different materials in a kitchen can only be achieved by skillfully selecting the colors and patterns of the flooring.
Large bathroom
A spacious room will provide more opportunities for implementing a variety of design ideas. Here you can experiment with unexpected solutions and color combinations.
In a large bathroom, wall decoration in both white and dark colors will look beneficial. And patterns and large panels will help highlight the necessary accents.
Bright contrast and the use of several colors at the same time would be appropriate here. In this case, it is desirable that the floor is darker than the walls.
However, the color of the floor should be present at least in small quantities in the decoration of the walls of the room. The mosaic cladding will also look beautiful.
Where to place the joint
Before you start designing, you need to solve the problem of the joint between the tiles and the laminate flooring in the kitchen, photo. The bases of tiles and laminate flooring differ in rigidity and degree of expansion of the material, so technologically the joint line must always exist.
There are several ways to solve the problem of joints on the kitchen floor:
- Cover with an aluminum decorative strip used to fix the linoleum in the area where the canvas adjoins the walls and thresholds of the kitchen;
- Mask the seam with vinyl overlay;
- Arrange the podium along the line where the tiles and laminate meet.
Regardless of how the joint is designed, the main thing is to choose the right place for its arrangement. The seam line should not cross the main directions of movement of people in the kitchen. Everyone who enters the kitchen either does not reach the seam line or moves parallel to the seam. In such conditions, the likelihood of tripping over the decorative overlay separating the tiles from the laminate in the kitchen photo is reduced to a minimum.
The most traditional solution involves laying tiles on the kitchen floor in an L shape. A strip of tiles or porcelain tiles is laid under the kitchen furniture and partially covers the narrow area in front of the countertop. The rest of the floor space remains behind the laminate.
In the simplest case, the problem of locating the joining line between tiles and laminate in the kitchen is solved in the same way as when laying linoleum. To do this, parallel to the line of the table top or the plane of the facade of the furniture set, the line of the future joint is measured.
The line should run from the edge of the countertop at a distance equal to one and a half steps of an adult, usually the owner of the kitchen. In this case, taking a step back, a person will not catch his shoes on the protruding threshold.
The podium is set up in a similar way. Traditionally, the tiled area is located 2-3 cm below the level of kitchen floors with laminate flooring.
Installation procedure
Anyone can handle installation work. In this case, it is worth taking into account the recommendations of specialists and correctly performing each subsequent step:
- Before laying tiles, it is ideal to level the work surface to avoid subsequent deformation of the tiles.
- Lay tiles only on a dry and clean floor.
- The base for installation must be treated with a primer.
- Remove excess adhesive immediately during installation work, and use a rubber roller to remove air bubbles from under the tiles.
Tiles imitating laminate from the Elm collection of the Kerama Marazzi factory
Options for combining tiles and laminate
Both types of flooring, regardless of the size of the occupied floor area, color and texture of the material, remain important details of the kitchen interior in any conditions. Therefore, experts recommend making the most of the decorative capabilities of tiles. There is always less of it on the kitchen floors, but it is the tiled canvas that adjoins the furniture facade, which means it can shade and enhance the decorative effect.
Scheme of dividing the kitchen room with a joint line
When choosing the design of kitchen floors, the texture and color of the laminate, the size and method of laying tiles, it is important to find a solution to two problems:
- Firstly, choose the right colors of tiles and laminate, either in contrast or in related color schemes;
- Secondly, the method of sealing the joint should make kitchen visitors forget that there are two different materials on the floors. The floor covering looks like a single canvas with two sections of different colors or shades.
The simplest version of the dividing line between tiled flooring and laminate flooring is made using a direct directrix.
If the furniture set is placed in a kind of “pocket” of the kitchen, then the easiest way is to make the joint along an already existing border.
Advice! One of the most elegant solutions involves arranging the joint in the form of a curved line, arc or even a semicircle.
A straight type of arc, limiting the tile covering, can protrude into the laminate part of the kitchen floors quite deeply; optimally, the dividing line should reach the dining table in the center of the room.
With reverse curvature of the arc, the dividing line reduces the floor area under the tiles to a minimum, while at the entrance to the kitchen and in the area of the refrigerator or sink, the size of the tiled area is doubled.
The joint line can divide the kitchen floors into two equal parts; the proportions and sizes are usually chosen by the owners based on their preferences and step sizes. A good help in planning floor design is old linoleum or laminate left over from a previous renovation. On the floor covering, like on a map, there are clear views of all the paths and routes of movement of apartment residents around the kitchen.
If tiles in the form of hexagonal honeycombs are used, then the boundary between the laminate and the tiles can take on very complex, bizarre shapes.
Contrasting combination of tiles and laminate
Dividing with contrasting colors is considered one of the techniques that allows you to visually delimit the kitchen area into two independent zones.
For example, a strip of floors adjacent to the countertop and covered with light tiles is considered a “kitchen” area, where access is limited to everyone except the hostess. The rest of the kitchen under the laminate is conventionally considered the territory of guests.
Using contrasting colors does not require special design skills. The dark part of the floors is reserved for laminate covering, since a large number of slats are made in gray and brown colors. Light-colored laminate flooring on kitchen floors is used in exceptional cases.
Tiles, on the contrary, are chosen in light colors. Even taking into account the fact that marks and stains are clearly visible on a light background, cream, light brown and yellow stripes of tiles look much more expressive than gloomy dark red and gray tiles.
Contrast can be used not only in colors, but also in texture. One example of combining laminate with tiles is shown in the photo.
Tiles and lamellas of approximately the same size are laid perpendicular to each other. As a result, the kitchen floors are divided into two zones with different types of coverage, but visually the area looks like one whole.
How to combine flooring with furniture
Planning a kitchen flooring scheme with two types of flooring should begin with choosing the colors of the laminate, tiles and cabinetry. Moreover, all three color solutions need to be selected and combined with each other before the renovation begins.
The easiest way to solve the problem is for furniture in light colors. A white, cream or beige set goes well with almost any light tile, but always in warm colors.
In this case, the laminate for the remaining part of the floors must be selected from a dark or red-brown color group.
If dark-colored furniture is installed in the kitchen, you have to perform color divisions. This means that the dark facade must be complemented by contrasting cladding of the apron and most of the wall. Light tiles laid on the floors and on the kitchen wall go well with dark furniture and the chocolate color of the laminate. True, you will have to abandon the upper tier of wall cabinets.
If the kitchen interior uses light walls and a ceiling, and the room is illuminated by huge windows, then the problem of matching dark furniture and brown laminate flooring with light tiles can be solved by increasing the width of the floor area reserved for tiled flooring.
Design Tips
Many designers use the combined option. This is a good opportunity for zoning space. Apartment owners are attracted by the possibility of simplifying the care of the floor surface.
When choosing a material, you should focus on the combination of shape, color scheme, and overall stylistic design. To make different materials look harmonious next to each other, you should choose tiles and laminate of the same color, but in different shades. The difference should be one tone. What will be lighter: tiles or laminated panels is not so important.
For a better combination, it is worth making one part of the finish more expressive, and let the other instead of the background. Some designers combine glossy and matte tiles of different sizes. Laminate is chosen with the simplest design to obtain maximum effect.
Hexagonal tiles look stylish and unusual. This is a good opportunity for zoning space. Thanks to the non-standard shape, it is possible to create a unique transition along a broken line between two types of flooring. In some cases, standard tiles are used, but they vary with different installation methods. You can choose longitudinal, transverse, diagonal. Lay in a herringbone or checkerboard pattern.
The imitation of various materials deserves special attention. If you are laying tiles with the texture of textiles, leather, or marble stone, choosing a darker laminate will add nobility to the floor surface. A good option for a kitchen decorated in a modern style is laminate, complemented by multi-colored honeycomb-shaped tiles.
Materials of the same tone allow you to give the interior a laconic appearance. However, a competent choice of contrasting shades will make it no less harmonious. To smooth out the situation, some use a combination of white and beige.
When working on the design, it is worth paying attention not only to the color combination, but also to the shape of the line along which the laminated panels adhere to the tiles. She may be:
- straight, curved or rounded shape;
- without threshold or with curb;
- at the same or different heights.
When choosing the shape of the joint, the following rules should be taken into account:
- the form must fully comply with the chosen style concept. If regular geometric shapes predominate in the interior due to rectangular cabinets and a square table, it is worth making the transition in a straight line;
- a connection along a wavy line is completely justified if there is a similar line on pieces of furniture and the design of other surfaces. A wavy line may be present in the design of a cabinet or ceiling surface;
- It is easier to form a transition along a zigzag line if the laminate is laid in a checkerboard pattern.
Transition between tile and laminate in the kitchen
The main problem with arranging the transition joint between tiles and laminate is that you cannot do without a gap. The small gap between the tiles and the slats compensates for the thermal expansion of the flooring material. If you fill the joint with concrete or resin, then within a week the laminate will begin to warp.
Cork gasket
If the design conditions for kitchen floors do not require the installation of thresholds or any other overhead elements, then you can compensate for the gap using a cork gasket. Essentially, the cushioning material is a long cork strip with wedge-cut side surfaces.
The plug is installed simultaneously with laying the laminate. After fixing the lamella, the tape is firmly clamped between the ends of the tile and the laminate.
Despite the fact that the strength of balsa wood is inferior to plastic and aluminum, today the most expensive brands of laminate are sealed with cork. In addition, flooring with cork never creaks or sag on the substrate.
Grouting joints
One of the options for sealing the joint involves the use of special types of colored silicone that is resistant to abrasion. The gap between the tiles and the lamellas is closed with a polyvinyl chloride tube, and the upper part is filled with silicone mass and smoothed with a special tool to obtain a smooth surface.
The advantages include the ease of laying the material; silicone effectively prevents liquid from entering the joint between the plates. The disadvantages include the rapid abrasion of soft material.
Sometimes silicone material is used when installing an L-shaped decorative profile. The lath is laid under the edge of the tile covering at the stage of laying the lamellas. In fact, the profile is glued under the slab and fixed with the end of the laminate covering.
Aluminum sill
Of all the options for sealing a dividing seam, this is considered the most durable, but can only be used for straight joints. The decorative strip is made from a cold-drawn blank, the cross-section of which resembles the profile of a mounting mushroom.
On the back side of the rail there is a mounting groove for dowel heads. To close the seam, you need to roll the required number of plugs into the floor, after which the strip with dowels placed in the groove is carefully pressed into the joint between the tile and the laminate.
The outer surface of the aluminum slats is always covered with a decorative film to match the color of the laminate, so when choosing a profile you need to inquire about the coating code; it must match the coding indicated on the lamellas.
If the level of tiles and tiles is different, then the joint is closed with a podium profile.
Vinyl sill
Decorative PVC plastic tape is considered the cheapest and simplest material used for sealing seams. But of all the installation options for sealing, vinyl tape has an important quality - it can be bent along any curved path.
The installation process begins with cutting the joint; the ends of the tiles and lamellas are cut to the width of the mounting bridge laid at the bottom of the joint.
The plastic U-shaped “path” is attached to the concrete base using dowels and plugs. The vinyl tape is softened in a container of hot water and quickly pressed over the laid U-profile. After the plastic has cooled, the vinyl is securely held inside the seam.
Video description
An ideal joint between laminate and tile without any consequences.
Aluminum thresholdSource mada.kiev.ua
Vinyl threshold
If there are curved joints, it will not be possible to use metal thresholds. In this case, you can purchase flexible vinyl tape that can be laid in any direction. This material is affordable and easy to handle, so craftsmen often find use for it in repairs.
During installation, the first step is to prepare the seam. At the depth of the joint there is a special bridge, the width of which is cut to the tiles and laminate. The profile is fixed to the concrete base with dowels and plugs. Before laying the tape on the profile, it must be treated in a hot liquid to soften it. When the plastic has completely cooled, the vinyl product will be firmly fixed inside the joint.
Docking methods
Fastening with thresholds means that a special profile is inserted into the gap between the laminate and the tile.
Steel or aluminum strips are considered one of the most reliable and easiest to install. The appearance of such thresholds does not always fit into the design of the kitchen floor made of tiles and laminate. Wood planks have a more aesthetic appearance. The disadvantage of wooden planks is that they cannot hide the wavy joint line. To join seams between materials that have the same thickness, you can use construction foam, silicone or special mastic. Such materials will provide a tight connection; moisture or dirt will not get between the seams, but they have a short service life and require some experience in use.
To disguise a tortuous joint, use flexible Step Flex profiles. This profile can be given the desired shape, which will close any gap. Flexible profiles have a rich palette of colors, which allows them to be used to design any surface.
Fastening - threshold
The thickness of the materials that are laid on the floor surface can be different, and sometimes areas in the kitchen are made in the form of a podium or small steps. In this case, it is best to use fastening using thresholds. They can be straight, leveling or finishing.
If the floor is installed at the same level, straight thresholds are used, if the zones have different heights, leveling strips are used, and the podium and steps are finished with finishing thresholds. This application allows for a smooth transition from tile to laminate.
All thresholds have two types of fastenings. When hidden, all parts are covered with a decorative strip. If the type of fastening is open, then the heads of the screws or dowels will be visible. When attaching the thresholds, be sure to leave a gap to prevent deformation of the laminate, and the threshold itself is installed end-to-end with it.
Fastening - butt
When fastening butt joints, no additional materials are used. This type of installation is possible if the tiles and laminate have the same thickness and do not require additional leveling. Butt joints are also used to create wavy joints.
Installation of a wavy joint
The wavy joint is the most complex method of joining two types of material. Before starting work, a template is made according to which the tiles are laid. After this, lay the laminate so that part of it lies on the tile, mark the outline of the tile according to the template and cut it along the marked lines with a jigsaw.
At the next stage, the laminate is disassembled, and tiles are cut out along the marked contour using a grinder. Next, lay the substrate under the laminate at a distance of 100 mm from the tiles and install it. In those places where there is no backing, the laminate is fixed using silicone glue. The same glue is used to fill the joint seam and rub it in after drying.
Fastening with foam and sealant
Using construction foam, sealant or mastic, you can make sinuous seams of different widths or depths. With this method of fastening, all work must be done very carefully so as not to damage the floor covering. Excess foam or mastic is very difficult to remove from tiles or laminate, and an insufficient amount of installation material can cause the fastening to be unreliable and short-lived. Butt fastening with foam requires certain knowledge and experience from the master. The disadvantage of this method of fastening is that if part of the coating is damaged, it cannot be partially replaced and the entire joint will need to be dismantled.
Material selection
First you need to decide on the material from which the flooring is made.
Ceramics. It is based on fired clay. On the shelves of construction stores you can find ceramics of various designs and textures. Ceramic tiles are wear-resistant and convenient for creating design elements - ornaments, panels. Disadvantages include high fragility and thermal conductivity compared to other materials.
Porcelain tiles. This coating is obtained from a mixture of two types of clay and granite chips. During the manufacturing process, the mixture is exposed to high temperatures and pressure. The advantages are high strength and high-quality design. Disadvantages - high price.
Quartz vinyl. This is a composition based on high quality quartz sand with the addition of pigments, stabilizers and vinyl. The latter makes the tile durable, flexible and wear-resistant.
The choice of floor color usually dictates the area and design of the room, as well as the tastes of its occupants. There is an opinion that the tiles in the hallway and in the kitchen should be the same. This is the simplest and most win-win solution, but you can always experiment and create your own atmosphere in each room.
A pastel-colored floor can add light to a darkened room and visually expand the room.
A dark floor will look good in a spacious room, setting off light furniture. For a kitchen in a classic style, a coating that imitates natural stone is suitable.
Tiles that imitate wood or parquet will fit perfectly into the interior of a small kitchenette.
And the floor of a country-style kitchen can be decorated with tile inserts with a pattern or design.
The most popular colors for decorating kitchens and hallways are beige, gray and brown.
Black and white tiles are used much less often, since every speck and every stain after washing the floor catches the eye. Glossy ceramics create the same effect.
This is another reason why a rough surface finish is more appropriate in the kitchen and hallway.
When choosing shapes and sizes, they most often focus on the area of the room: the larger the room, the larger the tiles should be.
There is another approach to choosing the shape and size of ceramics: give preference to those tiles that require less cutting when laying. This allows you to save both money when purchasing material and time spent on work.
Now you can buy products of standard sizes (30x30 cm, 20x30 cm, 20x25 cm, 20x20 cm, 10x15 cm, 10x10 cm) and larger tiles (40x40 cm, 60x100 cm, 70x120 cm).
The floor in the hallway and kitchen is often contaminated with sand and melted snow, subject to impacts and impact from heels. Therefore, the coating must meet certain technical characteristics:
- Water resistance - below 3%.
- Friction coefficient - no more than 0.75%.
- Wear resistance class - no less than PEI 3.
- Safety category - 9-10.
- Hardness index - from five units.
- Chemical resistance - class AA or A.
- Variety - first. Among first grade products there is the smallest amount (5%) of defects.
The leaders in tile production are Spanish and Italian companies.
Possibility of installing heated floors
The laminate itself is warm, it is pleasant and cozy to walk on it barefoot, especially since most of the slats convey the roughness of natural wood.
But for those who like it hot, you can pre-install a heated floor system. You just need to choose a covering that shows the heated floor icon.
Criterias of choice
What should the choice of kitchen flooring be based on? First, think about what kind of floor you want in your kitchen. The choice of material largely depends on the personal preferences of the apartment owner. There is no need for a beautiful floor in the kitchen; its surface should be practical and pleasant to the touch - only then will your feet feel comfortable. In the photo you can see options for combining different floor coverings with the rest of the kitchen interior.
The material for finishing the floor should match the overall design of the kitchen, as well as your financial capabilities. The kitchen is a room where there is a lot of walking, spilling liquids, dropping pieces of food, and using various chemical cleaning products.
It is important to plan the costs not only for the purchase of the coating and its installation, but also for the care of the new floor
Linoleum is a budget option for the kitchen floor.
The floor in the kitchen must meet special requirements, have a high level of moisture resistance and hygiene. The photo of the types of kitchen floor finishing shows that linoleum is usually used for these purposes. The kitchen ranks second among the areas of the apartment that are exposed to water; the bathroom floor should have an even higher level of resistance to humidity.
The finishing of the kitchen floor must take into account the increased accumulation of dirt and grease stains on its surface. In photos of kitchens that have been in use for some time, it is noticeable that areas of the material near the stove are covered with a grease film. Not every housewife has the opportunity to constantly clean, so grease will inevitably accumulate on the floor, and cleaning old dirt with aggressive chemical and mechanical means can damage the surface of the floor material.
Often design projects involve laying a combined floor in the kitchen: the area surrounding the food preparation area is made of a material that is resistant to water, dirt and grease stains.
The floor covering must withstand standard mechanical stress for a kitchen, that is, be impact-resistant and wear-resistant. Broken plates and dropped pots can easily leave cracks and scratches on poor-quality material. And increased traffic in the room will lead to bald spots on the surface of the coating. Such a floor will definitely not please the owner’s eye.
The floor in the kitchen should have a durable and easy-to-clean coating.
The building materials market offers many options for covering kitchen floors, but not each of them meets all the listed requirements. Carpets and other similar decor in the kitchen will look completely out of place: they will absorb all the spilled liquid and collect most of the crumbs, dust and other small debris. Floors in the kitchen should be made taking into account the possibility of dry and wet cleaning on a regular basis. The photo shows common flooring options suitable for the kitchen: linoleum, laminate and tiles.
